

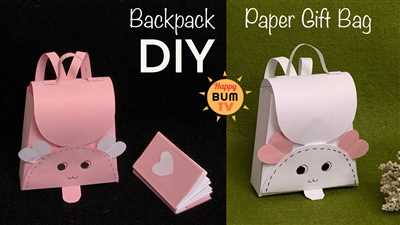
If you’re a fan of Minecraft or just need a new backpack for your adventures, making your own backpack is a fun and creative project. With a few simple materials and some basic sewing skills, you can create a unique backpack that is both functional and stylish.
To make a backpack, you will need the following materials:
- Denim or other sturdy fabric
- Ruler
- Scissors
- Sewing machine or needle and thread
- Optional: Mini device for illustrations
Start by creating a pattern for your backpack. Measure and cut two rectangular pieces of fabric for the base of the backpack. The size of these pieces will determine the overall size of your finished product.
Next, cut two additional pieces of fabric for the sides of the backpack. These should be the same length as the base pieces and as tall as you want your backpack to be. Place these pieces on top of the base pieces, aligning the edges, and sew them together.
Once the sides are sewn to the base, cut two smaller rectangular pieces for the front and back of the backpack. These should be the same width as the base pieces and shorter in height. Place them on top of the sides and sew them together.
After the main pieces of the backpack are sewn together, it’s time to add the straps. Cut two long strips of fabric for the shoulder straps and two shorter strips for the handle. Position the straps on the back of the backpack and sew them securely into place.
Finally, add any additional pockets or embellishments you desire. You can use the mini device for illustrations or sew on patches or buttons to personalize your backpack.
Once everything is finished, turn the backpack right-side out and give it a final press with an iron to smooth any wrinkles. Now you’re ready to fill your new backpack with all your essentials and embark on your next adventure!
- Backpack
- How to make a Backpack in Minecraft
- Step 1: Making the base
- Step 2: Adding the finishing touches
- Step 3: Placing the straps
- Make the bag
- Step 1: Placing the front and back pieces together
- Step 2: Sewing the sides and bottom
- Step 3: Attaching the base
- Making Backpack Pattern with Mini size
- Video:
- DIY Backpack – How to Make a Backpack
Backpack
A backpack is a necessary item for many people, especially if you enjoy outdoor activities or need to carry a lot of items with you. Making your own backpack can be a fun and creative project that allows you to customize the size, design, and functionality of the bag to suit your needs.
One of the first steps in making a backpack is to choose the right materials. You can use a variety of fabrics such as canvas, denim, or nylon, depending on your preference and the level of durability you need. Additionally, you will need a pattern or a design idea to guide you through the process.
Once you have your materials and pattern, you can start by measuring and cutting out the necessary pieces for your backpack. This means measuring and cutting a base piece, as well as the sides, front, and back. Use a ruler to ensure the measurements are accurate and to create straight edges.
Next, you will need to assemble the pieces of your backpack. This involves placing the front and back pieces on top of the base piece, aligning the edges properly, and sewing them together. You can use a sewing machine or hand-sew the pieces if you prefer.
After the main body of the backpack is assembled, you can add additional features such as pockets, straps, and a closure mechanism. This is where your creativity can shine, as you can make these elements as simple or as elaborate as you like. Consider adding a zipper for easy access or using adjustable straps for added comfort.
Once all the pieces are in place, it is time to put the finishing touches on your backpack. This can include adding any necessary decorations, such as embroidery or patches, and ensuring that all the seams are securely sewn. Take the time to carefully inspect your backpack and make any necessary adjustments before declaring it finished.
In summary, making your own backpack is a rewarding project that allows you to create a personalized and functional bag. Whether you’re using it for camping, school, or just to carry your everyday items, having a handmade backpack means you have a unique and one-of-a-kind device. So grab your materials and get started on making your very own backpack today!
How to make a Backpack in Minecraft
In the popular game Minecraft, players have the opportunity to create their own items and tools. One of the most useful and necessary inventions is a backpack. This handy device allows players to carry more items and resources while exploring the vast world of Minecraft.
To make a backpack in Minecraft, you will need a few materials and follow a simple crafting recipe. The base material for the backpack can be any type of block, but optionally, you can choose to make it from pieces of denim fabric, giving it a more traditional look. The necessary materials include:
- Minecraft crafting table
- 8 pieces of the base material (or denim fabric)
- A ruler or measuring device
- A pair of scissors
- A sewing machine (optional)
Step 1: Making the base
Start by crafting a backpack using the Minecraft crafting table. Place the 8 pieces of the base material or denim fabric in a square shape, filling all of the slots. This will create the base of the backpack.
Step 2: Adding the finishing touches
Once you have the base of the backpack, you can add optional decorations or illustrations to make it more personalized. You can use a sewing machine to attach patches, buttons, or other embellishments to the front and back of the backpack.
At this point, you can also choose to insert a mini chest into the backpack. This means you will have even more storage space for your items while on your adventures. To do this, open the backpack and place the mini chest inside.
Step 3: Placing the straps
To complete the backpack, you will need to attach straps to each side. These straps can be made from the base material or from additional pieces of denim fabric. Use scissors to cut them to size and then sew or glue them to the edges of the backpack, making sure they are securely attached.
Now you have a functional backpack for your Minecraft character to carry and store items. Make sure to place the finished backpack in your character’s inventory, and you are ready to go on your next mining or building adventure!
Make the bag
Once you have all the necessary pieces cut out from the denim, it’s time to start making the backpack. You will need a ruler and a sewing device for this step.
1. Take the front and back pieces of the bag and place them with the right sides facing each other. Use pins to secure the edges in place.
2. Sew along the sides and bottom of the bag, leaving the top open. You can use a sewing machine or sew by hand. Make sure to reinforce the corners for added durability.
3. Now it’s time to make the base of the bag. Take the base piece and place it on one of the bag sides, aligning the edges. Pin it in place and sew along the edge, attaching the base to the side piece. Repeat this step for the other side of the bag.
4. Optional: If you want to add pockets to your backpack, now is the time to do it. Cut out pieces of denim for the pockets, and place them on the bag where you want them to be. Pin them in place and sew along the edges.
5. With the bag still inside-out, fold down the top edges of the bag about 1 inch to create a clean finish. Pin the folded edges in place and sew along the edge to secure them.
6. Turn the bag right side out and you now have a finished denim backpack! You can add additional decorative elements, such as patches or embroidery, to personalize your bag.
Illustrations of each step can be found below:
Step 1: Placing the front and back pieces together
Step 2: Sewing the sides and bottom
Step 3: Attaching the base
Making Backpack Pattern with Mini size
Making a mini backpack pattern is a fun project that allows you to create a small version of a backpack, perfect for carrying essentials or for doll-sized adventures. This tutorial will guide you through the process of making a backpack pattern with a mini size, using materials like denim and a ruler.
To begin, you will need the following materials:
- Denim fabric
- Ruler or measuring device
- Scissors
- Pins
- Needle and thread
First, take a piece of denim fabric and cut out the base of the backpack. This will be the foundation of the mini backpack. Use your ruler to measure and cut the desired size for the base.
Next, cut out the sides, front, and back pieces of the backpack. These should be smaller in size compared to the base, in order to create a mini backpack. You can use the ruler to measure and cut each piece accordingly.
Once all the necessary pieces are cut, place each piece on top of the base, aligning the edges. Pin them in place to secure the pieces together.
Now, it’s time to sew the pieces together. Using a needle and thread, stitch along the edges of the pinned pieces to attach them to the base. Make sure to sew the pieces securely, leaving an opening at the top for the opening of the backpack.
After sewing, remove the pins and turn the mini backpack right side out. You should now have a finished mini backpack pattern, with a top opening.
This mini backpack pattern can serve as a basis for creating various mini backpack designs. You can customize it by adding straps, pockets, or any other details you desire. Use your imagination and creativity to make the mini backpack truly unique!
In conclusion, learning how to make a mini backpack pattern means you can create your own miniature backpacks for various purposes. With the use of denim fabric and a ruler, you can easily create a mini backpack pattern that is both functional and stylish. Follow the steps outlined in this tutorial, and enjoy making your own mini backpacks!