

Infographics are a great way to present complex information in a visually appealing and digestible format. Whether you need to communicate data, explain a process, or highlight key points, infographics can be an effective tool. In this article, we will guide you through the process of creating an infographic, step by step.
The first step in creating an infographic is to decide on the topic and gather the content you want to include. Consider what message you want to convey and what information will support that message. You may already have text or data that you want to include in your infographic, or you may need to write it from scratch. Either way, it’s important to have a clear idea of what you want to communicate before you start designing.
Once you have your content ready, it’s time to start designing. If you’re not a designer, don’t worry! There are plenty of online tools and resources that can help you create professional-looking infographics without any design experience. One of the best tools you can use is Edraw Infographic Maker. It offers a library of pre-designed templates and a wide range of customizable elements that you can use to bring your ideas to life.
To start creating your infographic, open Edraw Infographic Maker and find a template that suits your topic. You can search for templates by keyword or browse through the categories to find the one that best matches your content. Once you’ve found a template you like, simply click on it to open it in the editor.
Now that you have your template open, it’s time to add your own content and design elements. You can customize the text, colors, fonts, and visuals to match your brand or personal style. Simply click on any text or symbol to edit it, and use the toolbar on the left to add or remove elements. You can also drag and drop elements from the library onto your canvas to add extra visuals.
Once you’re happy with your design, it’s time to save and export your infographic. Edraw Infographic Maker makes it easy to save your work in various formats, such as JPEG, PNG, PDF, and HTML. You can also directly share your infographic via email or social media. It’s up to you how you want to distribute your infographic and reach your target audience.
In conclusion, creating an infographic doesn’t have to be a difficult or time-consuming task. By following the steps outlined above and using tools like Edraw Infographic Maker, you can produce a visually stunning and informative infographic with just a few clicks. So why wait? Start creating your ultimate infographic today and make your content stand out!
- The Ultimate Guide for any Infographic Designer
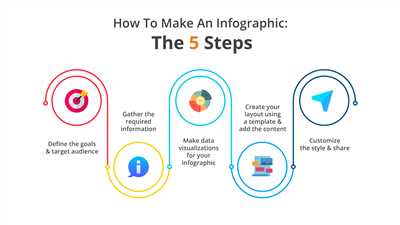
- Step 1: Choose a Topic
- Step 2: Gather Content
- Step 3: Design your Infographic
- Step 4: Add Visuals and Text
- Step 5: Save and Share
- 1 Find A Topic
- How to Design an Infographic Online
- Step 1: Choose an Infographic Design Tool
- Step 2: Select a Template
- Step 3: Add Textual and Visual Elements
- Step 5: Save and Export
- Conclusion
- Keys to a good infographic
- 1. Find the right template
- 2. Use a step-by-step guide
- Conclusion
- Design Matters
- Conclusion
- Video:
- How to make an infographic
The Ultimate Guide for any Infographic Designer
Creating an infographic can seem like a daunting task, but with the right tools and guidance, it can be a fun and rewarding project. Whether you’re a beginner or an experienced designer, this guide will provide you with the essential steps and tips to help you produce an effective infographic.
Step 1: Choose a Topic
The first step in creating an infographic is to choose a topic. Think about what message you want to convey and what information you want to present. It’s important to select a topic that is interesting and relevant to your audience.
Step 2: Gather Content
Once you have chosen a topic, it’s time to gather the content for your infographic. This can include statistics, facts, quotes, or any other information that you think will support your message. You can find this content online or by conducting your own research.
Step 3: Design your Infographic
Now comes the fun part – designing your infographic. You can either create your own design from scratch using design software like Adobe Illustrator, or you can use an online infographic template. There are many templates available that provide pre-designed elements like icons, symbols, and text boxes, making it easy for you to create your infographic.
Step 4: Add Visuals and Text
Visuals are an essential part of any infographic. They help to make the information more engaging and easy to understand. Add graphs, charts, illustrations, or images that are relevant to your topic. Use textual elements like headings, subheadings, and bullet points to organize and structure your content.
Step 5: Save and Share
Once you have completed your infographic, it’s important to save it in a format that is easy to share. You can save it as a PDF or an image file. You can also consider creating an interactive infographic that allows users to click on different elements to explore more information.
In conclusion, creating an infographic doesn’t have to be a complicated process. By following the steps outlined in this guide, you will be able to produce a visually appealing and informative infographic that effectively communicates your message. Remember to keep your design clean and simple, use visuals to support your content, and make it easy for your audience to understand. Happy designing!
If you need some more ideas or help with your infographic project, you can find a library of templates and resources at Edraw. They have a wide range of templates on various topics that you can open and edit to suit your needs.
For any further questions or inquiries, feel free to email us at [email protected] We’re always here to help!
1 Find A Topic
When creating an infographic, the first step is to find a topic that you want to focus on. This is an important decision because it will determine the content and design of your infographic. You want to choose a topic that is both interesting to you and your target audience.
One of the best ways to find a topic is to brainstorm ideas. Think about what you want to communicate and the message you want to convey through your infographic. Consider what kind of data or information you have access to that would make for a compelling and informative infographic.
If you’re having trouble coming up with a topic, you can also browse through the templates and libraries of online infographic design tools. These platforms often have a wide selection of pre-made templates and design elements that you can use as a starting point for your own project. This can save you time and help you narrow down your options.
Another option is to look for inspiration in your daily life. Pay attention to current events, trends, or issues that are relevant to your target audience. This could be anything from popular culture to scientific discoveries. By finding a topic that is timely and relevant, you are more likely to create an infographic that will resonate with your audience.
Once you have chosen a topic, the next step is to gather the textual content and data that will be included in your infographic. This can include statistics, facts, quotes, or any other information that supports your main message. Make sure to fact-check and cite your sources to ensure that your infographic is accurate and credible.
Remember, the ultimate goal of your infographic is to simplify complex information and present it in a visually appealing way. This makes it easier for your audience to understand and engage with your content. By following these steps and choosing a good topic, you will be well on your way to creating an effective infographic.
To start the design process, open an infographic design tool like Edraw Infographics. You can create your own design from scratch or choose a template from the library. The tool will provide you with a wide range of design elements, including symbols, text boxes, and more, to help you bring your infographic to life.
Once you have your design and content ready, you can start working on the visuals. This is where the help of a graphic designer or an infographic design tool becomes handy. You can add colors, fonts, icons, and other visual elements to make your infographic visually appealing and engaging.
Once you’re satisfied with the design, save your infographic and export it in a format that you can easily share. Most infographic design tools allow you to save in various formats, such as JPEG or PNG. You can also choose to share your infographic directly from the tool by clicking on symbols like email or social media icons.
In conclusion, creating an infographic involves several key steps, starting with finding a topic that is interesting and relevant to your audience. By following a guide like this and using an online infographic design tool, you can easily create an engaging and visually appealing infographic that will capture the attention of your audience.
How to Design an Infographic Online
Designing an infographic online can be a fun and creative process that allows you to present information in a visually appealing way. Whether you’re a professional designer or just trying your hand at creating an infographic for a personal project, there are some steps you can follow to make the process easier.
Step 1: Choose an Infographic Design Tool
There are many online tools available to help you create infographics. One of the best options is Edraw Infographic, which offers a variety of templates and symbols that you can use to build your infographic from scratch. Open the Edraw Infographic website and click on the “Start Now” button to begin your project.
Step 2: Select a Template
If you’re not sure where to start with your design, choosing a template can be a good option. Edraw Infographic offers a library of pre-designed templates that you can customize to fit your needs. Click on the “Template” tab to browse through the available options and find one that you like.
Step 3: Add Textual and Visual Elements
Once you have selected a template (or decided to design from scratch), it’s time to add your content. Click on the text boxes to input your text, and use the symbol library to add visual elements like icons, charts, and graphs. Remember that the visuals should support and enhance your textual content.
Step 4: Design and Customize
Now that you have the basic elements in place, it’s time to make your infographic visually appealing. Experiment with different color schemes, fonts, and layouts to create a design that is cohesive and engaging. Use the toolbar at the top of the screen to access additional design options.
Step 5: Save and Export
Once you’re happy with your design, it’s important to save your work. Click on the “Save” button to ensure that your progress is saved. Edraw Infographic also offers the option to export your infographic in various formats, such as JPEG or PNG, so that you can easily share it with others.
Conclusion
Designing an infographic online is a step-by-step process that involves selecting a tool, choosing a template or starting from scratch, adding textual and visual elements, designing and customizing the infographic, and finally saving and exporting the completed project. Following these steps will help you create a good infographic that effectively communicates the content and engages your audience.
Keys to a good infographic
Creating an infographic from scratch can be a daunting task, especially if you’re not a designer. That’s where infographic templates come to the rescue. With a good template, you can save time and have a professional-looking infographic in no time.
1. Find the right template
When choosing a template, make sure it suits the topic and content of your infographic. The design should be visually appealing and easy to read, with elements like symbols and visuals that help convey your message effectively.
2. Use a step-by-step guide
If you’re new to creating infographics, using a step-by-step guide will make the process much easier. The guide will walk you through the necessary steps, from opening the template to adding your own text and visuals.
| Step 1: | Open the template in your preferred infographic design tool. |
| Step 2: | Add your textual content, such as headings and subheadings. |
| Step 3: | Insert visuals from the template library or use your own. |
| Step 4: | Customize the design by changing colors, fonts, and layout. |
| Step 5: | Save and export your infographic in a suitable format. |
| Step 6: | Share your infographic by clicking the “Share” button or emailing it. |
By following these steps, you’ll be able to create a high-quality infographic that will impress your audience.
In conclusion, the key to a good infographic is using the right template, following a step-by-step guide, and adding visually appealing elements that enhance your content. Whether you’re a designer or not, using infographic templates and guides can make the process of creating infographics much easier and more efficient.
Conclusion
Creating infographics can be an easy and fun project, even if you’re not a professional designer. With the help of online tools like Edraw Infographic Software, you can save time and effort by using pre-designed templates and a vast library of visual elements.
In this guide, we have outlined the step-by-step process of how to produce an infographic. From finding the right topic and gathering content to choosing the best visuals and adding text, the key is to balance textual and visual elements effectively.
Design Matters
A good infographic design makes your content more appealing and easier to understand. The ultimate goal is to convey complex information in a visually engaging manner. By following the tips and guidelines provided, you can create captivating infographics that will captivate your audience.
Conclusion
Infographics are a powerful tool for conveying information. Whether you’re trying to present data, explain a concept, or share ideas, infographics can help you communicate your message effectively. With the right tools and a solid understanding of the principles of design, you can create compelling infographics that will leave a lasting impression.