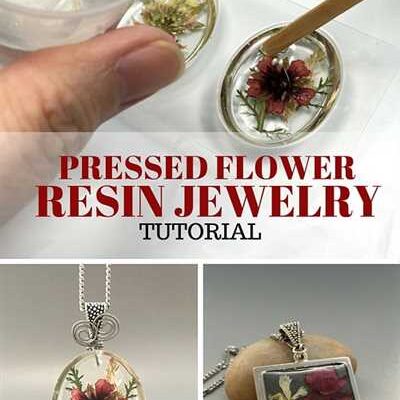

If you have a love for unique and beautiful accessories, making resin jewelry can be a fun and creative hobby to explore. Resin jewelry allows you to create customized pieces in various shapes, colors, and designs. Whether you want to make a stunning purple pendant or a delicate blue bracelet, resin jewelry offers endless options for self-expression.
To start making resin jewelry, you will need a few basic supplies. These include resin, a type of liquid plastic that can cure and harden, a mold to shape the resin, a UV lamp to cure the resin, and various tools and materials for mixing and adding embellishments. It’s important to note that resin materials can be found in different types and brands on the market, so make sure to choose the one that suits your project best.
Once you have gathered all your supplies, the first step is to mix the resin. Using a measuring cup, follow the instructions on the resin packaging to determine the right amount of resin and hardener to use. Typically, a 2:1 ratio is recommended, meaning you’ll use two parts resin and one part hardener. Make sure to mix them thoroughly to ensure proper curing.
After mixing, you can then add color to your resin mixture if desired. You can use pigments specifically designed for resin, or experiment with other sources such as acrylic paint or alcohol ink. Adding a small amount will give a translucent effect, while adding more will create a more opaque look. Mix the color well, ensuring there are no streaks or lumps.
- How to Make Resin Jewelry
- Supplies Needed
- Step 1: Prepare Your Work Area
- Step 2: Mix the Resin
- Step 3: Add Color (Optional)
- Step 4: Pour the Resin
- Step 5: Cure the Resin
- Step 6: Demolding and Finishing
- Final Tips
- How to Make Resin Pendants with UV Resin
- Step 2: Molding and Demolding of OOMOO™ 30
- Things to Avoid
How to Make Resin Jewelry
If you have ever wanted to create your own unique and beautiful jewelry, working with resin can be a great option. Resin jewelry has become increasingly popular in the market, as it allows for creativity and endless design options. In this guide, we will walk you through the steps to make your own resin jewelry.
Supplies Needed
Before you start, make sure you have all the supplies needed:
| – Resin (regular or UV) | – Mold (such as a bezel or silicone mold) | – Oomoo™ mold-making rubber |
| – Mixing cups | – Stir sticks | – Measuring spoons |
| – Pigments or dyes | – Optional: UV lamp for curing UV resin |
Step 1: Prepare Your Work Area
Start by setting up your work area. Make sure it is well-ventilated and protected, as working with resin can be messy. Place a drop cloth or newspaper under your work area to avoid damage.
Step 2: Mix the Resin
Follow the instructions on your resin product for mixing. Typically, you will need to mix equal amounts of resin and hardener. For example, if the instructions say to mix 2 tablespoons of resin with 2 tablespoons of hardener, measure out the appropriate amount of each and pour them into a mixing cup. Stir the mixture well until it becomes clear and free of streaks.
Step 3: Add Color (Optional)
If you want to add color to your resin jewelry, you can mix in pigments or dyes. Use a small amount at a time, as a little goes a long way. You can experiment with different colors and create unique swirling effects.
Step 4: Pour the Resin
Once your resin is mixed and colored (if desired), carefully pour it into your mold. Make sure to pour slowly and avoid overflow. If you are using a bezel, fill it to the top. If using a silicone mold, leave a little space for demolding later.
Step 5: Cure the Resin
If you are using regular resin, follow the curing instructions provided with the product. This usually involves leaving the resin to cure for at least 24-48 hours. If you are using UV resin, you can cure it with a UV lamp for a few minutes.
Step 6: Demolding and Finishing
Once your resin has cured, carefully remove it from the mold. If you are using a silicone mold, you can bend the mold to release the resin. If you are using a bezel, gently tap it on a hard surface to demold the resin piece.
Once demolded, you can sand any rough edges or imperfections to achieve a smooth finish. You can also add additional layers of resin if desired.
Final Tips
- Practice makes perfect! Don’t be discouraged if your first few resin pieces don’t turn out as expected. With time and practice, you’ll improve your technique.
- When working with resin, be mindful of the curing time. Too much or too little time can affect the final result.
- Protect your work area and wear gloves to avoid skin contact with the resin.
- There are many different types of resin available on the market, so do some research to find the one that best suits your needs.
- If you’re unsure about mixing pigments or dyes, start with a small amount and gradually add more until you achieve your desired color.
By following these steps and using your creativity, you can create beautiful resin jewelry pieces that you’ll be proud to wear or give as gifts!
How to Make Resin Pendants with UV Resin

UV resin is an under-used type of resin that can work wonders for creating beautiful resin jewelry. In this guide, we will show you how to make resin pendants using UV resin and a few other supplies.
To start, you will need a UV lamp, a silicone mold, UV resin, a mixing spoon or stick, and some other supplies like oomoo™ mold-making rubber, a bezel frame, and various jewelry findings. You can find these supplies on websites like Amazon or your local craft store.
First, prepare your workspace by wearing gloves and covering it with a white sheet or paper to create a clean working area. UV resin can be messy, so it’s important to take precautions to avoid any damage or stains.
Once your workspace is ready, mix a small amount of oomoo™ mold-making rubber according to the instructions. You can find the instructions on the packaging of the oomoo™ product. Leave the mixture to cure for about 30 minutes.
While the oomoo™ is curing, you can start preparing your UV resin. UV resin comes in two bottles – one with a purple cap and one with a white cap. You’ll use both of these to make your pendants.
Start by adding a small amount of the purple resin to a mixing cup. You’ll only need a teaspoon or less, depending on the size of your mold. Then, add an equal amount of the white resin to the cup. Mix the two resins together well, until they are fully combined.
Once the oomoo™ has cured, remove it from the mold and place it on a flat surface. This will be the base for your pendant. You can also experiment with adding various objects or materials into the mold before pouring the resin to create different effects.
Now, pour a thin layer of the mixed resin into the mold, covering the oomoo™ base. Use a stirring stick or a toothpick to spread the resin evenly and remove any air bubbles. You can also add colors or swirls to the resin at this stage to enhance your creativity.
Once you’re satisfied with the first layer, place the mold under the UV lamp and cure it for the recommended time. This is usually around 1-3 minutes, but it may vary depending on the brand of resin you are using. Follow the instructions provided with your resin for best results.
After curing the first layer, you can continue to pour more resin into the mold to create additional layers or add different elements to your pendant. Just make sure to cure each layer under the UV lamp before adding the next one. This will help to create a smooth and glossy surface.
Once you have added all the layers and elements you want, cure the pendant for the final time under the UV lamp. This will ensure that the resin is fully cured and hardened.
After curing, carefully demold your pendant by gently flexing the sides of the mold. The resin should release easily from the mold, leaving you with a beautiful piece of resin jewelry.
Now you can attach a bezel frame or other jewelry findings to your pendant and it’s ready to wear or give as a gift. UV resin gives a unique and professional look to your jewelry, and with practice, you’ll be able to create stunning resin pendants.
Remember to always follow the safety precautions when working with UV resin and other resin materials. Wear gloves, work in a well-ventilated area, and avoid direct contact with your skin or eyes. UV resin can cause skin and eye irritation, so it’s important to take proper precautions.
So, now that you know the basics of making resin pendants with UV resin, it’s time to unleash your creativity and start making your own beautiful jewelry!
Step 2: Molding and Demolding of OOMOO™ 30
Once you have all your supplies ready, including pendants or other jewelry pieces that you want to make, you can start molding and demolding with OOMOO™ 30. This type of mold-making material is popular in the market due to its ease of use and versatility.
To begin, place your jewelry piece or frame on a clean, flat working surface. Make sure that the surface is level and that there are no particles or debris that might affect the quality of your mold.
Next, mix equal amounts of Parts A and B of OOMOO™ 30 in a mixing cup. It’s best to use a separate cup for each part to ensure accurate measurements. For example, if you’re making a small mold, you might use a teaspoon of each part.
Once the two parts are thoroughly mixed, pour the OOMOO™ 30 mixture into the mold. You’ll want to pour the mixture slowly to avoid any trapped air bubbles. Start by pouring in the center of the mold and gradually work your way towards the edges.
When pouring, you have two options for creating unique designs. You can let the resin settle naturally, which will result in a regular layer of OOMOO™ 30, or you can take a toothpick or a stir stick and swirl the mixture to create a marbled effect. This gives your jewelry piece a more artistic and eye-catching look.
Once you’ve poured the OOMOO™ 30 into the mold, gently tap the mold on your working surface to help remove any remaining air bubbles. You can also use a toothpick or a small skewer to pop any large bubbles that may have formed.
Now, it’s time for the OOMOO™ 30 to cure. Place the mold in an open area and let it sit undisturbed for the recommended curing time. This can vary depending on the brand and type of OOMOO™ 30 you’re using, so be sure to refer to the instructions provided by the manufacturer.
While curing, you can cover the mold with a plastic container or cup, but make sure it’s not touching the OOMOO™ 30 surface to avoid any damage. You can also place the mold under a UV lamp for faster curing if you have access to one.
Once the OOMOO™ 30 is fully cured, you can demold your jewelry piece. Gently peel back the edges of the mold, starting from one corner, until the piece is fully released. If the mold doesn’t come off easily, you can use a small tool like a toothpick or a skewer to help loosen it.
Finally, inspect your demolded piece for any imperfections or rough edges. Sand down any rough areas with sandpaper or a file to create a smooth finish. You can also add a coat of resin or paint to enhance the look of your jewelry further. Let the added layer cure and then your jewelry is ready to wear or sell!
Things to Avoid
When making resin jewelry, there are a few things to avoid to ensure the best results:
Avoid using too much resin: It’s important to measure the right amount of resin for your project. Using too much resin can make the jewelry too thick or heavy, while using too little can result in incomplete coverage or weak pieces.
Avoid working in direct sunlight: UV light can cause resin to cure faster, which can lead to a cloudy or white finish. To prevent this, work in a shaded area or use a UV lamp to cure the resin.
Avoid adding too much colorant: While adding color to your resin can enhance its beauty, adding too much can result in a thick, opaque mixture that is difficult to work with. Start with a small amount and gradually add more if needed.
Avoid demolding too soon: It’s important to let your resin cure properly before demolding. Demolding too soon can damage the piece or cause it to lose its shape. Follow the instructions on the resin product for the recommended curing time.
Avoid using regular modeling clay as a mold: Regular modeling clay is not suitable for resin molding as it can react with the resin and cause it to not cure properly. Use a high-quality silicone mold instead, such as OOMOO™, which gives the best results.
Avoid using a cheap digital scale: Accurate measurements are crucial when working with resin. Invest in a reliable digital scale to ensure that you measure the right amount of resin and hardener for your project.
Avoid wearing jewelry when working with resin: Resin is a sticky substance that can easily adhere to jewelry, causing damage. It’s best to remove any jewelry before starting the resin jewelry making process.
Avoid mixing resin too vigorously: When mixing resin, gentle stirring is recommended. Vigorous stirring can introduce air bubbles into the mixture, which can be difficult to remove once poured into the mold.
Avoid using a heat gun: While a heat gun can help remove air bubbles from resin, it can also cause the resin to cure too quickly or unevenly. Instead, use a heat gun or torch designed specifically for resin work, which will provide more controlled heat.
Avoid rushing the curing process: Resin needs time to properly cure and harden. Rushing the process by increasing temperature or using a different curing agent can result in a poorly cured piece that is prone to cracking or yellowing over time.
Avoid using a bezel without a frame: When creating resin pendants or other jewelry pieces, it’s important to use a bezel with a frame. This helps to hold the resin in place and prevents it from leaking out during the curing process.
Avoid using too much filler: Fillers like glitter or other materials can add a unique touch to your resin jewelry. However, using too much filler can make the resin mixture thick and difficult to work with. Start with a small amount and add more as needed.
Avoid wearing light-colored clothing: Resin is a liquid substance that can easily stain light-colored clothing. To avoid ruining your favorite shirt, wear dark or old clothing when working with resin.
Avoid using a small workspace: When working with resin, you’ll need enough space to move freely and work comfortably. Avoid using a small workspace that may restrict your creativity and make it difficult to work with larger molds or pieces.
Avoid using a cheap resin: High-quality resin will produce better results and a more durable finished product. While there may be cheaper resin options on the market, it’s worth investing in a reputable brand to ensure the best outcome.
Avoid pouring resin too quickly: Pouring resin slowly and in thin layers is key to achieving a smooth finish. Pouring too quickly can result in trapped air bubbles and an uneven surface.
Avoid using a white light lamp: Regular white light can interfere with the curing process of some resins, causing them to not cure properly. Use a lamp specifically designed for resin work, typically a UV or LED lamp, to ensure proper curing.
Avoid leaving your resin uncured: Once you start working with resin, you’ll need to work efficiently to ensure that it cures properly. Leaving resin uncured for too long can lead to a sticky or tacky surface, making it difficult to work with or adversely affecting the final product.
Avoid adding too much hardener: Adding too much hardener to resin can cause it to cure too quickly, resulting in a brittle or unstable piece. Follow the instructions for the recommended amount of hardener to ensure a proper cure.
Avoid using a 1:1 resin-to-hardener ratio: While a 1:1 ratio is commonly used for resin projects, different resins may have different mixing ratios. Follow the instructions provided with your specific resin to ensure the best results.
Avoid storing resin in an open container: Resin can start to cure when exposed to air, so it’s important to store it in a sealed container to prevent premature curing. Use airtight containers or ziplock bags to keep your resin fresh.
Avoid touching the cured resin: Once your resin has cured, it’s best to avoid touching it with your bare hands. The oils on your skin can leave marks or smudges on the surface, affecting its appearance. Wear gloves or hold the pieces by their edges when handling them.
Avoid using a silicone mold release: Some silicone mold release agents can interfere with resin curing or affect the finish of the piece. Instead, use a mold release spray specifically designed for resin to ensure proper demolding.
Avoid using a damp or dusty workspace: Resin is sensitive to moisture and dust, which can affect its curing process and final appearance. Set up your workspace in a clean and dry area to ensure the best results.
Avoid using too much pressure when demolding: When removing your resin piece from the mold, apply gentle pressure to avoid damaging the piece or deforming its shape. Use your fingers or a demolding tool to carefully release the resin from the mold.
Avoid using a single layer of resin: To achieve a strong and durable resin piece, it’s best to pour multiple layers rather than a single thick layer. This allows each layer to cure properly and avoids excessive heat buildup that could cause the resin to warp or crack.
Avoid using resin past its expiration date: Resin has a shelf life, so it’s important to check the expiration date before using it. Using expired resin can result in a poor cure or weak finished product.
Avoid using a hairdryer to remove air bubbles: While a hairdryer may seem like a quick fix for removing air bubbles, it can actually blow dust or debris onto the wet resin surface. Use a heat gun or a heat torch specifically designed for resin work to safely remove air bubbles.
Avoid leaving resin in sunlight: Long-term exposure to sunlight can cause resin to yellow or become brittle over time. If you plan to display or wear your resin jewelry outdoors, consider using a UV-resistant resin to ensure its longevity.
Avoid adding too much of a certain color: Some colors, such as blue and purple, can overpower the resin mixture if added in large quantities. Start with a small amount of colorant and gradually increase until you achieve the desired shade.
Avoid using low-quality resin supplies: Using low-quality resin supplies can affect the overall quality and durability of your resin jewelry. Invest in reputable brands and purchase from trusted sources, such as art supply stores or online marketplaces like Amazon.
Avoid using the same mold for different types of resin: Different types of resin have different molding and curing requirements. Using the same mold for different types of resin can result in improper curing or damage to the mold.
Avoid pouring too much resin at once: It’s best to pour resin in layers, allowing each layer to cure before adding another. Pouring too much resin at once can result in excess heat and can cause the resin to cure unevenly or warp the mold.
Avoid neglecting safety precautions: Working with resin involves dealing with chemicals and potentially hazardous materials. Always wear gloves, work in a well-ventilated area, and follow safety guidelines provided by the resin manufacturer.
By keeping these tips in mind and avoiding these common mistakes, you’ll be well on your way to creating beautiful resin jewelry pieces.