

If you’re looking for a quick and efficient way to collect data online, Google Forms is one of the most powerful tools at your disposal. With its user-friendly interface and plethora of features, it’s easy to see why millions of users turn to Google Forms for their data collection needs.
When you start using Google Forms, the first step is to create a new form. You can choose from various pre-designed templates or start from scratch. Once you have your form set up, you can add different question types such as multiple choice, text, or checkboxes.
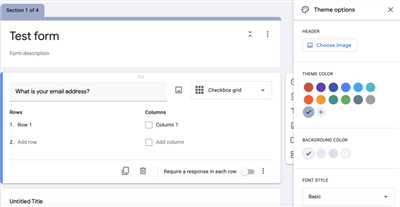
If you want to make your form look more appealing, you can also customize the themes and colors to match your brand or personal preferences. Additionally, you can add images or videos to make your form more engaging.
Once you’re finished creating your form, the next step is to set up the options for collecting responses. You can choose to collect the responses in a Google Spreadsheet, where each form submission will create a new row with the answers. You can also choose to have the responses submitted to your email directly, without the need for a spreadsheet.
When it comes to analyzing the collected data, Google Forms provides you with a variety of tools. You can view the responses in a summary format, which gives you an overview of the answers. For a more detailed analysis, you can open the responses in the Google Spreadsheet and use various functions and formulas to manipulate the data.
Google Forms also allows you to close the form once you have collected all the responses you need. This is especially useful if you have a specific deadline or a limited number of participants. Once the form is closed, no further submissions will be accepted.
In conclusion, Google Forms is a powerful and convenient tool for collecting data online. Its user-friendly interface, various question types, and customizable themes make it an ideal choice for both personal and professional use. Whether you’re conducting a survey, collecting feedback, or organizing an event, Google Forms has all the features you need to get the job done quickly and efficiently.
What is Google Forms and how it works
Google Forms is an online tool provided by Google that allows you to create surveys, quizzes, and questionnaires. It is a free service that can be used without any knowledge of HTML or coding.
Google Forms works by allowing you to create a new form, add questions to it, and customize the layout and design. Once your form is set up, you can share it with others or embed it on your website.
To create a form, you need to have a Google account. You can start by going to the Google Forms website and signing in with your Google credentials. Once you’re signed in, click on the “Blank” option to create a new form from scratch.
Google Forms provides a variety of question types for you to choose from, including multiple-choice, dropdown, and short answer. You can also add sections or pages to your form to make it more organized and easy to navigate.
In addition to collecting responses through the form itself, Google Forms also allows you to send the form via email to specific recipients. This can be done by clicking on the “Send” button at the top of the form and entering the email addresses of the recipients.
Once your form is submitted, the responses are collected and stored in a Google Sheets spreadsheet. Each response is stored in a new row, with each field of the form corresponding to a column in the spreadsheet.
If you want to analyze the results of your form, you can use the built-in functionality of Google Sheets or export the data to another tool or application. Google Forms also provides some extra features, such as the ability to create charts and graphs from your data.
In conclusion, Google Forms is a free online tool that allows you to create surveys and collect responses without any coding knowledge. It has a simple setup process and provides various features for analyzing and exporting the collected data. Whether you need a simple feedback form or a complex survey, Google Forms can be a useful tool to meet your needs.
What can Google Forms do for you
Google Forms is a powerful tool provided by Google that allows you to create and customize online forms. Whether you want to collect survey responses, gather customer feedback, or conduct job applications, Google Forms can help you with all of these tasks and much more.
With Google Forms, you can create a form from scratch or use one of the many available templates provided by Google. These templates cover a wide range of needs and can save you a lot of time when setting up your form. Once you’ve chosen a template, you can easily customize it to suit your particular needs.
The form creation process is intuitive and straightforward. You can add various types of fields and questions to your form, such as multiple-choice, checkboxes, short answer, and more. You can also add sections, themes, and custom headers to make your form look more appealing and organized.
Google Forms also allows you to authorize others to collaborate on your form. This functionality is especially useful when working on a form in a team, as it lets multiple people contribute and make changes simultaneously. You can even allow others to make edits directly in your form without giving them full access to your Google account.
Once your form is ready, you can start collecting responses. Google Forms automatically creates a response spreadsheet to store all the submitted answers. You can view the responses directly in the form editor or click through to see the results in a separate sheet. This makes it easy to analyze and work with the collected data.
If you need to share the form with others, you can quickly generate a shareable link or send it via email. You have full control over who can access and respond to your form, and you can even limit it to specific individuals or groups. Additionally, Google Forms provides a free option to close the form after a certain number of responses or a specific date and time.
One of the most powerful features of Google Forms is its integration with other Google tools. For example, you can connect your form to Google Sheets to automatically update a spreadsheet with the submitted responses. This allows you to work with the data in a more organized and structured format.
If Google Forms doesn’t provide a particular feature or functionality you need, you can enhance it using Google Apps Script. This scripting language allows you to add custom code to your form, extending its capabilities even further. Google provides a comprehensive documentation and tutorials to help you get started with Apps Script.
In conclusion, Google Forms is a versatile and easy-to-use tool that can help you collect and work with data efficiently. Whether you’re conducting surveys, gathering feedback, or organizing event registrations, Google Forms is a valuable tool that will save you time and effort. So, next time you need to create an online form, give Google Forms a try!
Conclusion
In conclusion, Google Forms is a powerful and user-friendly tool that allows you to create online forms for free. With its various features and easy setup steps, you can quickly start using Google Forms to collect responses and gather data.
When you open a new form, you’ll be provided with a template that you can customize to suit your needs. You can add various question types and format the form to make it look professional. Google Forms also allows you to set up themes and direct respondents to a specific page based on their answer.
Once you have finished creating your form, you can send it out to participants via email or share the link directly. The respondents will be able to answer the questions in the form, and the results will be automatically collected in a Google Sheets spreadsheet.
However, if you want some extra functionality, you can also use Zapier to integrate Google Forms with other tools and automate certain tasks.
One important note on using Google Forms is the security and privacy of the collected data. Google Forms does provide some level of protection, but it is always a good idea to be cautious when collecting sensitive information. Make sure to inform respondents about the data you will be collecting and how it will be used.
In conclusion, Google Forms is a fantastic tool for collecting data online. It is easy to use, has a wide range of features, and can be customized to fit your specific needs. Whether you’re a student, teacher, or business professional, Google Forms can help you streamline your data collection process and save you time. So why wait? Start using Google Forms today and see how it can benefit you!
Zapier setup
If you want to automate your Google Forms workflow and quickly work with the data submitted through your forms, Zapier is the tool you need. Zapier allows you to connect various apps and create automated workflows, saving you time and effort.
Here are the steps to set up Zapier with your Google Form:
- Start by signing up for a free Zapier account if you don’t have one already.
- Once you’re logged in, click on “Make a Zap” to start creating a new automation.
- In the search bar, look for “Google Forms” and select it as the trigger app.
- Authorize Zapier to access your Google Forms by following the provided steps.
- Next, choose the trigger event – in this case, it could be “New Response in Spreadsheet”.
- Select the Google account you want to use and choose the form from the drop-down menu.
- Zapier will now ask you to test the trigger to ensure it’s working correctly.
- If everything looks good, click on “Continue” to move to the next step.
- Now it’s time to set up the action – choose the app you want to connect with Google Forms. For example, you can select “Google Sheets” to send the form responses to a spreadsheet.
- Authorize Zapier to access your Google Sheets and choose the spreadsheet where you want the form responses to be sent.
- Map the form fields to the corresponding columns in your spreadsheet.
- Test the action to make sure everything is set up correctly.
- If the test is successful, click on “Continue” to finish setting up the zap.
- Give your zap a name and turn it on.
Once your zap is active, whenever a new response is submitted through your Google Form, it will be automatically added as a new row in your Google Sheets spreadsheet. You can then work with the data as much as you like and analyze the results in a format that suits your needs.
It’s worth noting that Zapier offers many other features and integrations, so you can do much more with your Google Forms. For example, you can send an email notification when a new form response is received, or you can use Zapier’s built-in automation tools to manipulate the data before it’s sent to your spreadsheet.
In conclusion, Zapier is a powerful tool that allows you to automate your Google Forms workflow and make the most of the data you collect. With a few simple steps, you can set up a zap that will save you time and effort, giving you more freedom to focus on what matters most.
Step 1 – New Spreadsheet Row in Google Sheets
To collect and work with data submitted through Google Forms, you will need to link it to a spreadsheet. This allows you to easily organize, analyze, and visualize the information provided by the form respondents. In this section, we will show you how to set up a new spreadsheet to store the form responses.
1. Start by creating a new Google Sheets document. You can do this by going to your Google Drive page, clicking on the “New” button, and selecting “Google Sheets” from the dropdown menu. If you already have a spreadsheet that you want to use, you can skip this step and open that file instead.
2. Once your new spreadsheet is open, make sure to give it a clear and descriptive name. This will help you identify the correct file when working with multiple sheets or forms.
3. In the first row of your spreadsheet, which is often referred to as the header row, you should include the field names that correspond to the questions in your Google Form. This will make it easier to understand and interpret the data later on.
4. Now, go back to your Google Form and click on the “Responses” tab. At the top right corner of this page, you will see a green button that says “Create Spreadsheet.” Click on it to link your form to the newly created spreadsheet.
5. A dialog box will appear asking you to authorize the connection between Google Forms and Google Sheets. Click on the “Allow” button to proceed.
6. Once the connection is authorized, Google Forms will automatically create a new worksheet within your spreadsheet. This worksheet will contain all the form responses in a tabular format.
7. You are now ready to start collecting responses through your Google Form. Each time someone submits the form, a new row will be added to the spreadsheet with their answers. This allows you to keep track of all the submissions and easily analyze the data.
8. When you have finished collecting responses and want to close the form, you can go back to the “Responses” tab in your Google Form and click on the “Accepting responses” toggle switch to turn it off. Alternatively, you can also close the form directly from the Google Form editor.
It is worth noting that when using this method, the data from your Google Form is automatically sent and stored in your Google Sheets. This means that you can access and work with the collected information even without an internet connection.
In the next section, we will explore some of the additional functionality and features that Google Forms and Google Sheets offer. You will learn how to analyze the data, create visualizations, and even automate certain tasks using Google Apps Script and third-party tools like Zapier.
Step 2 – Create Note in Close
Once you have submitted your form, you may want to provide a note in the “Close” section. This note will be displayed to the participants once they have completed the form, so it is a good opportunity to thank them for their time and let them know what the next steps are.
- First, go to the Google Forms homepage and choose the form you want to work with.
- Click on the “Responses” tab to access the responses from your form.
- In the top-right corner, click on the 3-dot menu icon and choose “Create Spreadsheet”. This will create a new Google Sheets spreadsheet that will collect all the responses from your form.
- In the Google Sheets spreadsheet, click on the “Add-ons” tab in the top menu and choose “Get add-ons”.
- In the marketplace, search for “Close” and click on the “Close – Email & Document Merge” add-on.
- Click on the “Install” button to add the Close add-on to your Google Sheets.
- Close the marketplace and go back to your Google Sheets spreadsheet.
- In the top menu, you will now see a “Close” tab. Click on it.
- In the Close sidebar, click on the “Setup” tab and authorize Close to access your Google Sheets.
- Next, click on the “Templates” tab and choose a template that fits your needs. Close provides various templates for different themes and purposes.
- Once you have selected a template, you can customize the text and fields to tailor it to your requirements.
- After setting up the template, click on the “Compose” tab to write the email or note that will be sent to the participants.
- From there, you can use the provided tags to insert dynamic data from your form responses, such as the participants’ answers.
- Once you are satisfied with the note, click on the “Send” button to send it to all the participants who have completed the form.
Using the Close add-on allows you to quickly and easily send personalized notes or emails to the participants of your Google Forms. It adds an extra layer of functionality and customization to the form, making it more engaging and professional.
Keep in mind that you need to have a working knowledge of Google Sheets and how to work with spreadsheets in order to set up and use the Close add-on.