

In this tutorial, we will be exploring how to create a shooting game from scratch. If you’re new to game development, don’t worry! We’ll start with the basics and guide you through each step of the process.
First, let’s talk about the main character of our game. We will use a sprite called “spr_player” as our player character. This sprite will be placed in the center of the screen and will be able to move in any direction. The sprite will always face the direction it is moving in, which adds a nice touch to our game.
To make our game more interesting, we will also add other objects that the player can shoot at. These objects can be anything from arrows to small enemies. Each object will have its own unique properties and behaviors, making the game more challenging.
Next, let’s take a look at the game’s resources. It’s important to note that creating a game involves gathering resources from various sources. These resources can include images, sound effects, music, and more. Make sure you have all the necessary resources before you begin.
Now, let’s move on to the code. We will use a programming language called GML (GameMaker Language) to write the code for our game. GML is a powerful and easy-to-learn language that is perfect for game development.
In the beginning, we will set up the main starting screen of our game. This screen will contain all the necessary buttons and options for the user. We will also establish the basic events that will occur in the game, such as when the player shoots or when an object is hit.
Within the game loop, we will check for user input and update the game accordingly. This includes handling the player’s movements, shooting the objects, and updating the score. We will also show a preview of the current level and display the player’s score on the screen.
Lastly, we will take a look at the shooting mechanics of our game. We will create a function that handles shooting and apply it to the player’s character. This function will make the player shoot in the direction they are facing, creating a realistic shooting effect.
By following these steps, you will be able to create your very own shooting game. Just remember to take your time and test your game at every stage to ensure everything is working as expected. Let’s get started and make 2023 the year of shooting games!
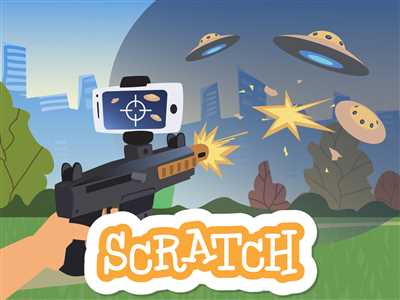
Lock and Load: How to Make a Shooting Game on Scratch in 2023
If you’re interested in making your own shooting game on Scratch, you’re in luck! This step-by-step guide will walk you through the process of creating a simple shooting game using Scratch, a popular drag-and-drop programming language. By following these instructions, you’ll have your very own shooting game up and running in no time!
Step 1: Setting Up
To begin, open Scratch and create a new project. Once your project is open, you’ll need to define some initial variables. Create two global variables called “score” and “ammo” by clicking on the “Variables” category and then selecting “Make a Variable”. Set the initial value of both variables to 0.
Step 2: Creating the Character
Next, you’ll want to create the character that the user will control. To do this, you can use the built-in sprite editor in Scratch. Draw or import an image for your character, and then add it to your project by using the “New Sprite” button.
Step 3: Character Movement and Rotation
In order to make your character move and rotate, you’ll need to add some scripting code. First, add the following code to make your character move when the arrow keys on the keyboard are pressed:
- When [left arrow v] key pressed
- change x by -10
- When [right arrow v] key pressed
- change x by 10
- When [up arrow v] key pressed
- change y by -10
- When [down arrow v] key pressed
- change y by 10
Next, add the following code to make your character rotate towards the mouse pointer:
- point towards [mouse-pointer v]
Step 4: Shooting Bullets
Now it’s time to add the shooting aspect to your game. First, create a new sprite for your bullet by using the “New Sprite” button. You can draw or import an image for your bullet in the sprite editor.
Next, add the following code to your character to make it shoot bullets when the spacebar is pressed:
- When [space v] key pressed
- create clone of [bullet v]
- move [10 v] steps
- start sound [shoot v] until done
Step 5: The Shooting Mechanism
To make the bullets shoot from the character’s location towards the mouse pointer, you’ll need to add some additional code to the bullet sprite. Add the following code to the bullet sprite:
- When green flag clicked
- point towards [mouse-pointer v]
- go to [character v]
- move (2) steps
Step 6: Scoring and Ammo
Finally, you’ll want to add scoring and ammo functionality to your game. To keep track of the score and ammo, add the following code to your character:
- When I receive [hit v]
- change [score v] by 1
- When [flag v] clicked
- forever
- if < [ammo v] < 3 >
- change [ammo v] by (1)
- if < [ammo v] < 3 >
- forever
That’s it! By following these steps, you’ve created a basic shooting game on Scratch. You can now expand on this project by adding more features such as enemy characters, power-ups, and different levels. Have fun!
Movement
One of the most important aspects of any shooting game is the movement of the player character. Movement can be simply defined as any change in position or location on the game’s workspace. In this tutorial, we will explore how to make the player character move using the keyboard.
To get started, open Gamemaker and create a new project. Once the project is open, you will see a workspace where you can create your game. In the workspace, you can draw your characters, objects, and environments. For this tutorial, we will focus on the movement of the player character, so let’s create a new object to represent the player.
Click on the “Add Sprite” button on the top toolbar to open the sprite editor. Here, you can draw the player character using the tools provided. Once you have drawn your character, click “OK” to save it. Now, in the “Create” event of the object you previously created, add the following code:
keyboard_check(vk_right)
// move the player character to the right
x += 5;
This code checks if the right arrow key on the keyboard is pressed and if it is, it moves the player character 5 pixels to the right. Similarly, you can create code for moving the character in the left, up, and down directions by using the vk_left, vk_up, and vk_down constants respectively.
Now, if you run the game, you will see that the player character can be moved in different directions using the arrow keys on the keyboard. However, the character can move off the screen, which is not desirable. To prevent this, we can add some boundary conditions to restrict the character’s movement within the game window.
In the Keyboard_check(vk_right) event, add the following code:
// check if the character is at the rightmost position
if x >= room_width – sprite_width
x = room_width – sprite_width;
This code checks if the character’s x-position is greater than or equal to the room width minus the sprite width. If it is true, it sets the character’s x-position to the maximum allowed value so that it cannot move beyond the right edge of the room. Similar conditions can be added for the other directions to restrict the character’s movement.
In summary, by using Gamemaker’s built-in functions and the keyboard_check event, we can create movement for the player character in a shooting game. It is important to define the character’s movement in each event where movement is possible, such as the keyboard_check events for the arrow keys. Additionally, it is a good practice to add boundary conditions to prevent the character from moving off the screen and to keep it within the game window.
Note that this is just a single step in creating a shooting game. In future tutorials, we will cover other aspects of game development, such as shooting bullets, creating enemies, and designing levels. Stay tuned!
Starting A New Project
When starting a new project for a shooting game, there are several steps that you need to take. This section will guide you through those steps and help you get started on creating your game.
First, open the game development tool that you will be using to make your game. There are many different game development tools available, but for this tutorial, we will be using GameMaker Studio 2.
Once you have opened the tool, you will need to create a new project. Click on the “New Project” button or select “New Project” from the “File” menu. Give your project a name and choose the location where you want to save it.
After creating the project, you will be presented with a blank canvas. This is where you will be creating all the objects and components for your game. Each object in your game will have its own set of properties, such as rotation and movement.
To start building your game world, you can either load pre-made assets or create your own. GameMaker Studio 2 provides a wide range of built-in resources that you can quickly use, such as sprites, sounds, and backgrounds. You can also import your own resources from external sources.
Next, you will need to create a main character for your game. This character will be controlled by the player and will move around the game world. You can create a character by adding a new object to your project and assigning it a sprite. You can then define the character’s movement with a script or by using built-in functions.
When the game starts, you will need to define what happens. You can do this by adding events to your objects. For example, you can add an event that makes the character move when the arrow keys are pressed. You can also add events that make the character shoot the bullets or interact with other objects.
It is important to organize your project well, especially if you plan to work on it for a long time. GameMaker Studio 2 provides a folder structure to make it easier to manage your resources and assets. You can create folders to group similar objects or resources together.
Once you have set up the basic structure of your game and added some objects and events, you can start adding more functionality to your game. This can include things like adding levels, power-ups, or enemies. You can also add visual effects or sound effects to make your game more engaging for the player.
Remember to save your progress regularly to avoid losing any work. You can save your project by clicking on the “Save” button or selecting “Save” from the “File” menu. It is also a good idea to back up your project regularly to prevent any loss of data.
Now that you have a basic understanding of how to start a new project for a shooting game, you can use this knowledge to create your own game. Experiment with different objects, events, and functions to see what works best for your game idea. Have fun creating your shooting game!
The Workspace
The workspace is the area where you will build and design your shooting game. In the workspace, you can create and arrange different elements such as studio, layers, arrows, objects, and more.
When you first start GameMaker Studio, you will see an overview of the user interface. This is where you can create a new project or open an existing one to begin working on your shooting game.
Once you have started a new project, you will be presented with a global object called “obj_shooter” and a blank room. This is the starting point of your game, and you can build upon it to create the gameplay experience you desire.
In the workspace, you can take visual assets like sprites and place them in the room or attach them to objects. Sprites are the visual representations of your game’s elements, such as the player character or enemies.
The visual aspect of your game can be changed by editing the image_angle property of objects. For example, you can make an arrow object rotate around its center to show the direction it is pointing.
In addition to visual elements, you can also add functionality to your shooting game by using code. GameMaker has a built-in scripting language called GML (GameMaker Language) that allows you to create events and actions for objects.
In the workspace, you can create events that trigger when certain conditions are met, such as when the player presses a certain key on the keyboard. You can then specify what actions should occur when these events happen, such as shooting a bullet or moving the player character.
Events and actions are organized in a hierarchical structure in the workspace. You can expand or collapse sections to quickly navigate through your code and make changes as needed.
When you create objects in the workspace, they belong to a layer. Layers are used to control the order in which objects are drawn on the screen. Objects on higher layers will appear in front of objects on lower layers.
In the workspace, you can also create folders to organize your objects and scripts. This makes it easier to find and work with specific elements as your shooting game becomes more complex.
In summary, the workspace in GameMaker Studio is where you bring your shooting game to life. It provides a visual and coding toolset that allows you to create and modify the various aspects of your game, from visuals and animations to game logic and functionality.
Sprites
An overview of sprites in the context of creating a shooting game involves using a graphics software or a sprite studio to define characters and objects that will be used in the game. Sprites are essentially images or visual representations that move on the screen. In a shooting game, sprites could include the player character, enemies, bullets, and other interactive elements.
Each sprite typically consists of a series of frames that represent different states or movements of the object. For example, a player character sprite might have frames for walking, jumping, shooting, and more. These frames are then put together in a project file to create the sprite animation.
When the game is running, the frames of the sprite are shown one after the other, creating the illusion of movement. For example, if the player character moves to the right, a series of frames showing the character in different positions as it moves to the right are displayed rapidly, giving the appearance of continuous motion.
In GameMaker, each sprite has an image_angle attribute that can be used to rotate the sprite. This attribute defines the direction in which the sprite is facing. By scripting, you can change the image_angle value to make the sprite rotate in a certain direction.
If you’ve used Scratch before, you might be familiar with the concept of sprites. In Scratch, sprites are the objects that you create and use in your projects. The same idea applies in GameMaker – each object you create in the game corresponds to a sprite.
To make a sprite in GameMaker, you need to go to the “resources” tab and click on the “create” button. This will open a dialog box where you can give your sprite a name, specify its dimensions, and choose an image file to use for the sprite.
Once the sprite is created, you can use it in your rooms by simply dragging and dropping it onto the desired location in the room editor. You can also assign different sprites to different instances of the same object to give them unique looks.
When creating a shooting game, it’s important to have a sprite for the shooter and another sprite for the bullets. The shooter sprite represents the player character, while the bullet sprite represents the projectiles that the player fires.
To draw the sprite on the screen, you can use the “draw_sprite” function in a GameMaker event. For example, you can use the “draw_sprite” function in the “draw” event of the shooter object to show the sprite on the screen.
It’s also possible to make the shooter object follow the mouse cursor. This can be achieved by using the “lock” function in a GameMaker event. For example, you can use the “lock” function in the “step” event of the shooter object to make it follow the mouse_x and mouse_y positions.
When the player presses the right arrow key on the keyboard (keyboard_check(vk_right)), you can call a script to handle the shooting action. This script will create a new instance of the bullet object and give it a starting position and direction. The bullet object will then move in that direction until it hits something or goes off-screen.
In conclusion, sprites are an essential component in creating shooting games. They represent the visual elements that move on the screen and interact with the user. By using sprites, you can quickly and visually create game objects such as player characters, bullets, and enemies. Sprites allow for easy movement and animation, making your game more engaging and dynamic.
Objects and Instances
In order to create a shooting game, you need to understand the concept of objects and instances. Objects are the building blocks of your game, and instances are copies of those objects that you can interact with.
When scripting in a game engine like Unity or GameMaker Studio, you usually start by creating a single object that represents the player character or the main character of your game. This object will always be present in the game, and it will be responsible for controlling the player’s movements.
Here’s an example: let’s say you have a shooter game where the player moves around using arrow keys. In this case, you would create an object called “Player” and assign it a script that handles the player’s movements. This script listens for keyboard events and moves the player object accordingly.
Objects can also be used to represent other aspects of your game, such as enemies, bullets, or power-ups. For example, you could create an object called “Enemy” and assign it a script that controls how it moves and behaves in the game.
Note that objects and instances can be visually represented in a game editor, where you can drag and drop them onto a scene or level. When an object is placed in the game editor, an instance of that object is created in the game. Multiple instances of the same object can be created, each with its own unique properties.
Let’s say you have created three instances of an object called “Enemy” in your game. Each instance can have its own position, rotation, and other properties. This makes it possible to create different types of enemies with different behaviors and appearances.
When an object is created in your game, it belongs to a specific room or level. It can be opened and accessed from within that room or level. However, objects can also be global, meaning they can be accessed from any room or level in your game. Global objects are useful for creating common functionalities that need to be shared across different parts of your game.
To summarize, objects and instances are essential components in creating a shooting game. Objects represent different elements of your game, such as players, enemies, and bullets. Instances are copies of objects that can be placed and interacted with in your game. By scripting the behavior of objects and instances, you can make things happen in your game, such as shooting bullets in a specific direction or rotating objects by clicking on them. Understanding objects and instances makes it easier to code and design your game, taking your project to the next level.
Rooms
A crucial aspect of creating a shooting game is to define different rooms or levels where the action takes place. In GameMaker Studio, rooms are containers that hold all the objects, sprites, backgrounds, and other elements of a particular game section.
To get started with creating rooms, you can go to the Room Editor in GameMaker Studio. It is where you can visually design and arrange the game elements within a selected room. This editor can be opened by double-clicking on the room you want to work on in the Resource Tree.
Once you have the Room Editor opened, you can drag and drop objects onto the workspace, define their starting position and rotation, and even specify any variables they should have. You can also set up the room dimensions, background colour, and other properties.
In addition to creating rooms through the visual editor, you can also create rooms dynamically using code. For example, if you want to generate random levels, you can write functions that generate and place objects within the room.
Rooms are connected to each other through the use of objects such as doors or teleportation devices. One way to achieve this is by using global variables to keep track of the player’s progress and to load the next room when needed.
When working with multiple rooms, it’s important to consider the performance of your game. You can control the number of frames per second that the game runs to ensure smooth gameplay. Additionally, you can expand on the concept of rooms by categorizing them into levels or stages with increasing difficulty.
In summary, rooms are essential components of a shooting game as they determine the layout and progression of the game. Whether you create them visually or dynamically through code, rooms provide the necessary structure for your game world.
Events and Code
In your shooting game, you’ve got a lot going on. There are almost always multiple events happening at the same time, and it’s important to keep track of everything that’s going on in order to create an engaging and dynamic game.
One of the first things you’ll need to do is set up your workspace in the game development tool of your choice. This could be either a visual tool, where you can easily drag and drop sprites and assign behaviors, or a more code-focused tool, where you’ll need to write the logic for every step the game takes.
Either way, it’s important to quickly get familiar with the tool you’re using, especially if you’re new to game development. You’ll want to learn how to create and move sprites, assign actions to buttons, and define the rules for how the game moves and interacts.
Once you have your workspace set up, the next step is to start creating events. Events are the actions that take place in your game, such as when the player shoots or when an enemy moves. By defining these events, you can create the rules and behaviors that govern how your game works.
In a visual tool, you might have a list of pre-defined events and actions that you can simply select from. For example, you might have a “collision” event that is triggered when two objects collide, and you can assign an action to happen when that event is triggered.
In a code-focused tool, you’ll need to write the logic for each event yourself. This might involve using a programming language or scripting system to define the conditions and actions that happen when a certain event occurs. This can be more complex, but it also gives you more control over how your game behaves.
For example, you might have a function that returns the current position of the player’s character, and another function that returns the rotation of the enemy. You can use these functions to define the rules for how the enemy moves and reacts to the player’s actions.
In both cases, it’s important to test your events and code as you go along. Make sure that everything is working as expected, and adjust as needed. It’s also a good idea to have a preview mode, where you can see how your events and code are affecting the game in real-time.
As you add more events and code to your game, it may start to get more complex. You might have events that belong to different categories, such as “movement” or “collision.” You might also have multiple instances of the same object, each with its own properties and behaviors.
It’s important to keep everything organized and well-structured. Use comments to explain your code, and group related events together. This will make it easier to navigate and understand your code as it grows.
Remember, creating a shooting game is a step-by-step process. Start small with a simple character that can shoot a ball, and gradually expand and define more complex events and behaviors. With time and practice, you’ll be able to create your own unique and engaging shooting game.
Movement
In shooting games, movement is a key aspect of gameplay. It allows the player to navigate around the game world, dodge enemy attacks, and position themselves for optimal shots. In this section, we will explore how to create movement for a player character in a shooting game.
To get started, open your project in GameMaker and create a new room. This will serve as the main playing area for your game. You can define the size and properties of the room in the Room Properties window.
Next, you will need to create a player character object. You can either draw or drag and drop an image for the character, or use the built-in character sprite provided by GameMaker. Once you have your character image, define its properties such as image_angle and image_speed.
Now, lets define the movement of the character. GameMaker provides several built-in variables and functions that can be used to handle movement. For example, the keyboard_check(vk_right) function returns a value of true if the right arrow key on the keyboard is pressed. You can use this function in a Step event to make the character move to the right when the key is pressed.
So, you can write a simple script like this:
 if (keyboard_check(vk_right)) {
 x += 5;
 }
This will move the character 5 pixels to the right each step. You can do the same for other directions by checking the keyboard state for the corresponding keys.
In addition to keyboard input, you can also handle movement using mouse input. For example, you can make the character follow the mouse cursor by adding the following code to the Step event:
 x = mouse_x;
 y = mouse_y;
This will make the character’s position always equal to the mouse cursor’s position, creating a “follow” effect. You can experiment with different values and formulas to achieve the desired movement behavior.
Another important aspect of movement is rotation. In shooting games, the player character often needs to rotate to aim and shoot at enemies. GameMaker provides functions like direction and point_direction to handle rotation. For example, you can use the following code to make the character rotate towards the mouse cursor:
image_angle = point_direction(x, y, mouse_x, mouse_y);
This will make the character always face towards the mouse cursor, allowing for precise aiming and shooting.
In this section, we explored different ways to handle movement in a shooting game. Whether it’s using keyboard or mouse input, or implementing rotation, movement is a fundamental aspect of gameplay. By using GameMaker’s built-in variables and functions, you can easily create smooth and responsive movement for your game characters.
Rotation
When creating a shooting game, one key aspect is the rotation of your character. In the previously mentioned section, we discussed how to create a basic shooting mechanic using the mouse. Now, let’s explore how we can make our character face the direction of our mouse cursor.
To start, we need to add some properties to our character object. In this case, note that we will be using the image_angle variable to represent the rotation of our character. This variable is built-in and returns the current angle of the object in degrees.
To update the rotation of our character, we can use the mouse_x and mouse_y properties that represent the current position of our mouse cursor. Inside our character’s step event, add the following code:
image_angle = point_direction(x, y, mouse_x, mouse_y);
This code calculates the direction from the character’s current position to the mouse cursor’s position and sets the image_angle accordingly.
Next, let’s add a visual indication of the character’s rotation. Drag and drop a new sprite called “arrow” from the resources window onto the room. Once placed, open the sprite editor and draw a small arrow pointing up.
Now, in the draw event of our character object, add the following code:
 draw_sprite_ext(spr_player, 0, x, y, 1, 1, image_angle, c_white, 1);
 draw_sprite_ext(spr_arrow, 0, x, y, 1, 1, image_angle, c_red, 1);
This code will draw our character sprite (spr_player) with the correct rotation and color. Additionally, it will draw the arrow sprite (spr_arrow) on top of our character to indicate the direction it is facing. The c_white and c_red values represent the color of the sprites.
With these changes, our character will now rotate towards the mouse cursor, giving a visual cue to the player about the direction they are aiming.
Note that the image_angle property belongs to the instance of the object, not the global scope. This means that each character object can have a different rotation value. In this case, we are using the same rotation for both the character sprite and the arrow sprite, but feel free to adjust it as needed.
Summary
In this tutorial, we explored the process of creating a shooting game using GameMaker, a powerful game development tool. We discussed how to set up the workspace and folder structure, as well as how to create rooms to build the game world. We also covered how to place objects in the rooms and how to use events to make things happen in the game.
We learned about the different types of objects and how to use them to create everything from bullets to enemy characters. We also discussed the global and instance variables and how they can be used to keep track of important information in the game.
Another key aspect of creating a shooting game is player input, and we covered how to handle keyboard and mouse events, allowing the user to control the player character. We also explored how to handle button clicks and drag and drop events.
We discussed the importance of properly organizing code and how to use scripts and functions to make our code more modular and easier to read. We also explored how to load and display images in the game, as well as how to handle sprite rotation.
Finally, we added some additional features to our shooting game, such as power-ups and different ball styles. We discussed how to expand the game by adding more levels and challenges, as well as how to handle game over and victory conditions.
In conclusion, creating a shooting game can be a complex process, but with the right tools and techniques, it is definitely achievable. GameMaker provides a user-friendly environment for both beginners and experienced developers to bring their game ideas to life.
Step 3 The Main Character
In the previous sections, we started by creating a new project and setting up the basic structure of our game. Now it’s time to create the main character of our shooting game.
The main character, also known as the player or the shooter, will be controlled by the user and will be responsible for shooting the bullets. Instead of using a pre-made sprite, let’s create our own by combining simple shapes.
To start, open the Room Editor by clicking on the option “Edit objects” in the Room Properties window. Then, select the “spr_player” object and drag it onto the room. This will create an instance of our main character in the game world.
Next, let’s add some properties to our main character. In the Object Properties window, click on the tab called “Properties”. Here, we can define variables that will belong to our main character object. For example, we can add a variable called “speed” and set its value to 3. This will determine how quickly our main character can move in the game.
Now, let’s add another variable called “direction”. This variable will store the rotation angle of our main character. By default, it will be set to 0, which means that the main character will face right. We will later use this variable to rotate our main character based on the user’s input.
In the same tab, click on the option called “Events”. This will open the Event Editor, where we can add code to define the behavior of our main character. Here, we can add functions that will be called when certain events occur, such as when the user presses a key or when the main character is created.
For now, let’s add a global variable called “bullets”. This variable will keep track of all the bullets in the game. We will initialize it as an empty array.
Now, let’s create a new event by clicking on the “Add Event” button. In the event list, find the “Step” event and select it. This event will be called every frame of the game and allows us to update the main character’s position and rotation.
In the Step event, we will add the following code:
// Get the current position of the main character
var x = this.x;
var y = this.y;
// Move the main character based on the user’s input
if (keyboard_check(vk_left))
{
x -= speed;
}
if (keyboard_check(vk_right))
{
x += speed;
}
if (keyboard_check(vk_up))
{
y -= speed;
}
if (keyboard_check(vk_down))
{
y += speed;
}
// Update the position of the main character
this.x = x;
this.y = y;
This code gets the current position of the main character and then updates it based on the user’s input. If the user presses the left arrow key, the main character’s x coordinate is decreased by the speed value. If the user presses the right arrow key, the x coordinate is increased. The same logic applies to the y coordinate and the up and down arrow keys.
Finally, we set the main character’s position to the updated values. This will move the main character in the game world.
Now if you test the game, you should be able to control the main character using the arrow keys. However, the main character is not yet visible because we haven’t added any sprites to it.
In the next section, we will add sprites to our main character to make it visible in the game. We will also add the ability to shoot bullets. Stay tuned!
Simple Shooter Game
In this section, we will walk through the process of creating a simple shooter game using Gamemaker Studio. You will learn how to define objects, create sprites and rooms, and add basic functionality to the game.
First, let’s start by creating the necessary objects for our game. We will need a shooter object, which will represent the player’s character, and a bullet object, which will be used to shoot at the enemies. To create these objects, go to the resources tab in the workspace, and create a new object for each of them.
Next, we need to define the properties of each object. For the shooter object, we can set its properties such as its speed and rotation. For the bullet object, we can define properties like its speed and direction. You can adjust these properties depending on the specific requirements of your game.
After defining the objects, we can move on to creating sprites for each of them. Sprites are the visual representations of the objects in the game. To create a sprite, open the image editor in Gamemaker Studio and draw the desired image for each object. Once the sprites are created, assign them to the corresponding objects.
Now, let’s create a room for our game. Rooms are the individual levels or screens in the game. You can create multiple rooms to represent different levels or areas. To create a room, go to the resources tab and add a new room. You can drag and drop the objects onto the room to place them in the desired positions.
At this point, we have defined our objects, created sprites for them, and placed them in a room. However, we still need to add some functionality to make the game playable. To do this, we will define events and actions for our objects.
For example, we can use the keyboard_check function to detect if the player presses a certain key, such as the right arrow key, to move the shooter object. We can also use the mouse functions to detect if the player clicks the mouse button to shoot a bullet. By chaining these events and actions, you can create complex interactions between the objects in your game.
In addition to events and actions, you might also want to add some visual effects to make your game more engaging. For instance, you can change the colour or rotation of objects, create particle effects, or display text on the screen. Gamemaker Studio provides a wide range of built-in functions and tools to help you achieve these visual effects.
As you work on your game, take note of any changes or improvements you make. This will help you keep track of your progress and make it easier to debug any issues that may arise. You can also organize your resources into folders or categories to keep them organized and easy to find in the workspace.
Finally, when you are ready to test your game, you can click on the play button in Gamemaker Studio to see how it works. You can also export the game to different platforms, such as Windows, Mac, or mobile devices, to share it with others.
In summary, creating a simple shooter game involves defining objects, creating sprites, setting up rooms, and adding functionality using events and actions. With Gamemaker Studio, you can easily create your own games and bring your ideas to life.