

If you are a blogger, you may have come across the need to customize your blog’s appearance. While there are many pre-made themes available, sometimes you may want to create your own unique template. In this article, we will guide you through the steps of making a blogger template from scratch.
Before diving into the process, it’s essential to have some basic knowledge of HTML, as well as CSS, which will help you customize the look and feel of your blog. If you are new to these technologies, don’t worry! There are numerous resources available online, including tutorials and the stack overflow community, where you can find answers to your questions.
First and foremost, start by planning the layout and design of your template. Decide how you want your blog to look and how you want the different sections, such as the header, sidebar, and footer, to be arranged. Having a clear idea in mind will make the process much smoother.
Once you have your template’s layout planned, you can start working on the code. To create a template in Blogger, you need to have access to the XML source code of your blog. If you don’t have this option in your Blogger dashboard, you can follow a tutorial to enable it.
Open the XML source code editor and copy the full code into a blank text editor. From here, you can start modifying the code to match your desired template. Blogger templates are divided into sections, and each section has its own tags and attributes. You can modify these sections to add your own content or customize the existing elements.
One of the ways you can make your template more dynamic is by making it widgetable. Widgets allow you to add various functionalities to your blog, such as a search bar, social media buttons, or recent post lists. By adding widget areas to your template, you can easily drag and drop these elements without editing the source code.
Once you have finished customizing your template, you can test it by applying it to your blog. Simply save the modified XML code and upload it to your Blogger dashboard. Make sure to back up your previous template in case you want to revert to it later.
In conclusion, creating your own Blogger template can be a rewarding experience for bloggers who want a unique look for their blogs. With a little knowledge of HTML and CSS, you can build a template from scratch or modify an existing theme to suit your needs. Don’t hesitate to reach out to the Blogger community for help and guidance!
- How to create your own blogger template from scratch full course
- Planning the layout
- 1 Answer 1
- Blank Blogger Template
- Blogger on Stack Overflow
- Two Ways to Access Blogger Theme Source Code
- 1. The Layout Section
- 2. Starting from Scratch
- acibut
- Video:
- Create A Blogger Template From Scratch – Blogger Theme Basics
How to create your own blogger template from scratch full course
Creating your own blogger template from scratch can be a rewarding and exciting experience. With the right knowledge and planning, you can design a customized template that perfectly fits your blog’s needs. In this full course tutorial, we will walk you through the step-by-step process of creating your own blogger template from scratch.
Step 1: Layout Planning
The first step in creating your own blogger template is to plan the layout of your template. Decide how you want your blog to look and what sections you want to include, such as the header, sidebar, and footer. Sketch out a rough draft or make a list of the sections you want to have in your template.
Step 2: Finding a Blank Template
Next, find a blank template to use as a starting point. There are many websites and online communities where bloggers share their templates for free. Look for a template that closely matches the layout you have planned.
Step 3: Creating the Template XML Code
Once you have a blank template, you can start creating the XML code for your template. The XML code is what tells Blogger how to display your blog. You will need to familiarize yourself with XML syntax and tags to create the template code.
Step 4: Testing Your Template
After you have created the template code, it is important to test it to make sure it works correctly. Publish your template to a test blog and make sure all the sections and widgets are displaying correctly. Test the template on different devices and browsers to ensure it is responsive.
Step 5: Adding Your Own HTML and CSS
Once you have a working template, you can start customizing it by adding your own HTML and CSS code. This is where you can add your own unique design elements and make the template truly your own. You can also modify the layout and appearance of the existing sections of the template.
Step 6: Adding Widgetable Sections
If you want to make your template widgetable, you can add widgetable sections to it. Widgetable sections allow you to easily add and remove widgets from your template without editing the HTML code. You can add widgetable sections to the sidebar or footer of your template.
Step 7: Looking at the Source Code
When you are creating your own blogger template, it is important to take a look at the source code of other templates for inspiration and guidance. Look at the source code of popular blogger themes and see how they are structured. This will give you a better understanding of how to structure your own template.
Step 8: Accessing Knowledge from the Blogger Community
If you ever get stuck or have a question while creating your own blogger template, don’t be afraid to ask for help. There are many online communities and forums where you can ask questions and get answers from experienced bloggers and developers.
In conclusion, there are two ways you can create your own blogger template from scratch. You can either start with a blank template and modify it to fit your needs or you can create the template completely from scratch. With the knowledge and skills gained from this full course tutorial, you will be able to create your own customized blogger template that reflects your unique style and vision.
Planning the layout
Before diving into the code and creating your own Blogger template from scratch, it’s important to spend some time planning the layout of your blog. This step is crucial because it will determine how your blog will look and function.
There are two main ways you can plan the layout of your Blogger template. The first way is to sketch it out on a piece of paper or use a design tool to create a visual representation. This will give you a full picture of how your blog will look, including the placement of different sections and widgets.
The second way to plan the layout is to access the Blogger community and find existing themes that you like. Take a look at the source code of these themes and see how they are structured. This will give you a better understanding of how different elements are coded and arranged.
Once you have a clear plan in mind, you can start working on the actual template. If you have some HTML knowledge, you can code the template by hand using a text editor. If you’re not comfortable with coding, there are also tutorials available online that can guide you through the process.
When planning the layout, consider the following key elements:
- Header: This is the top section of your blog where you can include your blog’s title, logo, and navigation menu.
- Content: This is the main section of your blog where your blog posts will be displayed. It’s important to make sure the content area is wide enough to accommodate different types of media, such as images and videos.
- Sidebar: This is the column on the side of your blog where you can place different widgets, such as a search bar, social media buttons, or recent posts.
- Footer: This is the bottom section of your blog where you can include copyright information, links to other pages, and additional widgets.
When planning the layout, it’s also important to consider the widgetable sections. These are sections in your template where you can add different types of widgets. By default, Blogger provides a few widgetable sections, such as the header, sidebar, and footer. However, you can also create your own custom widgetable sections if needed.
Once you have a clear plan for the layout, you can start working on creating the actual template. The next step is to create a test template XML file and answer some key questions such as how many widgetable sections you want to have and where they should be placed.
In the next tutorial, we will dive deeper into the code and create a blank template from scratch. Stay tuned!
1 Answer 1
If you want to create your own Blogger template from scratch, there are a few ways to go about it. Below, you’ll find a working tutorial on how to make a blank HTML template with overflow-x: hidden;
- Start by planning your layout. Think about the sections you want to have in your template, such as header, main content, sidebar, and footer.
- Create a new XML file in your preferred code editor and name it “test_templatexml”.
- In the XML file, find the code for the
section and make sure it has access to the necessary Blogger widgets. - Copy the code from the Blogger theme source and paste it into the XML file.
- Look for the tag in the code and remove it. This will give you a blank template to work with.
- In the section, add the necessary CSS code to style your template.
- Save the XML file and go to your Blogger dashboard.
- In the Theme section, click on “Edit HTML”.
- Copy the code from your test_templatexml file and paste it into the HTML editor.
- Click on “Save theme” to apply the changes.
Now you have a blank template to work with, and you can start creating your own Blogger theme from scratch. There are plenty of resources available online, as well as a helpful community of bloggers, where you can find tutorials and tips on creating your own theme. In addition, there are full themes and templates available for download, which you can modify to fit your needs.
This answer is provided by the Stack Overflow community, and it offers one way to create a Blogger template. Of course, there is no one right way, so feel free to explore different methods and experiment with your own ideas!
Blank Blogger Template
If you’re looking to create your own Blogger template from scratch, there are two main ways to go about it. One way is to start with a blank template that has no layout or design, and then build up from there. Another way is to find a pre-made template that closely matches what you’re looking for and then modify it to fit your needs.
If you choose to start with a blank template, you’ll need to have some knowledge of HTML and CSS in order to create a fully working theme. The first step is to create a new HTML file that will serve as the source code for your Blogger template.
Once you have your blank template file, there are several sections you’ll need to create. The header section is where you’ll include any code or links that you want to appear at the top of your blog. The main section is where your blog posts and other content will be displayed.
You may also want to include a sidebar section, which can be used to display widgets or other additional content. The footer section is where you’ll place any code or links that you want to appear at the bottom of your blog.
Creating a blank template gives you the freedom to design your blog layout from scratch and tailor it to your own unique style. However, keep in mind that this approach requires more coding knowledge and time to create a fully functional and visually appealing theme.
If you’re not comfortable creating a blank template from scratch, another option is to find a pre-made template that you like and modify it to fit your needs. There are many websites and communities of bloggers where you can find free or paid themes that are already widgetable and have a good layout.
No matter which option you choose, creating your own Blogger template can be a rewarding process that allows you to customize your blog to your specific needs and style. Don’t be afraid to experiment and test different ways of arranging your blog content until you find the perfect layout for your blog.
Blogger on Stack Overflow
When it comes to creating a Blogger template, there are several ways to go about it. One option is to start from scratch and write the code yourself, using your own HTML and CSS knowledge. Another option is to find a pre-made template that you like and modify it to fit your needs.
Stack Overflow is a popular online community for developers, and it can be a great resource for bloggers who are looking for help with their templates. There are many knowledgeable users on Stack Overflow who are willing to assist with code questions and provide guidance.
If you’re starting with a blank Blogger template, you can use the source code from a working template as a starting point. One way to access this code is by visiting the “Edit HTML” section in the Blogger dashboard. From there, you can find the code for the current template and use it as a reference. Another way is to search for “Blogger template tutorial” on Stack Overflow, and you’ll likely find some useful tutorials and code snippets to help you get started.
Of course, if you have a specific layout or functionality in mind for your blog, you may need to plan and create your own custom template. Stack Overflow can still be a valuable resource in this case. You can look for answers to specific coding questions, or you can post a question yourself and ask for guidance from the community.
In addition to the code, Stack Overflow also has a section dedicated to Blogger themes. Here, you can find various themes that have been created by other bloggers. These themes are often widgetable, meaning that you can easily customize them by adding or removing widgets. You can take a look at the source code of these themes to get an idea of how they are structured and how you can modify them to fit your own needs.
If you’re not familiar with HTML and CSS, don’t worry. Stack Overflow has a vast amount of information and resources to help you learn these languages. There are tutorials and guides specifically tailored to bloggers, as well as general resources that cover the basics of web development. You can follow these tutorials and practice your skills on a test_template.xml file to see how things work before diving into creating your own theme.
In conclusion, Stack Overflow is a valuable resource for bloggers who want to make their own Blogger template. Whether you’re starting from scratch or modifying an existing template, the community on Stack Overflow can provide the knowledge and support you need to create a fully functional and customized theme for your blog.
Two Ways to Access Blogger Theme Source Code
If you are a blogger on Blogger, you may have wondered how to access the source code of your own blog’s theme. There are two ways to do so, depending on your level of knowledge and how deep you want to delve into the code.
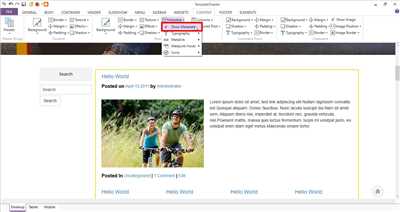
1. The Layout Section
If you have a basic understanding of HTML and CSS, you can access the source code of your Blogger theme through the Layout section. Here’s how:
- Login to your Blogger account and go to the “Themes” section.
- Click on “Edit HTML” below the theme you want to work with.
- You will be taken to the HTML editor, where you can make changes to the source code of your theme.
- Make the necessary changes and click on the “Save theme” button to save your modifications.
2. Starting from Scratch
If you want to have full control over your Blogger theme and create it from scratch, there is another way that requires more technical knowledge. Here’s how:
- Create a new blog on your Blogger account.
- Copy the source code below and save it as “test_template.xml”.
- Upload the “test_template.xml” file to your new blog’s theme in the “Themes” section.
- Click on “Edit HTML” below the theme you just uploaded.
- You will now have a blank canvas to work with, where you can create your theme using HTML and CSS.
- Add the necessary code for elements like the header, sidebar, and footer to complete your blog’s design.
- Make sure to test your template to ensure everything is working correctly.
- When you are satisfied with your theme, click on the “Save theme” button to save your changes.
Both of these ways provide you with access to the source code of your Blogger theme, but the second option gives you the opportunity to start completely from scratch and create a theme that is unique to your blog. Whether you choose to modify an existing theme or create one from scratch, there are plenty of resources and a supportive community on sites like Stack Overflow and Blogger Help to assist you with any questions you may have along the way.
acibut
There are several ways to access and make changes to the acibut of your Blogger template. Blogger has a community of themes that you can choose from, or you can create your own layout with HTML and CSS. If you have planning to create a new template from scratch, there are two main ways to go about it.
- You can start with a blank HTML file and build the template code from scratch. This is a good option if you have a solid knowledge of HTML and CSS and are comfortable working with code.
- Alternatively, you can find a pre-made template that you like and then customize it to fit your needs. This can be a quicker option if you don’t want to start from scratch, but it may require some knowledge of HTML and CSS to modify the template to your liking.
If you choose to create a template from scratch, one important section to look out for is the header section. This is where you will find the source code for creating the header of your blog.
When working with a template, it’s always a good idea to test the template.xml file before making any changes to your blog. This will ensure that your changes don’t cause any issues with your blog’s functionality.
In summary, acibut is an important part of creating a Blogger template. Whether you choose to start with a blank HTML file or customize an existing template, having a good knowledge of HTML and CSS will help you create the perfect template for your blog.