

Are you going to build a mobile app but don’t know where to start? Take a blank moment and let me introduce you to Ionic. Ionic is a powerful open-source framework that allows you to create hybrid mobile apps using web technologies such as HTML, CSS, and JavaScript. With its efficient and expressive code, Ionic makes it easier than ever to develop a high-quality, cross-platform application.
In this tutorial, I will guide you through the process of creating your first Ionic app. Before we start, make sure you have some basic knowledge of HTML, CSS, and JavaScript. We will be using the Ionic CLI (Command Line Interface) to create and run our app, so make sure you have it installed.
To create a new Ionic app, open your command line, navigate to the folder where you want to create your project, and run the following command:
ionic start myapp
This command will create a new project folder named “myapp” and install all the necessary dependencies. Once the installation is done, navigate to your app folder using the following command:
cd myapp
Now, you can start building your app. Ionic provides a rich set of pre-built UI components to work with, so you don’t need to create everything from scratch. You can specify the components you want to include in your app by editing the HTML and TypeScript files in the “src” folder.
When you are ready to test your app, you can use the following command to run it on a device or in a browser:
ionic serve
For Android integration, you will need to have the Android SDK installed on your machine. Once it’s set up, you can run the following command to start the app on an Android device or emulator:
ionic cordova run android
That’s it! You now know how to create an Ionic app from scratch. The process may seem overwhelming at first, but with practice and the help of the Ionic documentation, you will become more familiar with all the available commands and features.
- The Ionic Build Process Tutorial
- Getting Started
- Building the App
- Running the App
- Testing the App
- More Advanced Builds
- Capacitor Integration
- Stencil Integration
- Testing your app on an Android device
- A more expressive, efficient, and rich way to build
- Ionic CLI Capacitor Commands
- Video:
- How to build Release Ionic App
The Ionic Build Process Tutorial
In this tutorial, we will walk through the process of creating an Ionic application and the build process using the Ionic CLI. If you are new to Ionic or want to start from scratch, this tutorial is for you. We will create a blank Ionic app with TypeScript, which is a rich and expressive way to write JavaScript code.
Getting Started
To start, make sure you have the Ionic CLI installed on your machine. You can install it by running the following command:
$ npm install -g @ionic/cliOnce the CLI is installed, you can create a new Ionic project with the following command:
$ ionic start myapp blank --type=angularThis command will create a new folder named “myapp” in the current directory and initialize it as an Ionic project with a blank template. The --type=angular flag specifies that we want to use Angular as the framework for our app.
Building the App
Now that we have created our project, let’s go into the project folder:
$ cd myappTo build the app, we use the Ionic CLI’s build commands. For example, to build the app for Android, you can run:
$ ionic build androidThis will generate the necessary files and resources for running the app on an Android device or emulator. You can also build the app for other platforms like iOS by substituting “android” with “ios” in the command.
Running the App
After the app is built, we can run it on a device or emulator. To do this, we can use the Ionic CLI’s run commands. For example, to run the app on an Android device, you can run:
$ ionic run androidThis will install the app on the connected Android device and launch it. You can also run the app on other platforms like iOS by substituting “android” with “ios” in the command.
Testing the App
During development, it’s important to test the app on different devices and configurations. The Ionic CLI provides commands to make this process efficient. For example, to test the app in a browser, you can run:
$ ionic serveThis will start a local development server and open the app in your default web browser. You can also test the app on a specific device platform by passing the platform name as an argument, like ios or android.
More Advanced Builds
In addition to the basic build commands, the Ionic CLI provides more advanced build options. For example, if you need to include vendor.js files or specify other build dependencies, you can use the --cordova flag. You can also use the --prod flag to enable production mode optimization.
Capacitor Integration
If you are using Capacitor for native app integration, the Ionic CLI provides commands to work with Capacitor projects. You can use the ionic capacitor add command to add Capacitor to your project, and the ionic capacitor build command to build the project with Capacitor.
Stencil Integration
Lastly, if you want to create efficient and reusable components, you can use the Stencil integration with Ionic. Stencil is a compiler for building web components, and it provides a more efficient way to create components compared to traditional frameworks like Angular and React.
That’s it! Now you have a basic understanding of the Ionic build process and how to create an Ionic app. Experiment with different commands and options to tailor the build process to your specific needs. Happy coding!
Testing your app on an Android device
To test your Ionic app on an Android device, you’ll need to follow a few steps. This tutorial will guide you through the process of creating a blank Ionic project, installing the necessary dependencies, and testing your app on an Android device.
To start, open your command prompt or terminal and navigate to the folder where you want to create your project. Run the following command to create a new blank Ionic project:
ionic start myapp blank --type=angularThis will create a new project called “myapp” with a blank template and Angular as the framework. Once the project is created, navigate into the project folder:
cd myappNext, you’ll need to install any dependencies that are needed for Android integration. In the project folder, run the following commands:
npm install @capacitor/android
npm install @capacitor/core
npx cap init
This will install the necessary Capacitor packages and initialize Capacitor in your project.
Now, it’s time to build your application for Android. Run the following command:
ionic buildThis command will build your application and create the necessary files for Android. Once the build process is complete, you can integrate your app with an Android device. Connect your Android device to your computer using a USB cable and run the following command:
npx cap add androidThis command will add the Android platform to your Capacitor project. You should see a new “android” folder in your project.
To test your app on your Android device, run the following command:
npx cap open androidThis command will open your Android project in Android Studio. From here, you can build and run your app on your connected Android device. If you’ve never worked with Android Studio before, there are plenty of tutorials available that can help you get started.
Once your app is running on your Android device, you can test its functionality and ensure that it’s working as expected. If you need to make any changes to your app, you can do so in your project’s source files, located in the “src” folder.
In this tutorial, we’ve covered the basics of testing your Ionic app on an Android device. By following these steps, you’ll be able to create and test rich and efficient mobile applications with Ionic, Angular, and Capacitor.
A more expressive, efficient, and rich way to build
When it comes to creating an app, you need a way to efficiently build, test, and deploy your code. That’s where Ionic comes in. With Ionic, you can create a rich and expressive application that works seamlessly across iOS, Android, and the web.
At the moment, you may be wondering how to get started with Ionic. Well, the first thing you need to do is create a new project. You can do this by using the Ionic CLI (Command Line Interface). Simply open your command prompt or terminal, navigate to the folder where you want to create your project, and run the following command:
ionic start myapp blank --type=angular --cordova
This will create a new Ionic project named “myapp” with a blank template, using Angular and Cordova integration. Once the process is complete, navigate into the project folder using the cd command:
cd myapp
Now that you’re inside your project folder, you can start adding components and pages to your app. Ionic provides a variety of pre-built components that you can use, such as buttons, cards, and tabs. To include a component, simply import it in your JavaScript or TypeScript file and use it in your template.
But what if you want to create your own custom component? That’s where Stencil comes in. Stencil is a tool for building fast, efficient web components using modern JavaScript. With Stencil, you can create reusable components that work seamlessly with your Ionic app.
If you’re going to be testing your app on a device, you’ll need to install some additional dependencies. For Android testing, run the following command:
ionic cordova run android
This will take care of installing the necessary files and setting up your Android device for testing. If you prefer to test on iOS, use the following command instead:
ionic cordova run ios
Once you’re ready to build your app for production, you can use the following command:
ionic build --prod
This will compile your app and generate the necessary files for deployment. The final output will be available in the “www” folder of your project.
And there you have it! A more expressive, efficient, and rich way to build your Ionic app. Whether you’re starting from a blank template or incorporating custom components, Ionic provides the tools and resources you need to create a high-quality app.
Ionic CLI Capacitor Commands
When creating an Ionic app, you have several options for building and testing your application. One efficient way to take your Angular or React code and work with it on a device is to use the Capacitor commands available in the Ionic CLI.
The Ionic CLI includes a set of commands for creating, building, and running Capacitor applications. These commands are designed to make it easy to work with Capacitor, a powerful tool that allows you to build iOS, Android, and web applications using JavaScript, TypeScript, and HTML.
To start using Capacitor with your Ionic app, you first need to create a new project using the Ionic CLI. You can do this by running the following command:
ionic start myapp blank
This command will create a new Ionic project with the name “myapp” and the “blank” template. The “blank” template includes the minimal set of files and dependencies needed to start creating your app’s components.
Once your project is created, you can start building your app’s code and files. The Ionic CLI provides a rich set of commands for creating new pages, components, services, and more.
For example, if you want to create a new page named “MyPage”, you can use the following command:
ionic generate page MyPage
This command will create the necessary files and code for the “MyPage” page, including an HTML template, a JavaScript file, and a TypeScript file.
In addition to generating code, the Ionic CLI also includes commands for building and testing your app. For example, if you want to build your app for Android, you can use the following command:
ionic build android
This command will compile your TypeScript and convert it to JavaScript, process your project files, and create an Android-ready application in the “platforms” folder.
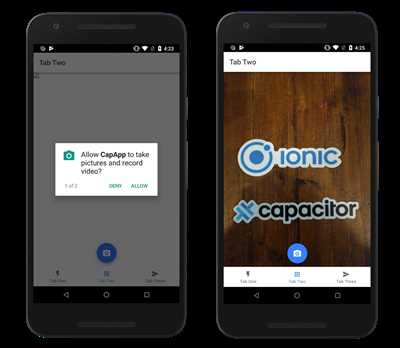
Once your app is built, you can use the Capacitor CLI commands to add native functionality to your app. For example, if you want to integrate the Capacitor Camera plugin into your app, you can use the following command:
npx cap add @capacitor/camera
This command will add the Capacitor Camera plugin to your project and update the necessary files and dependencies.
With the Capacitor commands, you can take your Ionic app to the next level by adding native device features and integrating with other third-party libraries.
In conclusion, if you’re starting to build an app with Ionic, the Capacitor commands are a powerful and expressive way to create rich, efficient applications. Whether you’re building a small test project or a large-scale production app, these commands will help you along the way.