

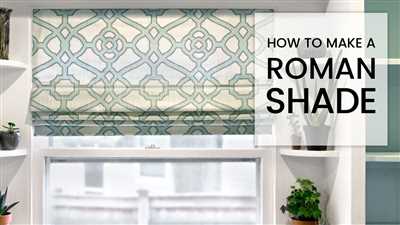
If you want to add a touch of elegance to your bedroom or any other room in your house, roman blinds are a great choice. These traditional window shades have a neat and structured look when open, and provide a slightly folded fabric look when closed. In this tutorial, we will show you how to make your own roman blinds, starting from preparing the fabric and ending with attaching the blinds to the window frame.
Before we dive into the step-by-step guide, here’s what you’ll need:
- Fabric of your choice
- Lining fabric
- 5/8-inch wooden dowel or batten
- Blind cord or string
- Mini blind brackets
- Brush, scissors, glue, and a sewing machine (optional)
Step 1: Measure the window dimensions
Start by measuring the length and width of your window. Then, decide how long you want your roman blinds to be. Remember to add extra length at the bottom for the folds. Mark these measurements on your fabric and lining fabric.
Step 2: Cut the fabric and lining
Using the marks as a guide, cut the fabric and lining to the desired size. Make sure to cut straight edges for a neat look.
Step 3: Attach the fabric and lining
Place the fabric and lining with the wrong sides facing each other. Sew them together at regular intervals, creating pockets for the slats or dowels to be inserted.
Step 4: Insert the slats or dowels
Slide the slats or dowels into the pockets you created, starting from the bottom. This will help the blinds maintain their shape and fold nicely.
Step 5: Attach the blind cord or string
Attach the blind cord or string at the bottom of the blinds and thread it through the slats or dowels. This will allow you to control the opening and closing of the blinds.
Step 6: Mount the blinds on the window frame
Fasten the mini blind brackets to the window frame. Then, attach the blinds to the brackets, making sure they are secured properly.
Step 7: Arrange the folds
To achieve the classic roman blind look, arrange the folds evenly by gently pushing the fabric up from the bottom. Use a brush to smooth out any wrinkles or creases.
Now that you have learned how to make your own roman blinds, you can enhance the look of any room in your house. Follow these step-by-step instructions, and your windows will show off a beautiful and functional window treatment. Enjoy!
- How to make roman blinds step by step pictures
- WORKROOM TUTORIAL How to make a Lined Roman Blind
- Instructions
- Set Length of Blind
- Remove Extra Blind Slats
- Arrange Slats on Fabric
- Attach Fabric Around Bracket
- Secure Fabric to Blind
- Attach Bottom of the Roman Shade
- Step 2 Preparing your fabric
- Step 5 Mount the Roman Blind
- Sources
- Videos:
- DIY Roman Shades
How to make roman blinds step by step pictures
Learning how to make roman blinds can be a fun DIY project that can add a nice touch to any room. Roman blinds are a traditional and stylish window treatment that can be custom made to fit any window size.
Here is a step by step tutorial on how to make roman blinds with pictures to guide you along the way:
Step 1: Gather the Materials
Before starting, gather all the materials you will need. This includes fabric, lining, cord, rings, a batten, a bracket set, and a mini blind or slats.
Step 2: Measure and Cut the Fabric
Measure the length and width of your window and add an extra 5 centimeters to each side for seam allowances. Cut the fabric to size and make sure it is straight and even.
Step 3: Prepare the Fabric
Sew the fabric and lining together, with the right sides facing each other. Leave a small opening at the bottom for turning the fabric right side out. Press the fabric to create neat folds and remove any creases.
Step 4: Mark and Attach the Rings
Place the rings on the fabric at regular intervals along the folds, starting from the bottom. Sew them securely in place.
Step 5: Attach the Cord
Thread the cord through the rings, starting at the bottom and working your way up. Tie a knot at each ring to secure the cord.
Step 6: Make the Folds
Mark the intervals for the folds on the batten. Attach the blind to the batten, aligning the marks with the folds. Use a brush to secure the fabric to the batten using glue.
Step 7: Mount the Blinds
Attach the bracket set to the top of the window frame. Slide the batten into the bracket and secure it in place.
Now you have your very own homemade roman blinds! They can be easily opened and closed using the cord, and the folds will give your window a clean and elegant look.
Remember to take your time and read the instructions carefully while making your roman blinds. Using step by step pictures can also help you visualize the process better.
Whether you decide to make roman blinds for a bedroom, living room, or any other room, they will add a touch of style and sophistication to your space.
Don’t forget to check out videos and other online resources for more tips and ideas on how to make roman blinds!
WORKROOM TUTORIAL How to make a Lined Roman Blind
Roman blinds are a popular choice for window coverings as they add a touch of elegance to any room. In this tutorial, we will show you step by step how to make a lined Roman blind for your bedroom or any other room in your home.
Materials:
- Fabric of your choice
- Lining fabric
- Thread
- Mini blind cord or string
- Wooden batten or mounting frame
- Brackets for mounting the blind
- Hooks or rings
- Brush or roller for applying glue
Instructions:
|
Picture: Step-by-step instructions on how to make a lined Roman blind. |

By following these instructions and learning how to make your own Roman blinds, you can create a beautiful and traditional window treatment that will enhance the look of any room. If you prefer visual guidance, there are also many online videos and tutorials available that show the process in detail.
Remember to remove any extra strings or cords from the bottom of the blind to ensure a nice clean finish. Use a brush or roller to apply glue to the edges of the blind for a secure hold. Enjoy your new Roman blinds!
Instructions
When making roman blinds, it’s important to follow these step-by-step instructions to ensure a successful outcome.
1. Measure your window to determine the length and width of the blinds you will need. Add any extra length needed for folding and securing.
2. Gather all the necessary materials, including fabric, lining, mini batten, cords, rings, hooks, and a cord lock.
3. Prepare your fabric by cutting it to the desired size. Remember to leave extra fabric on the sides to allow for folding and sewing.
4. Attach the lining to the back of the fabric using a sewing machine. This will give the blinds a more finished and professional look.
5. Mark the intervals where the folds will be made on the fabric. This can be done using a pencil or fabric marker.
6. Fold the fabric at each marked interval, creating pleats or folds. Use a straight edge or ruler to help achieve neat and even folds.
7. Secure the folds in place by sewing them or using fabric glue. Be sure to remove any excess glue to prevent it from showing.
8. Attach the mini batten at the bottom of the blinds to help them hang straight. This can be done using a brush and fabric glue.
9. Attach the rings or hooks to the top of each fold, making sure they are evenly spaced and secure.
10. Thread the cords through the rings or hooks, starting from the bottom and working your way up. Secure the cords to the frame of the blinds.
11. Attach the cord lock to the side of the blinds to allow for easy opening and closing. Make sure it is placed in a convenient location.
12. Mount the blinds onto the bracket on your window or wall. Follow the manufacturer’s instructions for proper installation.
13. Test the blinds to ensure they open and close smoothly. Adjust the cords if necessary.
Congratulations! You have successfully made your own roman blinds. Enjoy the beautiful and functional addition to your bedroom or any other room in your home.
Set Length of Blind
Once you have learned how to make Roman blinds and have gathered all the necessary materials, it’s time to set the length of your blind. This step is crucial to ensure that your Roman blinds fit perfectly on your window and look nice in your room.
Here is a step-by-step tutorial on how to set the length of your Roman blinds:
- Start by deciding how long you want your blinds to be. Measure the window frame from the top to the bottom to determine the desired length.
- If necessary, remove any existing blinds or shades from the window.
- Measure and mark the length on both sides of the window frame using a pencil or fabric marker. Make sure the marks are straight and at the same level.
- Take the fabric for your blinds and lay it flat on your workroom floor or table. If you haven’t done so already, cut the fabric to the desired width, leaving extra fabric on both sides for seam allowances.
- Fold the bottom edge of the fabric up by about 2 inches and secure it with pins or clips. This will create a neat and finished look on the bottom of the blind.
- Decide on the intervals at which you want your folds or slats to be. You can use pictures or instructions from sources like sewing pattern books or online tutorials to help you decide on the spacing.
- Starting from the bottom, fold the fabric at each interval and secure it with pins or clips. Make sure the folds are straight and evenly spaced.
- Attach the bottom batten to the bottom edge of the blind using glue or sewing. This will hold the folds in place and give the blind structure.
- Thread the cord through the loops or rings on the back of each fold or slat. This will allow you to open and close the blind.
- Mount the brackets on the window frame according to the manufacturer’s instructions. Make sure they are evenly spaced and level.
- Attach the blind to the brackets using the cords or hooks provided. Ensure that the cord is securely fastened and the blind is level.
- Brush the blind with a mini blind brush to remove any dust or debris. This will keep your blinds looking clean and fresh.
By following these steps, you will be able to set the length of your Roman blinds and have them ready to hang in your bedroom or any other room in your home. Remember to take your time and work carefully while preparing your blinds for installation.
Remove Extra Blind Slats
When making your own Roman blinds, it’s important to ensure that the folds line up nicely when the blinds are open. One way to achieve this is by removing extra blind slats. This tutorial will show you how to remove the extra slats from the bottom of your blinds.
Before you start, gather all the necessary tools and materials. You will need a brush or a mark-making tool, scissors, a mini blind bracket, and a batten. Optionally, you can use a sewing machine if you want to add fabric to your blinds.
Step 1: Take down the blind from the window frame by lifting the cords and detaching the strings from the hooks. Place the blind on a flat surface.
Step 2: Decide how many slats you want to remove. This will depend on the length of your window and the desired look of your blinds. Traditional Roman blinds typically have 5-6 folds, so you may want to remove a few slats.
Step 3: Starting from the bottom, gently remove the bottom rail and detach the cords from the slats. Set aside the extra slats and the bottom rail.
Step 4: Using a brush or a mark-making tool, measure and mark where the slats will be attached. Make sure the marks are straight and evenly spaced.
Step 5: Arrange the slats on the marks and secure them in place using glue or a sewing machine. If you’re using fabric, fold the edges over the slats and sew them in place.
Step 6: Once the slats are attached, reattach the cords to the slats. Make sure they are evenly spaced and lined up with the marks.
Step 7: Reattach the bottom rail to the slats, making sure it’s straight and secure.
Step 8: Mount the blind back onto the window frame, attaching the strings to the hooks.
Now that you have removed the extra blind slats, your Roman blinds will have a more streamlined and elegant look. Follow the same steps to remove slats from the other side of the blind if needed.
Learning how to remove extra blind slats is an essential step in making Roman blinds. It will help you achieve the desired look and functionality for your room. Make sure to read the instructions and watch videos or tutorials from reliable sources before starting your project.
Arrange Slats on Fabric
When making roman blinds, one of the important steps is to arrange the slats on the fabric. This step is crucial in creating the nice folds and straight lines that roman shades are known for.
After preparing your fabric, lay it out on a workroom table or a bed. Make sure the fabric is slightly larger than your window frame, as this will allow for adjustments and will ensure that the blind fits properly.
Next, decide on the length of the blind and mark intervals on the fabric where you will secure the slats. The number of intervals will depend on the size of your window and the desired look of the blind. Traditional roman shades typically have 5-7 intervals.
Starting from the bottom, brush a thin line of fabric glue along each interval. Then, place the slats on the fabric, making sure they are straight and evenly spaced. Repeat this process for each interval.
With the slats in place, it’s time to attach the cords. Cut two lengths of cord per slat – one for each side. Make sure the cords are long enough to go from the bottom of the blind, up through each slat, and to the top where they will be tied off or secured with hooks.
Remove any excess fabric from the bottom of the blind, leaving enough to create a fold. Sew along the edges to secure the ends and create a neat finish.
Now that the slats and cords are in place, your roman blinds are almost ready. In the next step, we will learn how to mount the blinds and add the finishing touches.
Attach Fabric Around Bracket
Once you have read the instructions and watched videos on how to make roman blinds, it’s time to move on to the next step: attaching the fabric around the bracket. This is an important part of the process because it helps to secure the fabric in place and gives your blinds a finished look.
Before you start, make sure you have all the necessary tools and materials, including a workroom or a clear workspace where you can lay out your fabric. Here are the steps to attach the fabric:
- Start by arranging the fabric so that the right side is facing down and the wrong side is facing up.
- Measure and mark the intervals on the fabric where you want the folds or pleats to be. The length of these intervals will depend on the pattern and style you decide for your blinds.
- If your fabric is not already lined, you may need to line it at this stage. This will help to provide some structure to the blinds and give them a more finished look.
- If you haven’t done so already, remove any excess fabric from the sides to ensure a neat finish. You can use scissors or a sewing machine to do this.
- Place the fabric on a flat surface and position the bracket on the workroom or workspace where you want the blinds to be mounted on the window frame.
- Using a brush or a glue, apply a small amount of glue on the back of the fabric, along the edges that will be attached to the bracket. Make sure to spread the glue evenly and avoid using too much.
- Starting at one end, attach the fabric to the bracket. Press the fabric firmly against the bracket and hold it in place for a few seconds to allow the glue to bond. Continue attaching the fabric all around the bracket in the same manner.
- If you are using traditional hooks instead of a bracket, you can sew the fabric directly onto the hooks. Position the fabric around the hooks and sew it in place using a sewing machine or by hand.
- When the fabric is securely attached to the bracket or hooks, you can now work on the bottom part of the blinds. If you want to add slats or cords to your blinds, now is the time to do so. Follow the instructions provided with the slats or cords to attach them to the fabric.
- Take a step back and look at your work. Make any necessary adjustments or fixes to ensure that everything is straight and aligned.
- Once you are happy with how the fabric is attached and the folds or pleats are in place, you can trim any excess fabric or cords for a neat finish.
- Open the blinds slightly to make sure they work well and the strings or cords are not tangled.
By following these steps, you will be able to attach the fabric around the bracket or hooks and complete the process of making your own roman blinds. Remember to take your time and work carefully to achieve the best results.
Secure Fabric to Blind
Once you have made the folds in your fabric and attached the batten to the bottom, it’s time to secure the fabric to the blind. Here are the steps:
- Decide on the interval and mark the spots where you want to place the rings or hooks along the top of the blind.
- Arrange the fabric on a flat surface, with the wrong side facing up.
- Using a brush, apply a thin line of fabric glue along the edges of the fabric, both on the front and back.
- If you are using a lined fabric, repeat the above step on the lining fabric as well.
- While the glue is still wet, carefully position the blind frame over the fabric, aligning the marked spots with the rings or hooks.
- Press the fabric down firmly onto the frame, making sure it is secure.
- If you prefer a more traditional look, you can sew the fabric onto the blind frame instead of using glue.
- Once the fabric is secured to the blind frame, attach the rings or hooks at the marked spots.
- If you are using a cord for the blinds, thread it through the rings or hooks.
- Make sure the folds of the fabric are straight and aligned, and adjust them if necessary.
- If you want to add extra stability to your blind, you can attach mini slats or strings at regular intervals along the length of the blind.
- If you like, you can add a decorative trim or ribbon to the bottom of the blind.
Now your fabric is securely attached to the blind frame. The next step is to mount the blind bracket on the window frame and hang the blinds. This process will be covered in the next step of this tutorial.
While you are learning how to make roman blinds, it can be helpful to have some visual aids. There are many videos and instructional sources available online that show you step by step instructions and pictures of the process. You can also find patterns and instructions in books or magazines.
Remember, the means by which you secure the fabric to the blind may vary slightly depending on the type of blind you are making – for example, a made-to-measure blind might have slightly different instructions than a standardized one. Be sure to read the instructions that come with your blind kit, if you are using one, and adjust these steps accordingly.
Making your own roman blinds can be a nice DIY project that adds a personal touch to your home. Take your time to carefully follow the instructions and enjoy the process of creating your own custom window shades.
Attach Bottom of the Roman Shade
Once you have lined the fabric and secured the pleats, it’s time to attach the bottom of the Roman shade. This step is crucial to give your blinds a nice, finished look.
Here is a step-by-step tutorial on how to attach the bottom of the Roman shade:
- Start by deciding on the length you want for your Roman shade. Measure the window frame where you plan to mount the blinds and mark the desired length.
- Remove the blinds from the work area and lay them flat on a clean surface.
- Take the fabric and fold the bottom edge up to meet the marked length. Use a brush to make sure the fold is nice and straight.
- Using a sewing machine or hand stitching, sew a straight line along the folded edge to secure it in place. Trim any excess fabric.
- Next, take a batten or a thin piece of board and cut it to the width of the blinds. This will be used to weigh down the bottom of the Roman shade and help it hang nicely.
- Apply some fabric glue to the bottom edge of the fabric and press the batten onto it. Make sure it is centered and secure.
- Allow the glue to dry completely before moving on to the next step.
- Finally, attach small rings or hooks at regular intervals along the bottom of the Roman shade. These will be used to connect the cords or strings that will be used to open and close the blinds.
By attaching the bottom of the Roman shade properly, you ensure that it hangs nicely and gives your room a finished look. Take your time to carefully follow the instructions and refer to pictures or videos to help you along the way.
Whether you are making traditional or mini blinds, learning how to attach the bottom of the Roman shade is an important part of the process. It means you are one step closer to having beautiful, custom-made blinds for your bedroom or any other room in your home!
Step 2 Preparing your fabric
Once you have decided on the fabric for your Roman blinds, you need to prepare it before starting the actual making process. Here are the steps to properly prepare your fabric:
| 1. Remove any wrinkles or folds in the fabric by gently ironing it. Make sure to use a low heat setting and avoid ironing directly on the fabric to prevent any damage. |
| 2. If your fabric is not already lined, you may decide to add a lining to give your Roman blinds a more finished and sophisticated look. A lining will also help to block out light and add insulation to the room. |
| 3. Measure the dimensions of your window and cut the fabric to the appropriate size. Be sure to add a few extra inches to both the width and length to account for hems and folds. |
| 4. If your fabric has a pattern, make sure to carefully align the pattern when cutting the fabric to ensure a nice and even look. |
| 5. If you are using a tutorial or instructions, it’s important to read them thoroughly before starting work on your fabric. This will help you understand the specific steps and techniques involved in making Roman blinds. |
| 6. Secure the bottom of the blind by sewing or gluing a batten along the edge. This will provide stability and prevent the fabric from sagging. |
| 7. If you are working with a fabric that frays easily, you can use a fray check or clear nail polish to seal the edges and prevent them from unraveling. |
| 8. Attach hook-and-loop tape or fabric tabs to the top of the blind so that it can be easily attached to the mounting bracket. |
| 9. Mark and attach the necessary rings, cords, and slats to the fabric at equal intervals according to your chosen style and functionality. Cord or string guides can be used to arrange the cords or strings neatly along the back of the blind. |
| 10. Make sure to leave extra cord or string at the ends for easy operation of the Roman blind. You can also attach a cord or string cleat near the bottom of the window frame to secure the cords when the blind is open. |
By following these steps, you will have your fabric prepared and ready for the next stage of making Roman blinds. Preparing your fabric well is essential for achieving a professional, polished look for your DIY Roman blinds.
Step 5 Mount the Roman Blind
After you have completed all the previous steps, it’s time to mount your Roman blind onto the window frame. Make sure you have all the necessary tools and materials ready before starting.
1. Determine where you want to mount the blinds. Measure and mark the desired position on both sides of the window frame.
2. Take the blind and open it up. Arrange the folds nicely and make sure everything looks straight and even.
3. Attach the mini or traditional blind brackets to the top of the window frame, following the manufacturer’s instructions. Make sure they are secure and well-aligned.
4. If you haven’t done so already, remove any excess fabric from the bottom of the blind by cutting it to the desired length. Use a sharp pair of scissors or a fabric cutter for a clean cut.
5. Take the batten that you made earlier and place it at the bottom of the blind. Glue the fabric to the batten, using a strong adhesive. Make sure the fabric is taut and there are no wrinkles or bubbles.
6. Attach the cord guides to both sides of the window frame at regular intervals, according to the instructions provided with the blind. These cord guides will be used to thread the cords through.
7. Thread the cords through the cord guides, starting at the bottom and working your way up. Make sure the cords are evenly spaced and well-secured.
8. Attach the cord ends to the bottom of the batten, slightly overlapping them. Use a strong adhesive or tie them securely. Make sure the cords are taut and there is enough tension to raise and lower the blind smoothly.
9. Once everything is in place, give your Roman blind a final check to ensure it is straight and looks well. Adjust the folds and slats if necessary.
10. Mount the hooks onto the underside of the batten, following the manufacturer’s instructions. Make sure they are evenly spaced and securely attached.
11. Finally, lift the blind and hang it onto the hooks. Adjust the cords to set the desired height and make sure everything is working properly.
Congratulations! You have successfully mounted your Roman blind. Now you can enjoy the beautiful look it adds to your room.
Note: These instructions are meant as a general tutorial to guide you through the process of making and mounting a Roman blind. It is important to read and follow the specific instructions provided with your blind and consult additional resources and videos, if needed, for a more comprehensive learning experience.
Sources
If you’re looking to make Roman blinds for your room, there are several resources you can use to guide you through the process. Whether you prefer to learn by reading instructions or watching videos, these sources will help you create a nice set of Roman blinds to decorate your windows.
1. Online Tutorials: There are many websites and blogs that provide step-by-step tutorials on how to make Roman blinds. These tutorials usually include pictures or videos to show you each stage of the process. You can find tutorials on popular craft websites, sewing blogs, and even YouTube.
2. Traditional Sewing Resources: If you prefer a more traditional approach, you can look for books or magazines that provide instructions on making Roman blinds. These resources often provide detailed diagrams and patterns to help you along the way.
3. Workroom Techniques: Many professional workrooms, where Roman blinds are commonly made, share their techniques and tips through blog posts or online forums. These resources can be especially helpful if you’re looking to achieve a more professional finish.
4. Hardware and Supplies Suppliers: Some hardware and sewing supplies suppliers provide guides or tutorials on their websites. These resources not only show you how to make Roman blinds but also help you decide on the types of materials and hardware you’ll need.
Remember, when working with blinds, safety should be a top priority. Make sure to secure the cords and attach any necessary safety devices to prevent accidents, especially if you have young children or pets in the house.
By learning how to make Roman blinds, you’ll open up a world of possibilities for your window coverings. Enjoy the process and don’t hesitate to experiment with different fabrics and colors to find the perfect match for your room.