
When composing email messages in Outlook, you may want to include a signature to provide your contact information, promote your business, or add a personal touch to your emails. Outlook makes it easy to create and insert a signature into your messages. In this article, we will guide you through the steps to help you add and customize a signature in Outlook.
To insert a signature in Outlook, you can follow these easy steps:
- Step 1: Open Outlook and go to Options
- Step 2: Find the Signature settings
- Step 3: Create or edit a signature
- Step 4: Insert the signature into your email
- How to add a signature on Outlook iPhone iPad Desktop
- Create a signature in Outlook Web
- How to Add a Signature Image in Outlook
- How to add an image to an email signature in Outlook
- Sources
Step 1: Open Outlook and go to Options

First, open Outlook on your desktop or laptop. Then, click on the “File” tab at the top left corner of the window. In the list of options, click on “Options”.
Step 2: Find the Signature settings

In the Outlook Options window, select the “Mail” tab from the left sidebar. Scroll down until you find the “Compose messages” section. Here, you will find the “Signatures” button. Click on it to access the signature settings.
Step 3: Create or edit a signature
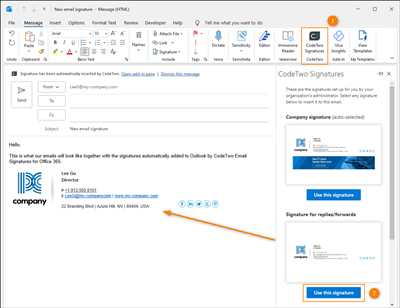
In the Signatures and Stationery window, you can create a new signature by clicking on the “New” button. You can also edit an existing signature by selecting it from the list and clicking on the “Edit” button. When creating or editing a signature, you can enter your desired text, format it, and even add an image or photo if you like.
Step 4: Insert the signature into your email
After creating or editing your signature, you can choose when to insert it into your emails. In the Options tab of the Signatures and Stationery window, you can set your default signature for new messages, replies, and forwards. You can also manually insert a signature into individual emails by clicking on the “Signature” button in the email editor and selecting the desired signature from the list.
By following these steps, you can easily insert and customize a signature in Outlook. Whether you’re using Outlook on your desktop, laptop, iPad, or iPhone, these instructions would help you add a professional touch to your email messages. Don’t forget to save your changes before closing the Signatures and Stationery window. Happy composing!
How to add a signature on Outlook iPhone iPad Desktop
Creating a professional and informative email signature is essential when sending emails, as it can help provide recipients with important contact information. In Outlook, you can easily add a signature to your emails on your iPhone, iPad, or desktop. Follow these steps below to learn how:
On iPhone and iPad:
- Open the Outlook app on your iPhone or iPad.
- Tap on the three horizontal lines at the top-left corner of the screen to open the menu.
- Scroll down and tap on “Settings”.
- Next, tap on “Mail” and then select “Signature”.
- Type in your desired signature using the on-screen keyboard. You can also tap on “Image” to include a photo or logo in your signature.
- After customizing your signature, tap on the back arrow to save your changes.
On Desktop:
- Open Outlook on your desktop.
- In the top-right corner, click on the gear icon to open settings.
- In the settings panel, click on “View all Outlook settings”.
- In the left-hand menu, select “Compose and reply”.
- Scroll down to the “Email signature” section.
- Use the signature editor to create your signature. You can choose different font styles, sizes, colors, and even add a background image.
- When you are satisfied with your signature, click on “Save” to apply the changes.
By following these easy steps, you can quickly add a signature to your Outlook emails, no matter if you are using your iPhone, iPad, or desktop. Customizing your signature can help enhance your emails and provide recipients with important information about you or your company.
Create a signature in Outlook Web
If you would like to add a signature in Outlook Web, follow these steps:
1. Open Outlook Web and click on the “Settings” gear icon in the top right corner of the screen.
2. In the dropdown menu, click on “View all Outlook settings”.
3. In the left sidebar, click on “Mail” and then select “Compose and reply”.
4. Scroll down until you find the “Email signature” section.
5. In this section, you can now create and edit your signature. You can include text, images, and even customize the background.
6. To add an image to your signature, click on the “Insert image” button in the signature editor. You can then choose an image from your desktop, iPad, iPhone, or web. You can also add a photo from your Outlook settings.
7. Edit the settings of your signature to customize it further. You can change the font, size, color, and more.
8. Once you have created your signature, click on the “Save” button to save your changes.
Now, every time you compose a new email or reply to a message, your signature will automatically be added.
What’s more, you can have multiple signatures for different purposes. Just click on the “New” button in the signature editor to create a new one.
Using an Outlook Web signature can help you save time and make your emails look more professional.
How to Add a Signature Image in Outlook
If you would like to include an image in your Outlook email signature, you can easily do so using the desktop or web version of Outlook. Whether you are using a PC or Mac, iPad or iPhone, the steps are generally the same.
Here are the steps to insert a signature image in Outlook:
- Open Outlook and click on “File” in the top left corner of the screen.
- On the left side of the screen, click on “Options” to open the Outlook Options dialog box.
- In the Outlook Options dialog box, select “Mail” from the list of options on the left.
- Under the “Create or modify signatures for messages” section, click on the “Signatures…” button.
- In the Signatures editor, click on the “New” button to create a new signature, or select an existing signature to edit.
- In the Signature editor, you can use the formatting tools to customise the text, font, and background of your signature.
- To insert an image, click on the “Insert Picture” icon in the editor toolbar.
- In the Insert Picture dialog box, you can choose to insert a picture from your computer, from an online source, or from your Outlook photos.
- Select the image you would like to use as your signature and click on the “Insert” button.
- Adjust the size and position of the image within your signature as needed.
- Click on the “OK” button to save your signature changes.
- In the Options dialog box, make sure your new signature is selected as the default signature for new messages and/or replies/forwards.
- Click “OK” to save your changes and close the Options dialog box.
Now, when you compose a new email in Outlook, your signature with the inserted image will automatically be added to the email.
By following these steps, you can easily add a signature image in Outlook to make your emails more professional and visually appealing.
How to add an image to an email signature in Outlook
If you want to add a photo or image to your email signature in Outlook, there are a few easy steps you can follow to help you achieve this. By adding a photo or image to your email signature, you can personalize your emails and make them more visually appealing.
To add an image to your email signature, you can start by opening Outlook and clicking on the “File” tab in the top left corner. From there, go to “Options” and then select “Mail” from the left-hand side menu. Next, click on “Signatures” to open the Signatures tab.
In the Signatures tab, you can choose whether you want to create a new signature or edit an existing one. You can also select the email account you want to add the image to if you have multiple accounts set up in Outlook.
Once you’ve selected the signature you want to edit or create, click on the “New” button to open the Signature Editor. In the Signature Editor, you can customise your signature by adding text, formatting it, and inserting images.
To insert an image, click on the “Insert Picture” button in the Signature Editor toolbar. This will open a window where you can find and select the image file you want to include in your signature. After selecting the image, click on “Insert” to add it to your signature.
Once the image is inserted, you can adjust its size, position, and other settings using the options available in the Signature Editor toolbar. You can also add more elements to your signature, like a background color or additional text, to make it look even more polished.
After you’ve finished customising your signature and adding the image, click on “OK” to save your changes. Your new signature, including the image, will now be applied to your outgoing email messages.
It’s important to note that the steps to add an image to an email signature may vary slightly depending on the version of Outlook you are using, whether you are using it on a desktop or web, and if you are using Outlook on an iPhone or iPad.
What are you waiting for? Start personalising your emails by adding an image to your Outlook email signature!
Sources
When you want to add a signature to your email messages in Outlook, there are several options available. You can insert a signature using the built-in editor in Outlook, or you can create and edit a signature in your email settings. Here’s how to do it on both desktop and web versions of Outlook:
Desktop:
- Open Outlook and click on “File” in the top-left corner of the screen.
- Select “Options.”
- In the Options window, click on “Mail” in the left sidebar.
- Click on the “Signatures” button in the Compose messages section.
- In the Signatures and Stationery window, click on “New” to create a new signature.
- Enter a name for your signature and click “OK.”
- In the signature editor, you can type your signature, add an image (such as a photo or logo), include a hyperlink, customize the font and size, and more.
- When you’re done customizing your signature, click “OK” to save it.
- To insert your signature in an email, click on the “Signature” button in the message window and select the signature you want to use.
Web:
- Open Outlook in a web browser and compose a new email.
- Click on the editor options (represented by three dots) in the toolbar at the bottom of the compose window.
- In the menu, select “Signature” and then “Signatures…” from the dropdown.
- In the Signatures panel, click on the “New” button to create a new signature.
- Enter a name for your signature and click “OK.”
- In the signature editor, you can type your signature, add an image, customize the font and size, and more.
- When you’re done customizing your signature, click “Save” to save it.
- To insert your signature in an email, click on the “Signature” button in the compose window and select the signature you want to use.
These steps apply to both the desktop version of Outlook and Outlook on the web. Depending on what version of Outlook you are using, the specific steps and options may vary slightly.