

If you’ve ever looked at a popup book and thought, “Wow, that’s amazing!” then you’re not alone. Popup books are a magical form of art and paper engineering that can captivate both children and adults. The good news is that making your own popup book is not as difficult as it may seem. With some basic materials and a little bit of time, you can create your very own popup book that will delight everyone who opens it.
The first step in making a popup book is to gather your supplies. You will need heavy papers, such as cardstock or construction paper, as the main material for your book. Tissue paper or magazine pages can be used for creating the popups. You will also need scissors, glue, and some basic art supplies like markers or colored pencils. If you’re a beginner, it’s a good idea to start with a simple design, like a triangle or a spine fold.
Once you have your supplies, you can start construction on your popup book. Begin by creating the pages of your book by cutting out pieces of paper in the desired size and shape. You can make as many pages as you like, but keep in mind that the more pages you have, the harder it may be to control the popup mechanisms. Next, take the tissue paper or magazine pages and cut out images or shapes that you want to use as popups. These will be glued to the pages and will create the 3D effect when the book is opened.
To create the popups, you will need to use an accordion-fold technique. This involves folding the tissue paper or magazine pages back and forth, like a fan. Then, glue the folded strip of paper onto the page so that it pops up when the book is opened. You can create multiple popups on the same page, or you can spread them out across different pages. Be sure to test each popup as you go along to ensure that it’s working properly.
One of the most important steps in making a popup book is to glue the pages together. Use a line of glue along the center fold of each page and press them together firmly. This will bind the pages together and create a sturdy book. Once the glue is dry, your popup book is ready to be enjoyed!
Popup books are a wonderful gift for children and adults alike. They can be used to tell stories, showcase artwork, or simply provide entertainment. No matter what theme or design you choose, your popup book is sure to be a unique and captivating creation. So go ahead and let your inner popup book wizard come out, and start making your own popup book today!
Create a Pop-Up Book: 5 Easy Steps for Beginners
Pop-up books are a magical combination of engineering and art that can delight both children and adults. If you’ve ever been captivated by the intricate designs and surprising elements of these books, you might be wondering how to create your very own pop-up book. Fear not, because we’ve got you covered! In this tutorial, we will walk you through the process of making a pop-up book in just 5 easy steps.
Step 1: Gather the Supplies
To begin, gather all the necessary supplies. You will need a pair of scissors, heavy construction paper, glue, and a few pieces of tissue paper. Additionally, you will need some images or designs that you want to use for your pop-ups. You can choose to create your own or find inspiration from books, magazines, or the internet.
Step 2: Create the Pop-Up Elements
Next, start by creating the pop-up elements that will bring your book to life. You can choose from various types of pop-ups, such as simple cuts, folded flaps, or accordion-fold pop-ups. Decide on the type you want to use and carefully cut out the necessary shapes from your construction paper. Make sure to keep the cuts precise and clean.
Step 3: Construct the Book
Once you have created the pop-up elements, it’s time to construct the book itself. Take a few sheets of heavy construction paper and fold them in half to create the book’s pages. Then, cut out a piece of construction paper for the book’s cover and glue it to the front and back pages. This will serve as the spine of your book.
Step 4: Attach the Pop-Ups
Now, it’s time to attach the pop-up elements to the book. Use glue to carefully attach each pop-up to the pages. Be mindful of their placement and ensure they don’t interfere with each other when the book is opened and closed. Take your time and be patient as you glue each piece in place.
Step 5: Add the Finishing Touches
Finally, add the finishing touches to your pop-up book. You can cut out additional images or designs to decorate the pages, or add a title to the front cover. Get creative and let your imagination run wild! Once you’re satisfied with the look of your book, let the glue dry completely.
And there you have it – your very own pop-up book! With just a few simple steps, you’ve created a beautiful and interactive piece of art. Whether you’re giving it as a gift or keeping it for yourself, this pop-up book is sure to impress. So go ahead, explore the world of pop-up books and let your creativity soar!
Art Supplies
When it comes to making a popup book, you’ll need a few art supplies to bring your creations to life. Here are some essential items you’ll need:
– Cardstock or heavy construction paper: This sturdy material will be the basis for your popup book.
– Scissors: A pair of good-quality scissors will be essential for making precise cuts.
– Glue: You’ll need glue to attach various parts of your popup book together.
– Images or magazine cut-outs: Use images or cut-outs from magazines to add visual interest to your popup book.
– Triangular ruler: This tool will help you create precise folds and lines in your popup book.
– Tissue paper: Tissue paper can be used to create delicate and translucent elements in your popup book.
– Pop-up dies: These pre-made templates are great for beginners and can help you create complex popup mechanisms.
– Pencil and eraser: You’ll need these tools to sketch out your ideas and make any necessary corrections.
– Scoring tool: A scoring tool can help you create neat and crisp folds in your popup book.
– Paints and brushes (optional): If you’d like to add color to your popup book, paints and brushes can be used to bring your illustrations to life.
With these art supplies, you’ll have everything you need to start creating your own unique popup book. Next, we’ll walk you through a tutorial on how to bring your ideas to life and make your very own masterpiece!
Book Construction Supplies
If you’ve decided to try your hand at making a popup book, you’ll need a few supplies to get started. Here’s a list of materials you’ll need:
- Heavy quality paper or cardstock: This will be used for the pages of your book, as well as for creating the pop-up elements. A thicker material will ensure that your book is sturdy and durable.
- Scissors: You’ll need a pair of sharp scissors for cutting out shapes and making precise cuts.
- Glue: A good quality glue will be essential for adhering the various pieces together. Choose a glue that dries clear and has strong bonding properties.
- Tissue paper: This lightweight material can be used to create translucent effects in your pop-ups. It can be folded or cut into desired shapes and glued onto the pages.
- Accordion-fold paper: This type of paper is perfect for creating the pop-up mechanism. It can be folded in a zigzag pattern to create the desired effect.
Before you begin, it’s important to note that making a popup book requires patience and precision. The steps involved can be quite intricate, especially for beginners. But fear not, with a little practice and some guidance, you’ll soon be creating impressive pop-up books.
To get started, you’ll first need to decide on the theme or story for your book. Then, you can gather images or create your own illustrations that relate to the theme. Once you have your materials ready, you can start constructing the book.
The construction process involves cutting out the desired shapes and gluing them onto the pages. You’ll also need to create folds and creases to make the pop-ups work properly. Most popup books have a combination of simple and complex pop-ups, so you can choose to start with the easier designs and gradually work your way up.
An excellent resource for learning pop-up book construction techniques is the book “How to Make Pop-Up Book” by Jan Pienkowski. It provides step-by-step tutorials and helpful tips for creating pop-ups that really pop.
Once you’ve completed the construction of your book, you can add finishing touches like decorative elements or a cover design. Remember to take your time and pay attention to detail to ensure a professional-looking result.
So, gather your supplies and let your imagination soar as you embark on the journey of creating your own magical popup book.
Making Pop-up Books by Jan Pieńkowski
If you’re a fan of pop-up books, then you’ve most likely come across the works of Jan Pieńkowski. Pieńkowski is a renowned author and illustrator known for his amazing pop-up books that have captivated readers of all ages.
Creating a pop-up book may seem like a heavy task, but with Pieńkowski’s techniques, it’s actually quite easy for beginners. In this tutorial, we’ll take a look at the 5 steps to make your own pop-up book using his methods.
Step 1: Gather Your Supplies
Before you begin, make sure you have all the necessary materials. You’ll need scissors, glue, papers or cards for the pages, and any images or art you want to include in your book. Pieńkowski suggests using heavy paper or cardstock for the best quality pop-ups.
Step 2: Fold and Cut-Out
Pieńkowski discovered that an accordion-fold is the best way to create pop-ups that can be opened and closed with ease. Fold your papers or cards in an accordion style, making sure each fold is the same width. Then, use your scissors to create the desired shapes for your pop-ups. Pieńkowski often uses triangle cuts or door-like openings.
Step 3: Glue and Control the Popping
Once you have created your cuts, it’s time to glue your pop-ups in place. Carefully place the glue along the edges of the folds, making sure not to put too much or it might cause the paper to warp. Pieńkowski recommends using tissue paper as a control line to limit the extent of the pop-up movement.
Step 4: Add Images and Art
Now it’s time to get creative and add the images and art that you want to showcase in your pop-up book. Glue them onto the pages, making sure they align with the pop-ups. Pieńkowski suggests using a combination of different materials and construction techniques to create depth and interest in your book.
Step 5: Bind Your Book
Finally, it’s time to bind your book together. Pieńkowski recommends using a heavy paper or cardstock for the front and back covers, and a spine made of glued paper strips. You can use an engineer or wizard fold to create a secure binding. Once everything is glued together, your pop-up book is ready to be enjoyed.
Jan Pieńkowski’s pop-up books are a true work of art, and with his techniques, you can create your own masterpiece. Follow these 5 steps, and you’ll be well on your way to making a pop-up book that will amaze and delight everyone who opens it.
Easy Pop-Up Book Tutorial with images
If you’ve ever thought about making a pop-up book, this tutorial is for you! We’ve created a step-by-step guide with images to help you make your own pop-up book. Whether you’re a beginner or a seasoned pop-up book wizard, you’ll find these instructions easy to follow.
Supplies you’ll need:
- A pair of scissors
- Heavy construction paper
- Tissue paper
- Glue
- Images or cut-outs for your pop-ups
Step 1: Start by folding your construction paper in half to create the base of your book.
Step 2: Cut out a rectangle from the top layer of your folded paper. This will create a “door” that opens to reveal the pop-up inside.
Step 3: Fold your construction paper accordion-style to create the pages of your book. Make sure the folds are even and neat.
Step 4: Take your images or cut-outs and glue them onto the accordion-folded pages. You can glue them above or below the fold, depending on the effect you want.
Step 5: Once you’ve glued your images in place, fold the book back up and make sure everything lines up correctly. Adjust as needed.
Step 6: Cut out a triangle from the bottom edge of the front cover. This will create a “pop-up” effect when the book is opened.
Step 7: Open the book and glue the triangle to the inside of the cover. This will give the illusion of something popping out of the page.
Step 8: To add a finishing touch, glue a piece of tissue paper over the triangle cut-out. This will create a window-like effect.
Now, you have your very own pop-up book! With these easy steps and some creativity, you can create a beautiful book that will impress your friends and family. Whether you want to make a gift or just enjoy the art of pop-ups, there are so many possibilities with this craft. Have fun exploring and creating!
Quality Control
When it comes to making a popup book, quality control is a crucial step to ensure that your finished product looks its best. Here are some tips for achieving the highest quality in your popup book:
- Start with the right materials: To create sturdy and durable popups, use heavy paper or cardstock. This will make your book more long-lasting and resistant to wear and tear.
- Cut with precision: Use sharp scissors or a paper cutting tool to make clean and precise cuts. This will ensure that your popup elements look neat and professional.
- Fold accurately: Follow the instructions and fold lines exactly as indicated. A slight misalignment can affect the functionality and appearance of your popups.
- Glue carefully: When attaching popup elements to the pages, use a high-quality adhesive that provides strong bonding. Apply the glue evenly and avoid excess glue that can create unsightly smudges.
- Inspect for flaws: Before finalizing your popup book, carefully inspect each page and popup element for any defects or imperfections. Fix any issues or replace faulty components to guarantee a flawless finished product.
Remember that quality control is an ongoing process throughout the entire construction of your popup book. By paying attention to these details, you can ensure that your popups are eye-catching, functional, and durable.
Pop-Ups and Paper Construction
Pop-up books are a fascinating form of art that combines engineering and creativity. The idea of pop-ups was discovered by illustrator Jan Pienkowski, and since then, many artists and crafters have been captivated by the magic of these interactive books.
Making a pop-up book is not as complicated as it may seem. It all starts with a pair of scissors, some heavy-weight paper or cardstock, and your imagination. By folding and cutting the paper in certain ways, you can create pop-ups that surprise and delight the reader.
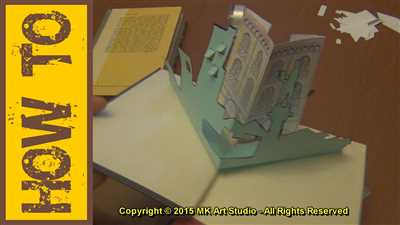
The most common type of pop-up is the “V-fold” or “triangle” fold. This technique involves folding a piece of paper in half, making a diagonal cut, and then folding the cut-out triangle to create a pop-up shape. By gluing the pop-ups onto the pages of your book, you can bring your story to life.
To create a pop-up book, you will need the following supplies:
- Heavy-weight paper or cardstock
- Scissors
- Glue
- Tissue paper
First, start by designing the layout and storyline of your book. Once you have a clear vision, begin constructing the pages. Creating an accordion-fold spine for your book will allow the pages to open and close smoothly. Fold the paper in a zigzag pattern, creating equal-sized panels that will serve as the pages of the book.
Next, it’s time to add the pop-ups. Cut out shapes or figures from your heavy-weight paper or cardstock. Make sure these cut-outs are smaller than the dimensions of the panels on your accordion-fold spine. Then, fold and glue these pop-ups onto the pages, ensuring they can be easily opened and closed.
As you work on your pop-up book, don’t be afraid to experiment and let your creativity take control. The possibilities are endless, and you can create scenes that move, characters that pop out, or even three-dimensional structures.
Pop-up books are not only a wonderful gift for children but also a great way for beginners to explore the art of paper construction. With practice and patience, you can create stunning pop-up books that will amaze and delight people of all ages.
So, if you’ve ever been fascinated by the intricate and magical world of pop-ups, why not give it a try? Grab some paper, scissors, and glue, and let your inner paper wizard come to life!


