

If you’re looking for an affordable and durable way to make waterproof decals, we have the perfect solution for you. By applying a waterproof coat over your printed artwork, you can ensure its longevity and protection against the elements.
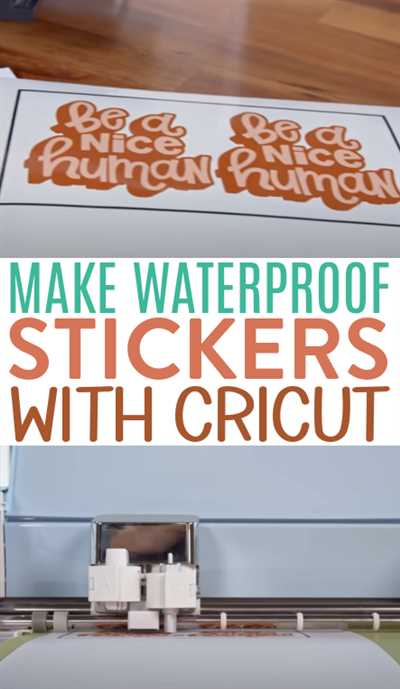
The first step is to design your artwork in a program like Photoshop. Take your time and pay attention to every detail, as this will show in the final product. Once you’re happy with the design, you can proceed to the next step.
There are several methods to make waterproof decals, but the most accessible one is to use a clear sheet of adhesive vinyl. These sheets are widely available online and in stores, making it easy to get the materials you need.
Next, you’ll need to apply a waterproof or weatherproof overcoat to your printed design. This can be done using a spray-on type of overcoat or by laminating the decals with a homemade or store-bought clear adhesive. Both methods have their advantages, so decide based on your preference and the type of finish you want to achieve.
After applying the overcoat, allow the decals to fully dry. This usually takes a few hours, so be patient and resist the urge to touch or handle them until they’re completely dry. Once dry, your decals are ready to be used and will be protected from fading and water damage.
To apply the decals, simply peel off the backing and carefully stick them to the desired surface. The waterproof coating will ensure that they stay in place and maintain their glossy appearance over time. You can use these waterproof decals for a variety of purposes, from labeling your personal belongings to decorating your car or laptop.
By following this procedure, you can make your own waterproof decals and enjoy the benefits of their durability and affordability. Take your time, experiment with different techniques, and soon you’ll be able to create stunning waterproof decals that will stand the test of time.
How Do You Make Homemade Waterproof Stickers
Homemade waterproof stickers can be a fun and creative way to personalize your belongings, label items, or add a unique touch to crafts and projects. While there are various methods for making waterproof stickers, one of the most accessible and affordable ways is to make them using clear vinyl sticker sheets.
To make homemade waterproof stickers, you’ll need clear vinyl sticker sheets that are compatible with either an inkjet or laser printer. These sheets can usually be easily found online or at your local craft store. The method you choose will depend on the type of printer you have or prefer to work with.
Here’s how you can make homemade waterproof stickers:
- Design your artwork: Use a graphic design program such as Adobe Photoshop or an online design tool to create your desired sticker design. You can add text, shapes, images, or any other elements to make your stickers unique.
- Print your stickers: Once you’re happy with the design, print it onto the clear vinyl sticker sheet. Make sure to follow the printer settings recommended by the manufacturer for best results.
- Allow the ink to dry: Give the printed stickers enough time to dry completely. This step is crucial to avoid smudging or smearing the ink.
- Apply a waterproof and weatherproof coating: To ensure the durability of your stickers, apply a clear glossy coat over the printed side of the sheet. This will not only protect the ink from water damage but also give the stickers a nice finish.
- Let it dry: Allow the glossy coat to dry completely. This step will usually take a few hours. Once dry, your stickers are ready to use.
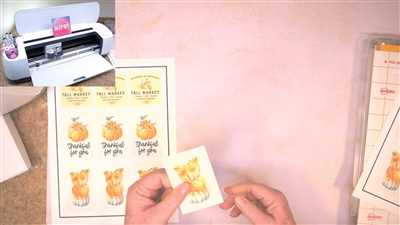
- Cut out your stickers: Use scissors or a craft knife to carefully cut out each sticker, following the shape and outline of your design.
- Apply your stickers: Peel off the backing from each sticker and apply them to your desired surface. Make sure the surface is clean and dry for better adhesion.
By following this procedure, you’ll have homemade waterproof stickers that can withstand water, weather conditions, and regular handling. These stickers can be used on various items like notebooks, water bottles, laptops, or any other surface you want to decorate or label.
Keep in mind that this method is suitable for smaller orders or when you want to create custom stickers with intricate details. If you’re looking for larger quantities or need a faster production time, there are professional sticker printing services available that offer waterproof materials and finishes.
Whatever method or materials you decide to use, always make sure to test the waterproof capabilities of your homemade stickers before applying them to valuable or sentimental items. This will ensure that you’re happy with the results and that your stickers are truly waterproof/outdoor safe.
Add Durability
To make your waterproof decals last longer, it’s important to add a layer of protection. This will help prevent them from fading or peeling over time, especially if they’re exposed to harsh weather conditions. Here are two methods you can use to add durability to your decals:
1. Laminate: One way to make your decals more weatherproof is by laminating them. You can either purchase laminating sheets or use a laminating machine, if you have access to one. Simply print out your decals and then laminate them using the laminating sheets or machine. This will create a clear, glossy finish that will protect your decals from water damage and fading. Laminating is a popular method used for larger decals or those that need to be shipped or handled frequently.
2. Spray overcoat: Another method to make your decals waterproof is by using a spray overcoat. This method is more suitable for smaller decals or artwork that you want to protect. You can find waterproof or weatherproof spray overcoats at most art supply stores or online. Make sure to choose a product that is specifically designed for outdoor use and can withstand high weather conditions. After you’ve printed your decals, apply the spray overcoat according to the instructions on the can. This will create a protective layer that makes your decals resistant to water and fading.
Both of these methods add durability to your decals and ensure that they can withstand various weather conditions. They also help to preserve the colors and details of your design, making them look vibrant for a longer period of time. Whether you decide to laminate or use a spray overcoat, always follow the procedure and safety instructions provided with the materials you’re using. This way, you can make sure your decals are fully waterproof and ready for any outdoor adventure or application.
 |  |
| Cricut machine | Spray overcoat |
A Clear Gloss Overcoat Spray
If you want to make your decals waterproof and weatherproof, adding a clear gloss overcoat spray is an effective method. This spray can be easily found online or in stores, making it easily accessible for anyone to use.
Before you proceed with the application, make sure that your decals are fully dry. If they’re not, wait for them to dry completely before applying the clear gloss overcoat spray.
There are different types of clear gloss overcoat sprays available, either in solvent or water-based form. The solvent-based sprays tend to be more durable and long-lasting, but they can also be more expensive. On the other hand, the water-based sprays are more affordable but may not offer the same level of durability.
Here’s a step-by-step procedure on how to apply the clear gloss overcoat spray to your decals:
- Start by printing your decals using a high-quality printer. You can either design your decals in Photoshop or use pre-made designs that are available online.
- If your decals are printed on standard sticker sheets, cut them into the desired shapes.
- Make sure that the surface where you’ll be applying the clear gloss overcoat spray is clean and dry.
- Shake the can of clear gloss overcoat spray well before using it. This will ensure that the product is mixed thoroughly for the best results.
- Hold the can at a distance of about 6-8 inches from the decals and spray a light, even coat of the clear gloss overcoat spray. Make sure to cover the entire surface of the decals.
- Allow the decals to dry completely according to the instructions on the spray can. This usually takes around 24 hours.
- Once the decals are fully dry, they’re now waterproof and weatherproof. The clear gloss overcoat spray adds a glossy finish to the decals, making them look more professional and protecting them from fading or water damage.
The clear gloss overcoat spray is an excellent way to make your decals waterproof and weatherproof. It not only enhances the overall look of your decals but also prolongs their durability, ensuring that they will stick and stay safely on any surface, even in challenging weather conditions.
So, if you’re looking for a method to make your decals waterproof, a clear gloss overcoat spray is the way to go. It’s an affordable and accessible solution that can make a huge difference in the longevity and quality of your decals.
B Apply An Overcoat Sheet
After the decals are printed and dried, the next step in the process is to apply an overcoat sheet. This step is crucial for making the decals waterproof and weatherproof.
There are several methods you can use to apply an overcoat sheet:
- Using a homemade laminator: If you have a laminating machine at home, you can use it to laminate the decals. Simply feed the decals through the machine, and it will apply a clear, glossy overcoat to protect the artwork.
- Using a spray-on overcoat: There are special spray-on coatings available online that can be used to make decals waterproof. Simply spray the coating evenly over the decals, making sure to cover the entire surface. Allow the decals to dry completely before further handling.
- Using a solvent-based overcoat: Another option is to use a solvent-based overcoat, which provides a high level of durability and protection. This method usually requires a professional printer, as it involves printing the decals on a special type of sheet that can withstand the solvent. If you’re not familiar with this method, it’s best to seek professional help or learn from online tutorials.
Regardless of which method you choose, make sure to follow the instructions provided with the overcoat materials to ensure that you apply it correctly. This will ensure that your decals are waterproof and able to withstand outdoor elements.
After the overcoat sheet is applied, wait for the recommended amount of time for it to fully dry. Once dry, your decals will be ready to be shipped or used in any way you see fit. The overcoat sheet adds an extra layer of protection and helps maintain the longevity of your decals.
Remember, it’s always a good idea to make a test print and apply an overcoat sheet to ensure that the final result meets your expectations. This way, you can make any necessary adjustments before proceeding with larger orders or more intricate designs.
By following this procedure and using the right materials, you can easily make your decals waterproof and weatherproof. This method is affordable, especially when compared to ordering custom waterproof decals, and it allows you to have full control over the design and finishing touches of your decals.
So, if you’re ready to start making waterproof decals, why wait? Learn the process and get creative with your own designs. You’ll be happy with the results!
Decide on the Method
When it comes to making waterproof decals, you have several methods to choose from. Each method has its own advantages and disadvantages, so you need to decide which one suits your needs best. Here are some options:
- Homemade laminating: This method involves using everyday materials to create a water-resistant coating for your decals. It’s affordable and accessible, but may not provide the highest level of waterproofing.
- Store-bought laminating: You can also purchase laminating products from stores. These often come in larger sheets and can provide better weatherproofing. However, they can be more expensive.
- Using waterproof materials: If you’re getting your decals professionally printed, you may have the option to choose waterproof materials. This can be a great solution if you want to ensure that your decals will be fully weatherproof.
- Spray overcoat: Another option is to apply a clear, waterproof spray overcoat to your decals. This method works well for homemade decals or those printed on standard materials. However, it may not offer the same level of protection as laminating or using waterproof materials.
Decide on the method that works best for you based on your budget, time constraints, and desired level of waterproofing. Remember to follow any specific instructions provided by your printer or manufacturer to ensure the best results. Once you’ve decided, you can proceed to the next step and start making your waterproof decals!
Waterproof Stickers Labels
If you’re looking to create fully waterproof outdoor stickers and labels, you’ve come to the right place. In this article, you’ll learn the procedure that will allow you to make waterproof decals easily and affordably!
First, you need to decide on the type of materials you want to use for your stickers. There are two main options: clear or glossy sheets. Clear sheets are ideal if you want the design to show through, while glossy sheets add a nice gloss finish. Both options are waterproof.
Next, you need to prepare your artwork. Make sure your design is high in detail and accessible. You can use a design software or a Cricut machine to create your artwork. Once you’re happy with the design, proceed to the next step.
Now it’s time to print your decals. Use a printer that uses solvent-based ink, as this ink is more durable and water-resistant compared to other methods. You can either print on the waterproof sheets directly or print on standard sheets and then add a clear laminate overcoat to make them waterproof.
Once your decals are printed, wait for them to dry completely. This usually takes a few hours. While you wait, you can start preparing the sticker sheets by cutting them into the desired shapes and sizes.
After the decals are dry, it’s time to apply a waterproof coat. You can either use a waterproof spray or a clear overcoat specifically designed for weatherproofing. Make sure to follow the instructions on the product you choose.
Once the decals are waterproof, you can now safely apply them to your desired surface. Peel off the backing and stick them on. The waterproof coating will ensure that your decals stay intact even when exposed to rain, water, or other harsh weather conditions.
Don’t worry about the durability of your waterproof stickers and labels. They’re designed to withstand outdoor conditions and won’t fade easily. You can confidently use them on vehicles, outdoor equipment, water bottles, and more.
In conclusion, making waterproof stickers and labels is a simple process. With the right materials and methods, you can create durable and weatherproof decals that will last for a long time. So, why wait? Start making your waterproof decals today!