
If you’ve ever wanted to create your own website, you’re in luck! In today’s digital age, it’s easier than ever before to get your own piece of the web. Whether you’re looking to start a blog, showcase your portfolio, or even run a full-fledged business online, creating a website is a great way to get noticed and establish your online presence. In this article, we’ll walk you through the steps of making your own website, from choosing a domain name to publishing your site.
The first step in creating any website is choosing a domain name. Your domain name is the address that people will use to find your site on the web. When choosing a domain name, it’s important to keep a few things in mind. First, you’ll want to make sure that the name is easy to remember and relevant to your website’s content. Second, you’ll want to make sure that the domain name is available for registration. There are many domain name registration services available online, where you can search for available names and purchase them for a small fee.
Once you’ve chosen a domain name, the next step is to choose a web host. A web host is the company that provides the server space where your website will live. There are many web hosting companies to choose from, ranging from free options to professional-grade services. The type of web host you choose will depend on your individual needs and budget. If you’re just starting out and want to keep costs to a minimum, a free web host may be a good option. However, if you’re running a business or expect a large number of visitors to your site, it may be worth investing in a commercial web hosting service.
- How to Make a Website From Scratch in 10 Minutes or Less
- The Essential Step-by-Step Guide to Making Your Own Website
- Get Your Domain Name
- Choose a Web Host and Sign Up for an Account
- Designing your Web Pages
- Testing Your Website
- Collecting Credit Card Information Making Money
- Getting Your Site Noticed
- Create your website builder account
- Sources
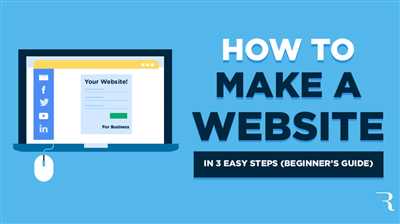
How to Make a Website From Scratch in 10 Minutes or Less
If you’re looking to create a website from scratch without any prior coding experience, this guide is for you. In just 10 minutes or less, you’ll have your own website up and running. So let’s get started!
The first thing you’ll need is a domain name. This is the address that people will use to access your website. You can buy a domain from a commercial company, or use a free domain if you prefer. Make sure to choose a name that represents your business or brand.
Next, you’ll need to choose a website builder. There are many options available, but we recommend using WordPress. It’s a popular choice among developers and offers a user-friendly interface. WordPress allows you to easily drag-and-drop elements onto your website and edit them as needed. It’s easy to install, and you can access it by signing into your account.
Once you have WordPress installed, you can start designing your website. There are many templates and themes available that you can choose from. Simply select one that suits your business or personal style, and then customize it to your liking.
Now it’s time to add content to your website. This can include articles, images, videos, and more. Make sure to keep your content relevant and engaging to your target audience.
When it comes to search engine optimization (SEO), there are a few key factors to consider. Make sure to include relevant keywords in your title tags, meta descriptions, and content. This will help search engines understand what your website is about and improve your ranking in search results.
Once your website is complete, it’s time to go live. Choose a hosting company that has good uptime and customer support. There are many options available, so do your research and choose the one that best suits your needs.
Finally, make sure your website is mobile-friendly. More and more people are accessing the internet through their mobile devices, so it’s important to have a responsive design that looks good on all screen sizes.
In conclusion, creating a website from scratch doesn’t have to be difficult. With the right tools and resources, you can have your website up and running in no time. Follow the steps above, and you’ll be well on your way to making your online presence known.
The Essential Step-by-Step Guide to Making Your Own Website
Introduction
Creating a website is easier than ever before, thanks to the wide range of tools and resources available. Whether you’re starting a blog, an online store, or a business website, this step-by-step guide will help you through the process of making your own website.
Step 1: Define Your Purpose
Before you dive into creating a website, it’s essential to define its purpose. Think about what you want to achieve with your website, whether it’s to showcase your business, share your thoughts on a blog, or sell products online.
Step 2: Choose a Platform
There are several platforms available for building websites, but the most popular one is WordPress. WordPress is a user-friendly and highly customizable content management system (CMS) that is perfect for beginners.
Step 3: Find a Host
To make your website live and accessible on the internet, you’ll need a hosting provider. There are many hosting options available, both free and paid. Make sure to choose a reliable host that offers good security, fast loading times, and excellent customer support.
Step 4: Select a Domain Name
A domain name is the address of your website. It should be short, memorable, and related to your business or blog. You can register a domain name with a domain registrar and link it to your hosting account.
Step 5: Install WordPress
Once you have a hosting account and a domain name, you can install WordPress. Most hosting providers have a one-click installer for WordPress, making the setup process easy and hassle-free.
Step 6: Choose a Theme
Selecting a theme will determine the overall design and layout of your website. Choose a theme that is mobile-friendly, as more and more users are accessing websites from their smartphones and tablets.
Step 7: Customize Your Website
You can customize your website by changing its colors, fonts, menus, and widgets. Most themes have a built-in customizer, which allows you to make changes with just a few clicks. If you want more advanced customization options, you can hire a developer or learn to code yourself.
Step 8: Add Content
Now it’s time to add content to your website. Create pages for different sections, such as Home, About, Services, and Contact. Start writing blog posts or uploading products, depending on the purpose of your website.
Step 9: Optimize for Search Engines
To make sure your website gets noticed by search engines like Google and Bing, you’ll need to optimize it for SEO (Search Engine Optimization). This includes using relevant keywords in your titles, headings, and content, as well as making your website fast and mobile-friendly.
Step 10: Set Up Social Media Accounts
Social media can be a great way to promote your website and attract visitors. Set up accounts on platforms like Facebook, Instagram, and Twitter, and link them to your website. This will help you reach a wider audience and engage with your customers.
Step 11: Get an SSL Certificate
It’s important to keep your website secure, especially if you’re collecting any sensitive information from your visitors. An SSL certificate encrypts the data transmitted between your website and your visitors, ensuring it cannot be intercepted by hackers. Most hosting providers offer free SSL certificates.
Step 12: Launch Your Website
Before you launch your website, make sure to test it thoroughly and fix any bugs or issues. Double-check all the links, forms, and functionality to ensure everything is working correctly. Once you’re confident that everything is in place, it’s time to make your website live!
Conclusion
By following these step-by-step instructions, you can make your own website and establish a strong online presence for your business or blog. Remember to keep updating and improving your website to stay ahead of your competition and provide a great user experience for your visitors.
Get Your Domain Name
When it comes to creating a website from scratch, one of the first essential steps is getting your own domain name. A domain name is the web address that people will use to access your website, like www.yourwebsite.com.
Choosing a domain name takes some work. You’ll want to think carefully about what you want your website to be about and what kind of image you want to project. It should be something that is easy to remember and reflects your brand or business.
There are many domain name providers that allow you to search for available domain names. Some popular options include Bluehost, BlueGriffon, and HostGator. You can simply type in the domain name you’re looking for and see if it’s available.
Keep in mind that some domain names may already be taken, especially if they are common words or phrases. If your desired domain name is not available, you may need to get creative by using synonyms, adding a different word before or after your desired name, or using a different domain extension like .net or .org instead of .com.
Once you have chosen and secured your domain name, you will need to set up a hosting account. This is where your website’s files will be stored and where visitors will be able to access your website. Many hosting companies offer domain registration as part of their hosting packages.
After you have set up your hosting account, you will need to connect your domain name to your hosting account. This can usually be done through your hosting provider’s control panel. The process may vary depending on the hosting company you choose, but there are typically step-by-step instructions provided.
It’s also important to note that search engines like Google and Bing take domain names into account when ranking websites. Having a professional and relevant domain name can improve your website’s visibility in search engine results.
While there are free website builders and hosting options available, it is generally recommended to invest in a commercial web hosting account. This will give you more control and flexibility over your website.
In conclusion, getting your domain name is an essential step in creating a professional and successful website. Take the time to choose a domain name that represents your brand or business well, and make sure to set up proper hosting to keep your website live.
Choose a Web Host and Sign Up for an Account

When it comes to making a website, one of the first important steps is choosing a web host and signing up for an account. A web host is a company that provides the necessary services and technologies to make your website accessible on the internet.
There are many web hosting companies available, each offering different types of hosting plans and services. Before choosing a web host, there are a few factors to consider:
- Price: Web hosting companies offer different pricing plans, so it’s important to choose one that fits within your budget.
- Features: Look for features such as website builders, email accounts, SSL certificates, and more, depending on your specific needs.
- Support: Make sure the web host provides reliable customer support, as you may need assistance with your website in the future.
- Uptime: Uptime is the amount of time a web host’s servers are operational. Look for a web host with a high uptime percentage to ensure that your website is always accessible.
- Scalability: If you plan on expanding your website in the future, choose a web host that offers scalable hosting plans.
Here are some steps to follow when choosing a web host and signing up for an account:
- Do some research: Look for web hosting companies using search engines and read customer reviews to get an idea of their reputation and reliability.
- Decide on a hosting plan: Most web hosting companies offer shared hosting, VPS hosting, and dedicated hosting plans. Determine which plan suits your website’s needs.
- Choose a domain name: If you don’t already have a domain name, consider buying one from a web host or using a separate domain registrar.
- Check if the web host offers a website builder: If you’re not familiar with coding or don’t have the time to build a website from scratch, consider using a website builder with drag-and-drop functionality.
- Sign up for an account: Once you’ve chosen a web host and a hosting plan, follow the sign-up process on their website to create an account.
- Provide your payment details: You’ll need to enter your credit card or other payment information to complete the account setup.
- Set up your website: Depending on the web host, you may have the option to use a content management system like WordPress or a website builder to design your website.
- Customize your settings: After your website is set up, you can choose and customize themes, plugins, and settings to give it a professional and unique look.
- Ensure your website is live: Test your website to make sure it’s working properly and accessible to visitors.
By following these steps and choosing a web host that meets your needs, you’ll be on your way to creating a successful website. Make sure to consider all the factors mentioned before making your decision, as each web host has its own advantages and limitations. Happy building!
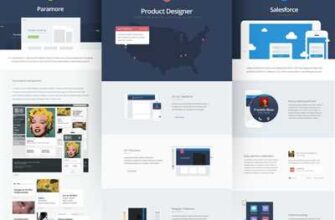
Designing your Web Pages
When it comes to designing your web pages, there are a few key steps to follow. First, you’ll want to choose a website builder or web hosting company. There are many options available, so you’ll need to do some research to find the one that works best for you.
If you’re starting from scratch, it can be very helpful to use a drag-and-drop website builder. This type of software allows you to easily move elements around on your web page without needing to write any code. Most website builders also have pre-designed templates available, which can make the design process even easier.
For those who have their own design ideas, though, it’s still possible to work with a website builder. Many builders allow you to customize your pages to a very high degree, giving you more control over the look and feel of your site.
Another alternative is to use a WYSIWYG editor, which stands for “What You See Is What You Get.” This type of software lets you design your web pages using a visual interface, similar to working with a word processor. It’s a great option for those who are less comfortable with coding.
Regardless of which method you choose, there are a few general design principles to keep in mind. First, make sure your pages are easy to navigate. This means organizing your content in a logical way and providing clear links to other pages on your site.
Additionally, consider the overall layout and color scheme of your pages. You want to create a visually appealing design that reflects the purpose and tone of your website. It’s also important to optimize your pages for mobile devices, as more and more people are accessing the web from their smartphones and tablets.
Lastly, don’t forget about the importance of content. While design is a key factor in attracting visitors to your site, the content you provide is what will keep them coming back. Make sure your pages are informative, engaging, and easy to read.
In conclusion, designing your web pages can be a fun and creative process. Whether you choose to use a website builder, a wysiwyg editor, or code your pages from scratch, there are plenty of resources available to help you along the way. Just remember to keep the overall design and user experience in mind, and don’t forget about the importance of high-quality content.
Testing Your Website
Once you have designed and created your website using a website builder or HTML editor, the next step is to test it to ensure that everything is working properly. Testing your website is an important step that helps you ensure that your site is user-friendly and performs well across different devices and browsers.
There are several things you should consider when testing your website:
- Functionality: Test all the features and functionalities of your website, such as forms, buttons, and links, to make sure they work as intended.
- Responsiveness: Check if your website is mobile-friendly and if it adapts to different screen sizes and orientations. Use emulators or test it on real devices to ensure a consistent user experience.
- Compatibility: Test your website on different browsers (such as Chrome, Firefox, and Safari) to ensure that it displays correctly and functions properly on each.
- Navigation: Test the navigation on your website to make sure it is intuitive and easy for visitors to find the information they are looking for.
- Load Time: Optimize the loading speed of your website by compressing images and files. Test the load time of your website using tools such as Google PageSpeed Insights.
When it comes to testing your website, there are different tools and resources available to help you:
- Online Testing Tools: There are various online tools that allow you to test your website’s performance, responsiveness, and compatibility across different devices and browsers. Some popular tools include BrowserStack, CrossBrowserTesting, and Sauce Labs.
- Manual Testing: This involves manually going through your website and testing its features, functionalities, and responsiveness on different devices and browsers. This can be a time-consuming process but is often necessary for accurate testing.
Overall, testing your website is crucial to ensure that it provides a positive user experience and is functional across different platforms. By thoroughly testing your website, you can identify any issues or areas that need improvement before making it live. Remember, creating a website is just the first step, and ongoing testing and maintenance are important to keep your website running smoothly and meeting the needs of your customers.
Collecting Credit Card Information Making Money
If you’re looking to make money with your website, one option is to collect credit card information. There are several ways to go about this, but it’s important to proceed with caution to avoid any legal or ethical issues. In this article, we’ll discuss how you can collect credit card information on your website and use it to generate revenue.
First, you’ll need to have a website up and running. There are many ways to create a website, but we recommend using a website builder like BlueGriffon. It’s easy to install and use, and it provides a professional-looking website right off the bat. Alternatively, you can use a content management system like WordPress or Joomla if you’re familiar with those platforms.
Once you have your website created, you’ll need to choose a web hosting company to host your site. There are many hosts to choose from, but some popular options include Bluehost, GoDaddy, and HostGator. Make sure to choose a hosting plan that provides the features you need, like a mobile-friendly website and SSL certificates to keep your users’ data secure.
When you have your website and hosting account set up, it’s time to start collecting credit card information. One way to do this is by adding a “Buy Now” button to your website. You can create your own button using an image editing software like Adobe Photoshop or simply use the pre-made buttons provided by payment processing companies like PayPal or Stripe. These companies will handle the payment process and transfer the funds to your chosen bank account.
Another option is to integrate a payment gateway directly into your website using a service like Authorize.net or Braintree. This allows you to process credit card payments without redirecting the user to a different website. However, keep in mind that this method requires more technical knowledge, so you may need the help of a developer to set it up correctly.
It’s important to note that there are legal and ethical considerations when collecting credit card information. You must ensure that you’re complying with all relevant laws and regulations, including obtaining proper user consent and securely storing the data. It’s recommended to consult with a lawyer or legal professional to make sure you’re following all necessary guidelines.
In conclusion, collecting credit card information can be a lucrative way to make money with your website. However, it’s important to tread carefully and make sure you’re following all legal and ethical guidelines. By choosing a reputable hosting company, using a secure payment gateway, and obtaining proper user consent, you can avoid potential issues and create a successful online business.
References: Bing.com, Google.com
Getting Your Site Noticed
Once you have created your own website using a website builder or HTML editing software like BlueGriffon, it’s time to get your site noticed. No matter how well-designed your site is, it won’t bring in business if no one can find it. Here are 10 essential steps to making sure your website gets the attention it deserves:
1. Choose a domain name: Your domain name is the address where your website can be found. Make sure it is simple, easy to remember, and related to your business or topic.
2. Optimize for search engines: Use keywords relevant to your website in your page titles, meta tags, and content. This will help search engines like Google or Bing to find and rank your site.
3. Create mobile-friendly pages: With more and more people using their mobile devices to browse the internet, it’s important that your website looks good and works well on smartphones and tablets.
4. Collect customer testimonials: Positive reviews and testimonials from satisfied customers can help build trust and credibility. Include them on your website to showcase the quality of your products or services.
5. Connect with social media: Create social media accounts for your business and link them to your website. This is a great way to reach a wider audience and engage with your customers.
6. Blog regularly: Start a blog on your website and regularly post articles related to your industry or niche. This will not only provide valuable content for your visitors but also help improve your search engine rankings.
7. Get listed on online directories: There are many online directories where you can list your website for free. This can help increase your online visibility and drive more traffic to your site.
8. Consider paid advertising: If you have a budget, you can also consider paid advertising options like Google Ads or Facebook Ads. This can help attract targeted traffic to your site and increase your chances of making sales.
9. Use SSL certificates: SSL certificates are used to secure the connection between your website and your visitors. Having an SSL certificate not only protects your customers’ data but also gives your site a professional look.
10. Analyze and improve: Keep track of your website’s performance using tools like Google Analytics. Analyze the data to see what is working well and what needs improvement, and make the necessary changes to optimize your site.
Create your website builder account
If you’re looking to create your own website without any coding knowledge, signing up for a website builder account is a great deal. With so many options to choose from, it can be overwhelming, but this guide will help you make the right choice for your business or personal website.
Website builders are online software that help you build websites easily. You don’t need to know HTML or any coding languages to create and edit web pages. Most website builders offer a drag-and-drop WYSIWYG (What You See Is What You Get) editor, making it simple to customize your site to suit your needs.
One of the essential things to consider when choosing a website builder is the ease of use. You want a platform that is user-friendly and allows you to quickly navigate through the various settings and features. Some website builders also provide templates, which can give you a head start in designing your site.
When creating your website builder account, make sure to choose a domain name that reflects your business or personal brand. The domain name is the web address where your site will be located (e.g., www.yourbusinessname.com). You can purchase a domain name from popular domain name registrars or often get a domain name for free with some website builder plans.
Hosting is also an important consideration. Some website builders include hosting services, while others may require you to host your site with a third-party company. Make sure that the hosting company you choose can support the software you’re using and provides the necessary features for your site.
Once you have signed up for a website builder account, you can start creating your site. Most website builders offer pre-designed templates that you can simply customize with your own content. You can add text, images, videos, and more to your pages using the drag-and-drop editor.
When working on your site, it’s important to consider mobile-friendliness. More and more people are accessing the internet on mobile devices, so having a mobile-friendly site is a must. Luckily, many website builders offer responsive templates that automatically adjust your site’s layout for different screen sizes.
After you have finished editing your site, it’s a good idea to test it out before publishing it. Some website builders offer a preview mode or allow you to view your site on different devices to ensure it looks and functions as expected.
Finally, when you’re ready to go live, choose a plan that suits your needs and budget. Some website builders offer free plans with limited features, while others require a monthly or yearly subscription. Take into account any additional features you may need, such as SSL certificates for secure browsing.
With these simple steps, you can create your own website in just a few minutes. Website builders have made it easier than ever for anyone to have an online presence. So, why wait? Sign up for a website builder account today and start building your beautiful website!
Sources

When it comes to creating a website, there are several essential sources that every developer should know about. These sources provide valuable information and tools to help you design and build your own website.
One of the first sources to mention is Google. It offers a variety of resources for web developers, such as the Google Search Console and the PageSpeed Insights tool, which allow you to test and optimize your website for search engines. Google also has a wide range of articles and blog posts that provide step-by-step instructions and valuable tips for designing and building websites.
If you’re looking for a website builder that is easy to use and requires no coding, WordPress is another great source to consider. With its drag-and-drop editor and a wide range of available themes and plugins, WordPress makes it very convenient for beginners to create their own mobile-friendly websites.
If you want more control over the design and functionality of your website, you can also consider using a software like BlueGriffon. This HTML editor is available for Windows and Mac and allows you to create and edit HTML files directly. It provides a step-by-step guide to help you get started with designing your website.
If you’re interested in collecting customer information or selling products on your website, you might want to look into buying a domain name and hosting your website with a reputable hosting provider. This will give you a professional look and allow you to have your own domain name. Most hosting providers also offer SSL certificates, which are essential for keeping your customers’ information secure.
When it comes to testing your website, it’s important to have access to different devices and browsers. Make sure to test your website on mobile devices, as well as different browsers like Google Chrome, Mozilla Firefox, and Microsoft Edge. This will help you ensure that your website looks and works well on all devices and browsers.
These sources mentioned above are just a few that can help you get started with creating your own website. Whether you choose a website builder like WordPress or prefer to design your website from scratch using HTML and CSS, the most important thing is to keep learning and experimenting.