

If you’re a fan of the Cricut Maker or Cricut Explore machines, then you know how amazing they are for cutting and designing custom stickers. But what happens when you want to take your stickers to the next level?
That’s where waterproof stickers come in. With waterproof stickers, you can use them on items that come into contact with water without worrying about them getting damaged. They’re perfect for water bottles, laptops, and more! In this tutorial, I’m going to show you how to make your own waterproof stickers using your Cricut machine.
Step 1: Gather Your Materials
To make waterproof stickers, you’ll need a few supplies:
– Cricut Maker or Cricut Explore machine
– Printable sticker paper
– Waterproof sealant spray
Step 2: Design and Cut Your Stickers
Using Cricut Design Space, create or upload the design for your stickers. Make sure to adjust the settings for the type of sticker paper you’re using. Once you’re happy with the design, send it to your Cricut machine to cut.
Step 3: Apply the Waterproof Sealant
After your stickers have been cut, carefully remove them from the mat. Find a well-ventilated area and lay your stickers flat on a protected surface. Spray a thin, even coat of waterproof sealant over the entire surface of each sticker. Let them dry completely before moving on.
Step 4: Enjoy Your Waterproof Stickers
Once the sealant is dry, your stickers are now waterproof and ready to use! Stick them onto water bottles, laptops, or any other item that you want to make water-resistant. Plus, the sealant will also help protect your stickers from fading.
Now that you know how to waterproof your Cricut stickers, you can enjoy the freedom of using them in even more ways. Whether you want to create custom decals for personal use or make waterproof stickers to sell, this tutorial has you covered. Get creative and start making your own waterproof stickers today!
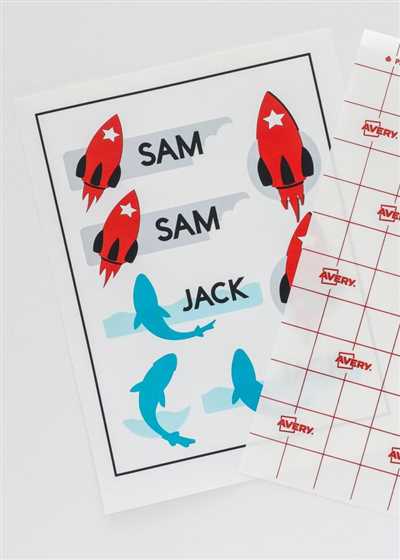
Printable Waterproof Sticker Set – US Letter 6 ct

If you enjoy creating custom stickers, this Printable Waterproof Sticker Set is perfect for you. With 6 stickers in the set, you’ll have plenty of space to design and print your own unique decals.
The stickers in this set are specifically designed to be waterproof and resistant to water. This means that you can use them on a variety of surfaces, both indoors and outdoors, without worrying about them getting damaged or ruined.
To make these waterproof stickers, you’ll need a printer and a Cricut Maker or a similar cutting machine. The first step is to open the design file in your preferred software and adjust the size, if necessary.
Once you have the design ready, you can print it on a US Letter size paper. Make sure to use a printer that supports waterproof ink for best results.
After printing, let the stickers dry for a few minutes before proceeding to the next step. This will ensure that the ink is fully set and won’t smudge or run when it comes into contact with water.
Next, place the printed sheet on a flat and clean surface, with the printed side facing up. Use a ruler or a straight edge to cut along the edges of the stickers. This will create individual stickers that you can peel off and stick wherever you like.
Once the stickers are cut, they are ready to be used. Simply peel off the backing paper and stick them onto any clean and dry surface. Whether you want to decorate your water bottle, laptop, or journal, these waterproof stickers will add a unique touch to your belongings.
Remember to avoid exposing the stickers to excessive water or submerging them in water for extended periods of time. While they are waterproof, prolonged exposure to water may cause the adhesive to weaken or the ink to fade.
That’s it! With this Printable Waterproof Sticker Set, you can create your own personalized stickers that will resist water and stay vibrant for longer. Enjoy the process of designing and printing your own stickers, and don’t forget to check back for more updates and tutorials on our website.
Table of Contents
1. Introduction
2. Step-by-step tutorial
3. Choosing the right materials
4. Making your stickers water-resistant
5. Printing and cutting your designs with a Cricut
6. Adding custom designs with Cricut Maker
7. Tips and tricks for perfect stickers
8. How to set up and use a printable sticker printer
9. Enjoying the freedom of waterproof stickers
10. Updates and Xtra tips
11. Conclusion
Print Then Cut Updates Cricut Design Space Tutorial
If you love making custom stickers, decals, or other printables with your Cricut Maker, you’ll be excited to hear about the latest updates to the Print Then Cut feature in Cricut Design Space. These updates make it even easier to create waterproof stickers that are resistant to water and other elements, ensuring they last longer and stay looking great.
Step 1: Set up your design
Open Cricut Design Space on your computer and create a new project. Use the Text tool to add the desired letter or image to your project. You can also import designs from other sources if you prefer.
Step 2: Print your design
Connect your compatible printer to your computer and select the Print Then Cut option in Design Space. Make sure you have waterproof or water-resistant sticker paper loaded into your printer.
Step 3: Set custom material settings
In Design Space, navigate to the “Custom Material” settings. Choose the appropriate settings for your waterproof sticker paper, such as the appropriate pressure and blade depth. This will ensure a clean cut on your stickers.
Step 4: Stick it to the table
Place your waterproof sticker paper onto a flat surface, such as a table or cutting mat. Smooth out any wrinkles or bubbles to ensure a smooth printing surface.
Step 5: Print and cut
Press the “Go” button in Design Space to start the Print Then Cut process. Design Space will send the print job to your printer and then prompt you to load the printed sticker paper into your Cricut machine. Follow the on-screen instructions to complete the cutting process.
Step 6: Enjoy your waterproof stickers!
Once your Cricut machine has finished cutting, carefully remove your waterproof stickers from the cutting mat. These stickers are now resistant to water and can be used on a variety of surfaces without worry.
Step 7: Share your creations with us!
We would love to see what you create with your waterproof stickers. Share your designs and projects with us on social media using the hashtags #waterproofstickers and #cricutcreations.
That’s it! With these Print Then Cut updates in Cricut Design Space, you can easily create custom waterproof stickers that will last. So get creative and start making your own waterproof stickers today!
Step 7: Stick and Enjoy
Once you have printed and sealed your waterproof stickers with the Cricut machine, it’s time to stick them on! Make sure you have a clean and dry surface to apply the stickers to. You can use a printable sticker paper for this step, which you can easily find online or at your local craft store.
Open up your Cricut Design Space software and select the custom design that you want to print. Load the sticker paper into your printer and make sure to set the printer settings according to the instructions provided in Step 6.
After printing, use the Cricut machine to cut out the stickers. Follow the tutorial provided by Cricut for cutting the decals precisely. Once the stickers are cut, you can peel them off the sticker paper and stick them to your desired surface.
Remember, these stickers are waterproof and water-resistant, so you don’t have to worry about them getting damaged if they come in contact with water. This makes them great for outdoor use, like for labeling water bottles or decorative items that might be exposed to water.
Stick your waterproof stickers with care, ensuring that they adhere well to the surface. Press them firmly to make sure they stay in place. You can use a table or any hard object to help you with this process.
Now that you know how to make waterproof stickers with your Cricut machine, you can create custom designs that are not only eye-catching but also long-lasting. Stick your stickers with confidence, knowing that they will stay intact even if exposed to water.
Enjoy your newly created waterproof stickers and make sure to check back for more updates and content on our blog!


