If you’re wondering how to insert a signature in Outlook, you’re in the right place. Having a signature at the bottom of your emails can add a professional touch and make it easier for recipients to contact you.
To insert a signature in Outlook, follow these steps:
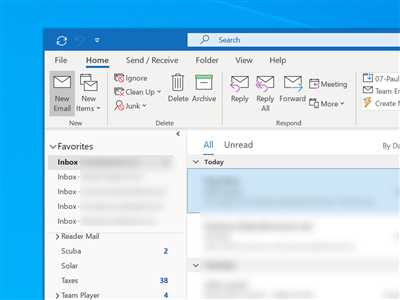
- Open Outlook and click on the “File” menu.
- Click on “Options” and then select “Mail” from the left-hand menu.
- Under the “Compose messages” section, click on “Signatures”.
- In the “Signatures and Stationery” window, click on the “New” button to create a new signature.
- Type a name for your signature and click “OK”.
- In the “Edit Signature” text box, type the details you want to include in your signature, such as your name, email address, phone number, and company logo. You can also paste an image or type a specific message.
- If you want to include your signature in every outgoing email, select the “Default signature” option and choose the signature you’ve created in the drop-down menu.
- Click “OK” to save your changes.
Now, every time you compose a new email or reply to a message, Outlook will automatically insert your signature at the bottom. You can resize or make any changes to your signature by going back to the “Signatures” section in the Outlook preferences. Keep in mind that these instructions may vary depending on the version of Outlook you’re using and the specific email server your organization is using.
So, now you know how to add and create a signature in Outlook. Whether you’re using Outlook on a Windows PC or a Mac, these steps should help you set up your signature in no time. Happy emailing!
Create and add an email signature in Outlook Web App
If you’re using Outlook Web App to send and manage your emails, you can easily create and add an email signature to all of your outgoing messages. A signature is a block of text that is automatically inserted at the bottom of every email you send, including replies and forwards.
Here’s how you can create and add an email signature in Outlook Web App:
- Open Outlook Web App in your preferred web browser and sign in with your Microsoft account.
- Click on the gear icon in the top-right corner of the page to open the Options menu.
- Under the Mail section, click on the “Signature” option.
- In the Signature section, click on the “+ Create New” button.
- Type a name for your signature in the “Untitled Signature” field. This name is for your reference only.
- Enter the details you want to include in your signature, such as your name, job title, company name, contact information, or any other relevant information. You can also insert a logo or resize the text and images in your signature.
- When you’re done, click on the “Save” button to save your newly created signature.
- Now, every time you compose a new email or reply to a message, your signature will be automatically added at the bottom.
It’s important to note that the email signature you create in Outlook Web App will only be applied when you send emails from the web app. If you also use Outlook on your desktop or mobile device, you’ll need to set up separate signatures for those platforms.
By following these steps, you can easily create and add an email signature in Outlook Web App. Having a professional and consistent email signature is a great way to make your emails look more polished and convey important information about yourself or your organization.
Keep in mind that every organization or company may have specific preferences or provided signatures, so make sure to follow any guidelines or instructions provided by your IT department or email server administrator.
How to set up your Outlook email signature on desktop
If you’re using Microsoft Outlook on your desktop, you can easily set up an email signature to include details about yourself or your organization. Having a personalized email signature can make your messages look more professional and provide important information to recipients.
Here’s how you can create and insert a signature in Outlook:
- Open Outlook on your desktop and click on the “File” option in the menu at the top.
- Under “Options,” select “Mail” from the left-hand side panel.
- In the “Compose messages” section, click on the “Signatures” button.
- A new window titled “Signatures and Stationery” will open. In this window, you can create and manage your signatures.
- Click on the “New” button to create a new signature.
- Type in a name for your signature (e.g., “Work Signature”) and click “OK”.
- In the “Edit signature” section, you can enter the details you want to include in your signature, such as your name, email, phone number, company name, and logo.
- If you have already created a signature elsewhere, you can copy and paste it into the “Edit signature” section.
- Make any necessary changes to the font, size, or style of your signature using the provided options.
- If you want to include your signature in every outgoing email, select it under “Choose default signature” for both new messages and replies/forwards.
- Click “OK” to save your changes and exit the window.
Now, whenever you compose a new email or reply to a message, your signature will automatically be included at the bottom of the email. You can also manually add or remove the signature while composing the email if you prefer.
Keep in mind that this process may vary slightly if you are using Outlook on a Mac or the web browser version of Outlook. However, the general steps provided here should be applicable to most versions of Outlook.
Setting up an email signature can not only save you time by automatically adding your details to your emails but also enhance the professionalism of your communication. Take advantage of this feature in Outlook to make a lasting impression!
How to make a signature on Outlook for desktop Mac
If you’re using Outlook for desktop on your Mac, you can easily create and add a signature to your email messages. A signature is a personalized block of text or an image that can be automatically added to the bottom of every email you send. It’s a great way to include your name, contact details, organization logo, or any other information you want to include in your email.
Here’s a step-by-step guide on how to create and insert a signature in Outlook for desktop Mac:
- Open the Outlook app on your Mac and go to the “Preferences” menu.
- Click on “Signatures” located under the “Email” section.
- In the “Signatures” preferences, you’ll see a list of signatures that you have already created. If you haven’t created any signatures yet, it will show an “Untitled” signature.
- To create a new signature, click on the “+” button at the bottom of the signature list.
- In the “Untitled” signature, enter the details of your signature, such as your name, organization/company name, contact details, and any other information you want to include.
- You can also resize and format the text of your signature using the options provided.
- If you have a specific signature that you want to use for new messages, select it from the “New messages” drop-down menu.
- If you want to use a different signature for replies and forwarded messages, select it from the “Replies/forwards” drop-down menu.
- Once you’ve made all the changes to your signature, click on the “OK” button to save the changes.
Now, every time you compose a new email or reply to a message, your created signature will automatically be inserted at the bottom of the email. If you prefer to manually add a signature to your emails, you can do so by selecting the signature from the “Signature” menu while composing a message.
It’s important to note that the steps provided above are for Outlook for desktop on Mac. If you’re using Outlook on the web or a different email client, the steps may vary.
By following these steps, you can easily set up and insert a signature in Outlook for desktop Mac, adding a professional touch to your email messages and keeping your company’s or organization’s branding consistent.
Copy and Paste
If you want to include a signature in your emails using Microsoft Outlook, you have the option to copy and paste it from a source or create a new signature. This section will provide details on how to copy and paste a signature into Outlook.
To begin, open the desktop app of Microsoft Outlook on your Mac or PC. Then, click on the “File” menu at the top left corner of the screen and select “Options” from the drop-down menu.
In the Options window, click on the “Mail” tab on the left side. Under the “Compose messages” section, you will find the “Signatures…” button. Click on it.
In the Signatures window, you can see a list of all the signatures you have created for your Outlook account. Here, you can choose to create a new signature or edit an existing one. To copy and paste a signature, select the one you want to use and click on the “Copy” button provided on the right side of the window.
Now, open a web browser and go to the Outlook web app. Sign in using your email and password when prompted. Once you’re in, click on the “Settings” gear icon at the top right corner and select “Mail” from the drop-down menu.
In the Mail options, go to the “Compose and reply” section and click on “Email signature”. Here, you can paste the signature you copied from Microsoft Outlook by simply using the “Paste” option or by pressing “Ctrl+V” or “Command+V” on your keyboard.
If you want the signature to automatically appear in every outgoing email, make sure the “Automatically include my signature on new messages I compose” option is checked. Additionally, if you want the signature to appear in replies and forwards, check the corresponding boxes provided.
Once you have pasted the signature and made the necessary changes, scroll down to the bottom of the page and click on the “Save” button to save the changes.
Now, whenever you create a new email or reply to a message using the Outlook web app, your signature will be included automatically.
It’s important to note that if you want to have a specific signature for emails sent from the Outlook desktop app and a different one for the web app, you’ll need to create and set up separate signatures in each platform.
Copy and paste is a convenient way to set up a signature in Outlook, whether you want to include a logo, your company details, or any other specific information. Follow the steps provided above to create and insert a signature using the copy and paste method.
How to Add a Signature in Outlook for Mac
Signatures are a great way to add a professional touch to your emails, whether you’re using Outlook for Mac for personal or business purposes. Adding a signature allows you to include important details about yourself or your company, such as your name, contact information, and organization logo.
Here’s how you can add a signature in Outlook for Mac:
- Open Outlook on your Mac. If you haven’t already created a signature, go to the “Preferences” menu and click on “Signatures”.
- In the Signatures window, click the plus icon to create a new signature. You can choose to manually enter your signature details or copy and paste them from another source.
- If you want to include an organization logo in your signature, you can either copy and paste it into the signature field or click the provided “Insert Picture” option and browse for the logo on your computer.
- Make any necessary changes to the signature, such as resizing the logo or adding additional contact information. You can also choose whether you want to use this signature for all emails or only for specific accounts.
- Once you’ve made all the desired changes, click “OK” to save your signature.
Now, every time you compose a new email or reply to a message in Outlook for Mac, your signature will automatically be inserted at the bottom. It’s a great way to keep your emails consistent and add a professional touch.
Note that if you have multiple email accounts set up in Outlook for Mac, you can choose a specific signature for each account. Just go to the “Signatures” section in the Preferences menu and select the account from the dropdown menu.
By following these steps, you can easily add a signature in Outlook for Mac and ensure your emails are professional, visually appealing, and provide the necessary contact information or company details. So go ahead and sign your emails with confidence!
Sources
When it comes to inserting a signature in Outlook, there are several sources you can refer to for the necessary information and instructions. Here are some of the key sources:
- Microsoft Support: The official Microsoft support website is always a reliable source for guidance on Outlook-related topics. It provides step-by-step instructions on how to insert a signature in both the desktop app and the web version of Outlook. You can find detailed information on manually creating and making changes to your signature, including how to include images and logos.
- Outlook Help Center: Within the Outlook application, there is a Help Center that offers useful information and tips. To access it, open Outlook and click on the question mark icon located in the top-right menu. From the dropdown menu, select “Help” to open the Help Center. Type in your query or search for “signature” to find articles and guides related to creating and managing signatures in Outlook.
- Your Organization’s IT Department: If you’re using Outlook for work emails, your organization’s IT department may have specific guidelines or restrictions regarding email signatures. They can provide you with the necessary details, including any standard formatting or branding requirements.
- Online Tutorials and Guides: A quick web search will yield numerous tutorials and guides on inserting signatures in Outlook. Many websites and blogs provide step-by-step instructions, screenshots, and even video tutorials to help you set up your signature effectively. However, be cautious and ensure you are following reliable sources.
- Email Preferences and Options: Within the Outlook application or web interface, you can find options and settings related to email signatures. Open the settings or preferences menu and navigate to the “Mail” or “Email” section. Look for an option to set up your signature and follow the provided instructions.
- Mac or Windows Support: Depending on your operating system, there may be differences in the steps for inserting a signature in Outlook. If you’re using Outlook on a Mac, consult the official Apple support website or the Microsoft Office support page for Mac. For Windows users, refer to the Microsoft Support website or the Outlook Help Center for Windows-specific instructions.
With these sources at your disposal, you’ll have all the information you need to insert a signature in Outlook. Make sure to follow the instructions carefully and customize your signature to reflect your name, job title, and any additional information you want to include. Remember to resize any images or logos to maintain a professional appearance, and set up different signatures for specific purposes like outgoing emails, replies, or forwarded messages. Whether you want to manually create your signature or use an automated option, these sources will guide you through the process.