

If you’re a maker in 2023, you know how important it is to use the best materials for your projects. When it comes to creating labels, Cricut is the go-to device for many creators. With its open design and user-friendly interface, Cricut makes it easy to design and cut labels for any kind of organizer, travel bags, or boxes.
But what kind of material should you use for your labels? Well, Cricut has tested various materials and found that the most popular and reliable option is heat transfer vinyl. This material not only allows you to create durable labels, but it also gives them a professional and stylish look.
With Cricut, you have the freedom to design your labels using their free software. You can choose from a wide range of fonts, graphics, and shapes to create the perfect label for your needs. And if you’re not the creative type, don’t worry! Cricut’s blog is filled with tons of inspiration and tutorials to help you learn and improve your label-making skills.
But what if you don’t have a Cricut machine? No problem! You can also use your Brother printer to print labels. Just make sure to use the right kind of material and follow the instructions provided by the manufacturer.
If you thought making labels was a hassle, think again. Cricut has revolutionized the way we create labels, making it easier and more enjoyable than ever. So why wait? Get your Cricut machine or start printing labels with your Brother printer and organize your life like a pro.
Leave a comment below and let us know how you use labels in your everyday life. Are you a fan of Cricut or do you prefer another brand? We’d love to hear your thoughts!
Author: Debbie Wolfe
The Best Label Makers Tested in 2023
Are you tired of misplacing items or struggling to find things when you need them? With the best label makers tested in 2023, you can say goodbye to the chaos and hello to organization! These devices are designed to make your life easier, helping you label boxes, materials, and more with ease.
One popular label maker is the Cricut. With the Cricut label maker, you can easily create custom labels for your home, office, or travel needs. Whether you want to label boxes for moving, create personalized travel tags, or organize your kitchen, the Cricut has got you covered.
If you’re looking for a label maker that offers versatility, then the Brother label maker is a great choice. This device allows you to print labels of various sizes and materials, giving you the freedom to choose what works best for your needs. Whether you need heat-resistant labels, durable labels for outdoor use, or labels for your pantry, the Brother label maker can do it all.
When it comes to label makers, testing is crucial to ensure their effectiveness and ease of use. That’s why we went above and beyond to test various label makers in 2023. We wanted to make sure that the label makers we recommended were reliable and user-friendly.
Debbie Wolfe, author of the popular blog “The Organized Page,” was one of the experts who tested these devices. She shared her thoughts on each label maker, commenting on their overall performance and ease of use. After rigorous testing, the Cricut and Brother label makers came out on top as the best label makers in 2023.
If you’re wondering which label maker you should buy, look no further. The Cricut and Brother label makers offer the best features, durability, and versatility. Whether you need labels for your home, office, or travel, these label makers are sure to meet your needs.
Don’t wait any longer, start organizing your life today! Leave the chaos behind and embrace the convenience of labeled boxes, materials, and more. With the best label makers tested in 2023, staying organized has never been easier.
What do you think of the label makers mentioned in this article? Have you used any of them before? Leave a comment below and let us know your thoughts!
What Kind of Material Should You Use With a Cricut
When it comes to using a Cricut machine to create labels, choosing the right material is essential. The material you select can greatly impact the accuracy of your cuts, the durability of your labels, and the overall quality of your projects. In this section, we will explore the different materials that are compatible with the Cricut machine and which ones are best suited for label-making.
1. Vinyl: Vinyl is one of the most popular materials to use with a Cricut machine. It is available in a variety of colors, finishes, and thicknesses, making it versatile for different label-making needs. Vinyl labels are durable, waterproof, and can be easily applied to various surfaces such as glass, plastic, and metal.
2. Cardstock: Cardstock is another material commonly used with a Cricut machine. It is a thicker and sturdier paper that comes in a wide range of colors and textures. Cardstock labels are ideal for projects that require a more substantial and professional-looking finish. They work well for organizing files, boxes, and other items.
3. Heat Transfer Vinyl: If you’re looking to create labels for fabrics or apparel, heat transfer vinyl is the material for you. This type of vinyl is designed to be applied to fabrics using heat, making it perfect for personalizing clothing, bags, and other textile items. Heat transfer vinyl labels are long-lasting and can withstand multiple washes without fading or peeling.
4. Adhesive Foil: Adhesive foil is a shiny and metallic material that adds a glamorous touch to any label. It comes in various metallic finishes like gold, silver, and rose gold, making it perfect for creating labels that stand out. Adhesive foil labels are commonly used for weddings, parties, and special events.
5. Printable Sticker Paper: If you prefer to print your labels instead of cutting them, printable sticker paper is an excellent option. With a compatible printer and the right Cricut files, you can easily print and cut custom labels. Printable sticker paper is available in matte or glossy finishes, giving you the flexibility to achieve the look you desire.
In conclusion, when using a Cricut machine to create labels, you have a wide selection of materials to choose from. It’s essential to consider the specific requirements of your project and select the material that best suits your needs. Whether it’s vinyl, cardstock, heat transfer vinyl, adhesive foil, or printable sticker paper, the Cricut can help bring your label-making ideas to life with precision and creativity.
Author
Debbie Wolfe is the author of the popular blog “Cricut how to make labels”. As a thought leader in the Cricut community, she shares her expertise on various topics related to crafting and DIY projects using Cricut machines.
Debbie’s material of choice for making labels is high-quality vinyl. She believes that it provides the best results in terms of durability and aesthetics. When it comes to printing the labels, she recommends using a Cricut printer, which is specifically designed to work seamlessly with Cricut machines.
What sets Debbie’s approach apart is her dedication to providing free resources for her readers. She believes that everyone should have access to the knowledge needed to create beautiful labels with their Cricut. On her blog, she offers step-by-step tutorials, design files, and tips on how to personalize labels for different purposes.
In her experience, the most popular kind of labels people are making with their Cricut machines are for organizers, such as storage boxes and travel items. However, she encourages her readers to think outside the box and explore the endless possibilities of Cricut-made labels.
In open conversations on her blog, Debbie answers questions and provides valuable insights to her readers. She encourages them to share their own projects and engage in discussions about their Cricut experiences. This creates a sense of community and allows everyone to learn from each other.
Debbie has tested various Cricut machines, including the Cricut Maker and different Cricut Explore devices. She provides honest reviews and comparisons, helping her readers make informed decisions about which Cricut machine is best for their needs.
If you’re new to Cricut and want to start making labels, Debbie’s blog is the perfect resource to get you started. Her easy-to-follow tutorials and detailed explanations will guide you through the process and help you achieve professional-looking results.
So, if you’re ready to cut, print, and label your way to an organized and personalized space, don’t leave without checking out Debbie’s blog “Cricut how to make labels”. It’s the go-to place for all things Cricut and labels.
Leave a reply or comment on her blog to let her know how her tips and tutorials have helped you in your labeling journey. Debbie loves to hear from her readers and is always eager to assist with any questions or concerns.
“Kitchen organization, travel essentials, and more – with Cricut, labeling has never been easier!” – Debbie Wolfe, author of “Cricut how to make labels”
1 thought on “Kitchen Labels How To Print And Cut On Cricut”
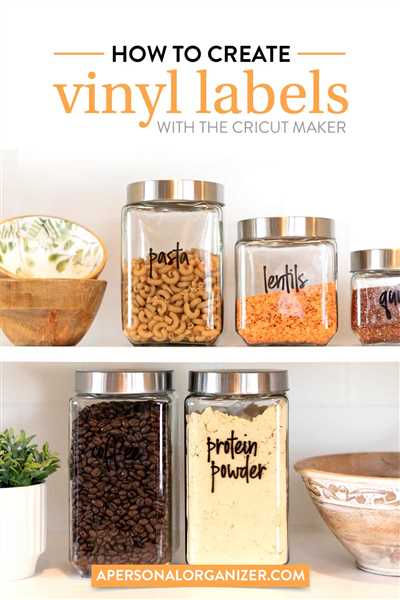
When it comes to organizing your kitchen, labels are your best friend. With the Cricut Maker, you can easily create beautiful and professional-looking labels for all of your kitchen products. Whether you need labels for your spice jars, food containers, or pantry shelves, the Cricut Maker can help you achieve a clean and organized space.
First, gather all of the supplies you’ll need for this project. You’ll need a Cricut Maker machine, Cricut Design Space software, a compatible printer, Cricut printable vinyl or sticker paper, and of course, your favorite kitchen labels design files.
Next, open the Cricut Design Space software on your computer. If you don’t have an account yet, you can easily create one for free. Once you’re in, select the “New Project” option and choose the Cricut Maker as your cutting machine. This will ensure that your label designs are compatible with your device.
Now, you can start creating your labels. Design your labels using the tools provided in the software. You can choose from a variety of fonts and images to make your labels unique and personalized. Once you’re happy with your design, click on the “Make It” button to proceed to the cutting step.
Before cutting, make sure to adjust your settings according to the kind of material you’re using. For printable vinyl or sticker paper, select the appropriate material setting in the software. Load your printer with the printable vinyl or sticker paper, and print your label designs using a compatible printer.
Once your designs are printed, place the printed sheet on a Cricut cutting mat and load it into your Cricut Maker. Follow the instructions on the software to calibrate the cutting settings, then click on the “Go” button to start the cutting process.
While the Cricut Maker is cutting your labels, you can prepare the surfaces where you’ll be applying the labels. Make sure they are clean and free from any dirt or debris. Once the cutting is complete, carefully remove the labels from the cutting mat and apply them to your desired surfaces.
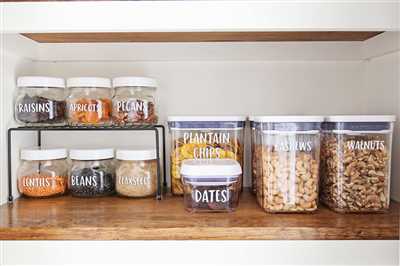
Now you have beautifully printed and cut labels for your kitchen! You can use them on jars, boxes, pantry shelves, or any other items that need to be organized. The Cricut Maker allows you to create labels that are not only functional, but also visually appealing. Say goodbye to the clutter and hello to an organized kitchen!
In conclusion, learning how to print and cut kitchen labels on the Cricut Maker is a game-changer for any home organizer. With its easy-to-use software, compatibility with a variety of printers, and precise cutting capabilities, the Cricut Maker is the go-to device when it comes to creating professional labels for your kitchen. Try it out for yourself and experience the joy of a clutter-free and beautifully organized kitchen.
Comment below and let us know what you think of this tutorial! Have you tried making kitchen labels with the Cricut Maker? We’d love to hear your thoughts and see your creations. Share your experience, tips, or any questions you may have. Happy labeling!
Leave a comment Cancel reply
If you’ve been keeping up with the latest crafting trends, you’ve probably heard of Cricut. Cricut is a popular brand of cutting machines that allows you to create beautiful crafts and personalized items with ease. One of the most popular uses for a Cricut machine is to make labels. Whether you need labels for your kitchen pantry, office organization, or travel boxes, a Cricut maker can help you create the perfect labels.
When it comes to making labels with a Cricut, the possibilities are endless. You can choose from a wide variety of materials, including vinyl, cardstock, and even heat transfer material. The Cricut machine cuts out your design precisely and cleanly, giving you professional-looking labels every time.
If you’re new to using a Cricut machine, don’t worry! Cricut has an easy-to-use software called Cricut Design Space that walks you through the entire process. You can either choose from a wide selection of pre-designed label templates or create your own custom labels. The software even has an option to import and open SVG files, so you can use your own designs.
One of the best things about making labels with a Cricut is that it’s completely free to use. Unlike other label makers or printer devices, Cricut doesn’t require you to purchase any additional materials or subscribe to a monthly plan. Once you have a Cricut machine, you have unlimited access to their software and the ability to create as many labels as you want.
So, what are you waiting for? Get started with Cricut and learn how to make labels that will make your organizing dreams come true. Leave a comment below and let us know your thoughts on this amazing crafting tool. We’d love to hear from you!
Author: Debbie Wolfe
Published: January 1, 2023