
If you’re a web developer, chances are you’ve had a case where you needed to build a website theme from scratch. Whether it’s for a personal blog, a business website, or an e-commerce store, creating your own website themes can give you the power to make your website truly unique. In this tutorial, we will learn how to create website themes using HTML and CSS.
The first step in building a website theme is to create a folder structure. This structure will contain all the files and folders that make up your theme. The main folder, usually called the theme folder, will contain subfolders for different parts of your website, such as the header, footer, sidebar, and content. Inside each of these subfolders, you will store the corresponding HTML and CSS files.
The main file of your theme is usually called the index.php file. This file serves as the entry point for your website and will contain the HTML template for your website’s main page. Inside this file, you will use PHP functions and tags to pull in the necessary information and display it on the page. It’s important to note that your theme can also contain additional PHP files and folders for more complex functionality.
When creating your website theme, it’s a good idea to start with a basic template. Many web developers use existing templates as a starting point and customize them to fit their needs. There are several websites where you can find free website templates, or you can purchase them from various online marketplaces. Once you have a template, you can use it as a foundation and modify it to match your vision.
In order to preview and activate your theme, you will need to follow a few steps. First, you need to enter your theme’s manifest file. This file contains information about your theme, such as its name, version, and author. Next, you will need to add a preview image for your theme. This image will be displayed when users preview your theme before activating it. Finally, you will need to create a functions.php file, which will contain any custom functions or code specific to your theme.
Building your own website theme from scratch may seem like a daunting task, but it doesn’t have to be. By following a series of steps and learning how to use HTML and CSS effectively, you can create a theme that is tailored to your needs. Whether you’re a beginner or an experienced developer, creating your own website themes can be a rewarding and enjoyable process.
In conclusion, creating website themes is a vital part of web development. It allows developers to build websites using their own unique style and design. By taking the time to learn how to create website themes, you can strengthen your development skills and create beautiful websites that stand out in the crowded online world.
- Tutorial Building your first website using a free website template part 2
- Prerequisites
- Create a Dataverse table to use in the web template component
- Create web template with manifest
- Add web template component to web page
- What are the main steps to create a WordPress theme
- Create a folder to store the files you will add
- Files
- Folders
- Create the style.css and index.php files
- How to Create a WordPress Theme FAQ
- Is It Hard to Create Your Own WordPress Theme
- Prerequisites
- Creating the Theme Files
- Building the Theme
- Preview and Activate Your Theme
- FAQ and Feedback
- Can You Make Money From WordPress Themes
Tutorial Building your first website using a free website template part 2
Now that you have chosen a free website template for your business or store, it’s time to start building your website. In this tutorial, we will walk you through the process of customizing the template to fit your specific needs.
The first thing you need to do is open the template files in a code editor or a web development tool like Visual Studio Code. Once you have the template files open, you will see several files, including a file called index.php and a folder named “css”.
The index.php file is the main file of your website and it contains the HTML structure of your web pages. The “css” folder contains a file called style.css, which is used to apply styles to your website. You can also find other files and folders that might contain additional information or functionality depending on the template you chose.
Before we start customizing the template, let’s take a closer look at the index.php file. This file is responsible for displaying the content of your web pages. It consists of several parts, including a header section, a main content section, and a footer section.
Inside the index.php file, you will find HTML code that represents each part of your web page. You can modify this code to change the structure and layout of your website. For example, if you want to add a new section to your homepage, you can add a new HTML element inside the main content section.
In addition to the index.php file, you may find other page-specific files inside the template folder. These files are usually named after the specific page they represent, such as “about.php” or “contact.php”. You can use these files to create additional pages for your website.
Now, let’s move on to customizing the style.css file. This file contains the CSS code that determines the visual style of your website. You can modify the CSS rules in this file to change the colors, fonts, and layout of your website.
If you are familiar with CSS, you can make changes to the existing code. However, if you are not comfortable with CSS, you can use a visual CSS editor or a theme customizer that is provided by some web development tools or content management systems like WordPress.
Once you have made the necessary changes to the template files, you can preview your website in a web browser. To do this, you can open the index.php file in your browser or set up a local web server to host your website.
If you are happy with the changes you have made, you can proceed to the next step, which is to upload your website to a web server. This will make your website accessible to the public on the internet.
In this tutorial, we have covered the basics of customizing a free website template to build your first website. Remember, website themes can serve as a starting point for your own website design, and you can always tweak and modify them to fit your needs in the future.
If you have any questions or need further assistance, don’t hesitate to ask for help in web development communities or forums. Developers are usually happy to provide guidance and share their suggestions based on their own experiences.
Now that you know how to build your first website using a free website template, you can unleash the power of web development and create your own online presence without spending a lot of time and money from scratch.
Prerequisites

Before creating website themes, there are a few prerequisites that you need to have in place. These prerequisites will ensure that you have all the necessary tools and knowledge needed to build a theme for your website.
- A text editor: You will need a text editor to create and edit the HTML, CSS, and JavaScript files that make up your website theme. Popular text editors include Visual Studio Code, Sublime Text, and Notepad++.
- HTML and CSS knowledge: Understanding HTML and CSS is essential for creating website themes. You should know how to structure your HTML markup and apply styles using CSS.
- Knowledge of PHP: Since many themes use PHP to add dynamic functionality, it is important to have a basic understanding of PHP. This will allow you to create functions and templates that can be used in your theme.
- Image editing software: You may need to edit images to use in your theme. Having software like Adobe Photoshop or GIMP can be useful for resizing, cropping, and optimizing images.
- A web server: In order to preview your theme, you will need a web server to host your files. You can set up a local server using tools like XAMPP or MAMP.
- A browser: Having access to a browser like Google Chrome or Mozilla Firefox is essential for testing your theme and ensuring that it displays correctly across different browsers.
By having these prerequisites in place, you will be well-equipped to start creating your own website themes. Make sure to familiarize yourself with these tools and technologies before diving into the theme-building process.
Create a Dataverse table to use in the web template component
In this tutorial, we will learn how to create a table using Dataverse that can be used in the web template component of your website theme. Dataverse is a free and powerful tool that allows you to store and manage data.
The first step is to create a folder in your workspace where you will store the Dataverse files. You can name this folder anything you like, but it is recommended to use a descriptive name that relates to the theme you are building.
Once you have created the folder, navigate to it and create a new file called “manifest.json”. This file will contain information about the table you are creating.
In the manifest.json file, enter the following content:
“table”: “your_table_name”,
“page”: “/path/to/your/page.html”,
“fields”: [
{
“name”: “field1”,
“type”: “text”
},
{
“name”: “field2”,
“type”: “text”
},
{
“name”: “field3”,
“type”: “number”
}
]
Replace “your_table_name” with the name you want to give to your table. The “page” field should be replaced with the path to the page where you want to use the table. The “fields” array should contain the names and types of the fields you want to include in the table. In this example, we have three fields: “field1” and “field2” are text fields, while “field3” is a number field.
Once you have entered this information, save the manifest.json file.
Now, you need to create a file called “style.css” in the same folder. This file will contain the CSS styles that will be applied to the table.
In the style.css file, you can add the CSS styles that you want to apply to the table. For example:
table {
width: 100%;
border-collapse: collapse;
}
th, td {
border: 1px solid #ddd;
padding: 8px;
}
th {
background-color: #f2f2f2;
}
These are just suggestions, and you can customize the styles based on your own design preferences.
Now that you have created the manifest.json and style.css files, you can activate the Dataverse table in the web template component of your website theme. To do this, navigate to the web template page where you want to use the table and open the “theme.liquid” file.
In the “theme.liquid” file, add the following code:
{% dataverse_table “your_table_name” %}
Replace “your_table_name” with the name you gave to your table in the manifest.json file.
Save the changes to the “theme.liquid” file.
Now, you can use the Dataverse table in your web template component. This table will display the data stored in the table you created, and the styles defined in the style.css file will be applied to it.
In this tutorial, we have learned how to create a Dataverse table to use in the web template component of your website theme. Following these steps, you can create and use your own tables in your website themes, giving you more control and flexibility in displaying data on your pages.
Create web template with manifest
If you want to create a web template from scratch or open an existing one, you can do it with a manifest file. A manifest file is a JSON file that is used to define the template and its components.
Creating a web template with a manifest file is easy. The first step is to create a new folder for your template. Inside this folder, you will need to create a manifest.json file. This file will be used to store all the information about your theme and its components.
In this manifest file, you will need to specify the name, description, version, and other details about your template. You can also specify the components that your template will include. This can be a single HTML file or a set of HTML files stored in separate folders. You can also include CSS and JavaScript files to customize the look and behavior of your template.
Once you have created the manifest file and specified all the necessary information, you can start building the template itself. This can be done using HTML, CSS, and JavaScript. You can also use a visual editor to create the template if you prefer.
After you have built your template, you can activate it in a web design tool or CMS. This will make it available for use in creating new pages or posts on your website. Users will be able to select your template from a list of available templates and use it to create their own pages.
Feedback from users is valuable in improving your template. You can ask for feedback in a blog post or create a FAQ section where users can ask questions about your template. You can also provide a contact form or email address where users can send their suggestions or report any issues they encounter.
Before you can use your template, there are a few prerequisites you need to take into account. Make sure you have the necessary tools and files to build and activate your template. You may also need to provide some additional information, such as the type of content your template is designed for or any specific tables or data you want to include.
In summary, creating a web template with a manifest file is a great way to build a customizable and reusable theme. It allows developers to follow a series of steps to create a theme that can be used to build multiple websites. The manifest file provides a structured way to define the components of your template and include additional resources. By following this tutorial and taking advantage of the tools and suggestions provided, you can create a web template that will be of great value to developers and users alike.
Sources:
– https://wordpress.org/gutenberg/handbook/templates/
– https://www.smashingmagazine.com/2018/07/web-designers-guide-webpack/
Add web template component to web page
When building a website theme, one of the first things developers need to do is add a web template component to the web page. This component is what will give the theme its structure and layout.
The web template component consists of several parts. The first part is the index.php file, which will contain the main structure of the web page. This file is usually stored in the root folder of the theme.
Inside the index.php file, developers can add the necessary HTML code to build the web page. This includes creating headers, footers, navigation menus, and any other elements that are needed for the design of the site.
One common case of using the web template component is to create a blog page. In this case, the index.php file will contain a loop that fetches and displays the blog posts. It will also make use of a separate file called style.css, which is used to define the visual style of the blog page.
To add a web template component to a web page, developers can follow a tutorial or use a template that has already been created. There are several resources available online that offer pre-built themes for popular content management systems like WordPress. These themes usually come with all the necessary files and folders, and developers just need to activate them in their WordPress dashboard.
If developers prefer to build a theme from scratch, they can take inspiration from existing themes or ask for suggestions and feedback from the web developer community. This can help them learn the best practices and techniques for building themes that are both visually appealing and functional.
It’s important to note that web template components are not limited to just the index.php file. Depending on the theme’s requirements, developers may need to create additional template files for different types of pages or post formats.
For example, a blog theme may have a separate template file for displaying a single blog post, a template for the blog archive page, and a template for the blog search results page. These template files can be stored in a separate folder inside the theme directory.
In addition to the template files, developers will also need to create a style.css file, which contains the CSS code that defines the visual style of the web page. This file is used to specify the fonts, colors, spacing, and other visual properties of the theme.
In conclusion, adding a web template component to a web page is an essential step in building a theme. Whether developers choose to use pre-built templates or create one from scratch, having a solid understanding of how web templates work and what prerequisites they require will ensure that the theme is well-designed and functional.
What are the main steps to create a WordPress theme
Creating a WordPress theme involves several steps and components that work together to provide a unique design for your website. Here are the main steps to create a WordPress theme:
- Create a folder: To begin, create a new folder with a meaningful name, such as “my-theme,” to store all the necessary theme files.
- Create a style.css file: Inside the theme folder, create a style.css file, which will contain the CSS styles used to design your website.
- Create an index.php file: The index.php file is the main template file that will be used to display the content of your website.
- Add content to your theme: Enter the necessary HTML content in the index.php file to create the structure of your web pages.
- Create a functions.php file: This file is used to add custom functions and features to your theme, such as menus, sidebars, or additional template parts.
- Add template files: Depending on the design of your website, you may need to create additional template files, such as header.php, footer.php, and sidebar.php.
- Activate your theme: Go to the WordPress admin panel, navigate to the “Appearance” section, and activate your newly created theme.
- Preview and customize your theme: Since your theme is now active, you can preview it and make any necessary changes using the WordPress customizer.
- Store theme options and settings: If your theme requires any specific options or settings, you can store them in a separate file or database table.
- Create a blog page template: If your theme will be used for a blog, create a separate template file for displaying the blog page.
- FAQ and tutorial pages: If you plan to offer an FAQ or tutorial section on your website, create template files to handle these specific pages.
- Use a native WordPress loop: To display dynamic content, use the WordPress loop construct to fetch and display the relevant data.
- Keep files organized: Ensure that your theme files are properly organized and follow the WordPress theme development best practices.
- Learn from available resources: There are several online tutorials, documentation, and communities dedicated to WordPress theme development. Make use of them to enhance your skills and knowledge.
- Test and debug your theme: Before launching your website, thoroughly test and debug your theme to ensure it works correctly and is free from any errors or issues.
- Prepare for future updates: Consider making your theme compatible with the latest WordPress version and implement best practices to make it easy to update in the future.
- Most important: Enjoy the process! Creating a WordPress theme can be a rewarding and creative experience. Have fun exploring different design possibilities and making your vision a reality.
Following these steps will help you create a functional and visually appealing WordPress theme that can cater to your business or personal needs. Take your time, explore different design options, and make the most out of the powerful features and customization options WordPress offers.
Create a folder to store the files you will add
When creating a new website theme, it’s important to have a dedicated folder to store all the files you will be adding. This helps to keep your files organized and makes it easier to manage your theme.
In the case of WordPress themes, the folder is typically stored inside the “wp-content/themes” directory. You can create a new folder with a name of your choice, based on the name of your theme. For example, if your theme is called “MyTheme”, you can create a folder called “mytheme” inside the “themes” folder.
Inside this folder, you will store all the files that make up your theme. This includes the main HTML templates, CSS stylesheets, JavaScript files, and any other assets such as images or fonts that may be used in your theme.
In addition to the main files, you may also want to create sub-folders to store specific types of files. For example, you can create a “templates” folder to store all the template files, a “css” folder to store the CSS stylesheets, and a “js” folder to store the JavaScript files.
If you are building your theme from scratch, you will need to create these folders manually. However, if you are using a theme builder or a WordPress theme development framework, these folders may be preset for you.
It’s also a good idea to create a manifest file in your theme folder. This file, usually named “manifest.json”, contains important information about your theme, such as its name, version, author, and a brief description. This information is used by WordPress to display the theme in the admin dashboard and can also be used by developers and users to learn more about your theme.
In summary, creating a dedicated folder to store your theme files is an important step in building your own website theme. This folder will contain all the necessary files and assets, organized into sub-folders for easy management. By following this step, you will be able to keep your theme organized and make it easier to maintain and update in the future.
Files
Creating a website theme involves working with several files and folders. In this part of the tutorial, you will learn about the files that are used to build a website theme from scratch.
The main file that controls the overall look and design of your website is called style.css. This file contains the CSS code that is responsible for the visual appearance of your website. It defines the styles for different elements such as headings, paragraphs, links, and more.
Another important file is index.php. This is the main template file of your theme. It is used to display the content of your website and is typically structured using HTML tags. Inside this file, you can add the necessary code to display data from your WordPress posts, pages, or custom post types.
There are also other files and folders that are commonly used in theme development. One such folder is called templates. It can contain multiple PHP files which are used to create different types of pages or components for your theme. These templates can be used to create pages like the home page, blog page, or any other variant you want to add to your theme.
Additionally, there is a file called functions.php. This file contains PHP code that can be used to extend the functionality of your theme. It allows you to add custom features, modify existing ones, and even interact with WordPress core functions.
Furthermore, there are two more important files: manifest.json and preview.png. The manifest.json file contains metadata about your theme, such as the name, version, and description. The preview.png file is a thumbnail image that is displayed when users preview or activate your theme in WordPress.
In the future, you may also need to create additional CSS or JavaScript files to add more styling or interactivity to your theme. These files can be stored in their own folders, such as css and js.
When creating your own theme, it is always a good idea to follow a file structure that makes sense to you. Organizing your files into separate folders and keeping everything clean and tidy will make it easier to navigate and maintain your theme in the long run.
Remember, the files mentioned here are just the main parts of a theme. Depending on your design and functional requirements, you may need to create additional files or folders to meet your specific needs.
If you don’t want to start from scratch, there are also free and paid theme templates available in various marketplaces and websites. These templates provide a starting point for your theme and can save you time and effort. Just make sure to customize them according to your own design and requirements.
In the next part of this series, we will take a closer look at the prerequisites for building a website theme from scratch. Stay tuned!
Folders
In order to create website themes, you will need to organize your files and assets into folders. These folders will contain different parts of your theme, such as the CSS styles, template files, and any additional assets you may need.
One important folder in your theme is called the style.css file. This file holds all the styling information for your theme and is used to define the look and feel of your website. All the CSS rules and declarations are stored in this file, and it is used to style the various components of your website.
In addition to the style.css file, you will also need a folder to store the main template files for your theme. This folder is typically called the templates folder and will contain the different page templates that you have created for your theme.
Another important folder to have in your theme is the content folder. This folder will contain all the content files for your website, such as blog posts, pages, and other types of content that you may have on your site.
There are several other folders that you can create in your theme, depending on your needs. For example, you may want to have a folder called assets, where you can store any additional assets, such as images or videos, that you may need for your theme.
In some cases, developers may also create a folder called data or tables to store additional data or tables that are used in the theme.
By organizing your files into folders, you can keep your theme files clean and easy to manage. It also makes it easier to navigate and find specific files when you need to make changes or updates to your theme.
In addition to the folders mentioned above, you may also want to create a preview folder. This folder can be used to store files that are used for previewing your theme, such as screenshots or demo content.
Overall, organizing your theme files into folders is an important step in the website theme creation process. It will make it easier for you to navigate and manage your files, and it will also make it easier for other developers to understand and use your theme in the future.
So, follow these steps to create folders for your website theme:
- Create a folder for your theme. Give it a unique and descriptive name.
- Inside your theme folder, create a folder called templates.
- Create a folder called content inside your theme folder.
- If needed, create additional folders for assets, data, or any other specific needs of your theme.
By following these simple steps, you can create an organized and structured folder system for your website theme. This will make it easier for you to manage your files, design your pages, and create a cohesive website design.
Remember, if you have any questions or need further guidance, there are plenty of resources available, such as tutorials, blogs, and FAQs, to help you along the way. Don’t hesitate to ask for feedback or suggestions from other developers who have experience in creating website themes.
Create the style.css and index.php files
In order to create a website theme, you will need to create two important files: style.css and index.php. These files are the main component parts of the theme and will define the design and functionality of your website.
First, create a folder on your workspace to store all the files related to your theme. You can name this folder based on the name of your theme or any other meaningful name. Since we will be using WordPress as our website platform in this tutorial, it’s a good idea to create a separate folder inside your WordPress themes folder to keep your theme organized.
Inside the theme folder, create a new file called style.css. This file will contain all the CSS code that defines the visual style of your website. You can start by adding some basic CSS styling to get started, and later on, as you progress in the theme development process, you can add more advanced styles and component-specific CSS code.
| File: style.css |
|---|
| /* Theme Name: Your Theme Name Description: A brief description of your theme Version: 1.0 Author: Your Name Author URI: Your website or portfolio URL */ |
In the style.css file, you need to add some specific information about your theme using the CSS comment syntax. This information includes the name, description, version, and author details of your theme. This information will be visible to the users and developers when they browse and install your theme.
Next, create a new file called index.php. This is the main file that will be used to display the content of your website pages. It is a PHP file because WordPress is a PHP-based platform. In this file, you will write the PHP code that will fetch and display the relevant content from your WordPress database, and also include any necessary template files and functions.
Here is a basic structure of the index.php file:
| File: index.php |
|---|
|
|
In the index.php file, we first include the header template using the get_header() function. The header template usually contains the HTML code for the header section of your website, such as the logo, navigation menu, or any other common elements that appear on every page.
After that, we have a
and the page content using Finally, we include the footer template using . The footer template includes the HTML code for the footer section of your website, such as copyright information, contact details, or any other common elements that appear on every page.
These are the basic steps to create the style.css and index.php files for your website theme. In future parts of this tutorial series, we will explore how to add more advanced styling, create custom templates and functions, and make use of the power of WordPress to create a fully functional and visually appealing website theme.
How to Create a WordPress Theme FAQ
If you’re a developer looking to create your own WordPress theme, this FAQ will help answer some of the most commonly asked questions and guide you through the necessary steps.
| Question | Answer |
|---|---|
| What is a WordPress theme? | A WordPress theme is a set of files that define the visual design and layout of your WordPress-powered website. It includes templates for displaying your content, stylesheets for styling the content, and other necessary files. |
| Where can I store my theme files? | Your theme files should be stored in the “wp-content/themes” folder of your WordPress installation. Each theme should have its own folder inside this directory. |
| How many files does a WordPress theme usually contain? | A WordPress theme can contain several files, but the main ones include the “style.css” file for the theme’s styles, the “index.php” file for the homepage, and templates for different types of content such as pages or posts. |
| How do I create my own theme? | To create your own theme, you can start with a basic structure and build upon it. You will need to add the necessary files and folders, and use HTML, CSS, and PHP to customize the design and functionality of your theme. |
| Can I use a free theme for my website? | Yes, you can use a free theme for your website. There are many free themes available in the WordPress theme directory that you can choose from and activate on your site. |
| What are the prerequisites for creating a WordPress theme? | To create a WordPress theme, you should have a basic understanding of HTML, CSS, and PHP. It’s also helpful to have knowledge of WordPress template tags and functions. |
| How long does it take to create a WordPress theme? | The time it takes to create a WordPress theme can vary depending on the complexity of the design and functionality you want to achieve. It can take anywhere from a few days to several weeks. |
| How do I preview my theme? | To preview your theme, you can go to the “Appearance” section in your WordPress dashboard and select your theme. This will show you how your theme will look on your website before activating it. |
By following this tutorial and learning the steps involved in creating a WordPress theme, you will be on your way to building your own theme and customizing the design and content of your website.
Is It Hard to Create Your Own WordPress Theme
Creating your own WordPress theme can seem like a daunting task, but it doesn’t have to be. With the right knowledge and a little bit of patience, you can build a custom theme for your website or blog. In this article, we will take a look at the main steps involved in creating a WordPress theme from scratch.
Prerequisites
Before you start building your theme, there are a few prerequisites that you should be aware of. First, you will need a basic understanding of HTML, CSS, and PHP. These are the core languages used to create WordPress themes. If you are new to web development, it may be helpful to take a tutorial or two to familiarize yourself with these languages.
Next, you will need to have a local WordPress installation set up on your computer. You can do this by downloading and installing the latest version of WordPress from the official website. This will allow you to test your theme as you build it without making any changes to your live website.
Creating the Theme Files
The first step in creating your own WordPress theme is to create the necessary files and folders. All WordPress themes have a specific structure that must be followed. The main folder for your theme should be named after your theme and placed inside the “Themes” folder of your WordPress installation.
| Folder | Type |
| Theme Folder | Main folder for your theme |
| style.css | CSS file that will contain the main styling for your theme |
| index.php | Main template file for your theme |
| header.php | Template file for the header section of your theme |
| footer.php | Template file for the footer section of your theme |
| sidebar.php | Template file for the sidebar section of your theme |
Building the Theme
Once you have created the necessary files and folders, you can start building your theme. The main part of your theme will be the index.php file, which will contain the HTML structure for your website.
You can use HTML tags and PHP functions to add dynamic content to your theme. For example, you can use the “get_header()” function to insert the header template, and the “get_footer()” function to insert the footer template.
In addition to the main template file, you can also create separate template files for different types of pages on your website, such as the home page, blog page, or contact page. These template files can be named according to the WordPress template hierarchy and placed inside your theme folder.
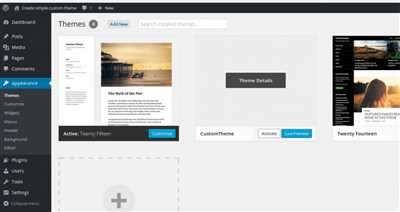
Preview and Activate Your Theme
Once you have finished building your theme, you can preview it by going to the “Appearance” section in your WordPress dashboard and selecting your theme from the list of available themes. This will give you a visual representation of how your theme will look on your website.
If you are happy with the preview, you can activate your theme and make it live on your website. Your custom theme will replace the default WordPress theme, giving your website a unique look and feel.
FAQ and Feedback
Creating your own WordPress theme can be a challenging but rewarding experience. If you have any questions or run into any issues, there are several resources available to help you. You can refer to the official WordPress documentation, join online forums, or ask for feedback from other developers.
Remember, practice makes perfect. The more themes you create, the better you will become. Start with simple designs and gradually add more complex features. With time and effort, you can create WordPress themes that are not only visually appealing but also functional and valuable for your business or personal website.
Can You Make Money From WordPress Themes
WordPress themes are files that define the style and layout of a WordPress website. They are created from scratch using HTML, CSS, and PHP to build the structure and design of the site. WordPress themes can be used to create long and visually appealing websites that allow businesses to showcase their products or services.
When it comes to making money from WordPress themes, there are a number of ways to do so. One option is to create and sell your own themes. This involves designing and developing unique themes that can be purchased by other WordPress users. There are marketplaces, such as ThemeForest, where you can sell your themes and potentially earn a good income.
Another way to make money from WordPress themes is to offer customization services. Many businesses and individuals who buy themes will need help modifying the design or functionality of the template to fit their specific needs. By offering your services to customize themes, you can earn money by providing valuable solutions and meeting the unique requirements of different clients.
In some cases, you can create free WordPress themes and make money from other sources, such as affiliate marketing or sponsored content. By providing a free theme, you can attract a large number of users who may be interested in related products or services. You can then monetize your website by promoting relevant products or including sponsored content within your theme.
In order to build and sell WordPress themes, there are some prerequisites and steps to follow. The main files and folders needed to create a theme are stored in the “wp-content/themes” directory of your WordPress installation. The main file of a theme is called “style.css” and it contains important information about the theme, such as its name, version, author, and style rules. In addition to this file, there are several other files and folders that can be used to customize different parts of the theme.
Inside the theme folder, you will find a file called “index.php” which is the main template file of your theme. This file is used to display the content of the website and it can be customized using PHP and WordPress functions. There are also other template files, such as “header.php” and “footer.php”, that can be used to build the header and footer sections of the website.
The “functions.php” file is another important part of a WordPress theme. It contains PHP functions that can be used to add extra features and functionality to the theme. For example, you can use this file to register custom navigation menus, enable theme support for post thumbnails, or customize the output of WordPress functions.
When building a WordPress theme, it is also important to create a “README.txt” file that serves as a user guide and provides information about the theme and its usage. In addition, you can create a “screenshot.png” file that will be displayed as a preview of the theme in the WordPress admin area.
In summary, creating and selling WordPress themes can be a profitable business. Whether you choose to build and sell your own themes or offer customization services, there are several ways to make money from WordPress themes. With the right skills and knowledge, you can create visually appealing and functional themes that cater to the needs of different businesses and individuals.
| FAQ | Answers |
|---|---|
| What is a WordPress theme? | A WordPress theme is a collection of files that define the style and layout of a WordPress website. |
| Where are WordPress themes stored? | WordPress themes are stored in the “wp-content/themes” directory of a WordPress installation. |
| How can I make money from WordPress themes? | You can make money from WordPress themes by creating and selling your own themes, offering customization services, or monetizing your website through affiliate marketing or sponsored content. |
| What are the main files of a WordPress theme? | The main files of a WordPress theme are “style.css”, “index.php”, “header.php”, and “footer.php”. |
| What is the importance of the “functions.php” file? | The “functions.php” file is used to add extra features and functionality to a WordPress theme. |