Are you looking for an idea to create an attractive menu card for your restaurant? Look no further! With the help of Flipsnacks, you can easily design a professional-looking menu layout with eye-catching contents. Whether you own a small café or a fancy restaurant, a well-designed menu card can make a huge difference in attracting customers.
When it comes to menu cards, we’ve all seen those plain, ordinary text-only cards. But why settle for less when you can create graphic menus that stand out from the crowd? With Flipsnacks, you’re just a few steps away from creating a menu card that will leave a lasting impression on your customers.
The first thing you need to do is take advantage of the free restaurant menu templates available on Flipsnacks. These templates can serve as a starting point for your menu design. Once you’ve chosen a template, you can start customizing it to fit your restaurant’s theme and style.
Next, finalize the layout of your menu. You can add more pages to your menu if you have a wide range of items to offer. Make sure to include sections for appetizers, main courses, desserts, and beverages. It’s always a good idea to highlight your most popular dishes or chef’s specials. Also, don’t forget to include a section for takeaway or delivery options if your restaurant provides those services.
Now comes the fun part – adding the contents to your menu card! Start by writing an enticing description for each menu item. Use descriptive and appetizing language to tempt your customers’ taste buds. Don’t forget to mention any special ingredients or dietary restrictions. If you have any signature dishes, make sure to highlight them.
Finally, make sure your menu card is visually appealing. Use high-quality images of your dishes to make them even more tempting. You can also include the restaurant’s logo and other branding elements to give your menu a professional touch. If you’re skilled in graphic design, you can use software like CorelDRAW to create custom illustrations and artwork for your menu.
By following these steps and using the resources available on Flipsnacks, you can create a menu card that not only showcases your culinary masterpieces but also enhances your customers’ dining experience. So, what are you waiting for? Start designing your menu card today and watch your restaurant’s popularity soar!
- Steps to Create Menu Cards
- Step 1: Decide on the Layout
- Step 2: Collect the Menu Items
- Step 3: Create a Table of Contents
- Step 4: Work on the Graphic Design
- Step 5: Spread out the Text
- Step 6: Take Advantage of Flipsnacks
- Step 7: Review and Finalize
- Table of Contents
- Step 1: Create an Outline
- Step 2: Choose a Layout
- Step 3: Find Templates
- Step 4: Add Text and Graphics
- Step 5: Organize Your Menus
- Step 6: Take Advantage of Technology
- CorelDRAW does more than just create restaurant menus
- Layout
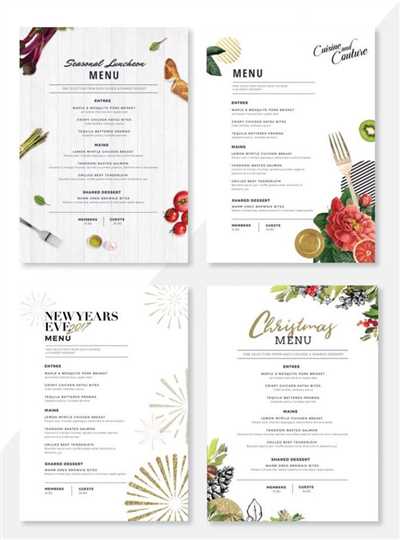
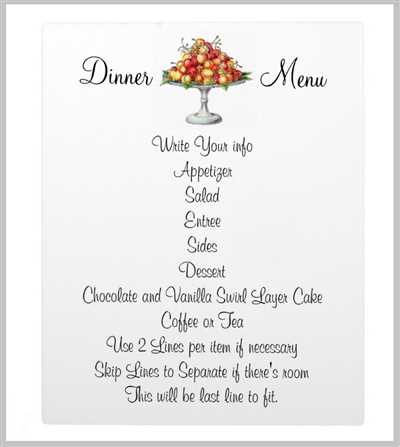
- Menu Templates
- Video:
- Menu Card Design #artandcraft #kidsvideo #vlogs #papercraft #DIY #kids
Steps to Create Menu Cards
When it comes to creating menu cards for your restaurant, there are several steps you need to take to ensure that your final product is both visually appealing and informative. In this article, we’ll walk you through the process from start to finish.
Step 1: Decide on the Layout
The first thing you should do is decide on the layout of your menu card. This will depend on the type of restaurant you have and the items you want to include. Some restaurants opt for a single-page layout, while others may prefer a multi-page booklet format. Decide on the layout that works best for you.
Step 2: Collect the Menu Items
The next step is to gather all the menu items that you want to include in your menu card. This includes appetizers, main courses, desserts, and any specialty items that your restaurant may offer. Make sure to include a variety of options to cater to different tastes.
Step 3: Create a Table of Contents
To make it easier for your customers to navigate through the menu, it’s a good idea to include a table of contents. This way, they can quickly find the section they’re interested in without having to flip through the entire menu card.
Step 4: Work on the Graphic Design
Now comes the fun part – designing the visual elements of your menu card. You can either create your own design from scratch or use free templates available online. Graphic design software like CorelDRAW can be a great tool for creating eye-catching menu cards.
Step 5: Spread out the Text
To make your menu card more visually appealing, it’s important to spread out the text. Use a combination of font sizes, styles, and colors to highlight important information such as the name of the dish, ingredients, and prices. This will make it easier for your customers to read and understand the contents of the menu.
Step 6: Take Advantage of Flipsnacks
Flipsnacks is a great platform that allows you to create digital menu cards. Not only does it save you money on printing costs, but it also gives you the flexibility to update your menu easily. You can include interactive elements such as videos and links, making it a more engaging experience for your customers.
Step 7: Review and Finalize
Before you finalize your menu card, make sure to review it carefully. Check for any spelling or grammar errors, ensure that all the prices are correct, and double-check the layout. Once you’re satisfied with the final version, you’re ready to print or publish your menu cards.
By following these steps, you can create enticing menu cards that effectively showcase the delicious meals your restaurant has to offer. Remember, a well-designed menu card can make a big difference in attracting customers and increasing sales.
| Advantage | Does | Spread |
|---|---|---|
| Helps | You | Attract |
| Customers | and | Generate |
| More | Revenue | For |
| your | Restaurant |
Table of Contents
When it comes to creating a menu card, there are a few steps you need to take. In this article, we’ll walk you through each of these steps, from coming up with an idea to the final layout of your menu.
Step 1: Create an Outline
To start, create an outline of what your menu should include. Think about the coreldrawer items you want to offer, such as appetizers, main courses, drinks, and desserts.
Step 2: Choose a Layout
Next, you need to choose a layout for your menu. You can either create a traditional spread with the menu on one side and the dishes on the other, or you can try something more unique, like a flipbook or a takeaway menu.
Step 3: Find Templates
If you’re not a graphic designer, don’t worry! There are plenty of free menu templates available online that you can use as a starting point. Websites like Canva and Flipsnack offer a wide range of menu templates to choose from.
Step 4: Add Text and Graphics
Once you have a template, it’s time to add your own text and graphics. Make sure to include descriptions for each menu item and any special offers or promotions you have. Use high-quality images to showcase your meals and make them look more delicious.
Step 5: Organize Your Menus
Depending on your restaurant’s needs, you may have different menus for lunch, dinner, and dessert. Make sure to organize your menus in a way that makes sense for your customers and makes it easy for them to find what they’re looking for.
Step 6: Take Advantage of Technology
With digital menus becoming more popular, you have the advantage of being able to update your menu easily. Consider using an online menu platform that allows you to make changes in real-time.
By following these steps, you can create a well-designed and enticing menu card for your restaurant. Remember, your menu is often the first thing customers see, so make sure it represents the quality of the meals you offer!
CorelDRAW does more than just create restaurant menus
When it comes to creating restaurant menus, CorelDRAW can do so much more than just the final layout. From idea to final text, CorelDRAW offers a range of tools that can help you craft the perfect menu.
The first advantage of using CorelDRAW for menu creation is the wide selection of templates it offers. Whether you’re creating a menu for a fine dining restaurant or a takeaway joint, CorelDRAW has templates that can suit your needs. These templates come with pre-designed layouts and graphics, making it easy for you to get started.
Once you’ve chosen a template, you can start working on customizing it to fit your restaurant. With CorelDRAW, you can easily change the layout, add or remove items from the menu, and adjust the text to match your restaurant’s branding. You can also take advantage of CorelDRAW’s graphic capabilities to create eye-catching images that will entice your customers.
When it comes to the contents of the menu, CorelDRAW makes it easy to organize your items. You can use tables to create sections for different types of dishes, such as appetizers, mains, and desserts. This way, your customers can easily navigate through the menu and find what they’re looking for.
CorelDRAW also makes it easy to spread out your menu across multiple pages. If you have a large selection of items, you can create a multi-page menu that flips like a book. This way, your customers can easily browse through all the options and make their selection.
Finally, CorelDRAW allows you to add the finishing touches to your menu cards. You can choose from a range of fonts, colors, and styles to create a visually appealing menu that matches the ambiance of your restaurant. With CorelDRAW, you can be confident that your menu will look professional and well-designed.
So, if you’re a restaurant owner or a graphic designer working with restaurants, don’t just limit CorelDRAW to menu creation. Take advantage of its powerful features and tools to create menus that are not only functional but also visually appealing.
Layout
When it comes to creating menu cards, layout is one of the most important aspects to consider. The layout of your menu should be visually appealing and easy to read for your customers. Here are some steps to follow when creating the layout for your menu card:
1. Takeaway: Before you start working on the layout, you need to have a clear idea of the contents of your menu. Decide on the coreldraw of your restaurant and the items you want to feature on your menu.
2. Graphic or text: Decide if you want to use more graphic elements or text for your menu card. Some restaurants prefer a visually appealing menu with lots of images, while others prefer a more text-based menu.
3. Templates: If you’re not a graphic designer, don’t worry. There are plenty of free templates available online that you can use as a starting point for your menu card layout. Websites like Flipsnacks offer a variety of templates that you can customize to fit your restaurant’s theme.
4. Spread it out: When laying out your menu card, always make sure to spread the items evenly across the page. Don’t overcrowd the menu with too many items. Leave enough space between each item so that it’s easy for the customer to read and make their selection.
5. Final touches: Once you’ve created the layout for your menu card, take a step back and review it. Make sure everything is in the right place and that the text is easy to read. You can also add some final touches, such as a logo or a catchy tagline, to make your menu stand out.
By following these steps, you can create a menu card that not only looks great but also helps your customers quickly and easily find the meal or dessert they’re looking for. The advantage of a well-designed menu card is that it does most of the work for you, as it can entice customers to try more items and come back for another visit.
Menu Templates
Creating a menu card for your restaurant can be a daunting task, but it doesn’t have to be. With the help of menu templates, you can save time and effort in designing a menu that’s both visually appealing and informative.
There are many software programs available, such as CorelDRAW, that provide pre-designed menu templates. These templates offer a range of styles and layouts, making it easy to choose one that suits your restaurant’s theme and concept.
If you’re not familiar with graphic design software, don’t worry! There are also free online platforms like Flipsnacks that offer ready-to-use menu templates. All you need to do is input your own text and images to customize the menu card to your liking.
When selecting a menu template, always keep in mind the contents of your menu. Consider the number of items you want to include, as well as any special sections like dessert or takeaway options. The layout should be structured and easy to read, with clear headings and a logical flow from appetizers to mains and beverages.
Take advantage of the templates’ design elements, such as different font styles and sizes, colors, and icons. These can help make your menu more visually appealing and attract customers’ attention to certain items or meal deals.
Once you’ve chosen a template and customized it with your restaurant’s details, it’s time for the final step – printing. Make sure to use high-quality paper stock and consider laminating the cards for durability. You may also want to print a few extra copies to have on hand for any future changes or events.
Remember, a well-designed menu card can be a great marketing tool for your restaurant. It should reflect the overall ambiance and style of your establishment, as well as entice customers to try more of your delicious offerings. With the help of menu templates, creating an appealing and professional menu has never been easier.