

If you’re an admin on your own Discord server, you might be looking for ways to customize it and make it stand out. One way to do this is by creating your own Discord stickers. Stickers are a great way to express yourself and add a personal touch to your server. In this article, we’ll show you how to create Discord stickers using online software.
There are different software tools available online that allow you to create your own stickers for Discord. One popular option is the Sticker Maker tool, which provides an easy and intuitive process for making stickers. With this tool, you can upload an image or video from your background and remove everything you don’t want in the sticker. You can then try different effects and apply them to your stickers.
Discord stickers were created to enhance the user experience and make conversations more fun and engaging. Stickers can be used in chat, and you can even use them as reactions to messages or as a way to show your emotions. They are a great way to add some personality to your server and make it more enjoyable for everyone.
To create stickers on Discord, you need to be at least a Level 2 Subin. This means you need to have a certain level of activity on the server, such as sending messages and interacting with others. Once you reach this level, you’ll be able to access the Stickers tab on the server and start creating your own stickers.
How To Make Discord Stickers
Discord stickers are a fun and creative way to express yourself in your server. Whether you’re an admin or just a regular user, you can make your own stickers and upload them for everyone to use. In this article, we will guide you through the process of creating and uploading your own stickers.
Step 1: Choose the Right Software
Before you start creating your stickers, you need to choose the right software. There are many different options available, such as Photoshop, Illustrator, GIMP, or even online image editors. Each software has its own features and capabilities, so choose the one that best suits your needs and level of expertise.
Step 2: Create Your Stickers
Once you have the software, it’s time to start creating your stickers. Decide on the theme or concept for your stickers and gather the necessary resources. You can create your stickers from scratch by drawing or designing them, or you can use pre-existing images and modify them as needed. Be creative and have fun with the process!
Step 3: What Are Stickers?
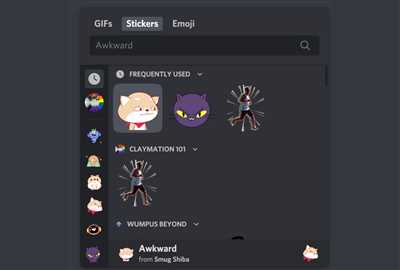
Stickers on Discord are a type of emoticon or emoji that can be used in chats and messages. They are larger and more detailed than regular emojis and can convey more complex emotions or ideas. Stickers can also have animations or special effects, making them even more expressive.
Step 4: Upload Your Stickers
When your stickers are ready, it’s time to upload them to your Discord server. Open Discord and go to the server where you want to upload the stickers. Click on the sticker button, usually located next to the emoji button. Then, click on the “Upload” button and select the stickers you want to upload from your computer. Discord will process the images and add them to your server’s sticker collection.
Step 5: Try Them Out!
Now that your stickers are uploaded, it’s time to try them out! Open a chat or message in Discord and click on the sticker button. Browse through your server’s sticker collection and select the sticker you want to use. Click on it to send it in the chat. Your friends and other server members can now use your stickers in their messages, bringing a new level of fun and expression to your server.
Remember, you can always remove or update your stickers if you’re not happy with how they turned out. Just repeat the upload process with the new stickers or remove them from your server’s collection.
Now that you know how to make Discord stickers, it’s time to get creative and start expressing yourself in a whole new way. Have fun creating and using your stickers on Discord!
What Are Discord Stickers
Discord stickers are a fun and creative way to express yourself in your server. They are similar to emojis but at a different level. With stickers, you can upload and use custom images to make your conversations more engaging and personalized.
Discord stickers can be created and uploaded by anyone with admin rights on a server. You can use various software and online tools to create your own stickers, or you can try out different sticker makers available online. The process of creating stickers usually involves selecting an image or video, removing the background if needed, and uploading it to Discord.
Once your stickers are created, they can be used by anyone in the server. You can apply them to messages, chat bubbles, or even use them in voice or video calls. Stickers are a great way to add some extra flavor and fun to your server interactions.
Discord stickers are different from emojis in that they have a more dynamic and expressive nature. They can bring static images to life and make your conversations more interactive. Whether you’re using stickers to react to messages, share your emotions, or simply have fun, they add another layer of creativity to your Discord experience.
Remove the Background
When creating stickers for your Discord server, you want to make sure they stand out and look professional. One important step in this process is to remove the background from your sticker image. By removing the background, you can focus on the main subject of your sticker and make it more visually appealing.
There are different software and online tools available that can help you remove the background from an image. One popular software is Adobe Photoshop, which provides advanced tools and features for precise background removal. If you’re not familiar with Photoshop or don’t have access to it, you can try other online background remover tools such as Remove.bg or Clipping Magic.
To remove the background using these tools, simply upload your sticker image and let the software do the work. They use advanced algorithms to separate the main subject from the background and provide you with a transparent image.
Before you proceed with the background removal, it’s important to properly prepare your image. Make sure your image is of high quality and well-lit. Pay attention to the details and edges of your subject to ensure a clean removal process.
Once you have a transparent image, you can add different effects, text, or other elements to enhance your sticker’s design. Be creative and experiment with different ideas to make your sticker unique and eye-catching.
Remember, the stickers you create will be used by the members of your Discord server. Make sure they are relevant and aligned with the themes and topics discussed in your server. It’s a good idea to involve your community in the sticker creation process by asking for their ideas and feedback.
In conclusion, removing the background from your sticker images is an important step in the sticker creation process. It allows you to focus on the main subject and make your stickers more visually appealing. Use the mentioned software and online tools to remove the background, and don’t forget to involve your community in the creation process for a more engaging experience.
Video Process
When it comes to creating stickers for your Discord server, there are a few different options you can try. One of the methods is to use an online image or video maker, such as the one provided by Subin, a popular Discord sticker maker. With this tool, you can upload your own images or videos and remove the background to create stickers.
The process to create stickers using this method is relatively simple. First, you need to gather your sources or materials. These can be images or videos that you want to turn into stickers. Next, you can use the online maker to remove the background from each image or video. This step is important to ensure that your stickers look clean and professional.
Once you have removed the background, you can then proceed to create the stickers. The online maker will provide you with tools and options to customize each sticker. You can add text, change the size and position of the sticker, and even apply filters or effects to enhance the look. Take your time to experiment with different settings and see what works best for each sticker.
After you have finished creating your stickers, you can save them and upload them to your Discord server. As an admin, you have the ability to upload stickers to the server for all members to use. Simply go to the server settings and navigate to the “Stickers” tab. From there, you can upload and manage your stickers easily.
That’s it! Now you know how to create stickers for your Discord server using an online image or video maker. Remember to have fun and get creative with your sticker designs. They can be a great way to express yourself and add some fun to your server.
Try Stickers on Your Discord Server
If you’re an admin on a Discord server and are looking to add some fun and personality to your server, why not try using stickers? Stickers are a great way to express yourself and add a touch of creativity to your server.
There are different ways you can make and use stickers on Discord. One option is to use a sticker maker software or online tool. There are many options available, such as Subin’s Sticker Maker or Sticker.ly, where you can create custom stickers from your own images or choose from a library of pre-made designs.
To add stickers to your server, you’ll need to upload them. On Discord, you can upload stickers in the form of image files, such as PNG or GIF. Simply drag and drop the sticker files into the Sticker tab on your server to add them.
Once the stickers are uploaded, they can be used by anyone on the server. Each user has a certain number of sticker slots, depending on their level. These slots determine how many stickers a user can have at any given time.
To use a sticker, simply click on the smiley face icon in the chat box and select the sticker you want to use. Stickers can be sent in both text channels and voice channels, allowing you to express yourself in different ways.
If you want to remove a sticker from your server, the process is simple. Just click on the sticker and select “Remove” to delete it from the sticker library. Keep in mind that once a sticker is removed, it cannot be recovered.
Stickers are a great way to add some fun and creativity to your Discord server. Try different stickers and see what works best for your community. Whether you’re using stickers created by others or making your own, they can enhance the overall experience and bring more joy to the server.
Subin B
Subin B is an online sticker maker for Discord. With Subin B, you can create custom stickers for your Discord server. Stickers are a fun way to express yourself and add some personality to your messages.
To make stickers with Subin B, follow these steps:
- Go to the Subin B website and sign in with your Discord account.
- Click on the “Sticker Maker” tab.
- Choose an image or video that you want to use for your sticker. The image or video should be in a format that is compatible with Discord.
- Remove the background from the image or video if needed. You can use a tool like Adobe Photoshop or an online background remover.
- Upload the image or video to Subin B.
- Choose a name for your sticker and select the “Discord” option.
- Select a level for your sticker. Stickers can be categorized into different levels based on their rarity or value.
- Try out different settings and effects to customize your sticker.
- Click on the “Create Sticker” button to finalize the process.
Once your stickers are created, you can use them on your Discord server. As an admin, you can add the stickers to the server’s sticker library and make them available to all server members. Stickers can be sent in chats and used in reactions just like regular emojis.
Subin B is a popular choice for creating stickers for Discord due to its user-friendly interface and the ability to create stickers from images or videos. Whether you want to make stickers for personal use or for your server, Subin B has everything you need.
Make your Discord server more fun and engaging with custom stickers created with Subin B!
Sources
When it comes to creating stickers for Discord, there are several sources you can use to get started. Here are some options:
- Discord Sticker Maker: Discord itself has a Sticker Maker feature that allows server admins to create custom stickers. You can remove the background from an image, add text, and even use animated stickers. Simply go to your server settings, scroll down to the Stickers section, and click on “Create Sticker Pack” to access the Sticker Maker.
- Online Sticker Makers: If you’re looking for a more advanced sticker-making experience, you can try using online sticker maker software. There are several websites available that allow you to create stickers from scratch or use pre-existing templates. Some popular options include Stickermaker.com and Subin’s Sticker Maker.
- Sticker Packs: Another option is to browse through existing sticker packs on Discord. Many users have already created sticker packs that you can use in your own server. Simply search for “stickers” in the Discord search bar, and you’ll find a variety of stickers to choose from.
- Video and Image Software: For those who are familiar with video or image editing software, you can create stickers using programs like Adobe Photoshop or GIMP. These software options provide more control over the sticker-making process, allowing you to create stickers at a more professional level.
Regardless of which source you choose, make sure to follow Discord’s guidelines and terms of service when creating stickers for your server. Stickers can add a fun and personalized touch to your server, so have fun exploring different sources and creating stickers that best fit your community!