

If you are interested in creating your own Android applications, this step-by-step guide will show you how. Creating an Android application can be a rewarding experience, as it allows you to build and publish your own projects for use on Android devices.
First, you will need to have Android Studio installed on your computer. Android Studio is a software development environment that is used to build Android applications. It provides a range of tools and libraries that can be used to create, build, and test your applications.
Once you have Android Studio installed, start by creating a new project. Give your project a name and select the target Android devices that your application will be built for. You can also specify the minimum Android version that your application will support.
Within your project, you will see a case called “app” in the project explorer. This is where you will build your application. Start by creating a new Java class within this folder. You can use the name of your application as the class name.
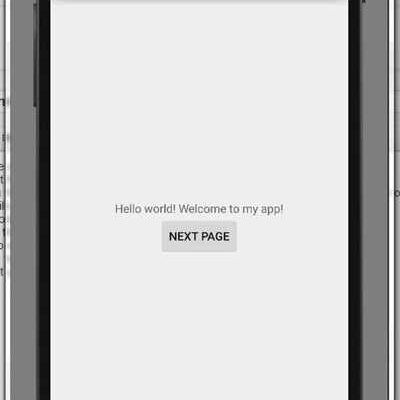
Next, you will need to create the user interface for your application. You can do this by creating an XML layout file within the “res” folder. This layout file will define the structure and appearance of your application. You can use various views and layouts available in Android Studio’s layout editor to design your user interface.
After creating your user interface, you can start writing the code for your application’s functionality. In Android Studio, you can create new Java classes and methods to handle different events and actions within your application. You can also use external libraries and APIs to add more features to your application.
Once you have finished building and testing your application, it’s time to publish it. Android Studio provides tools and resources to publish your application to the Google Play Store, where it can be downloaded and installed on Android devices. Note that you will need to create a developer account and pay a one-time fee to publish your application on the Play Store.
In conclusion, creating an Android application is a step-by-step process that requires using Android Studio, creating a new project, building the user interface, writing the code, and publishing the application. With the right tools and resources, you can create your own Android applications and make them available to a wide range of Android devices.
How to Create and Publish your own Android Library
Creating your own Android library is a great way to extend the functionality of your Android applications. It allows you to reuse code and make it available to other developers. In this article, we will see how to create and publish your own Android library.
Step 1: Creating a new Android Studio project
To start building your own Android library, you will need to create a new Android Studio project. In Android Studio, go to File -> New -> New Project. Enter a name for your project and select the target devices for which you want to build the library. Note that if you want your library to be used on all Android devices, you can select “phone and tablet” as the target device.
Step 2: Creating a new library module
Once you have created the project, go to File -> New -> New Module. In the dialog that appears, select “Android Library” as the module type. Enter a name for your library module and click “Finish”. Android Studio will create a new module within your project that is specifically for building the library.
Step 3: Writing your library code
In the newly created module, you can start writing the code for your library. You can add any classes, methods, and resources that you want to include in your library. It’s important to make sure that your code is reusable and well-documented.
Step 4: Publishing your library
Once you have finished writing the code for your library, it’s time to publish it. To do this, you will need to upload your library to a publicly accessible repository. There are many options available for hosting your Android library, such as GitHub, JitPack, and Bintray. Choose the one that suits your needs.
Step 5: Using your library within your own applications
After you have published your library, you can start using it within your own applications. To do this, simply include the library as a dependency in your application’s build.gradle file. You will need to add the repository and the library name in the dependencies section of the build.gradle file.
Step 6: Testing your library on a device
Before publishing your library, it’s important to test it on a real device to make sure that it works as expected. You can connect your Android device to your computer via USB and select it as the target device in Android Studio. Then, run your library as an application on the device. You should see that your library is functioning correctly.
Creating and publishing your own Android library allows you to share your code with the Android community and contribute to its growth. It’s a great way to showcase your skills and build a reputation as a developer. Start creating your own Android library today!
How to CreateStart a new Project in Android Studio
Creating a new project in Android Studio is the first step towards building your own Android application. In this guide, we will show you how to create a new Android project using Android Studio.
Before we begin, note that Android Studio is the official IDE for Android development, and it is available for Windows, macOS, and Linux operating systems.
Step 1: Open Android Studio
The first step is to open Android Studio on your computer. If you do not have Android Studio installed, you can download it from the official Android Studio website. Once Android Studio is installed and running, you will see the welcome screen.
Step 2: Create a New Project
To create a new project, click on “Start a new Android Studio project” on the welcome screen. You will then see a dialog where you can enter the details for your new project.
Step 3: Configure your Project
In the “Configure your new project” dialog, you will need to enter the following information:
– Application name: Enter the name for your application. This is the name that will be shown to users on their devices.
– Company domain: Enter your company’s domain name in reverse order (e.g., com.example.myapp).
– Project location: Choose a location on your computer where you want to save the project files.
Step 4: Select the Target Devices
Next, you need to select the target devices for your application. Android Studio provides a list of device definitions that you can choose from, such as phone, tablet, Android TV, and Wear OS. You can also create your own device definition by clicking on the “Create New Virtual Device” button.
Step 5: Select the Minimum SDK
After selecting the target devices, you need to choose the minimum SDK that your application will support. The SDK version determines which features and APIs are available to your application. It is recommended to select the latest SDK version to take advantage of the latest features and improvements.
Step 6: Add Additional Features
In this step, you can add additional features to your project, such as Instant App support, App Bundle support, or a watch face. Choose the options that are relevant to your project.
Step 7: Finish
Finally, click on the “Finish” button to create your new project in Android Studio. Android Studio will generate the necessary files and folders for your project, including the initial source code files.
Note that Android Studio also offers additional options and settings that you can customize for your project. You can explore these options later as you become more familiar with Android development.
Once your project is created, you can start building your Android application by writing code, adding resources, and designing the user interface. You can also build and test your application on various devices using the Android Studio’s built-in emulator or by connecting a physical device to your computer.
Having completed these steps, you are now ready to create and build your own Android application using Android Studio. Good luck with your development journey!
Step 1: Creating a new project in Android Studio
Creating a new Android project using Android Studio is the first step in building your own Android application. In this step, we’ll guide you through the process of creating a new project.
1. Open Android Studio on your device. If you don’t have Android Studio installed, you will need to download and install it first. You can find the download link on the official Android Studio website.
2. Once Android Studio is open, go to the “Welcome to Android Studio” screen. Here, you will see several options. Select “Start a new Android Studio project” to create a new project.
3. In the “Create New Project” window, you will be prompted to enter a name for your project. Choose a name that represents your application. Note that the project name is independent of the application name that will be shown to users on their devices.
4. Select the directory where you want to save your project files. You can choose the default location or specify a custom location.
5. Next, you will need to select the minimum SDK version that your application will target. The SDK version determines the oldest Android devices that your application can run on. In most cases, it is recommended to select the latest SDK version available.
6. Android Studio will also ask you to select the project template. A template is a pre-built code structure that you can use as a starting point for your application. You can choose from various templates such as “Empty Activity”, “Basic Activity”, “Fullscreen Activity”, and more. Select the template that best fits your application’s requirements.
7. After selecting the template, you can optionally enable additional features such as Kotlin support, Instant App support, and Firebase backend integration. Enable or disable these features based on the needs of your application.
8. Once you have completed all the necessary steps, click “Finish” to create your new project. Android Studio will now generate the necessary code and project structure for you.
Creating a new project in Android Studio is the first step towards building your own Android application. In the following steps, you will learn more about the Android development process, including coding, testing, and publishing your application to the Google Play Store.
Note: The steps mentioned above may vary slightly depending on the version of Android Studio you are using.
| Sources |
|---|
| 1. Official Android Studio website – https://developer.android.com/studio |
Build the application

Once you have created and set up your project in Android Studio, you are ready to start building your application. Here is a step-by-step guide on how to build your Android application using Android Studio:
- Open Android Studio and select your project from the list of available projects.
- In the project window, navigate to the “app” folder and open the “build.gradle” file. This is where you can configure the build settings for your application.
- In the “build.gradle” file, note the “android” block which specifies the various configurations for your Android application.
- Within the “android” block, look for the “defaultConfig” section. Here, you can configure the basic settings for your application, such as the application ID and minimum SDK version.
- Under the “defaultConfig” section, you will also find the “dependencies” block. This is where you can add any external libraries or dependencies that your application may require.
- Note that Android Studio uses Gradle as the build system, which makes it easy to manage dependencies and build your application.
- In case you are using any external libraries, you can add them to your project by specifying the library name and version within the “dependencies” block.
- Once you have configured all the necessary settings, you can build your application by selecting the “Build” option from the top menu and then choosing “Make Project”.
- Android Studio will then compile your code, resources, and assets to generate the APK file for your application.
- If there are no errors in your code, the build process should complete successfully and you will be able to see the generated APK file in the “build” folder of your project.
- You can now test your application on a physical device or an emulator by running the APK file.
- To run the application on a device, make sure that USB debugging is enabled on the device and connect it to your computer using a USB cable. Then, select the “Run” option from the top menu and choose your connected device from the list of available devices.
- Android Studio will then install the application on the selected device and launch it for testing.
- In case you encounter any issues during the build process, you can check the build logs and error messages in the “Build” window of Android Studio to identify and resolve the problems.
- Once you are satisfied with your application and it is ready for distribution, you can publish it to the Google Play Store or any other app marketplace.
By following these steps, you can successfully build your own Android application using Android Studio. Take note of the different configuration options available in the build.gradle file, as they will be useful in customizing your application according to your requirements.
See Also
When creating an Android application, there are several steps that need to be completed. In the case of building an Android application, there are a few important points to note:
- The Android build system, which is used to compile and build your application.
- The Android SDK, which provides the tools and libraries required to create Android applications.
- The Android Studio IDE, which is a powerful integrated development environment for Android development.
- The Android device or emulator that you will be using as the target for your application.
- The Android Manifest file, which contains important information about your application.
- The Android resources, such as layouts, strings, and images, that are used to create the user interface of your application.
- The Android code, which is written in Java and is used to implement the functionality of your application.
- The process of creating an Android application can vary depending on the requirements of your project. The following steps provide a general guideline:
- Create a new Android project in Android Studio.
- Select a name and location for your project.
- Choose the minimum SDK version and other project settings.
- Create the main activity and layout for your application.
- Write the code for your application’s functionality.
- Build and run your application to see how it looks and works on a device or emulator.
- Test your application on different Android devices and screen sizes to ensure compatibility.
- Make any necessary changes or improvements to your application.
- Select the devices on which you want to publish your application.
- Create a signed APK file for your application.
- Publish your application to the Google Play Store or other app stores.
In addition to the steps above, there are also many resources available that can help you with creating Android applications. The Android Developer website provides detailed documentation and tutorials, which can be a great starting point for beginners. There are also many online forums and communities where you can ask questions and get help from experienced developers.
By following the steps and utilizing the resources mentioned above, you can create an Android application in no time!
Sources
When creating an Android project, you may need to use various sources to build your application. These sources include libraries, code snippets, and tutorials that can help you in the process of creating your Android app.
One of the main sources that you can use is the Android Studio. Android Studio is an integrated development environment (IDE) that provides a comprehensive set of tools for creating Android apps. It allows you to select the target Android devices, create and edit the code, and build and publish your app.
When creating a new Android project in Android Studio, you have the option to select a template that will create a basic structure for your app. This template can be used as a starting point, and you can modify it to fit your specific needs. You can also select a minimum SDK version, which defines the minimum Android version that your app will support.
Another source that you can use is the Android Developer website. This website provides a wealth of information on how to create Android apps, including tutorials, code samples, and documentation on the various Android APIs and tools. It also provides guidelines on best practices for building Android apps.
In addition to these sources, there are also various third-party libraries and code repositories available that you can use to enhance your app. These libraries provide pre-built components and functionality that you can easily integrate into your app, saving you time and effort in coding everything from scratch.
It is worth noting that when using external sources, such as libraries, you need to ensure that they are compatible with your target Android devices. Some libraries may have specific requirements or dependencies that need to be met, and not all libraries are suitable for all devices.
In conclusion, when creating an Android app, there are a variety of sources that you can use to help you build your app. The main sources include Android Studio, the Android Developer website, and third-party libraries. By using these sources, you can save time and effort in creating your app and take advantage of existing code and resources.


