

Are you looking for a unique and creative way to showcase your work? Handmade portfolios are a great option! Whether you’re an artist, designer, calligrapher, or dressmaker, a handmade portfolio is an excellent way to display your creations and impress potential clients or employers.
Making your own handmade portfolio allows you to customize every aspect, from the materials used to the patterns and designs on the cover. Plus, it’s a fun and fulfilling project that will make you proud of your work. So, if you’re ready to get started, this article is here to help!
We’ll walk you through the process step by step, sharing several alternative methods and materials you can use, as well as some useful tips along the way. Whether you prefer a classic bound portfolio or a more adventurous flap book design, you’ll find the guidance you need to create a professional and eye-catching portfolio.
First, let’s talk about the materials you’ll need for your handmade portfolio. You’ll need paper, of course, as well as some tools like scissors, glue, and a ruler. You can choose different types of paper depending on the style you want to achieve, whether it’s a sleek and minimalist look or a more textured and artistic feel. There are also specialty papers available specifically for portfolios, so keep those in mind as well.
Next, you’ll need to decide on a pattern or design for the cover of your portfolio. This is where you can let your creativity soar! You can create your own patterns, use stencils, or find inspiration from other sources like magazines or websites. If you’re feeling adventurous, you can even try your hand at calligraphy or incorporate some of your own artwork into the design.
Once you have your materials and design ready, it’s time to start building your handmade portfolio. Depending on the method you choose, you may need to fold, cut, and glue the paper together. Follow the instructions carefully, and don’t forget to double-check your measurements to ensure a precise and professional finish.
In addition to the written instructions, we’ll provide helpful visual aids, including step-by-step photos and even a video tutorial. With these resources, you’ll have no trouble following along and creating a stunning handmade portfolio that showcases your work in the best possible light.
Now that you have a better idea of what to expect during the portfolio-making process, it’s time to get started building your own. Whether you’re a seasoned pro or a complete beginner, this article has all the information you need to succeed. So gather your materials, clear your workspace, and let’s dive right in!
The Dressmaker’s Portfolio – The Handmade Wardrobe 16th September 2024 DEPOSIT
Whether you’re a professional dressmaker or just someone who enjoys making handmade garments, having a portfolio to showcase your work is essential. A portfolio allows you to share your projects, patterns, and work methods with others, including potential clients or workshop attendees. In this article, we’ll show you how to create your own handmade portfolio to proudly display your dressmaking skills and build your brand.
The first step in creating your dressmaker’s portfolio is to gather the necessary materials. You’ll need high-quality paper, cardstock, and an alternative method of binding the pages together. Some dressmakers like to use a bound book with flap closure, while others prefer a portfolio with a spacer and calligraphy. Choose the method that best suits your style and budget.
Next, you’ll need to decide what to include in your portfolio. This will depend on the type of work you do and what you want to showcase. You may want to include photos of your completed garments, patterns you’ve created, and any workshops or classes you’ve attended or taught. If you have videos of your work process, those can be included as well.
Once you have all your materials and content gathered, it’s time to start building your portfolio. Begin by organizing your pages in a logical order, whether that’s by garment type, client, or chronologically. You want the flow of your portfolio to make sense to the viewer.
When you’re ready to assemble your portfolio, make sure to take your time and pay attention to detail. You want your portfolio to look professional and well-made. Use the appropriate adhesive or binding method for your chosen materials and ensure that everything is secure and in place.
As you work on your portfolio, keep in mind the purpose of your portfolio and the audience you’re targeting. If you’re looking to attract clients or workshop attendees, make sure to highlight your best work and demonstrate your skills and expertise. If you’re showcasing your work to potential employers or colleagues, focus on the technical aspects of your garments and the innovative patterns or techniques you’ve used.
Finally, once your dressmaker’s portfolio is complete, be proud of your work and show it off! Take the time to photograph your portfolio and share it on your website, social media, or in other professional settings. Your portfolio is a representation of your skills and creativity, so don’t be afraid to share it with the world.
So, whether you’re an eagle-eyed dressmaker or just starting out, creating a handmade portfolio is a great way to showcase your talent and build your brand. By following these steps and putting in the effort, you’ll have a professional and impressive portfolio to present to potential clients or workshop attendees. Start building your dressmaker’s portfolio today and take a step towards sharing your passion with the world!
– 16th September 2024 DEPOSIT –
Please note that the actual portfolio materials used in the workshops may differ from those shown in the photos or videos. The purpose of the workshops is to teach you the methods and techniques to create your own dressmaker’s portfolio, and the specific materials and patterns used during the workshops may vary.
| Date | Payment |
|---|---|
| 16th September 2024 | Deposit |
Materials Used
When it comes to making a handmade portfolio, you need to keep in mind that the materials you use can make a big difference in the overall quality and appearance of your work. Whether you’re a professional dressmaker’s or a DIY enthusiast, you’ll want to be proud of the materials you choose to build your portfolio with.
Here are some of the materials commonly used in creating a handmade portfolio:
- Pattern paper: This is an essential material for creating garment patterns or complete dressmaking work.
- Calligraphy paper: For those who like to add a touch of elegance to their portfolio, calligraphy paper can be a great alternative.
- Spacer paper: This material is used as a spacer between the pages to add depth and create a more professional look.
- Flap paper: A flap can be added to the cover of the portfolio to provide a bound look and protect the contents inside.
- Eagle paper: This type of paper is often used to create a textured or embossed cover for the portfolio.
In addition to these materials, you’ll also need basic tools like scissors, glue, and rulers to help you with the construction process. If you’re new to making portfolios, there are several workshops and video tutorials available online that can help guide you through the process.
Whether you’re creating a portfolio for yourself or as a gift for someone else, the materials you choose will play a big role in the final result. By using high-quality materials and paying attention to the details, you can create a beautiful and professional-looking handmade portfolio.
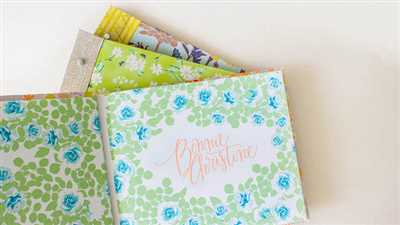
Calligraphy and Handmade Paper
If you want to add a touch of elegance and uniqueness to your handmade portfolio, consider incorporating calligraphy and handmade paper. Calligraphy adds a personal and artistic flair, while handmade paper provides a textured and distinctive background.
Instead of using traditional paper for your portfolios, consider using handmade paper. Handmade paper has a rich history and is made using traditional methods that date back centuries. From the 16th century onwards, craftsmen have been creating beautiful handmade paper that is still admired today.
When it comes to calligraphy, you have several options. You can attend workshops to learn calligraphy techniques and create your own calligraphy designs. Alternatively, you can hire a professional calligrapher to create custom calligraphy for you. Either way, calligraphy adds a touch of artistry and sophistication to your portfolio.
Handmade paper is an excellent alternative to regular paper for portfolios. It is often made from natural fibers such as cotton or linen, giving it a unique texture and appearance. The process of making handmade paper involves pulping the raw materials, pressing them onto screens, and then drying them. This method creates paper with a distinct texture and character.
There are various sources online where you can purchase handmade paper, including specialty paper stores and artisan websites. You can choose from a range of colors, thicknesses, and patterns to suit your preference. Handmade paper is a beautiful and eco-friendly option for showcasing your work.
When using calligraphy and handmade paper, consider how you will incorporate them into your portfolio. You can create custom covers with calligraphy titles or use handmade paper as a spacer between sections. The possibilities are endless, and the choice is yours.
Whether you’re a professional dressmaker, an artist, or a creative individual, adding calligraphy and handmade paper to your portfolio will make it stand out from the crowd. The unique combination of these elements is sure to impress potential clients or employers.
In conclusion, calligraphy and handmade paper are a proud addition to any portfolio. They provide a unique and personalized touch that separates you from the rest. So why not build your own creative portfolio using the method outlined here? Take inspiration from the centuries-old tradition of calligraphy and the beauty of handmade paper to create a portfolio that you’ll be proud to share.
How to Create a Professional Bound Portfolio of Your Work
If you’re a creative professional, having a well-organized and professional portfolio is essential. Whether you’re an artist, designer, or dressmaker, a handmade bound portfolio can showcase your best work and make a lasting impression on potential clients or employers. Here’s a step-by-step guide on how to create your own professional bound portfolio:
- Start by gathering all your completed projects and selecting the best ones to include in your portfolio. Consider the type of work you do and the audience you’re targeting when choosing your pieces.
- Once you’ve chosen your projects, create a pattern for your portfolio. This pattern will serve as a template for making multiple copies of your portfolio. You can use actual paper patterns, or if you’re familiar with digital software, you can create a pattern using computer-aided design (CAD) software.
- Now that you have your pattern, gather all the materials you’ll need to build your portfolio. This includes sturdy paper or cardstock for the cover and pages, a spine material, binding materials like ribbon or twine, and any additional embellishments you’d like to add.
- Next, cut out the pieces of your portfolio according to your pattern. Make sure to follow the instructions carefully, considering the size and orientation of each piece.
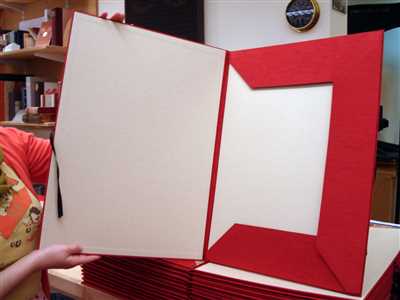
- Once you have all the pieces cut out, it’s time to assemble your portfolio. Start by attaching the spine material to the cover and pages using a suitable adhesive. Make sure to leave enough space for the pages to turn smoothly.
- After the spine is securely attached, you can start binding your portfolio. There are several methods you can use for binding, including sewing, stapling, or using eyelets. Choose the method that works best for you and complements the overall design of your portfolio.
- As you assemble your portfolio, make sure to include spacer materials between each page. This will give your portfolio a polished look and prevent the pages from sticking together.
- Once your portfolio is complete, it’s time to fill it with your best work! Arrange your projects in a way that flows well and highlights your skills and creativity. You can organize your work chronologically, by category, or any other method that makes sense for your industry.
- If you’re comfortable with video editing, you can also create a digital version of your portfolio to share online. This can be a great alternative or addition to the physical version, allowing potential clients or employers to view your work easily.
Creating a professional bound portfolio of your work requires time, effort, and attention to detail. But the end result will make you proud and help you stand out in a competitive market. Whether you’re a calligraphy artist, a fashion designer, or a graphic illustrator, a handmade bound portfolio is a powerful tool to showcase your talent and attract new opportunities.
Remember to keep your portfolio up to date by adding new projects and removing older ones. Your portfolio should always reflect your current skills and style.
Good luck and happy portfolio making!
Whether you’re a complete beginner or an experienced dressmaker, these sources can help you build a professional and well-crafted handmade portfolio. With the right materials and guidance, you’ll be proud to show off your work and make a strong impression.


