

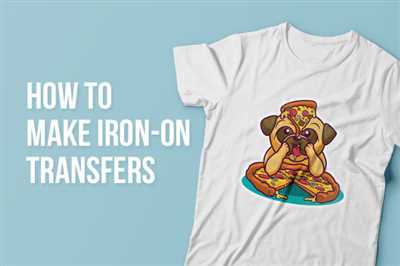
If you’re starting your own t-shirt business or just want to have some fun with personalized clothing, making your own shirt transfers can be a great option. With the right materials and a few simple steps, you can create professional-looking designs that will impress everyone who sees them. In this article, we’ll walk you through the process of making shirt transfers using iron-on designer paper.
To get started, you’ll need a few things. First, make sure you have dark-colored t-shirts, as the transfers work best on these materials. You’ll also need iron-on designer paper, which you can find at your local craft store or order online. Additionally, you’ll need an iron, parchment paper, and access to a computer with image editing software.
Once you have everything you need, the first step is to create your design. Use your image editing software to create or edit the design you want to transfer onto your t-shirt. Make sure to flip the design horizontally so that it appears in the correct orientation when transferred onto the shirt.
Next, print your design onto the iron-on designer paper according to the instructions provided. Remember to print it on the face-up side of the paper. The numbers may vary depending on the brand you’re using, but typically you’ll need to set your printer to the highest quality setting and use the “photo paper” or “transparency film” option.
After you’ve printed your design, cut it out using scissors or a craft knife. Make sure to leave a small border around the edges to prevent the transfer from peeling off. Place your t-shirt on a hard, heat-resistant surface and put the transfer face-down on the shirt, where you want it to appear.
- 5 Steps to Starting a T-Shirt Business With Heat Transfer
- What You Need
- T-Shirt Transfer Dark Instructions
- Edit The Image
- Pros and Cons of Iron on Transfer to Print Your Own T Shirt at Home
- Pros:
- Cons:
- Pros
- Easy to Make
- Customizable
- Cost-effective
- Wide Range of Materials
- Heat Resistant
- Dark Color Compatibility
- Cons
- Video:
- Printable HTV (Heat Transfer Vinyl) for Beginners!
5 Steps to Starting a T-Shirt Business With Heat Transfer
If you’ve always wanted to start your own t-shirt business, using heat transfer is a popular and cost-effective way to get started. With the right materials and instructions, you can easily create custom designs and sell them to customers. Here are five steps to help you get started:
| Step | Instructions |
|---|---|
| Step 1 | Design Your Own Shirt: Using a software or online designer, create your own unique t-shirt design. You can include words, numbers, and even images. Make sure the design is suitable for heat transfer. |
| Step 2 | Print Your Design: Use iron-on transfer paper to print your design. Make sure to follow the instructions provided with the paper. Remember to flip the design horizontally before printing, so that it appears correctly when transferred. |
| Step 3 | Prepare Your Shirt: Start by washing and drying your t-shirt. This will ensure that the material is clean and ready for the transfer. If you’re using a dark-colored shirt, you may need to use a dark transfer paper. |
| Step 4 | Apply the Transfer: Place the transfer face up on the shirt, following the instructions provided with the transfer paper. Use an iron to apply heat and pressure to the transfer. Be sure to press firmly and move the iron around to evenly distribute the heat. |
| Step 5 | Final Steps: Allow the transfer to cool completely before peeling off the parchment paper. Once cooled, give the shirt a final press with the iron to ensure a long-lasting transfer. Your t-shirt is now ready to be sold! |
Starting a t-shirt business with heat transfer has its pros and cons. Some pros include the ability to create unique designs at home, using inexpensive materials. The process is quick and easy, allowing you to produce shirts in small quantities or on-demand. However, there are also cons to consider. The transfers may fade or peel over time, especially with frequent washing. You may also face competition from other t-shirt businesses and need to invest in marketing to be successful.
In conclusion, heat transfer is a versatile and affordable method for starting a t-shirt business. With these five steps and some creativity, you can create your own unique designs and turn your hobby into a profitable venture. Good luck!
What You Need
- A computer with software to design and edit your own transfer
- Paper for shirt transfers
- An inkjet printer
- Parchment paper
- A dark T-shirt
- An iron
If you want to make your own shirt transfers at home, there are a few key items that you’ll need. First and foremost, you’ll need a computer with software that allows you to design and edit your transfer. There are many options available, both free and paid, so choose one that suits your needs.
Once you’ve selected your software, you’ll need paper specifically designed for shirt transfers. This paper is coated to ensure that the ink adheres properly to the fabric. Make sure you choose the right type of paper for your printer – inkjet or laser.
You’ll also need an inkjet printer to print your transfer onto the transfer paper. It’s important to follow the instructions that come with your transfer paper to ensure a successful print. Using the correct printer settings and paper type will help you achieve the best results.
Parchment paper is also essential for making shirt transfers. This paper acts as a barrier between the iron and the transfer, preventing any damage to the fabric. Place a sheet of parchment paper over the transfer and T-shirt before ironing.
Finally, you’ll need a dark T-shirt to transfer your design onto. Light-colored shirts won’t work as well with iron-on transfers, as the design may not show up as clearly. Choose a T-shirt that provides a good contrast to your design for the best results.
With these basic items, you’re ready to start making your own shirt transfers at home. Follow the steps provided by the transfer paper manufacturer, and use your iron to carefully apply the transfer to your T-shirt. Remember to iron the transfer face-up, with the material between the iron and the transfer.
There are both pros and cons to making your own shirt transfers. On the one hand, it’s a cost-effective way to create personalized shirts without the need to hire a professional. On the other hand, the quality and longevity of the transfer may not be as good as professionally made embroidery or screen-printed shirts.
However, if you’re starting a small business or just want to make a few shirts for personal use, making your own transfers can be a fun and creative option. Plus, with practice, you can improve the quality of your transfers and create professional-looking designs.
So if you have a computer with design software, a printer, transfer paper, a dark T-shirt, and an iron, you have all the tools you need to start making your own shirt transfers. Click the link below to learn more about the specific steps and tips for successful transfers.
T-Shirt Transfer Dark Instructions
When it comes to designing your own t-shirt, using heat transfers can be a fantastic way to achieve professional-looking results. By following a few simple steps, you can create custom t-shirt transfers at home. Here are the instructions for creating dark t-shirt transfers:
- Gather the materials you will need for this project. You’ll need a computer with image editing software, a printer, iron-on transfer paper for dark fabrics, a dark-colored t-shirt, and an iron.
- Start by editing your design using image editing software. Make sure to mirror the image so that it prints on the transfer paper correctly.
- Load the transfer paper into your printer so that the design will print on the coated side. It’s important to follow the specific instructions provided with your transfer paper.
- Print your design onto the transfer paper. Make sure to print using the “Best” quality setting for optimal results.
- Cut out the design from the transfer paper, making sure to leave a small border around the edges.
- Preheat your iron to the recommended temperature for the transfer paper.
- Place your t-shirt on a hard, flat surface and smooth out any wrinkles.
- Position the transfer paper face-up on the t-shirt, where you want the design to be.
- Cover the transfer paper with parchment paper to protect both the iron and the transfer.
- Using firm pressure, iron the transfer paper onto the t-shirt. Start with the iron on the top left corner of the transfer and move it in a circular motion. Make sure to apply heat evenly across the entire design.
- Iron the transfer for the recommended time. This will typically be around 20 to 30 seconds.
- Allow the transfer to cool completely before removing the parchment paper.
- Once the transfer has cooled, carefully peel off the parchment paper to reveal your printed design on the t-shirt.
- Congratulations! You have successfully created a dark t-shirt transfer at home.
There are pros and cons to using t-shirt transfers. On the plus side, they are easy to create and allow for full-color designs. It’s also a cost-effective option, especially if you’re starting your own t-shirt business. On the downside, transfers can crack and fade over time, and they may not look as professional as embroidery. However, with proper care, your transfer can last for a long time.
Now that you know the step-by-step instructions for creating dark t-shirt transfers, you can unleash your creativity and design unique t-shirts that will make a statement. Have fun exploring the possibilities!
Edit The Image
Before starting the process of making iron-on shirt transfers, you’ll need to edit the image you want to transfer onto your t-shirt. You can use software such as a graphic designer or embroidery software to make any necessary changes or modifications to your image.
If you don’t have access to professional software, there are plenty of free online options that you can use. Simply find a free image editing website or software, upload your image, and then you can begin to make any desired edits.
Some common edits you might consider include cropping the image, adjusting the brightness or contrast, or adding text or other elements to the design. Take your time with this step, as it will determine the final look of your shirt transfer.
Once you’re happy with the edited image, the next step is to print it out onto transfer paper. Make sure to use the proper transfer paper for your specific printer type (inkjet or laser) and whether you’re printing on light or dark-colored shirts. Following the instructions provided with the transfer paper, load it into your printer and print the image onto the paper.
When printing, make sure to set the image to the appropriate size for your shirt. Keep in mind that the image will be mirrored when transferred, so if there are any words or numbers in your design, you’ll want to flip them horizontally to ensure they appear correctly on the shirt.
Once you have a successful printed transfer, you can move on to the next step of transferring the image onto your shirt using an iron. Lay your t-shirt on a hard, heat-resistant surface and pre-heat your iron to the recommended heat setting for your transfer paper.
Place the transfer face-up onto the shirt in the desired position, making sure it is centered and straight. Cover the transfer with a sheet of parchment paper to protect both the transfer and the iron.
Apply firm pressure to the transfer with the iron, moving slowly in a back-and-forth motion. Be sure to apply even pressure to all areas of the transfer for the best results. Follow the recommended heat and time settings on your transfer paper instructions, usually around 15-20 seconds.
After the ironing is complete, allow the transfer to cool for a few moments before gently peeling off the parchment paper. Congratulations, you’ve just created your own custom shirt transfer at home!
Now that you’ve completed the necessary steps, you can enjoy wearing your personalized shirt or even consider creating transfers for your friends or starting a small business selling shirt transfers. There are pros and cons to consider, so make sure to research the market and potential customer base before diving into a t-shirt transfer business.
Pros and Cons of Iron on Transfer to Print Your Own T Shirt at Home
Iron on transfers are a popular method of printing custom designs onto t-shirts at home. This method allows you to create unique and personalized shirts without the need for expensive equipment or professional printing services. However, there are both pros and cons to using iron on transfers. Before starting your own shirt transfer project, it’s important to consider these factors:
Pros:
- Easy process: Iron on transfers are relatively simple to use and require just a few steps to complete. With some basic instructions, you can easily transfer your design onto the shirt.
- Cost-effective: Printing your own t-shirts using iron on transfers is a more affordable option compared to hiring a professional printing service or starting an embroidery business.
- Customizable designs: You have complete control over the design, allowing you to create shirts that match your unique style or promote your own brand. You can use design software to edit the image and add text, numbers, or any other elements you want.
- Wide range of material options: Iron on transfers work on various types of materials, including cotton, polyester, and blends. This versatility allows you to print on a wide range of t-shirt fabrics.
- Quick turnaround time: Unlike other printing methods, iron on transfers can be completed in a short amount of time. You can have your printed t-shirt ready to wear in just a matter of minutes.
Cons:
- Not as durable: While iron on transfers can last a long time with proper care, they may not be as durable as other printing methods such as screen printing or embroidery. The transferred design may crack or peel over time, especially after multiple washes.
- Limited color options: Iron on transfers are not suitable for all types of designs, especially those with complex color gradients or fine details. They are better suited for simpler designs or solid colors.
- Heat application: Ironing on the transfer requires heat, and there is a risk of burning or damaging the shirt if not done properly. It’s important to follow the instructions carefully and use the appropriate heat setting for the material.
- No face-up preview: Unlike other printing methods where you can see the final design on the shirt before printing, iron on transfers only reveal the true colors and appearance after heat application. This means you won’t know exactly how the design will look until it’s transferred.
Considering these pros and cons, you can decide if iron on transfers are the right method for your DIY t-shirt printing project. Just remember to carefully follow the instructions for a successful outcome and enjoy the creative freedom that iron on transfers provide!
Pros
When it comes to making shirt transfers at home using iron-on transfer paper, there are several advantages to consider. Here are the pros of creating your own custom shirt transfers:
Easy to MakeWith the right materials and software, you can easily create your own iron-on transfers at home. You don’t need to be a professional designer to print your own design on transfer paper. | CustomizableBy making your own shirt transfers, you have complete control over the design and can customize it to suit your preferences. You can add text, images, or even edit existing designs to make them unique. | Cost-effectiveCreating your own shirt transfers can save you money in the long run, especially if you plan to make multiple transfers. It is usually more affordable than ordering custom transfers from a professional printing business. |
Wide Range of MaterialsIron-on transfers can be applied to various types of materials, including cotton, polyester, and blends. This allows you to experiment with different fabrics and create unique shirts for different occasions. | Heat ResistantQuality iron-on transfers are durable and can withstand regular washing and drying. They won’t fade or crack easily, ensuring that your design stays intact even after multiple wears and washes. | Dark Color CompatibilityUnlike some other transfer methods, iron-on transfers work well on dark-colored shirts. The transfer paper is designed to be visible even on dark backgrounds, allowing you to create stunning designs on any color t-shirt. |
In conclusion, making your own shirt transfers using iron-on transfer paper has many advantages. It is easy, customizable, cost-effective, and compatible with different materials and dark colors. By following the instructions provided with the transfer paper and using the right heat settings on your iron, you can achieve successful results with your own printed transfers. Click here to learn more about the step-by-step process of making shirt transfers.
Cons
- Using iron-on transfers requires heat. The more heat you use, the more likely it is that the transfer will not adhere properly.
- Embroidery or long iron strokes can damage the transfer.
- Instructions for transferring onto dark materials can be more complicated than transferring onto light materials.
- If you’re using a printed image, you need to make sure that the image is mirror-flipped before printing.
- Iron-on transfers can sometimes crack or peel after multiple washes.
- You may need to spend extra time ironing each area of the transfer to ensure proper adhesion.
- The iron-on transfer may not last as long as other methods of shirt printing.
- If you’re starting a business, you may need to invest in a heat press machine for more professional results.
- The iron-on transfer can feel thick and stiff on the shirt.
- The transfer may not look as vibrant or polished as a professionally printed shirt.