
Printing stickers can be a fun and creative way to personalize your belongings or create custom gifts. Whether you want to make homemade labels for your pantry items or print professional-looking stickers for your business, printing on sticker paper is a great choice. Sticker paper comes in different types and sizes, allowing you to choose the perfect label for the specific surfaces you want to stick them on.
Before you start printing, there are a few steps you need to follow:
Step 1: Choose the Right Sticker Paper
There are various types of sticker paper available, including printable vinyl, inkjet sticker paper, and matte sticker paper. Each type has its own recommended printer, so make sure you choose the one that is compatible with your printer. Additionally, consider the size of the sticker paper and the shape of the labels you want to create.
Step 2: Adjust the Printer Settings
When printing on sticker paper, it’s important to adjust the printer settings to ensure the best results. Most printers have specific settings for printing on sticker paper, so make sure to follow the suggested guidelines. These settings may include selecting the appropriate paper type, adjusting the print quality, and choosing the correct paper size.
Step 3: Prepare the Image or Design
If you want to print your own images or designs on the sticker paper, you need to create or choose the right file. Consider the size and resolution of the image to ensure it fits on the sticker paper without being distorted or pixelated. You can use various software options such as Photoshop or even design apps on your phone or laptop for this purpose.
Step 4: Print and Cut
Once you have everything set up, you can now print the stickers onto the sticker paper. After printing, wait for the ink to completely dry before handling the stickers. Then, using scissors or a cutting tool, carefully cut out each sticker along the outline. Take your time and be precise to ensure the stickers look their best.
Now that you have your homemade stickers, you can start using them on various surfaces like notebooks, gift packages, or even walls. Some stickers may require gluing, while others can stick on their own. Always check the instructions provided with the sticker paper to ensure proper adhesion and support on the intended surfaces.
If you’re having trouble finding the right sticker paper or don’t have access to a printer, you can always opt for professional printing services. They can print your designs on high-quality sticker paper and deliver the finished product right to your door. This option is ideal for larger quantities or when you need specific sizes or types of stickers beyond what a home printer can provide.
Follow these simple steps and unleash your creativity by making your own custom stickers. Whether you’re printing labels for organization purposes or creating unique designs for personal use, printing on sticker paper offers endless possibilities.
Print stickers with your home printer in 3 simple steps
When it comes to creating stickers at home, printing them yourself is an ideal choice. Not only does it save you the time and effort of gluing each sticker by hand, but it also allows you to customize your stickers with any design or image you want. While professional printing options are always available, making homemade stickers using your home printer can be a fun and rewarding project.
Here are 3 simple steps to print stickers with your home printer:
- Choose the right sticker paper: There are various types of sticker paper available, including printable vinyl, inkjet sticker paper, and specific sticker paper for different surfaces. Depending on what you plan to use your stickers for, choose the type of sticker paper that is recommended for your specific printer and the surface you will be sticking them on.
- Create your sticker design: Using image editing software or online tools, design your stickers. You can either create a specific shape or choose from suggested shapes and sizes. Make sure to adjust the size of your design to fit the sticker paper sheets you have.
- Print and cut your stickers: Load the sticker paper into your printer and print your design. Ensure that your printer settings are set to the recommended settings for sticker paper. Once printed, let the ink dry completely. Then, use scissors or a paper trimmer to cut the stickers into their desired shape. You now have your homemade stickers ready to stick onto any surface you want!
Printing stickers at home not only allows you to have full control over the design and size, but it also gives you the freedom to print as many as you need. Whether you want to create custom labels for your homemade jam or make personalized gift stickers, the possibilities are endless. Just remember to choose the right sticker paper for your printer, adjust your design to fit the paper size, and follow the recommended printing steps. Get creative and start printing your own stickers today!
Step 2: Choose the right label shape and size
When it comes to printing sticker paper, choosing the right label shape and size is important. This will ensure that your stickers fit perfectly on the desired surface, whether it’s a page, a laptop, a wall, or a gift.
There are various options available when it comes to label shapes, and you can choose based on your preference or the specific type of sticker you want to create. Some suggested shapes include rectangles, circles, ovals, and squares. If you’re using printable sticker paper, you can also cut them into any shape you desire using scissors.
Label sizes can vary, and it’s important to choose the size that best fits your needs. For simple home use or for giving homemade gifts, smaller labels may be sufficient. However, if you’re printing professional stickers or need larger designs, you may want to opt for bigger label sizes.
When choosing the right label shape and size, consider the printer you’re using and the types of sticker sheets available. Some printers have specific label size options that you can adjust, while others may support a range of sizes. The recommended label size will depend on the printer’s capabilities.
It’s also important to consider the surfaces you’ll be sticking the labels on. If you’re planning to use the stickers on outdoor surfaces or surfaces that may come into contact with water, using vinyl or waterproof sticker paper may be ideal. These types of sticker paper can withstand various conditions and ensure the stickers stay intact.
In summary, when printing sticker paper:
- Choose the right label shape and size based on your preference or the specific type of sticker you want to create.
- Consider the printer you’re using and the types of sticker sheets it supports.
- Take into account the surfaces you’ll be sticking the labels on, and choose the appropriate sticker paper accordingly.
Following these steps will ensure that your stickers are printed in the perfect shape and size for your needs.
What Types of Printers Cannot Print on Vinyl Sticker Paper
When it comes to printing on vinyl sticker paper, not all printers are created equal. While many printers can handle the task with ease, there are some types of printers that are simply not designed to print on this specific type of paper. If you attempt to print on vinyl sticker paper with one of these printers, you may end up with smudged ink, poor image quality, or even damage to your printer.
| Printer Type | Reasons it Cannot Print on Vinyl Sticker Paper |
|---|---|
| Inkjet Printers | Although inkjet printers are commonly used for printing, they are not recommended for printing on vinyl sticker paper. Inkjet printers use water-based ink, which can easily smudge or run when applied to vinyl. This can result in blurry or distorted images and a poor overall quality. |
| Laser Printers | Laser printers use heat during the printing process, which can melt the vinyl coating on the sticker paper. This can cause damage to the printer and result in poor printing quality. Therefore, it is not suggested to use a laser printer for printing on vinyl sticker paper. |
| Dot Matrix Printers | Dot matrix printers use impact printing, which involves striking an ink-soaked ribbon against the paper to create an image. Since vinyl sticker paper has a smooth surface, the impact printing method will not transfer the ink effectively onto the paper, resulting in a poor print quality. |
| Thermal Printers | Thermal printers use heat to transfer ink onto paper. While this method can work well for some types of paper, it is not suitable for vinyl sticker paper. The heat from the thermal printer can cause the vinyl to warp or melt, resulting in a ruined print or damage to the printer. |
If you want to print on vinyl sticker paper, it is recommended to use an inkjet or laser printer specifically designed for this type of paper. These printers will have the necessary settings and ink formulations to ensure optimal print quality and adherence to the vinyl surface.
Always check the printer’s specifications to ensure it supports vinyl sticker paper before attempting to print. Using the wrong type of printer can lead to wasted time, materials, and frustration. By choosing the right printer for your vinyl sticker printing needs, you can create professional-looking stickers for a variety of purposes, whether it’s decorating your walls or giving homemade gifts.
How can I print stickers at home
If you’re looking to create custom stickers for personal use or as a unique gift, printing them at home can be a convenient and cost-effective option. With the right tools and steps, you can easily make your own stickers with professional-looking results. Here’s a simple guide on how to print stickers at home:
Step 1: Choose the right sticker paper
When making homemade stickers, it’s important to use a specific type of sticker paper that is compatible with your printer. Printable vinyl or inkjet sticker paper is recommended, as it provides good support for the ink and can be easily shaped and cut.
There are different sizes and types of sticker paper available, so choose the one that suits your needs best.
Step 2: Adjust printer settings
Before printing, it’s important to adjust the printer settings to ensure a perfect print. Make sure to select the right paper type and adjust the print quality to the highest setting for optimal results.
Step 3: Create or choose the sticker design
You can either create your own sticker design or choose from various pre-designed options available online. If you’re using pre-designed sticker sheets, simply input your desired text or adjust the image as needed.
Step 4: Print the stickers
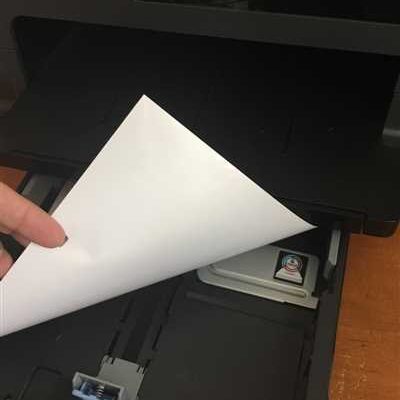
Once you have your sticker design ready, it’s time to print. Load the sticker paper into your printer tray, making sure it’s the right way up. If you’re unsure, consult the printer’s manual for guidance.
Step 5: Cut out the stickers
After the stickers are printed, carefully cut them out using a pair of scissors or a cutting tool. Take your time to ensure clean and precise cuts, especially for intricate shapes or designs.
Step 6: Apply the stickers
Now that your stickers are ready, you can apply them to various surfaces like walls, laptops, phones, or even tiles. Make sure the surfaces are clean and dry before gluing the stickers. If you want the stickers to be removable, consider using a sticker adhesive that is easy to remove without leaving residues.
Suggested tip: If you plan to use the stickers outdoors or on surfaces that may come in contact with water, consider laminating the stickers for extra protection.
Printing stickers at home is a fun and creative way to unleash your imagination. Whether you’re making labels for organizing or adding a personal touch to your belongings, the possibilities are endless. Just follow these steps, and you’ll have your own homemade stickers in no time!
Источники:
– https://www.wikihow.com/Make-Stickers
– https://www.instructables.com/How-to-Make-Stickers/
How To Use Inkjet Sticker Paper

When it comes to making homemade stickers, inkjet sticker paper is a popular choice. This type of paper allows you to print your own custom stickers right from your inkjet printer. Whether you want to create labels for organizing or personalize a gift, inkjet sticker paper is a versatile option for your sticker-making needs.
Here are some simple steps to follow when using inkjet sticker paper:
- Choose the right paper: Inkjet sticker paper comes in various sizes and types. Make sure to choose the appropriate paper size that fits into your printer. Also, consider the type of surface you will be sticking the stickers on. Some inkjet sticker papers are specifically designed for indoor use, while others are recommended for outdoor use.
- Design and print your stickers: Use a graphic design software or an online tool to create the perfect sticker design. Make sure to adjust the image or text size to fit the sticker shape and size. Then, simply print the stickers onto the inkjet sticker paper. Ensure that your inkjet printer supports printable sticker paper.
- Cut out the stickers: Once the stickers are printed, use scissors or a cutting tool to carefully cut out each sticker. You can choose to leave a border around the stickers or cut them into specific shapes.
- Peel and stick: Peel off the backing of each sticker and carefully stick them onto the desired surface. Whether it’s a notebook, a laptop, a water bottle, a wall, or a window, inkjet sticker paper allows you to personalize various objects.
Having inkjet sticker paper on hand gives you the freedom to create personalized stickers at home. Whether you want to label your belongings, make custom gifts, or decorate your personal items, inkjet sticker paper can help you achieve the desired result.
It’s important to note that inkjet sticker paper is not the same as vinyl sticker paper. While inkjet sticker paper is water-based and may not be suitable for outdoor use or surfaces exposed to water, vinyl sticker paper is more durable and water-resistant, making it ideal for outdoor applications.
In conclusion, when it comes to printing and using inkjet sticker paper, follow the suggested steps and consider your specific needs. Design and print your stickers on the right paper size, cut them out to the desired shape, and stick them onto the desired surface. With inkjet sticker paper, you can easily create professional-looking stickers that are perfect for personal use or gift-giving.
Sources
When it comes to printing sticker paper, there are several sources you can rely on. Each source offers different options and types of sticker paper to choose from, depending on your specific needs and preferences. Here are some of the most common sources:
1. Printable sticker paper sheets: These are ideal for home printing and come in various sizes, shapes, and types. You can easily print your own stickers using an inkjet or laser printer. The sheets are designed to support vibrant colors and sharp images.
2. Professional sticker paper: If you want high-quality stickers with a more polished look, professional sticker paper is the way to go. This type of paper often comes in specific sizes and shapes, making it perfect for creating custom stickers for gifts, laptops, phone cases, and more.
3. Vinyl sticker paper: Vinyl sticker paper is a popular choice for outdoor use and can withstand water and other environmental factors. It is recommended for making stickers that will be used on surfaces beyond paper, such as walls, windows, and tiles. Vinyl sticker paper can be printed using inkjet printers.
Regardless of the type of sticker paper you choose, it is always suggested to adjust your printer settings and use the right paper size to ensure optimal printing results. Some printers even have specific options for printing labels or sticker paper.
When it comes to cutting out your printed stickers, scissors are a simple and handy tool to use. However, if you want precise and professional cuts, consider investing in a guillotine paper cutter or a craft cutting machine.