

If you’ve ever watched a 3D movie at the cinema or on your laptop, you may have wondered how those glasses are able to give you such a lifelike and immersive experience. Here’s the secret: it’s all about the lenses. In this step-by-step guide, we’ll show you how to make your own 3D glasses right at home, without having to buy them from the internet or take them from a previous movie.
To make your own 3D glasses, you’ll need a few materials that you probably already have at home. First, you’ll need a red and blue marker or colored tape. These will be used to mark the lenses of your glasses and create the 3D effect. Next, you’ll need two pieces of cardstock or thick paper. These will serve as the frames for your glasses. Finally, you’ll need a pair of 3D glasses from a previous movie. Don’t worry if you don’t have any, as we’ll show you how to make the lenses yourself.
Start by taking one of the pieces of cardstock and cutting it into two equal-sized rectangles. These will be the frames for your glasses. Next, take the other piece of cardstock and cut out two circles that are slightly larger than the lenses of your previous 3D glasses. These circles will serve as the lenses for your own glasses. Once you have the circles cut out, place them in the centre of each frame.
Now it’s time to make the lenses. Take one of the lenses from your previous glasses and carefully trace around it onto the red marker or colored tape. Cut out the circle and stick it onto one of the frames, with the red side facing outwards. Repeat this process with the blue marker or tape, sticking it onto the other frame with the blue side facing outwards. Make sure that the lenses line up and match the placement of the eyes, as this is crucial for the 3D effect.
Once you have both frames with the lenses attached, use some glue or tape to stick them together at the sides. Make sure that the frames are aligned properly and that they fit comfortably on your face. You can also add some decoration or personalization to your glasses if you want to make them look even more unique.
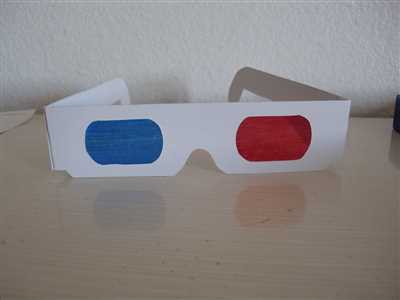
How to Make 3D Glasses at Home by Your Own

If you enjoy watching multimedia content in 3D, you’ll need a pair of 3D glasses to fully immerse yourself in the experience. But what if you don’t have a pair of 3D glasses on hand or don’t want to spend money on buying them? Don’t worry, because you can actually make your own 3D glasses at home using just a few materials.
Here’s what you’ll need to make your own 3D glasses:
- A red and a blue marker
- A pair of cardstock or poster board
- A pair of 3D glasses from a previous event or a 3D glasses template from the internet
- Glue or tape
- Scissors
Once you have all the materials, follow these steps:
- Start by printing out the 3D glasses template from the internet or use the one that you already have. If you can’t find a template, you can make your own by drawing two, identical glasses frames onto a piece of cardstock or poster board.
- Carefully cut out the two glasses frames using a pair of scissors.
- Take the red marker and color the left lens on both frames.
- Take the blue marker and color the right lens on both frames.
- Apply glue or tape to the sides of the frames to attach them together, ensuring that the red lens is on the left side and the blue lens is on the right side.
- Allow the glue to dry and your homemade 3D glasses are now ready to use!
To test out your homemade 3D glasses, you can watch 3D movies on your laptop or visit a 3D website that provides 3D content. Put on your 3D glasses and look at the screen. The red lens should be over your left eye and the blue lens over your right eye. You’ll now be able to see the 3D effects in the content.
Making your own 3D glasses is a fun and cost-effective way to enjoy 3D movies and other 3D content from the comfort of your own home. So why wait? Gather the materials and start creating your own 3D glasses today!
Here’s how to make a 3D poster
If you’ve ever wanted to create your own 3D poster without the need for special glasses, then look no further. Here’s a step-by-step guide on how to make a 3D poster right from the comfort of your own home.
Materials required:
- Photoshop or another image editing program
- Red and blue lens glasses
- A laptop or desktop computer
- Printer and cardstock paper
- Scissors
- Tape or glue
- Red and blue markers
Step 1: Choose the images
First, choose the images you want to use for your 3D poster. These can be your own photos or images you find on the internet. Make sure you have two images of the same scene taken from slightly different angles.
Step 2: Edit the images
Open the images in Photoshop or your preferred image editing program. Create two separate layers for each image. On one of the layers, use the red marker to mark the areas that will appear closer in the 3D effect. On the other layer, use the blue marker to mark the areas that will appear farther away.
Step 3: Print the images
Print the two edited images onto cardstock paper. Make sure to print them in the highest quality possible.
Step 4: Cut and layer the images
Cut out both images along the outline. Then, using tape or glue, stick the images together. Make sure the red-marked layer is in front and the blue-marked layer is behind it. This will give your poster a 3D effect.
Step 5: Make the frame
Use the scissors and cardstock paper to make a simple frame for your poster. Cut out a rectangle slightly larger than your printed images, and then cut another rectangle slightly larger than the first one. Glue or tape the smaller rectangle onto the larger one to create a frame for your poster.
Step 6: Stick the poster
Stick your 3D poster onto the front of the frame. Make sure it is centered and secure.
You’re done! Now you can enjoy your very own 3D poster without the need for special glasses. Place it on your wall, and let your friends and family marvel at your creativity. It’s a great way to add a unique touch to your home or office space.
Get the Mars Newsletter
Are you a space enthusiast who wants to stay up-to-date with the latest news and events happening on the red planet? Look no further! Sign up for our Mars newsletter and get all the information you need delivered right to your inbox.
Here’s how you can make your own 3D glasses to fully immerse yourself in the mesmerizing world of Mars. You’ll be able to enjoy captivating images and videos from the previous missions to the planet, taken by the Mars Rover. With these glasses, you’ll feel like you’re right there, exploring alongside the rover.
To make your own 3D glasses, you’ll need the following materials:
- A sturdy piece of cardstock or poster board
- A pair of red and blue lens filters
- Glue or tape
- A marker
Here’s a step-by-step guide on how to make your 3D glasses:
- First, take the piece of cardstock and cut out two identical frame shapes. These frames will hold your lens filters.
- Place the red lens filter in the left frame and the blue lens filter in the right frame, and secure them with glue or tape.
- Once the frame is ready, take a marker and mark a dot at the centre of each lens filter. This will help you align the filters correctly.
- To assemble the glasses, glue or tape the sides of the frames together, making sure that the lenses are aligned in the correct position.
- You’re almost there! Take your homemade 3D glasses and wear them. Now, you can enjoy Mars-related photos, videos, and multimedia content in 3D without having to go to the movies or any fancy events.
Don’t miss out on the latest news and updates from Mars! Subscribe now to our Mars newsletter and get the exclusive content delivered right to your email. You’ll never be out of the loop when it comes to the fascinating missions and discoveries happening on the red planet.
The Red Planet
If you’re a fan of Mars, then you’ll want to take a look at this step-by-step guide on how to make your own 3D glass for the Red Planet. With a few simple materials that you can find at home or easily get from the internet, you’ll be able to create your very own 3D glasses in no time.
To make your 3D glasses, here’s what you’ll need:
| Materials required: | Cardstock or thick paper | Red and blue marker | Scissors | Glasses frame | Glue or tape |
Step 1: Start by cutting out two lens shapes from the cardstock or thick paper. Make sure the lenses are the right size to fit in the glasses frame.
Step 2: Take the red marker and color one lens entirely red. Then take the blue marker and color the other lens entirely blue. The Red and Blue lens are essential for creating the 3D effect.
Step 3: Next, cut out two frames for the glasses from the cardstock or thick paper. These frames will hold the lenses in place.
Step 4: Glue or tape the lenses onto the frames. Make sure the red lens is on the left side and the blue lens is on the right side, so when you wear the glasses, your left eye sees the red images, and your right eye sees the blue images.
Once your 3D glasses are ready, you can enjoy the 3D movies, photos, and multimedia content about Mars that are available on various websites and media platforms. You’ll be able to look through the red lens at the red images and the blue lens at the blue images, creating a captivating 3D effect.
There have been numerous missions to Mars in the past, and there are always new and exciting events and news about the Red Planet. If you want to stay up to date with the latest happenings, you can sign up for newsletters or visit websites such as NASA’s Mars Exploration Program or the European Space Agency’s Mars site. They provide the latest photos, news, and multimedia content about Mars.
So, don’t just watch movies or see images of Mars on your laptop or phone screen. With your homemade 3D glasses, you’ll be able to immerse yourself in the Martian landscape and feel like you are right there on the Red Planet.
The Program
To make 3D glasses, there are various methods and materials you can use. In this tutorial, we will introduce a simple program that allows you to create your own 3D glasses at home. Here’s what you’ll need:
– A laptop or computer with internet access
– Cardstock or poster board
– Red and blue marker
– Scissors
– Tape
– Glue
– Images you want to view in 3D
– Photoshop or similar multimedia editing program
Once you have gathered all the required materials, here’s a step-by-step guide on how to make your own 3D glasses:
1. Take the cardstock or poster board and cut out two identical frames for your glasses. You can find templates online or create your own design.
2. Using the red and blue markers, color one lens red and the other lens blue. Make sure to color both sides of the lenses.
3. Once the markers have dried, find the centre of each lens and mark a small dot with the red marker on one lens and the blue marker on the other lens. This will help you align the lenses correctly.
4. If you want to add a decorative touch to your glasses, you can decorate the frames with markers or any other materials you have.
5. Now it’s time to stick the lenses to the frames. Apply glue on the back of each lens and carefully stick them onto the frames, aligning the dots you marked in the previous step.
6. Allow the glue to dry for a few minutes, and your homemade 3D glasses are ready to use!
To view 3D images or movies, simply put on your glasses and look through the red lens with your left eye and the blue lens with your right eye. The red lens will filter out the blue light, and the blue lens will filter out the red light, creating a stereoscopic effect that gives the illusion of depth.
Remember, this program is a fun way to create your own 3D glasses at home without the need to buy expensive ones. It’s a great activity for kids and adults alike, and you can use them to enjoy 3D photos, movies, or even virtual reality experiences. So go ahead and get creative with your own homemade 3D glasses!
News Events
If you want to make your own 3D glasses, here’s a fun project for you. With a few materials, some free time, and a little bit of creativity, you can create your own 3D glasses at home. So, let’s get started!
First, you’ll need the following materials:
- Cardstock or thick paper
- Red and blue marker
- Scissors
- Glue or tape
- Laptop or computer with internet access
Once you have all the materials, follow these step-by-step instructions:
- Start by creating the frame for your glasses. Take the cardstock or thick paper and cut out a shape similar to the glasses frames you typically see. Make sure to leave enough space for your eyes.
- Next, cut out two small rectangles from the cardstock or thick paper that will act as the lenses for your glasses. These should fit perfectly into the frames you just created.
- Color one of the rectangles completely red using the red marker. This will be the lens for your left eye.
- Color the other rectangle completely blue using the blue marker. This will be the lens for your right eye.
- Glue or tape the lenses onto the front of the frames, making sure to keep the red lens on the left side and the blue lens on the right side.
- Allow the glue to dry completely before using your 3D glasses.
Now that you have your own 3D glasses, here’s how you can use them:
- Find 3D images or movies on the internet or through a 3D multimedia program.
- Put on your 3D glasses and look at the images or watch the movies.
- You’ll notice that the images have an extra depth and appear to pop out at you.
So, whether you want to take a virtual trip to Mars or immerse yourself in the latest 3D movies, your homemade 3D glasses will let you do just that. Have fun and enjoy exploring the exciting world of 3D!
Multimedia
In the digital age, multimedia has become an integral part of our lives. It allows us to engage with various forms of content such as videos, images, and audio, enhancing our overall experience. Whether you’re browsing the internet, watching movies, or creating your own unique projects, multimedia is everywhere.
One popular form of multimedia is 3D glasses. These glasses can transport you into a whole new world, taking your movie-watching experience to the next level. Making your own 3D glasses is a fun and exciting DIY project that doesn’t require extensive materials or time.
Materials Required
To make your own 3D glasses, you’ll need the following materials:
- Cardstock or paper
- Red and blue marker
- Scissors
- Glue or tape
Step-by-Step Guide
- Start by cutting out two identical rectangular frames from the cardstock or paper. Make sure they are large enough to fit comfortably on your face.
- Color one frame with the red marker and the other frame with the blue marker. This will be used to create a contrasting effect for the 3D experience.
- Cut out two small rectangular pieces from the leftover cardstock or paper. These will act as the lenses for your glasses.
- Glue or tape the lenses onto the front of each frame, making sure they are aligned properly.
- Let the glue dry, and your homemade 3D glasses are ready to use!
Now that you have your own 3D glasses, you can enjoy 3D movies, images, and even virtual reality experiences in the comfort of your own home. These glasses work by allowing each eye to see a slightly different image or color, creating an illusion of depth and enhancing the overall viewing experience.
So, whether you want to explore the wonders of a distant planet, attend virtual events or missions, or simply enjoy the latest 3D movies, having your own 3D glasses lets you dive into a whole new world of multimedia. It’s a simple and affordable way to make the most out of your multimedia content without having to buy expensive equipment.
Remember, there’s always more to explore. The internet is filled with an abundance of multimedia content, ranging from stunning photos to interactive games and informative newsletters. With the right program or website, you’ll never run out of multimedia experiences to enjoy. So get your homemade 3D glasses ready and embark on a new journey in the world of multimedia!
Missions
Want to experience the thrilling adventures of exploring other planets and galaxies right from the comfort of your own home? Let’s embark on some exciting 3D missions! With just a few materials and some simple steps, you can create your own 3D glasses and immerse yourself in the mesmerizing world of multimedia.
To start your mission, you will need the following materials:
- A red and blue marker or colored cardstock
- A pair of scissors
- A clear plastic sheet or transparency film
- A glue stick or tape
- A laptop or smartphone
- Images of space, planets, or any 3D content you want to explore
Step 1: Take the clear plastic sheet or transparency film and cut out two rectangular frames that are slightly larger than your own eyes. These will be the lenses of your 3D glasses.
Step 2: Color one side of each lens frame with the red marker or using red cardstock. Color them evenly and make sure there are no white spots.
Step 3: Tape or glue the red side of one lens frame on the right and the blue side of the other lens frame on the left. These will be the sides facing your eyes when you wear the glasses.
Step 4: Open a new tab or window on your laptop or smartphone and search for 3D images or videos. You can find a wide variety of 3D content on the internet, including movies, photos, and interactive multimedia experiences. Choose the content that interests you the most or embark on an imaginary journey to Mars or any other planet you’d like to explore.
Step 5: Once you have found the desired 3D content, maximize the window or adjust the size to fit your screen. This step is important to ensure the 3D effect is effective.
Step 6: Put on your homemade 3D glasses and look at the screen through the red and blue lenses. You’ll notice that the images appear to have more depth and pop out from the screen. The red lens will filter out the blue light, while the blue lens will filter out the red light, creating the illusion of a 3D effect.
Step 7: Enjoy your 3D experience! Explore the wonders of the universe from the comfort of your own home. Whether you’re watching a 3D movie or exploring breathtaking photos of distant galaxies, the immersive experience will transport you to another dimension without leaving your couch.
Don’t forget to pass on the news of your intergalactic adventures to your friends and family! Share the guide with them and get ready for some thrilling 3D missions together.
Remember, your imagination is the limit! Create your own missions and explore the wonders of the universe through the lenses of your homemade 3D glasses. Subscribe to our newsletter or stay tuned to our website for more exciting events and multimedia content.
More
If you want to take your 3D glass-making adventures to the next level, here’s more information to consider. First, let’s take a look at the materials you’ll need. In addition to the cardstock, red and blue markers, and tape mentioned in the previous steps, you’ll also need 3D glasses lenses. These can be obtained from old 3D glasses or purchased online.
Once you have all the required materials, you can start by creating the frames. Take a cardstock and cut out two identical shapes for the frames. These frames will hold the lenses, so make sure they are the right size. You can use a marker to draw the frame shape on the cardstock and then cut it out.
Now, let’s move on to the lenses. Take the lenses from the old 3D glasses or the ones you purchased. Place one lens in the centre of the left frame and the other in the centre of the right frame. Use glue or tape to secure the lenses in place. Make sure they are positioned correctly, with the red lens on the left side and the blue lens on the right side.
Once the frames and lenses are attached, you can decorate the glasses with markers or add any designs you like. Let your creativity shine and make these 3D glasses truly your own.
If you want to make 3D images at home, you’ll need a program like Photoshop or another photo editing software. You can search for 3D images or download them from the internet. Once you have the images, open them in the program and follow the instructions to convert them to 3D. There are also websites and multimedia sites that offer 3D images and movies that you can enjoy with your homemade glasses.
Remember, making 3D glasses at home is a fun and creative project. Don’t get discouraged if your first attempt doesn’t turn out perfect. With practice and experimentation, you’ll get better at making them. Also, don’t forget to subscribe to our newsletter to stay updated on the latest news and events in the 3D world.
Sources

When making 3D glasses at home, you’ll need a few materials, such as cardstock, glue, tape, and red and blue markers. There are a few ways you can get the 3D images you want to view. Here’s a step-by-step guide on how to make 3D glasses without using Photoshop or any other program:
1. Take two lenses from an old pair of 3D glasses or buy them online. Make sure both lenses are the same size.
2. Cut out a frame for your glasses from the cardstock. You can use the template from a previous pair of 3D glasses or find one online.
3. Glue the lenses to the frame. Make sure they are aligned and centered.
4. Use the red marker to color one side of one lens and the blue marker to color one side of the other lens.
5. Tape the frame to hold the lenses securely in place.
Now, let’s look at some sources where you can find the 3D images and 3D movies to view with your homemade glasses:
– The internet: There are many websites that offer 3D images and videos for free. Just search for “free 3D images” or “free 3D movies” and you’ll find plenty of options.
– Multimedia events: Some events, like movie premieres or 3D showcases, provide 3D glasses for the audience. You can attend these events and take the glasses home with you.
– DVDs and Blu-rays: Many movies and documentaries are released in 3D format along with the regular 2D version. You can buy or rent these movies and watch them at home.
– 3D posters: Some posters have 3D images that can be viewed with 3D glasses. You can find these posters at stores or online.
– NASA’s Mars missions: NASA often releases 3D images of Mars taken by their rovers. You can find these images on NASA’s website or in their newsletter.
With these sources, you’ll have plenty of 3D content to enjoy with your homemade glasses. Just make sure to follow the instructions and have fun exploring the 3D world!


