If you’re a craftpro or someone who loves to get creative, you’ll definitely want to watch this tutorial on how to make sublimation tumblers. Sublimation tumblers are a popular choice for custom designs because they offer a glimmering and vibrant look that regular tumblers just can’t match.
Before we dive into the tutorial, let’s talk about what sublimation is. Sublimation is a heating process that allows ink designs to transfer onto a substrate, like a tumbler, using heat and pressure. This means that your designs will become a part of the tumbler itself, and they won’t fade or peel off over time. It’s the ultimate option for creating long-lasting and high-quality custom tumblers.
In order to make sublimation tumblers, you’ll need a few key materials. First, you’ll need a stainless steel tumbler, preferably one with a smooth surface. Next, you’ll need sublimation ink and sublimation paper, which can be purchased as a bundle or separately. You’ll also need a heat press or an oven that can reach the right temperature and pressure to sublimate the ink onto the tumbler.
The process is relatively simple, but there are a few tips and tricks that will help you get the best results. First, make sure to clean the tumbler thoroughly before starting the project. Any dirt or oils on the surface can interfere with the sublimation process. Next, you’ll need to print your design onto sublimation paper using a sublimation printer. Make sure to mirror the design and use the appropriate settings for sublimation printing.
Once the design is printed, you’ll need to cut it out and tape it securely onto the tumbler. Make sure that the design is positioned correctly and evenly on the tumbler. You can use heat-resistant tape or regular tape, just make sure it’s secure and won’t move during the sublimation process.
Now comes the fun part! Place the tumbler with the design facing outwards into the heat press or oven. Follow the instructions specific to your equipment for the right time, temperature, and pressure. While the tumbler is being heated, the ink will turn into a gas and then sublimate into the surface of the tumbler. This process makes the design permanent and ensures that it won’t fade or peel off over time.
Once the sublimation process is done, remove the tumbler from the heat press or oven and let it cool down. Be careful, as the tumbler will be hot! Once it’s cooled, you can remove the tape and admire your newly-made sublimation tumbler. It’s ready to be used or given as a unique and personalized gift to someone special.
If you’re unsure about any step in the process, don’t worry! There are plenty of online tutorials and videos available that can walk you through the sublimation tumbler-making process. Just make sure to do your research and gather all the necessary materials before getting started. Soon enough, you’ll be sublimating your own custom designs onto these beautiful and eye-catching tumblers!
- Sublimation Tumblers 3 Methods + Seamless Designs
- Watch the Video Tutorial
- What is a Sublimation Tumbler
- Can I Use Any Tumbler for Sublimation
- Best sublimation bundle for tumblers
- 1 How to remove sublimation ink from tumbler
- 2 Can you sublimate in a regular oven
- 3 Can you sublimate on stainless steel tumblers
- How To Make Custom Glimmering Sublimation Tumblers
- Materials and Equipment
- The Sublimation Process
- Tips and Tricks
- Video:
- How to Make Sublimation Tumblers in 3 Ways with Seamless Results!
Sublimation Tumblers 3 Methods + Seamless Designs
When it comes to creating custom designs on stainless steel tumblers, sublimation is one of the most popular methods. Sublimation allows you to print vibrant, full-color designs that wrap around the entire surface of the tumbler, giving it a seamless and professional look. In this tutorial, we will explore three different methods for sublimating tumblers and creating seamless designs.
Method 1: Using Sublimation Papers
The first method involves using sublimation papers to transfer the design onto the tumbler. To start, make sure you have a sublimation printer and sublimation ink. Print your design onto the sublimation paper, ensuring that it is the right size for the tumbler. Next, tape the printed sublimation paper onto the tumbler using heat-resistant tape. Place the tumbler in a sublimation oven and heat it at a precise temperature and pressure, following the manufacturer’s instructions. Once done, remove the paper and you’ll have a beautifully printed tumbler.
Method 2: Using Sublimation Tape
Another option is to use sublimation tape to create a seamless design on the tumbler. This method is similar to the first one, but instead of using sublimation papers, you’ll use sublimation tape. Apply the tape precisely along the edges of each design element, ensuring that it adheres well to the tumbler surface. The tape acts as a barrier, preventing the ink from spreading outside the desired area during the sublimation process. Once the tape is applied, follow the same steps as in method 1 to sublimate the design onto the tumbler. When done, carefully remove the tape to reveal your seamless design.
Method 3: Using a Wrap Attachment
If you’re going for the ultimate seamless design, using a wrap attachment is the way to go. A wrap attachment is a tool specifically designed for sublimating tumblers. It allows you to slide the tumbler into a specially made holder, which rotates to ensure even heating and ink distribution. This method is particularly useful when working with complex designs or if you want the entire tumbler surface to be covered with your custom design. Simply follow the manufacturer’s instructions for your wrap attachment, and soon you’ll have a flawless, glimmering sublimated tumbler.
Sublimation tumblers offer a unique and eye-catching way to customize stainless steel products. Whether you are using sublimation papers, tape, or a wrap attachment, the key is to have the right equipment, proper heat, pressure, and a high-quality design. Make sure to watch tutorial videos and learn from reliable sources before starting your sublimation tumbler project. With these methods, you’ll be able to create stunning, seamless designs that turn heads wherever you go.
Sources: CraftPro, Sublimation Tumbler 101, Sublimation Techniques
Watch the Video Tutorial
If you’re unsure of how to make sublimation tumblers, we’ve got you covered! The ultimate guide to making these glimmering tumblers is just a click away. In this video tutorial, we’ll show you exactly how to create your own custom designs on stainless steel tumblers using the sublimation process.
Sublimation is a method that allows the ink to be printed onto a special paper and then transferred onto the surface of the tumbler. The heat and pressure from the sublimation process cause the ink to turn into a gas and permanently sublimate into the substrate, which in this case is the stainless steel tumbler.
In the video, you’ll learn step-by-step how to sublimate your designs onto the tumbler. We’ll show you the best tips and techniques for achieving a seamless and professional-looking finish. You’ll also see how to use a heat press machine and a convection oven to ensure that your designs are precisely applied and long-lasting.
One of the most important aspects of this process is the type of paper you use. Regular printer paper won’t work here. You’ll need special sublimation paper that is designed to hold the ink and release it when heat is applied. We’ll go into detail about what paper to use and how to prepare it before starting your project.
During the tutorial, we’ll take you through the entire process from start to finish. We’ll show you how to properly prepare the tumbler by cleaning and preheating it. Then, we’ll demonstrate how to secure your design to the tumbler using heat-resistant tape.
As the tumblers will be heated, it’s important to rotate them while applying heat to ensure an even distribution. We’ll demonstrate the right technique for rotating the tumbler for the best results.
Once the tumbler is in the heat press machine or the convection oven, we’ll show you how to set the temperature and the time for optimal sublimation. We’ll go over the pressure settings and explain why this is crucial for a successful sublimation process.
When your tumbler is done, we’ll walk you through the steps to remove it from the heat source and let it cool down. We’ll give you tips on how to handle the hot tumbler safely.
The video tutorial is made by CraftPro, a leading brand in the sublimation community. They have years of experience and expertise in this craft, and they’ll share their knowledge and insights with you.
So, if you’re ready to dive into the world of sublimation tumblers and create your own customized creations, watch the video tutorial now. Soon, you’ll be making the most stunning and eye-catching tumblers that will impress everyone around you!
What is a Sublimation Tumbler
A sublimation tumbler is a type of drinkware that is specially designed to be customized using the sublimation process. Sublimation is a printing method that allows you to transfer a design onto a substrate using heat and pressure. The design is first printed on sublimation paper using sublimation ink, and then heat is applied to turn the ink into a gas, which bonds with the surface of the tumbler.
Sublimation tumblers are typically made of stainless steel, which makes them durable and long-lasting. They are also double-walled, which helps to keep drinks hot or cold for longer periods of time. The smooth surface of the tumbler allows for a seamless and flawless transfer of the design.
To create a sublimation tumbler, you will need a few key materials, including a sublimation printer, sublimation ink, sublimation paper, and a heat press or oven. You’ll also need a design software to create or modify your designs before printing them. There are various sublimation methods and processes that you can use to create your custom tumblers, and there are plenty of tutorials and videos available online that can guide you through the process.
When making a sublimation tumbler, the first step is to prepare your design. This can be done using a design software, or you can choose from pre-made designs that are available online. Once your design is ready, you will print it out on sublimation paper using a sublimation printer and ink.
Next, you will need to prepare the tumbler. Start by cleaning the surface with rubbing alcohol to remove any dirt or oils that could affect the transfer. You can also use a lint-free cloth to ensure a clean surface. Once the tumbler is clean, you can use heat-resistant tape to secure the sublimation paper onto the tumbler.
The next step is to heat the tumbler using a heat press or an oven. The heat and pressure will cause the ink to turn into a gas, and the design will be transferred onto the surface of the tumbler. The heating time and temperature will vary depending on the materials and tools you are using, so it’s best to follow the instructions provided with your sublimation bundle or consult an expert.
When the heating process is done, you will need to remove the tape and sublimation paper from the tumbler. Be careful as the tumbler can be hot. Once the tape and paper are removed, your custom design will be left behind, creating a beautiful and personalized sublimation tumbler.
Sublimation tumblers offer a versatile and customizable option for creating unique drinkware. You can use them to showcase your favorite designs, logos, or personal photos. They can be used for both personal and business purposes, making them a popular choice for gifts or promotional items.
In conclusion, a sublimation tumbler is a stainless steel drinkware that can be customized with personalized designs using the sublimation process. The sublimation process involves printing a design on sublimation paper using sublimation ink, and then transferring it onto the tumbler surface through heating. This method allows for a seamless and vibrant transfer, making sublimation tumblers a popular choice for those looking for custom and eye-catching drinkware.
Can I Use Any Tumbler for Sublimation
When it comes to sublimation, not all tumblers are created equal. While it may be tempting to use just any stainless steel tumbler for your sublimation project, there are some important factors to consider before diving in.
The process of sublimation involves using heat to transfer dye onto a specially coated surface. This means that in order for sublimation to work effectively, you need a tumbler that has been specifically made for this purpose.
Regular stainless steel tumblers do not have the necessary coating to properly sublimate. The glimmering stainless steel on these objects will not allow the ink to transfer and adhere to the surface, resulting in a failed project.
The best tumbler for sublimation is made from a special coating that allows the ink to vaporize and permanently bond with the surface. This means that when you sublimate a design onto the tumbler, it becomes a part of the tumbler itself and will not easily scratch or wear off.
There are several sources where you can find sublimation tumblers with the proper coating. These tumblers are typically made from stainless steel and have a white or silver surface that is ready for sublimation. You can find them from various suppliers and online stores, just make sure they are specifically labeled for sublimation.
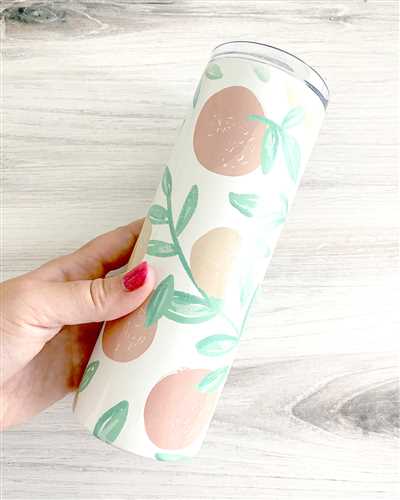
Another important consideration when selecting a tumbler for sublimation is the shape. Tumblers with flat sides are the easiest to work with, as they provide a seamless surface for the printed design. Rounded tumblers, on the other hand, may require additional methods and tools to ensure full coverage.
One popular option is to use sublimation paper and heat-resistant tape to attach your design to the tumbler. This technique allows you to precisely position and secure the design before applying heat. Just make sure to watch a tutorial or follow a guide for the specific steps and tips when using this method.
Sublimation tumblers can be sublimated in an oven or using a heat press machine. Both methods have their pros and cons, so it’s important to choose the one that works best for you. Whichever method you choose, remember to follow the instructions carefully and keep safety in mind.
As you sublimate your tumbler, be sure to rotate it periodically to ensure even heat distribution. This will help you achieve a consistent and vibrant result. And don’t forget to use a heat-resistant glove or mitt to protect yourself from burns.
In conclusion, while it may be tempting to use any tumbler for sublimation, it’s best to choose a tumbler specifically made for this process. The specialized coating on these tumblers ensures a successful and long-lasting sublimation project. So do some research, find the right tumbler, and start creating your ultimate sublimation masterpiece!
Best sublimation bundle for tumblers
If you want to create professionally designed and customized sublimation tumblers, you’ll need the best sublimation bundle for the job. This bundle includes everything you need to efficiently and effectively sublimate your designs onto stainless steel tumblers. In this article, we will guide you through the process and recommend the ultimate bundle that will take your sublimation tumblers to the next level.
When it comes to sublimating tumblers, one of the most important aspects is the surface preparation. Before you start the sublimation process, make sure that the stainless steel tumbler is thoroughly cleaned and free from any oils or debris. A clean surface will ensure that your design adheres perfectly to the tumbler and lasts for a long time.
The best sublimation bundle for tumblers usually includes a heat press machine. This machine is specifically designed to apply the precise amount of temperature and pressure needed to sublimate the ink onto the stainless steel surface. With a heat press machine, you can easily control the heating time and ensure that your design comes out flawlessly.
Another essential tool in the sublimation process is the sublimation paper. This specialized paper has a coating that enables it to absorb the sublimation ink and release it onto the tumbler surface. Using sublimation paper ensures that your design is transferred onto the tumbler precisely and without any smudging.
In addition to a heat press machine and sublimation paper, the best sublimation bundle for tumblers will also include a mug wrap or tumbler press. This accessory is used to hold the tumbler securely in place while it is being sublimated. It also helps to evenly distribute the heat and pressure, ensuring a seamless and vibrant design.
One of the main advantages of using a sublimation bundle for tumblers is the ability to rotate the tumbler during the sublimation process. This means that all sides of the tumbler can be sublimated, including the bottom. By rotating the tumbler, you can create a full wrap-around design that looks professional and eye-catching.
When using a sublimation bundle for tumblers, it’s important to note that the sublimation ink is converted from a solid to a gas form during the heating process. This vapor then penetrates the surface of the tumbler and becomes a permanent part of it. With the right combination of heat, pressure, and time, your designs will be vibrant, durable, and long-lasting.
If you’re looking for the best sublimation bundle for tumblers, the CraftPro bundle from Glimmering Ink is highly recommended. This bundle includes a high-quality heat press machine, sublimation paper, and a tumbler press. It also comes with a detailed tutorial video that guides you through the entire sublimation process, from start to finish.
In conclusion, the best sublimation bundle for tumblers is the one that provides you with all the necessary tools, such as a heat press machine, sublimation paper, and a tumbler press. These tools will ensure that your sublimation tumblers turn out beautifully and withstand the test of time. So, invest in the right bundle and start creating stunning custom tumblers today!
1 How to remove sublimation ink from tumbler
If you’ve made a mistake or simply want to change the design on your sublimation tumbler, don’t worry! Removing sublimation ink from a tumbler is possible and can be done using a few different methods. In this article, we’ll go over the most common ways to remove sublimation ink and give you tips on how to do it effectively.
Method 1: Heat and Pressure
One of the most popular methods for removing sublimation ink from a tumbler is by using heat and pressure. This technique works well for tumblers made of stainless steel. Here’s how you can do it:
- First, you’ll need to take off any attachments on the tumbler, such as the lid or straw.
- Next, wrap the tumbler with a heat-resistant tape, covering the areas you want to protect.
- Place the tumbler on a heat press or in an oven and heat it to a temperature of around 400°F (200°C).
- Apply pressure to the tumbler using a heat-resistant glove or a heat press machine.
- After a few minutes, remove the tumbler and let it cool down. The sublimation ink should slide off the surface.
Method 2: Using Chemicals
If the heat and pressure method doesn’t yield the desired results, you can try using chemicals to remove the sublimation ink. Here’s how:
- Purchase a chemical solvent designed for removing ink.
- Apply the solvent onto a cotton ball or cloth and gently rub it over the sublimation ink on the tumbler.
- Continue rubbing until the ink starts to fade or come off completely.
- Wash the tumbler thoroughly with soap and water to remove any residual chemicals.
Regardless of the method you choose, always make sure to follow safety guidelines and use protective equipment when necessary. With a bit of patience and precision, you’ll be able to remove sublimation ink from your tumbler, allowing you to start a new project or apply a different design.
Now that you know how to remove sublimation ink from a tumbler, you can confidently explore different designs and create stunning personalized tumblers!
2 Can you sublimate in a regular oven
When it comes to sublimation, many people wonder if it is possible to achieve the same results using a regular oven instead of a heat press. The short answer is yes, you can sublimate in a regular oven, but there are some important factors to consider before attempting it.
One of the crucial requirements for sublimation is applying heat and pressure simultaneously. This process allows the sublimation ink to turn into a gas and permeate the surface of the object, creating vibrant and long-lasting designs. While a heat press provides the necessary pressure, a regular oven lacks this feature by default.
So, if you decide to sublimate in a regular oven, you have a few options. One method involves rotating the object manually inside the oven to ensure even heating. Another option is to use a mug attachment, which can hold the tumbler in place while it is being heated. This attachment is typically made from stainless steel and is designed to withstand the high temperatures required for sublimation.
Before sublimating in a regular oven, it is important to ensure that the object you are working with is compatible with sublimation. Most tumblers are made from stainless steel, which is a suitable substrate for sublimation. However, it’s always best to check with the manufacturer or supplier to confirm if a particular tumbler is suitable for sublimation.
When sublimating in a regular oven, it is essential to take the necessary safety precautions. You should use heat-resistant gloves and handle the tumblers with care to avoid any burns. Additionally, you should protect the printed sublimation paper by using heat-resistant tape to secure it to the tumbler.
It’s worth noting that sublimating in a regular oven may not yield the same precise results as a dedicated heat press. The temperature inside the oven may not be as accurate or consistent, which can affect the final outcome of the sublimation process.
It is important to remember these tips and proceed with caution when sublimating in a regular oven. If you’re looking for the ultimate sublimation experience, investing in a heat press is the best option. However, if you don’t have access to a heat press, sublimating in a regular oven can still be a viable method to create custom designs on tumblers.
In conclusion, using a regular oven for sublimation is an option, but it’s crucial to be aware of the potential limitations and take the necessary safety precautions. If you’re interested in the full step-by-step process of sublimating in a regular oven, there are tutorials and videos available online that can provide detailed guidance on how to make sublimation tumblers using this method.
3 Can you sublimate on stainless steel tumblers
Sublimation is a popular method for creating custom designs on various objects, and stainless steel tumblers are no exception. While sublimating on stainless steel tumblers can be a bit more challenging compared to other substrates, it is still possible.
The first thing you need to consider is the type of tumbler you’re using. Not all stainless steel tumblers are suitable for sublimation. Look for tumblers that have a coating specially designed for sublimation, such as those made with a polymer coating.
Before starting the sublimation process, you’ll need to prepare your design. This can be done using graphic design software like Adobe Photoshop or CorelDRAW. Make sure to mirror your design before printing it onto sublimation paper.
Next, you’ll need to secure the sublimation paper with your design onto the tumbler using heat-resistant tape. This ensures that the paper stays in place during the sublimation process and prevents any shifting or smudging of the design.
Now comes the actual sublimation process. Place the tumbler with the attached sublimation paper into a heat press or an oven specifically designed for sublimation. Apply the necessary heat and pressure according to the manufacturer’s instructions.
The high heat and pressure will cause the sublimation ink on the paper to turn into a gas and penetrate the coated surface of the tumbler. This process allows the ink to become a part of the tumbler, resulting in a vibrant and long-lasting design.
While sublimating, it’s essential to rotate the tumbler to ensure even heating and to avoid any hot spots. This will help to prevent any potential uneven color distribution on the finished product.
Once the sublimation process is complete, remove the tumbler from the heat press or oven and carefully remove the sublimation paper. Be cautious as the tumbler will be hot. Allow it to cool down before handling.
The final result will be a beautifully custom-made stainless steel tumbler with your desired design. With proper execution, sublimation can create a seamless and visually stunning end product.
Remember, sublimation on stainless steel tumblers requires specific materials and equipment. Make sure to do thorough research and select the best tools and supplies for your project. There are many online tutorials and videos available to guide you through the process and provide helpful tips.
In summary, yes, you can sublimate on stainless steel tumblers, but it requires the right materials, proper technique, and attention to detail. With the ultimate goal of creating a glimmering and personalized tumbler, sublimation can be a great option for customizing stainless steel tumblers.
How To Make Custom Glimmering Sublimation Tumblers
If you’re looking to create stunning custom glimmering sublimation tumblers, you’ve come to the right place! Sublimation tumblers are a popular choice for personalized gifts or promotional items. By using the sublimation process, you can transfer designs onto the surface of a tumbler with ease. In this tutorial, we’ll walk you through the step-by-step process of making your own custom glimmering sublimation tumblers, so let’s get started!
Materials and Equipment
Before you watch the video tutorial or dive into the tutorial, let’s go through the materials and equipment you’ll need:
- Sublimation printer and ink
- Sublimation paper
- Sublimation tape
- Heat-resistant tape
- Heat-resistant gloves
- Sublimation tumbler
- Heat press or oven
- Glimmering substrate or powder
- Stainless steel tumbler
- Object attachment
- Heat-resistant tape
- Seamless heat-resistant tape
The Sublimation Process
To begin, print your desired design onto sublimation paper using a sublimation printer and ink. Make sure to mirror the image before printing, as it will be transferred onto the tumbler in reverse.
Next, take your sublimation tumbler and attach the printed design to it using sublimation tape. Ensure that the design is centered and aligned properly on the tumbler.
Now, it’s time to prepare the tumbler for the heating process. Make sure that both the tumbler and the design are clean and free of any dust or debris. This will ensure a seamless transfer.
If you’re using a heat press, set it to the appropriate temperature and time for the type of tumbler you’re using. If you’re using an oven, make sure it is preheated to the correct temperature.
Place the tumbler with the attached design into the heat press or oven, ensuring that the design is facing down onto the glimmering substrate or powder. Apply gentle pressure and allow the heat to transfer the design onto the tumbler.
After the heating process is complete, carefully remove the tumbler from the heat press or oven using heat-resistant gloves. Be cautious as the tumbler will be hot.
Let the tumbler cool down completely before removing the sublimation tape and paper. Once cooled, your custom glimmering sublimation tumbler is ready to use or gift!
Tips and Tricks
Here are some additional tips and tricks to consider when making custom glimmering sublimation tumblers:
- Rotate the tumbler while applying heat to ensure even sublimation on all sides.
- Use a stainless steel tumbler for the best results.
- Ensure that the glimmering substrate or powder is heat-resistant and suitable for sublimation.
- If using an oven, place the tumbler on a designated heat-safe surface.
- Watch the video tutorial carefully before attempting the process on your own.
- Experiment with different designs and colors to create unique and personalized tumblers.
With the right methods and materials, you can create stunning custom glimmering sublimation tumblers that will impress anyone. So gather your supplies and get started on your next sublimation tumbler project today!