
A digital signature is a way to indicate that a document or form has been signed electronically. It is typically created using software or a service that allows you to select and create your own digital signature. In this article, we will discuss how to write a digital signature, the different options available, and why it is important in today’s digital age.
When you receive an electronic document that needs to be signed, you usually have the option to sign it digitally. To do this, you will need to open the document in the software or service that you are using. Once the document is open, you can select the option to create a digital signature. This will typically open a space where you can draw or type your signature, indicating that you have signed the document.
There are a few ways to create a digital signature. One way is to simply write your signature using your mouse or touchpad. Another way is to upload an image of your signature and insert it into the document. Yet another option is to use software or a service that allows you to choose from a selection of pre-made signatures. No matter which method you choose, the goal is to create a unique signature that represents you as the signer.
After you have created your digital signature, you can save it for future use. This is especially helpful if you frequently need to sign documents or forms electronically. Once your signature is saved, you can easily load it onto any document you need to sign. This saves you time and effort, as you don’t have to create a new signature each time.
It’s important to note that digital signatures are different from e-signatures, although the terms are often used interchangeably. An e-signature is simply an electronic way of signing a document, while a digital signature is a specific type of e-signature that is created using digital certificates and can be used to verify the authenticity of a document or form.
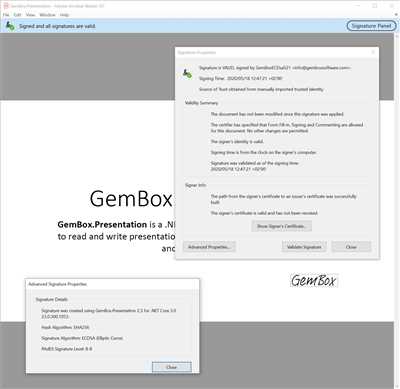
In order for a digital signature to be valid, it needs to be accompanied by a timestamp. This timestamp indicates the time at which the document was signed and adds another layer of security to the signature. The timestamp is typically generated automatically by the software or service you are using, so you don’t have to worry about manually adding it.
In conclusion, writing a digital signature is a simple and easy way to sign documents and forms electronically. Whether you choose to create your own signature or use pre-made signatures, the goal is to create a unique signature that represents you as the signer. By using digital signatures, you can save time and effort, while also ensuring the authenticity and integrity of your signed documents.
- How to Create an Electronic Signature Form
- How to make a digital signature
- How to Make an E-Signature
- 1 Choose an Electronic Signature Software
- Gather electronic signatures the easy way
- 2 Load Your Document Into Your E-Signature Software
- 3 Indicate The Signature Space in The Document
- 4 Send The Document to The Signer
- eSigning after You’ve Created Your Electronic Signature
- Sources
How to Create an Electronic Signature Form

An electronic signature form makes it easy to gather signatures digitally, without the need for physical documents. Follow the steps below to create your own electronic signature form.
- Choose a Software: Select a digital signature software that suits your needs. There are many options available, such as Adobe Sign, DocuSign, and emSigner.
- Create the Form: Open the software and indicate the order of the fields in the form. Typically, you can drag and drop fields into the desired space on the document.
- Add Signature Fields: In the form editor, add a signature field for each signer. This allows individuals to indicate where their signatures should go.
- Load the Document: After creating the form, load the document that needs to be signed into the software. This can be a Word document, PDF, or any other supported format.
- Send the Form: Once the document is loaded, you can send the form to the recipients. They will receive an email with a link to the form.
- Sign the Document: When the recipient opens the form, they will see the signature fields. They can sign electronically by typing their name, using a stylus, or uploading an image of their signature.
- Receive the Signed Document: After signing, the document is automatically saved and the signed version is sent back to you. Typically, you will receive an email notification.
Creating an electronic signature form is a simple way to make the signing process more efficient. With the help of digital signature software, you can easily create, send, and receive signed documents, saving time and eliminating the need for physical signatures.
Note: It’s important to choose a trusted service provider for your electronic signatures, such as emSigner or other reputable sources. Additionally, some forms may require a digital certificate or timestamp for added security.
How to make a digital signature
Creating a digital signature is a simple process that can be done using specialized software or online services. Here is a step-by-step guide on how to make a digital signature:
- Choose an e-signature service: There are many e-signature services available that offer different features and pricing options. Do some research and select the service that best suits your needs.
- Sign up and create an account: After choosing a service, sign up for an account. This usually involves providing some basic information such as your name and email address.
- Create your digital signature: Once you’ve created an account, you can start creating your digital signature. Most services provide different options for creating a signature, such as drawing it with a stylus or uploading an image of your handwritten signature.
- Select the document you want to sign: After creating your digital signature, you can load the document you want to sign. This can be a Word document, PDF, or any other supported file format.
- Gather the necessary information: Depending on the document you’re signing, you may need to provide additional information such as your name, date, or other fields. Fill in the required information in the designated spaces.
- Indicate where you want to place your signature: In the document, select the space where you want your digital signature to appear. Most e-signature services provide a simple way to drag and drop your signature into the appropriate location.
- Sign and save the document: After indicating the location, select the option to sign the document. The service will apply your digital signature to the document and save it.
- Timestamp and send the signed document: If you’re required to timestamp the document, select the appropriate option. Once the document is timestamped and saved, you can send it to the intended recipient.
- Receive and verify the signed document: The recipient of the signed document will receive it and can verify the authenticity of the signature. Digital signatures use certificates to ensure the integrity of the signed document.
By following these steps, you can easily create a digital signature and sign your documents electronically. Whether you’re an individual or a business, using digital signatures is a more efficient and secure way of signing documents.
Please note that the steps above are a general guide and may vary depending on the e-signature service you choose. Make sure to follow the specific instructions provided by the service you’re using.
Some popular e-signature services include DocuSign, Adobe Sign, and HelloSign. These services typically offer a user-friendly interface and a range of features to meet different signing needs.
Another option for creating a digital signature is to use a software like Adobe Acrobat or Microsoft Word. Both of these applications have built-in capabilities for creating and applying digital signatures.
One reputable source to obtain digital certificates is eMudhra. They provide trusted digital certificates that can be used for secure digital signing.
How to Make an E-Signature
When it comes to signing documents digitally, e-signatures have become the go-to option. With the advancement of technology, it has become easier than ever to create your own e-signature. In this article, we will guide you on how to make an e-signature using emudhra, a trusted service for electronic signatures.
Step 1: Open emudhra’s e-signature service
The first step is to open emudhra’s e-signature service in your web browser. You can usually find this service by doing a quick search on your preferred search engine.
Step 2: Create an account
Once the emudhra e-signature service is loaded, you will need to create an account in order to use the software. The registration process is simple and only requires a few fields to be filled out.
Step 3: Gather your documents
Before you can start signing documents, you need to gather the documents that need to be digitally signed. This can be done by either uploading the documents from your computer or by entering the URLs of the documents if they are stored online.
Step 4: Choose the type of signature
Emudhra offers different options when it comes to creating an e-signature. You can choose to create a simple e-signature with just your name or opt for a more advanced digital signature that includes a timestamp and other security features.
Step 5: Sign your documents
Once you’ve indicated the type of signature you want to create, you can proceed to sign your documents. Emudhra’s e-signature service usually provides a space where you can sign your documents by typing your name or by uploading an image of your handwritten signature.
Step 6: Save and send your signed documents
After you’ve signed each document, the emudhra e-signature service will automatically save the digitally signed documents for you. You can then choose to download the signed documents to your computer or send them directly to the recipients via email.
That’s it! Now you know how to make an e-signature using emudhra’s e-signature service. With this simple and efficient process, signing digital forms and documents has never been easier. Start using emudhra today and experience the convenience of electronic signatures.
| Step | Description |
|---|---|
| Step 1 | Open emudhra’s e-signature service |
| Step 2 | Create an account |
| Step 3 | Gather your documents |
| Step 4 | Choose the type of signature |
| Step 5 | Sign your documents |
| Step 6 | Save and send your signed documents |
1 Choose an Electronic Signature Software
When it comes to electronic signatures, one of the first steps is to choose the right digital signature software. There are many options available, so it’s important to consider your specific needs and requirements.
First, consider the features you require from the software. Do you need a simple and easy-to-use solution, or are you looking for a more advanced tool with additional features? Think about whether you need the ability to sign documents offline or if you require a timestamp on your signatures.
Next, gather any necessary certificates or documents that you may need to provide when signing electronically. Some software may require you to load or send certificates, while others may have an option to sign directly without any additional steps.
After you have gathered all the necessary information, it’s time to select the electronic signature software that best fits your needs. Some popular options include emSigner, Adobe Sign, and DocuSign. Each software has its own unique features and benefits, so make sure to research and compare them before making a decision.
Once you’ve selected your software, open the application and load the document you want to sign. Depending on the software, this may be done by simply clicking the “open” option and selecting the document from your computer. If you’re signing a form, the software may have a specific form field where you can indicate where your signature should be placed.
Now that you have your document open, you can proceed to create your electronic signature. Most software will provide you with a space to draw your signature using your mouse or touchscreen. Some software may also offer the option to upload a scanned image of your handwritten signature.
After creating your signature, you’re ready to apply it to your document. Select the “sign” or “apply signature” option, and the software will place your signature in the designated space. If you’re signing multiple forms or documents at the same time, the software may offer a batch signing option to streamline the process.
Once your document is signed, you can usually save it as a digitally signed file or send it electronically. The software may also provide the option to add a timestamp to indicate when the document was signed.
Remember, electronic signatures provide a convenient and efficient way to sign documents. With the right software, you can easily create and send secure digital signatures for all your signing needs.
Gather electronic signatures the easy way
When it comes to collecting electronic signatures, there are various methods available. However, some of these methods can be complicated and time-consuming. If you’re looking for a simple and easy way to gather electronic signatures, there is a solution.
Emudhra offers a service that allows you to gather electronic signatures with just a few simple steps. With this service, you can create forms that need to be signed digitally. These forms usually have the same fields as a typical paper form, but they are saved digitally instead.
Here is how it works:
- You create a digital document or form that needs to be signed.
- You select the option to add an electronic signature field.
- You choose the signer or signers who will be signing the document.
- You send the document to the signer(s) to indicate they need to sign.
- Each signer loads the document and digitally signs in the designated space.
- After all signatures have been collected, the document is automatically saved.
It’s that simple! No need to print, sign, and scan documents anymore. With Emudhra’s e-signature service, you can gather electronic signatures in a more efficient and environmentally-friendly way.
In addition to gathering signatures, Emudhra’s service also provides the option to timestamp each signature. This ensures that the signatures are valid and reliable, even during legal disputes.
So, if you’re tired of the traditional way of signing documents and want to make the process faster and easier, give Emudhra’s e-signature service a try. It’s the perfect solution for anyone who needs to gather electronic signatures.
2 Load Your Document Into Your E-Signature Software
After you’ve created your digital signature, the next step is to load your document into your e-signature software. This is usually done in the same way you would open any other document in the software.
In order to sign a document electronically, you need to have it in a digital format that can be edited. This can be a Word document, a PDF form, or any other type of electronic document. If your document is not in a digital format, you’ll need to convert it first.
Once you have your document in a digital format, open your e-signature software and select the option to load a document. This will typically be indicated by a button or menu option that says “Load” or “Open”.
After you’ve loaded your document, you may need to indicate which parts of the document need to be signed. Some e-signature software will automatically detect form fields or signature spaces, while others may require you to manually select the areas that need to be signed.
Next, you’ll need to choose the digital signature that you created earlier. This will typically be done by selecting it from a list of available signatures. If you have multiple signatures saved, make sure to choose the correct one.
Depending on the software you’re using, you may also have the option to add additional certificates or timestamps to your signature. These can provide extra layers of security and authenticity to your signed document.
Once you’ve selected your signature and any additional options, you’re ready to sign your document. Simply click on the “Sign” or “Create Signature” button, and your digital signature will be applied to the document.
After the document has been signed, you can save it and send it to the intended recipient. They will then be able to open the document and see that it has been digitally signed. Depending on the e-signature service you’re using, they may also receive a notification or receipt indicating that the document has been signed.
Signing documents electronically is a simple and easy way to indicate your approval or consent. It saves time and eliminates the need for physical signatures. Just make sure to choose a reputable e-signature software and follow the proper procedures to ensure the security and validity of your digital signatures.
Sources: emudhra.com, yourdigitalsignature.com
3 Indicate The Signature Space in The Document
After you’ve selected the electronic signature service or software that you prefer, it’s time to indicate where the signature space should be placed in the document. This step is important as it helps ensure that the signer knows exactly where to sign.
Typically, e-signature software or services provide a simple and easy way to add a signature field to your document. This field is usually represented by a rectangle or a line, indicating the space where the signature should be placed.
To indicate the signature space, you can follow these steps:
| 1. | Open the document you want to digitally sign. |
| 2. | Choose the option to add a signature field. This option can usually be found in the toolbar or menu of your e-signature software or service. |
| 3. | Gather the necessary information. Depending on the software or service you’re using, you may need to provide the signer’s name, email address, or other details. |
| 4. | Select where you want to place the signature field in your document. You can usually drag and drop the field to the desired location. |
| 5. | Indicate if a timestamp should be added. Some software or services allow you to include a timestamp with the signature, showing the exact date and time the document was signed. |
By indicating the signature space in the document, you’re making the signing process more efficient and streamlined. It saves time for both the sender and the recipient, as they don’t have to manually indicate where the signature should be placed.
Remember to save the document after you’ve indicated the signature space. This ensures that the signature field is saved and ready for the signer to fill out.
Now that you know how to indicate the signature space in the document, you’re ready to send it out for signatures. Each signer will be able to easily locate where they need to sign and complete the process of digitally signing the document.
Sources:
4 Send The Document to The Signer
After you have created your digital signature and signed the document, the next step is to send the document to the signer. There are several options for sending the document, each with its own advantages and disadvantages.
If you are using a digital signature service like eMudhra, the process is usually very easy. You simply need to open the software or online platform, select the document you would like to send, indicate who needs to sign it, and choose the order in which the signatures should be added.
Once you have filled out the necessary information, the document is usually saved as a PDF file with all the necessary fields for signing. This file can then be sent to the signer through email or any other electronic means. The signer will receive the document and can open it using any PDF reader software.
When the signer opens the document, they will see spaces where they need to sign or indicate their approval. Depending on the software or service you are using, these fields may be clearly marked or indicated in some other way. The signer can simply select the relevant field and add their digital signature to the document.
If you are using a digital signature software that offers timestamping, you may have the option to include a timestamp with the signature. This can provide additional proof of when the document was signed.
Once the signer has completed the signing process, they can typically save the document with their signature and return it to you. This can be done by simply clicking on the “Save” or “Submit” button, depending on the software or service.
Now, you’re done with the process of sending the document to the signer. If you’re using a digital signature service, the signed document is usually automatically returned to you. If you’re using a digital signature software, you may need to gather the signed documents from each signer and compile them into a single document.
Remember, the goal of using a digital signature is to streamline the signing process and make it more efficient. By using electronic signatures, you can save time and effort, eliminate the need for printing and scanning documents, and ensure the integrity and security of your signed documents.
So, don’t waste any more time! Start using digital signatures for your documents today and enjoy the ease and convenience they offer.
eSigning after You’ve Created Your Electronic Signature
Once you’ve created your electronic signature, you can start using it to sign documents digitally. There are several ways to eSign a document, and each option typically involves a simple process. Here are 4 steps to eSigning a document:
- Select the document you want to sign: Choose the file or form that you need to sign and open it in the appropriate software or service.
- Create a signature field: In the document, indicate where you want your signature to appear by adding a signature field. This can usually be done by selecting the “Add Signature” or similar option.
- Load your electronic signature: If you have saved your electronic signature as an image file, you can easily load it into the signature field. This can be done by selecting the “Load Signature” or similar option and choosing the image file.
- Sign and save the document: Once your signature has been loaded into the signature field, you can sign the document by selecting the “Sign” or similar option. After signing, make sure to save the document for future reference.
It’s important to note that some documents may require additional information, such as a timestamp or additional fields to be filled out. In such cases, follow the instructions provided by the software or service you are using.
There are many digital signature services available that can make the eSigning process even easier. One popular option is eMudhra eSign, which offers a simple and secure way to sign documents digitally. With eMudhra eSign, you can create and store multiple electronic signatures, send and receive signed documents, and even open and sign documents in real time with other signers.
Regardless of the method you choose, eSigning allows you to sign documents digitally, eliminating the need for physical signatures. This not only saves time but also allows for more efficient document management. So, if you’re wondering how to write a digital signature, follow these steps and start eSigning today!
Sources
When it comes to signing digital documents, there are several sources you can turn to for help. Whether you need a simple way to sign a word document or gather signatures on a more complex form, there is a service for your needs. Here are a few options to consider:
- Electronic Signature Software: There are many software options available that make it easy to create and sign digital documents. Some popular choices include Adobe Sign, DocuSign, and HelloSign. These software programs typically have a user-friendly interface, allowing you to select the document you want to sign, indicate where each signature needs to be placed, and choose the signing order if necessary.
- Electronic Signature Service Providers: If you don’t want to deal with downloading and installing software, you can use an online service provider. These providers offer a space where you can upload your document and create your digital signature. Examples include emSigner and eMudhra. Once your signature is created, you can typically just open the document, select the option to sign, and you’re ready to go.
- E-signing Forms: Some online platforms, such as Google Forms, have built-in options for digitally signing documents. With these forms, you can usually add a signature field to your document and send it to recipients to sign. This can be a convenient way to gather signatures for things like permission slips or contracts.
- Timestamp Certificates: If you need to prove the time at which a document was signed, you can use timestamp certificates. These certificates, often provided by electronic signature service providers or software, add a timestamp to your signature. This can be useful for legal purposes or to indicate when a contract was signed.
With these sources available, signing digital documents has become easier than ever before. Whether you choose to use software, online service providers, e-signing forms, or timestamp certificates, there is a solution to fit your needs.