Creating mist or fog in your photographs can add a dramatic and ethereal effect that can completely transform the mood and ambiance of an image. Whether you’re a professional photographer looking to enhance your artistic vision or a hobbyist experimenting with special effects, knowing how to make mist can take your photos to the next level. In this article, we will guide you through the process of creating mist using a simple DIY fogger project.
To make mist, you will need a few basic materials: a stainless steel atomizer, an ultrasonic fogger maker, a hair dryer, and a circuit to control the fogger. These items are easily sourced online or at your local hardware store. Additionally, you’ll need some basic tools like pliers and wire cutters to build the circuit.
Once you have gathered all the necessary supplies, follow these steps to make your own mist-maker machine:
- Step 1: Build the Circuit
- Step 2: Prepare the Atomizer
- Step 3: Set Up the Fogger Maker
- Step 4: Create the Mist Effect
- Step 5: Capture the Misty Scenes
- 3 Headed Ultrasonic Mist Maker in India For Mushroom Farming Stainless Steel
- How to Create Mist in Photoshop Easy Steps
- 1 Open an Image and Duplicate the Layer
- 2 Removing the Background
- 3 Gradient Effect and Resizing
- 4 Overhauling The Object
- 5 Use of Render Filters
- 6 Making the Cloud Patterns Look Natural
- 7 Last Step
- Final Output
- Ultrasonic Atomizer Fogger
- Circuit Diagram
- Project extensions
- Sources
- Video:
- How to make MIST MAKER at home | DIY mist maker
Step 1: Build the Circuit
Start by assembling the circuit that will control the fogger. There are various circuit designs available online, so choose one that suits your needs and skill level. If you’re new to electronics, consider using a pre-made circuit or following a detailed tutorial to ensure everything is wired correctly.
Step 2: Prepare the Atomizer
Take the stainless steel atomizer and remove any extensions or filters attached to it. This will ensure a clear and unobstructed output of mist. Place the atomizer in the center of your fogger maker, making sure it is secure and well-positioned.
Step 3: Set Up the Fogger Maker
Connect the fogger maker to your circuit following the instructions provided. Make sure all connections are secure and properly insulated. Once everything is in place, power on the fogger to test it and ensure it is functioning correctly. You should see a fine mist or fog being created.
Step 4: Create the Mist Effect
Now that your fogger is working, it’s time to make mist in your photographs. Find a suitable location where you want the mist to appear. This can be in a natural outdoor setting or indoors, depending on your desired effect. Position your object or subject in the desired location and set up your camera.
Step 5: Capture the Misty Scenes
After framing your shot, take a test photograph by activating the fogger at its lowest output setting. Evaluate the result and adjust the fogger’s output as needed to achieve the desired amount of mist. Experiment with different positions and angles to see how the mist interacts with the light and surroundings. Don’t be afraid to get creative and try different techniques to capture stunning misty scenes.
By following these steps, you can easily create mist and add a captivating effect to your photographs. Whether you’re working on a professional project or simply indulging in your passion for photography, knowing how to make mist will open up a whole new world of creative possibilities.
3 Headed Ultrasonic Mist Maker in India For Mushroom Farming Stainless Steel
Creating mist using an ultrasonic mist maker can add a beautiful and mystical effect to any environment. Whether you want to simulate a cloud-like atmosphere for your mushroom farming or simply enhance the ambiance of a room, an ultrasonic mist maker is a great tool to have.
In India, there is a growing demand for mist makers, especially for mushroom farming. These mist makers are made of stainless steel, ensuring durability and longevity. The three-headed configuration of this mist maker allows for a greater coverage area, perfect for larger mushroom farms.
To make mist using an ultrasonic mist maker, you’ll need a few key components:
- An ultrasonic mist maker: This is the main component that creates the mist using ultrasonic waves to atomize liquid.
- A power source: You’ll need a power source to provide the necessary energy for the mist maker to function.
- A container for the liquid: The mist maker requires a container filled with water or any other liquid of your choice.
- Filters: Filters can be used to remove impurities from the liquid and ensure a clean mist output.
Once you have these components, follow these steps to create mist using the ultrasonic mist maker:
- Place the mist maker in the center of the container filled with liquid.
- Connect the mist maker to the power source.
- Turn on the power source, and the mist maker will start creating mist instantly.
The mist created by the mist maker will rise and disperse, creating a fog-like effect in the surrounding area. This mist can be especially beneficial for mushroom farming as it provides the ideal humidity levels for mushrooms to grow.
In India, the demand for mist makers for mushroom farming has increased in recent years. The stainless steel construction ensures that the mist maker is sturdy and can withstand the harsh conditions of mushroom farming. This makes it a reliable and long-lasting choice for farmers.
Whether you’re using the mist maker for mushroom farming or for creating a mystical atmosphere in any other space, the three-headed ultrasonic mist maker in India is a great choice. Its stainless steel construction and large coverage area make it an ideal option for various projects.
How to Create Mist in Photoshop Easy Steps
Capturing the dreamy and ethereal effect of mist or fog in a photograph can add a touch of mystery and beauty to your images. While mist may naturally occur during certain weather conditions, you can also easily create the mist effect in Photoshop using simple steps and tools. In this tutorial, we will show you how to create mist in Photoshop in a few easy steps.
Step 1: Open the Image
Start by opening the image you want to add mist to in Photoshop. Make sure the image is in a high resolution and well-lit for best results.
Step 2: Duplicate the Background Layer
In the Layers panel, right-click on the background layer and select “Duplicate Layer.” This will create a duplicate layer of the image that we can work on without affecting the original.
Step 3: Select the Gradient Tool
In the Tools panel, select the Gradient Tool. You can also use the shortcut key “G” on your keyboard to quickly access the tool.
Step 4: Choose the Gradient
In the Options bar, click on the gradient preview to open the Gradient Editor. Choose a gradient that resembles the mist or fog color you want to create. You can also experiment with different gradients and colors to achieve the desired effect.
Step 5: Apply the Gradient
Click and drag the Gradient Tool from the place where you want the mist to start to the place where you want it to end. This will apply the gradient to the selected area.
Step 6: Adjust the Opacity
In the Layers panel, adjust the opacity of the mist layer to blend it with the background image. Lowering the opacity will give a more realistic mist effect.
Step 7: Add Blending Modes
In the Layers panel, experiment with different blending modes for the mist layer. Modes like Overlay, Soft Light, or Screen can give interesting and natural-looking results.
Step 8: Refine the Mist
If the mist looks too sharp or solid, you can use filters like Gaussian Blur or Motion Blur to soften it. Apply the desired filter to the mist layer and adjust the settings until you achieve the desired look.
Step 9: Final Touches
If needed, you can further enhance the mist effect by using other Photoshop tools and adjustments like Dodge and Burn, Color Balance, or Levels. Experiment with these tools to create the perfect misty atmosphere in your image.
Step 10: Save the Final Image
Once you are satisfied with the mist effect, save the final image in the desired format and resolution to preserve the misty atmosphere you created.
With these easy steps, you can easily create mist in Photoshop and transform your photographs into dreamy and magical scenes. Whether you want to add a touch of mystery to a landscape or create a haunting atmosphere in a portrait, mastering the art of creating mist in Photoshop can greatly enhance your creative projects.
1 Open an Image and Duplicate the Layer
To start creating misty effects on an image, you first need to open the image in a photo editing software like Adobe Photoshop. Once you have the image open, duplicate the layer. This allows you to work on a separate layer without affecting the original image.
If you’re a hair extensions maker in India and looking to create misty effects on your product photos, this step-by-step guide will show you how to easily achieve that. Whether you’re a photographer, graphic designer, or simply interested in adding a dreamy and ethereal touch to your images, follow these simple steps to create your own mist maker machine.
When making mist, the background plays a crucial role in creating the overall effect. Select the background layer underneath the image you’re working on and duplicate it as well. This will create a separate layer for the mist effect.
Now, you’re ready to get started with the mist making process!
2 Removing the Background
Removing the background from an image is a crucial step in creating mist effects. To achieve a natural mist effect, you need to isolate the object or subject from its background. Here are the steps to remove the background:
- Select the photo or image you want to work with. If you’re using an image from a digital camera, open it using a photo editing software or an online tool like Photoshop.
- Duplicate the image in order to have a backup of the original.
- Create a new layer and place it underneath the original image.
- Use the latest version of Photoshop or any other photo editing software with tools for background removal. There are various tools available, such as the magic wand tool, the pen tool, or the quick selection tool.
- Select the background by clicking and dragging on it using the appropriate tool. Be careful not to select any parts of the main object or subject.
- Once the background is selected, hit the delete or backspace key on your keyboard to remove it. You should now see a transparent or checkerboard pattern in place of the background.
- There may be some areas with leftover background or imperfections. Use the eraser tool or apply filters and blending modes to clean up the edges and create a smooth transition between the object and the background.
- After you have removed the background, you can resize the image as needed to fit your project or desired output size.
- Save the final image with a transparent background as a PNG file to preserve the mist effect.
By following these steps, you can easily remove the background of an image and create a mist effect. This technique is useful not only for mist making but also for various other creative projects such as graphic design, photo editing, or even farming.
3 Gradient Effect and Resizing
If you want to create a misty effect in your projects, there are a few steps you can take to achieve the desired result. One of these steps involves using gradient effects and resizing techniques. Here’s how:
Step 1: Create a background image
To create a misty effect, you first need to create a background image. There are several ways you can do this, such as using Photoshop or other image editing software. You can also use natural sources like clouds or misty landscapes as a background image.
Step 2: Duplicate the background layer
Once you have your background image, duplicate the layer. This will allow you to apply different effects to the duplicate layer without affecting the original image.
Step 3: Apply a gradient effect to the duplicate layer
To create the misty effect, you can use gradient filters. There are various types of gradient filters you can use, such as linear gradients or radial gradients. Experiment with different types of gradients to achieve the desired look.
Step 4: Resize the duplicate layer
You can easily resize the duplicate layer to fit your project’s needs. This can be done by using the resizing tool in your image editing software. Adjust the size of the layer until you’re satisfied with the look.
Step 5: Blending and color adjustments
After resizing, you can apply blending modes and color adjustments to the duplicate layer. This will help to enhance the misty effect and make it look more natural. Experiment with different blending modes and color adjustments to achieve the desired result.
Step 6: Final touches and output
Once you’re happy with the misty effect, you can make any final adjustments and then output the final image. This can be done by saving the image in the desired file format or by exporting it for use in your projects.
By following these steps, you can easily create a misty effect using gradient effects and resizing techniques. Whether you’re working on a photography project or a graphic design project, the misty effect can add a touch of mystery and beauty to your work.
4 Overhauling The Object
Once you have created the mist effect using the previous steps, you may want to further enhance and refine it to achieve the final desired outcome. This section will guide you through the process of overhauling the mist object.
To start, select the mist layer and duplicate it. This will allow you to have a version of the mist object which you can modify without affecting the original. You can do this by right-clicking on the mist layer and selecting “Duplicate Layer” from the menu.
Next, open the latest version of Photoshop and go to the “Filters” menu. Choose the “Blur” option and select “Gaussian Blur” from the submenu. Adjust the blurring effect to your liking, this will give the mist a more natural and realistic appearance.
After applying the Gaussian Blur, you may want to further enhance the mist by adding some color to it. To do this, select the mist layer and go to the “Image” menu. Choose “Adjustments” and then “Gradient Map” from the submenu. Select the desired gradient from the available options and apply it to the mist layer.
If you want to add more depth to the mist, you can also try blending it with other images or patterns. To do this, select the mist layer and select the “Layer” menu. Choose the “Blending Options” option from the submenu. Experiment with different blending modes and adjust the opacity as needed.
Finally, you may want to remove any unwanted elements or distractions from the mist object. Use the eraser tool or the background eraser tool to carefully remove any areas that are not fitting with the overall mist effect.
By following these steps, you can easily overhaul the mist object and achieve the desired misty effect for your projects.
5 Use of Render Filters
Render filters are powerful tools in Photoshop that can be used to add various effects to your images. Here are 5 ways you can use render filters to enhance and transform your photos:
1. Creating Misty Background: One popular use of render filters is to create a misty or foggy background. This can be especially useful in landscape photography or when you want to add a dreamy atmosphere to your images. By applying a render filter such as “Mist” or “Fog” over your photo, you can easily achieve this effect.
2. Adding Depth and Dimension: Render filters can also be used to add depth and dimension to your images. By applying a filter like “Blur” or “Gaussian Blur” to certain elements in your photo, you can create a sense of distance and make the subject in focus stand out even more.
3. Creating Unique Patterns and Textures: Render filters offer a wide range of options for creating unique patterns and textures. From creating a stainless steel look to adding a gradient effect, these filters can help you achieve a variety of artistic effects.
4. Performing Image Manipulation: Render filters are not just limited to adding effects, they can also be used for image manipulation. For example, you can use filters like “Distort” or “Transform” to stretch or warp certain elements in your photo, creating a surreal and abstract look.
5. Removing Unwanted Elements: Another useful application of render filters is removing unwanted elements from your photos. By using tools like the “Clone Stamp” or “Healing Brush” along with the render filters, you can easily retouch your images and remove any imperfections.
These are just a few examples of how you can use render filters in your projects. Experiment with different filters and settings to achieve the desired effect. Remember, render filters are powerful tools that can greatly enhance the look of your photos and unleash your creativity.
6 Making the Cloud Patterns Look Natural
To make the cloud patterns look natural, follow these simple steps:
- After you have created the mist using the mist maker or fogger from the previous steps, open the latest version of Photoshop and select the image that you want to add the mist effect to as the background.
- Use the shortcut keys “Ctrl + J” (Windows) or “Command + J” (Mac) to duplicate the background layer. This will give you a working copy to apply the mist effect to.
- Select the duplicate layer and go to the “Filter” menu. Under the “Render” submenu, choose “Clouds”. This will create random cloud patterns over the image.
- Go to the “Image” menu and choose “Adjustments” > “Gradient Map”. Apply a gradient that transitions from white to black. This will give the clouds a more realistic and natural look.
- Resize the cloud layer if needed by going to the “Edit” menu and choosing “Transform” > “Scale”. Use the handles to adjust the size of the clouds to fit your image.
- Select the mist layer and change its blending mode to “Screen” to blend it with the background and make it appear more natural.
- Lastly, use the “Eraser” tool or a layer mask to remove any mist that may be overlapping important parts of the image, such as faces or objects.
By following these steps, you can easily make the cloud patterns in your mist look natural and blend well with your background. The final output will be a great addition to your mist-making projects.
7 Last Step
After completing all the previous steps, you are now ready to create mist using your mist maker. Here are the final steps to follow:
Step 1: Place the ultrasonic mist maker in the center of the container or fountain where you want the mist to be created. Make sure it is securely positioned.
Step 2: Open the circuit of the mist maker and select the desired color and effect for the mist. You can use the latest version of Photoshop or any other photo editing software to apply filters and create the desired visual effect.
Step 3: Use an atomizer to add liquid to the mist maker. You can use water or any other liquid of your choice. The mist maker will convert the liquid into fog by using ultrasonic waves.
Step 4: Start the mist maker and wait for a few seconds for the mist to begin forming. You should see a layer of mist gradually filling the container or fountain.
Step 5: If you want to add a natural touch to the mist, you can use a hair dryer or fan to create air movement around the mist. This will give it a more realistic and dynamic appearance.
Step 6: Adjust the settings of the mist maker and experiment with different forms and shapes. You can create a mushroom-like shape or make the mist flow upward like a waterfall.
Step 7: Take a photograph of your final mist-making project. This will be a great visual reference for future projects and inspiration.
By following these steps, you can easily create mist using a mist maker. Remember to have fun and be creative with your mist-making experiments!
Final Output
Once you have followed all the necessary steps in making mist using the ultrasonic fogger, you will see the final output of your project. Bradley Ford, the creator of the fogger, has made it easy for anyone to build their own mist maker. With just a few tools and some basic knowledge of electronics, you can easily create your own fogger for your projects.
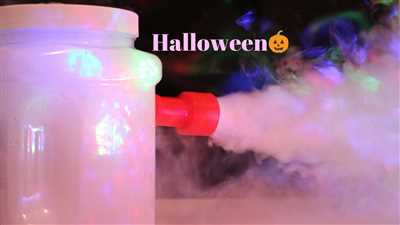
The final output of the mist maker is a cloud of mist that resembles waves. The misty waves look like a mushroom cloud hovering over the liquid surface. The fogger uses ultrasonic waves to create the mist, and the output is a fine mist that can easily be adjusted according to your needs.
To create the mist, the fogger uses a stainless steel atomizer. The atomizer creates small water droplets that form the mist. The mist is then released into the air, creating a foggy effect. The fogger also has a built-in water container where you can easily fill it up with water. Once you turn on the fogger, it starts generating the mist in a matter of seconds.
Once you have created the mist, you can use it for various projects. The mist can be used for photography to create a misty or dreamy look in your photos. It can also be used for farming projects, where the mist helps in the growth of plants. The mist can also be used for overhauling the air quality in a room, as it helps in removing dust particles and odors.
The final output of the mist maker depends on the settings you have selected. You can easily adjust the mist output by selecting the appropriate settings on the fogger. The fogger has various filters and blending patterns that can be used to create different mist effects. Once you have created the desired mist effect, you can simply duplicate the mist layer in Photoshop to easily create a gradient of mist.
In conclusion, the mist maker is a great tool for creating mist and adding a dreamy effect to your projects. Whether you are working on a photography project or a farming project, the mist maker can easily help you achieve the desired mist effect. With just a few simple steps, you can create a misty atmosphere that adds a touch of magic to your work.
Ultrasonic Atomizer Fogger
The Ultrasonic Atomizer Fogger is a device that uses ultrasonic waves to create a fine mist or fog. It is commonly used in various applications such as gardening, farming, and even in DIY projects. The fogger works by vibrating a small diaphragm at high frequency, causing droplets of liquid to be released into the air, creating a misty effect.
To make a mist with an ultrasonic atomizer fogger, follow these steps:
- Select the image or photo you would like to use as the background for your mist effect. It could be a natural landscape or any other image of your choice.
- Open the image in a photo editing software like Adobe Photoshop.
- Duplicate the background layer of the image.
- Select the duplicated layer and apply the “Gradient Overlay” layer style to it. Play around with the gradient colors and settings until you achieve the desired misty effect.
- Place a solid color layer underneath the mist layer to create a more realistic foggy look.
- Use the blending tools in the photo editing software to blend the mist layer with the background and the solid color layer.
- Apply any additional filters or extensions to enhance the mist effect, if desired.
- Resize the image to your desired dimensions if needed.
- Save your final misty image.
The Ultrasonic Atomizer Fogger is a great tool for creating mist or fog in various projects. Whether you’re working on a DIY gardening project or overhauling the background of your photos, this device can easily be used to add a natural and misty element to your work.
There are many sources where you can find these fogger makers, especially if you’re located in India or any other farming center. Some popular brands for ultrasonic atomizer foggers include Ford and Bradley. The latest version of these foggers comes in stainless steel, making them durable and long-lasting.
So, if you’re looking to make mist easily and efficiently, an ultrasonic atomizer fogger is the shortcut you need!
Circuit Diagram
Creating a mist effect can be achieved by building a circuit diagram for an ultrasonic fogger. This circuit diagram involves several steps and components that work together to produce the desired misty effect.
| Steps | Components |
|---|---|
| 1 | An ultrasonic atomizer is used to create fine water droplets. |
| 2 | A fogger circuit is built using an ultrasonic transducer and a driver circuit. |
| 3 | A mist maker is included to control the mist output. |
| 4 | A stainless steel fogger plate is placed underneath the water source. |
| 5 | A high-frequency generator is used to generate the waves needed for mist formation. |
| 6 | A power supply provides the necessary electrical energy for the circuit to function. |
| 7 | Filters and blending tools are added to adjust the mist’s color and effects. |
Once the circuit diagram is built and all the components are connected correctly, you can use the mist maker to create beautiful misty patterns. The mist will be released from the fogger, creating a natural and foggy atmosphere. The mist can be easily controlled using the mist maker’s settings, allowing you to adjust the mist output and the desired effect.
When making mist using this circuit diagram, place the object or photograph you want to create the mist effect for over the fogger. The mist will rise and cover the object, giving it a mystical and ethereal appearance. This effect is great for photography or creating a captivating ambiance for various projects or events.
Project extensions
If you’ve followed the previous steps to build your mist maker and create mist with the use of ultrasonic waves, you may be interested in exploring some project extensions to enhance the look and functionality of your mist-making setup. Here are seven project extensions that you can easily add to your mist-making projects:
- Background fogger: Create a misty background effect by placing a fogger device underneath your mist maker. This will add depth and atmosphere to your photos or videos.
- Misty photo booth: Set up a misty photo booth where people can have their pictures taken in a misty environment. Use colored filters and lighting to create different effects.
- Misty hair: Use the mist maker to create a misty effect on your hair. This works especially well for themed parties or photo shoots.
- Misty farming: Explore the use of mist in agriculture and gardening. Mist can help with plant irrigation and maintaining humidity levels for optimal plant growth.
- Misty art: Create misty art by using the mist maker and other tools like paint and ink. Experiment with different patterns and blending techniques.
- Atomizer attachment: Attach an atomizer to your mist maker to create smaller droplets of mist. This can give a finer, more ethereal look to your mist effect.
- Shortcut keys: If you’re proficient in coding, you can create shortcut keys to control your mist maker using a keyboard. This allows for easy adjustments and customization of the mist effect.
These project extensions are great ways to take your mist-making project to the next level. Whether you’re looking to create a natural misty atmosphere for a photo shoot or exploring the practical uses of mist in agriculture, there are endless possibilities for expanding and enhancing the capabilities of your mist maker.
Sources
If you’re looking to create mist or fog for your projects, there are a few different tools and methods you can use. Here are some of the best sources to get started:
- Ultrasonic Mist Maker – This device uses ultrasonic waves to create mist. It’s easy to use and can produce a fine mist for a natural effect.
- Atomizer – An atomizer is a device that converts liquid to a fine spray. It’s commonly used in hair salons for hair extensions or farming for spraying liquid fertilizers.
- Mushroom Fogger – This is a great option if you’re looking to create a misty or foggy effect in a confined space. It creates a dense fog that can be easily controlled.
Once you have the mist-making machine of your choice, you can follow these steps to create mist:
- Step 1: Fill the machine with water or a liquid of your choice.
- Step 2: Plug in the machine and turn it on.
- Step 3: Wait for a few seconds. The mist should start to come out from the output.
- Step 4: Adjust the settings if needed to control the amount and density of the mist.
If you want to make your mist look more natural or add some special effects, you can try the following techniques:
- Use colored liquid to create a different colored mist.
- Add a gradient or pattern to the mist using Photoshop or other photo editing tools.
- Duplicate the mist layer and add filters to create interesting visual effects.
With these sources and techniques, you can easily create a misty atmosphere for your photographs, film projects, or other creative endeavors.