

If you use Apple devices, such as iPhone or Mac, you might have created a beautiful slideshow using the built-in Photos app. Now, you want to share it with your friends or family, but you’re not sure how to do it. Don’t worry! In this article, we will answer your question and show you the step-by-step process of sharing your Apple slideshow.
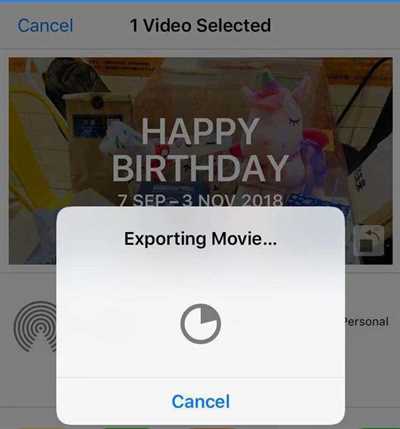
The first thing you need to do is to export your slideshow. Later, you can then share it with others. To export the slideshow, open the Photos app on your iPhone or Mac and select the slideshow you want to share. Then, click on the “Export” option in the menu. You can choose to export the slideshow as a movie or you can select the “Custom” option to specify the format and settings you prefer.
Once you have exported the slideshow, you can now share it. There are several ways to do this. If you want to share it via email or messaging apps, you can simply attach the exported file to your message. You can also share it on social media platforms, such as Facebook or Instagram, by clicking on the “Share” button and selecting the platform you want to share it on.
If you don’t want to share the entire slideshow, but just a selected few pictures, you can do that too. In the Photos app, go to the slideshow and click on the “Edit” button. Then, choose the pictures you want to share and click on the “Share” button. You can then select the sharing options, such as sending the pictures via email or messaging apps.
When sharing the slideshow or selected pictures, keep in mind that the recipient must have Apple devices or compatible software to view them properly. If they don’t, the slideshow might not show all the animations or other effects you have created. In such cases, you can consider publishing the slideshow on a webpage or creating a digital photo album that can be viewed on any device.
So, if you have created a stunning Apple slideshow and want to share it with others, just follow these simple steps. Export your slideshow, select the sharing options, and send it to your friends or family. They will be able to enjoy your slideshow in its full glory!
How to share slideshows created in Photos for Mac
If you’ve created a slideshow in Photos for Mac, you may want to share it with others. Fortunately, there are several ways to share your slideshow, depending on your preferences and the devices you are using.
Option 1: Export the slideshow as a video
If you want to share your slideshow as a video file, you can export it to a format compatible with popular video players. To do this, open your slideshow project and click on the “Export” button in the toolbar. Choose the video format you prefer and click “Export”. The exported video file can then be shared via email, uploaded to social media platforms, or transferred to a mobile device for playback.
Option 2: Create a custom project and share the file
If you want to share the slideshow project file itself, you can create a custom project and share it with others. To do this, open your slideshow project and click on “File” in the menu bar. Then choose “Create” and select “Custom project”. Save the custom project file to your desired location. You can then share this file with others via email, cloud storage services, or any other file-sharing method you prefer.
Option 3: Use iCloud sharing
If you use iCloud, you can also share your slideshow project with others using iCloud sharing. Simply open your slideshow project and click on the “Share” button in the toolbar. Select “Add People” and enter the email addresses of the people you want to share the slideshow with. They will receive an invitation to view the slideshow, and they can access it from their own devices using the Photos app or a web browser.
Option 4: Share on social media
If you want to share your slideshow on social media platforms like Facebook, you can do so directly from the Photos app. Open your slideshow project and click on the “Share” button in the toolbar. Choose the social media platform you want to share on, and follow the prompts to log in and publish your slideshow. Your slideshow will then be visible to your friends and followers on the social media platform you selected.
Option 5: Export as a PDF or create a book
If you want to share your slideshow as a static document, you can export it as a PDF or create a printed photo book. To export as a PDF, open your slideshow project and click on the “File” menu. Then choose “Export” followed by “Export Slideshow”. Choose the PDF format and save the file to your desired location. To create a printed photo book, open your slideshow project and click on the “File” menu. Then choose “Create” and select “Book”. Follow the prompts to design your book, and then choose the “Order” option to have it printed and delivered to your desired address.
Important tips:
– If you have selected specific slides in your slideshow and you want to share only those selected slides, you must deselect the “Include selected slides only” option in the export or project creation settings.
– If you don’t see the options mentioned above, you may need to update your Photos application to the latest version.
– Apple has removed the ability to sync slideshows to your iPod, iPhone, or iPad, so you’ll need to use one of the other sharing methods mentioned above.
– If you’re editing a slideshow and you don’t want to show a specific picture or movie, you can hide it by selecting the thumbnail of the picture or movie and clicking the “Hide” button in the toolbar.
– If you want to move a picture or movie to a different place in your slideshow, just click and drag it to the desired location.
– If you’re creating a slideshow in a Smart Album, the pictures in the album will automatically be added to the project, so you don’t need to manually add them.
– You can add music, animations, and custom frames to your slideshow to make it more dynamic and personalized.
– Be careful when sending slideshows via email or other means of communication as they may contain personal or sensitive information. You may want to remove any private or confidential pictures from the slideshow before sharing it.
Now that you know how to share slideshows created in Photos for Mac, you can easily share your memories and creative projects with friends, family, or a wider audience.
Export a slideshow
If you’ve created a slideshow in the Apple Photos application on your Mac and want to share it with others, you can export it in different ways. In this guide, I will show you how to export a slideshow and the various options you have for sharing it.
To export a slideshow, first, make sure you have selected the slideshow you want to export in the Photos application. Then click on the “File” menu and choose the “Export” option. This will open a dialog box with several export options.
You can choose to export the slideshow as a video, a PDF document, a set of image files, or a custom slideshow. If you choose to export it as a video, you can also select the resolution and quality settings for the video. If you choose to export it as a PDF document, you can select the page size and layout options.
When exporting as image files, you can choose to export all the pictures in the slideshow, or you can deselect some of them if you don’t want to include them in the exported files. You can also choose to export the slideshow as a custom slideshow, which allows you to arrange the pictures in a specific order and add custom animations and transitions between them.
After you have selected the export options, choose the location where you want to save the exported files. You can save them on your Mac, to an external drive, or to a cloud storage service such as iCloud. You can also choose to automatically sync the exported files to your iPhone, iPad, or iPod.
Once you have selected the export location, click on the “Export” button to start the export process. Depending on the size of your slideshow and the export options you have chosen, the export process may take some time.
After the export process is completed, you will see a thumbnail of the exported files in the selected export location. You can then use these files to share the slideshow in various ways. For example, you can upload the video to YouTube, Facebook, or other video-sharing websites. You can also print the PDF document or send it via email to others.
If you have exported the slideshow as image files, you can share them by sending them in an email, uploading them to a website, or exchanging them via a USB flash drive or memory card.
Remember that when exporting a slideshow, some features such as custom animations and transitions may be removed. If you need to edit or move these slideshows in the future, you must go back to the original project in the Photos application.
In conclusion, there are many ways to share the slideshows you’ve created in Apple Photos. By exporting them in different formats, you can share them with others on different platforms and devices.
You must log in to answer this question
If you want to share or move an Apple slideshow, you’ll need to log in to the respective application or service where the slideshow is saved. This could be iPhoto, an application on your Mac, or even an app on your iPhone or iPod.
Once you’re logged in, you can see all the slideshows you’ve created or saved. You’ll have options such as arranging the slideshows, hiding them, or even deleting them if you don’t need them anymore.
If you’re using iPhoto on your Mac, you can click on the “Projects” tab and select the “Slideshow” option. From there, you can select the slideshow you want to share or move.
If you’re using a mobile device such as an iPhone or iPad, you may need to open the Photos app and go to the “Albums” or “Collections” tab to find your slideshow.
Once you’ve selected the slideshow you want to share, you can click on the “Share” button. This will show you a list of options such as sending the slideshow via email, messaging apps, or even publishing it on social media platforms like Facebook.
If you want to share the slideshow with someone who doesn’t have the same application or device, you can also export it as a movie file or create a custom slideshow with just the pictures and video you want to share.
Keep in mind that if you choose to share the slideshow as a movie, any animations, transitions, or custom settings you’ve made may be removed or changed. The exported movie will be a single video file without the full editing options of the original slideshow.
If you don’t want to share the slideshow but want to save it for later, you can simply deselect the “Publish” or “Share” option. This will hide it from others, but you can still see it and access it yourself.
Remember to log out of your account if you’re sharing the device with someone else, or if you want to keep your slideshows private. This will prevent others from accessing your information or viewing your pictures.
| Steps to Share an Apple Slideshow |
|---|
|
By following these steps, you can easily share your Apple slideshow with others or move it to different devices or platforms.
See Also

If you’re looking for ways to share Apple Slideshow, you must have a question on how to do it. Just answer the question first: what do you want to achieve by sharing your slideshow?
If you’re looking to send your slideshow to someone, there are a few ways to do it. One option is to export the slideshow as a video file and then send it via email or messaging applications. Another option is to sync your slideshow to a mobile device, such as an iPhone or iPod, and then share it directly from there.
If you want to share your slideshow on social media platforms or online, you can choose to publish it on websites such as Facebook or iPhoto. You may also want to consider creating a custom slideshow application or using an online platform for sharing slideshows.
If you’re looking to share your slideshow with a group of people in a specific location, you can sync your slideshow to a smart TV or connect your mobile device to a projector. This way, you can display the slideshow on a big screen for everyone to see.
Additionally, if you need to exchange information or arrange pictures in a specific order, you can use the “arrange” and “show” options in Apple Slideshow. You can also move pictures or remove them from the slideshow by clicking on each thumbnail and selecting the appropriate options.
If you’re editing your slideshow and want to see how it will look when played, you can click on the “play” button to preview it. If you’re not happy with a picture or animation, you can click on it and choose different options, such as changing the duration or applying different transitions. You can also add text or frame the pictures to make them more visually appealing.
Remember, when sharing your Apple Slideshow, be mindful of the privacy options. If you don’t want certain pictures or information to be seen by others, make sure to set the appropriate permissions or hide them from the slideshow.
In summary, there are various ways to share your Apple Slideshow, depending on your specific needs and preferences. Whether you’re sharing it with friends and family, or publishing it online, these options will help you showcase your pictures and videos in a way that suits your requirements.
What if I don’t see any photos
If you don’t see any photos in your Apple slideshow, there could be a few reasons for that. Here are some possible solutions:
| If you’re using a camera or a mobile device to take photos: | Make sure that the photos are saved and not deleted or moved. Check the camera or mobile device’s settings to see where the photos are being saved. |
| If you’re using a Mac and editing photos in an application such as iPhoto: | Check if the photos are still in the application. Sometimes, when you deselect a photo from a slideshow, it can be removed from the application’s library as well. |
| If you’re using the Apple Photos application: | Click on the “Photos” tab and make sure that the “Moments” option is selected. If you have selected a different option, such as “Photos” or “Albums,” you may not see any photos in the slideshow. |
| If you’re using a Mac and the photos are stored in the Pictures folder: | Open the Pictures folder and check if the photos you want to use in the slideshow are there. |
| If you’ve created a custom slideshow in the Photos application: | Make sure you’ve selected the correct pictures to include in the slideshow. You can do this by clicking on the “Add Photos” button and choosing the pictures from your library. |
| If you’re using an iPhone or iPod touch: | Make sure that the photos you want to use in the slideshow are synced to your device. You can do this by connecting your device to your Mac or PC and using iTunes to sync the photos. |
| If you’re using an iPhone or iPad and want to share the slideshow: | Check if the slideshow has been saved or published. If you haven’t saved or published it yet, you won’t be able to share it. |
| If you’re sharing the slideshow on Facebook: | Make sure that you’re logged into your Facebook account and that you have the necessary permissions to share the slideshow. |
| If you’re exporting the slideshow as a video: | Check the export settings to make sure that the video will include the photos you want. |
| If you’re creating a slideshow using the Apple Books application: | Make sure that you have selected the right photos and that they’re in the correct order. You can rearrange the photos by clicking and dragging them in the thumbnail view. |
If you still don’t see any photos after trying these options, it’s possible that there aren’t any photos available for the slideshow. Double-check the locations where you expect to find the photos and ensure that they haven’t been deleted or removed.


