

If you’re an Android user and want to know how to make APK files, we’ve got you covered. APK files are used to install apps on Android devices, and they are downloaded and installed through a process called sideloading. With the right permissions and a few simple steps, you can create your own APK files and even publish them on the Google Play Store.
Many Android users prefer to download APK files directly from websites rather than going through the Google Play Store. This is generally because APK files are often available earlier than the official release and can be used to install different versions of an app. In this guide, we’ll show you how to make APK files on your Windows device, using a tool called MAUI.
MAUI is a popular open-source framework for building cross-platform apps. It allows you to create APK files for Android devices, as well as other platforms like iOS and Windows. To make APK files with MAUI, you’ll need to have the framework installed on your Windows device. Once you have MAUI set up, you can begin creating APK files for your apps.
Here is a step-by-step diagram of how to make APK files with MAUI:
- Select the app you want to create an APK file for.
- Download and install the necessary software, including MAUI and any additional dependencies.
- Set up your preferred development environment, such as Visual Studio or JetBrains Rider.
- Configure the necessary permissions for your app, such as internet access or camera usage.
- Create the necessary source files and code for your app.
- Build your app by compiling and linking all the necessary files and resources.
- Test your app on multiple devices to ensure compatibility.
- Generate the APK file using MAUI’s build tools.
- Sign and publish the APK file, if you want to distribute it to other users.
That’s it! Now you know how to make APK files for your Android apps using MAUI. Whether you’re a developer looking to release your app on multiple platforms or a user who wants to install apps from outside the Google Play Store, creating APK files can be a useful skill to have.
So, if you’re ready to unleash the full potential of your Android device, start learning how to make APK files today!
What is an apk file
An APK file (short for Android Package) is the package file format used by the Android operating system for distribution and installation of mobile apps. It contains all the elements necessary for the installation of an Android app, including the app’s code (compiled in a .dex file), resources, and manifest file. APK files are downloaded and installed on Android devices, similar to how .exe files are used on Windows.
APK files can be obtained from various sources, including the Google Play Store, third-party app stores, or directly from the developer’s website. The APK file acts as a container for the app and its associated files, allowing users to install it on their Android devices.
When an APK file is downloaded, it can be installed by simply opening the file on the Android device, or by transferring the file to the device and using an file explorer app to locate and install it. Prior to installing an APK file, users must enable the “Unknown sources” option in the device’s settings to allow installations from sources other than the Google Play Store.
APK files have a number of advantages. They allow users to easily download and install apps that are not available on the Google Play Store, and they provide more control over the installation process. Additionally, APK files can be shared easily, allowing users to transfer apps to other devices without the need for an internet connection.
However, there are some limitations and considerations when using APK files. APK files can only be installed on Android devices, and the installation process may vary depending on the device and Android version. Furthermore, APK files have the potential to contain malicious code, so it is important to only download APK files from trusted sources.
In conclusion, an APK file is a package file format used by the Android operating system for the distribution and installation of mobile apps. It allows users to download, install, and transfer apps outside of the Google Play Store, providing more options and control over the app installation process.
How do I install an APK file on my Android device
Installing an APK file on your Android device is a straightforward process. APK stands for Android Package Kit, and it is the file format used for distributing and installing applications on Android devices. If you want to install an app that is not available on the Google Play Store or if you have downloaded an app from another source, you will need to install it manually using an APK file.
Here’s a step-by-step guide on how to install an APK file on your Android device:
- Enable app installation from unknown sources:
- Go to the Settings on your Android device.
- Select the Security or Privacy option.
- Scroll down and look for the “Unknown sources” option.
- Tap on the toggle switch to enable app installation from unknown sources.
- Download the APK file:
- Open your preferred web browser on your Android device.
- Go to a trusted website or app store that offers APK files for download.
- Search for the app you want to download and tap on the download button.
- Wait for the APK file to be downloaded to your device.
- Install the APK file:
- Open the file manager or Downloads folder on your Android device.
- Find the APK file you downloaded earlier.
- Tap on the file to start the installation process.
- Read and review the permissions requested by the app.
- If you agree with the permissions, tap on the “Install” button to proceed.
- Wait for the app to be installed on your device.
- Revoke app installation from unknown sources:
- After you have installed the app, it is recommended to revoke app installation from unknown sources for security reasons.
- Go back to the Settings on your Android device.
- Select the Security or Privacy option.
- Scroll down and look for the “Unknown sources” option.
- Tap on the toggle switch to disable app installation from unknown sources.
That’s it! You have successfully installed an APK file on your Android device. It is important to note that APK files should be downloaded from trusted sources to avoid any security risks. Always make sure to review the permissions requested by the app before installing it.
How to install an APK on your Android device
If you want to install an APK file on your Android device, you can do it with just a few simple steps. Here’s how:
- First, make sure that you have downloaded the APK file you want to install. You can download APK files from various sources like websites or app stores.
- Before you can install an APK, you need to enable the “Unknown sources” option on your device. To do this, go to the “Settings” menu, select “Security” or “Privacy,” and then enable the “Unknown sources” option. This will allow you to install APK files from sources other than the official app store.
- Once you have enabled “Unknown sources,” you can proceed with the installation process. Open the file manager app on your Android device and navigate to the location where the APK file is stored.
- Select the APK file and tap on it to start the installation process. A dialog box will appear, asking for your confirmation to install the app. Tap on the “Install” button to proceed.
- During the installation process, your Android device may display a list of permissions required by the app. Review the permissions and decide whether you want to proceed with the installation. If you are unsure about the app’s permissions, it is better to revoke the installation and look for an alternative.
- Once the installation is complete, you will see a confirmation message that the app has been installed. You can then open the app from your device’s app drawer or home screen.
That’s it! Now you know how to install an APK on your Android device. Remember to be cautious when downloading APK files from sources other than the official app store, as they may contain malicious software. Always prefer downloading APK files from trusted sources.
For Android 8 and above
If you are using Android 8 and above, you have more options and features available to make the APK for your app. There are a few steps you need to follow in order to successfully create and publish your APK. Here’s how:
- Download and install the latest version of Blazor for Android 8 and above. Blazor is a preferred framework used for building web applications.
- Create a new file with the .apk extension. This file will contain all the necessary files and resources for your Android app.
- With Blazor, you can easily create a website for your app. Use the available tools and features to design and customize your app’s website.
- Select the target Android version for your app. It’s recommended to target Android 8 and above to ensure compatibility with the latest devices and features.
- Download the necessary Android SDK files for your app’s development. These files are used to build and run your app on Android devices.
- Once you have downloaded the required SDK files, you need to install them on your development machine. This will allow you to test and debug your app on Android devices.
- If needed, you can also revoke permissions for your app. Android 8 and above provide more control over app permissions, allowing users to choose which permissions they want to grant.
- To publish your app, go to the Google Play Store and follow the instructions for app publishing. You will need to create a developer account and provide the necessary information about your app.
- Make sure to select the appropriate target audience for your app. Android 8 and above offer more options for targeting specific devices and user groups.
- If you have multiple versions of your app, you can release them separately. Android 8 and above allow you to have different versions of your app available for download.
- There are also options available for beta testing and staged rollouts. You can use these features to test your app with a smaller group of users before releasing it to the public.
- Android 8 and above have improved the installation process for APK files. Users can now simply select the downloaded APK file and follow the on-screen instructions to install the app.
- Once installed, your app will be available on the user’s device. They can access and use your app like any other app installed on their Android device.
- If you are using Blazor, make sure to keep your app up to date with the latest versions of Blazor. This will ensure that your app runs smoothly and takes advantage of any new features or bug fixes.
That’s it! Now you know how to make an APK for Android 8 and above using Blazor. Follow these steps and start building amazing apps for Android devices!
For versions earlier than Android 8
If you have an Android device running on a version earlier than Android 8, you may still be wondering how to make an APK file. Don’t worry, we’ve got you covered!
Generally, the preferred method for creating an APK file on versions earlier than Android 8 involves using the command line interface. However, if you don’t feel comfortable working with command line tools, there are other options available to you.
One option is to use a tool like Blazor for Windows that allows you to create Android apps without writing any code. With Blazor, you can simply select the features and permissions you want your app to have, and it will generate the necessary files for you.
If you prefer to have more control over the app’s source code, you can use a tool like Maui to develop your app. Maui is a framework that allows you to create cross-platform apps, so you can develop your Android app using your preferred programming language.
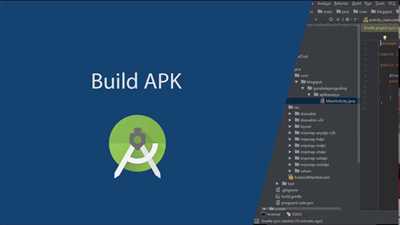
Once you have developed your app, you will need to publish it as an APK file. To do this, you can use the Android Studio IDE, which provides a visual interface for building and publishing APK files. Simply select the “Build” option in the menu and choose “Build APK” to generate the APK file for your app.
After you have generated the APK file, you can distribute it to users through multiple channels. One option is to host the APK file on a website and provide a download link for users to install it. Alternatively, you can publish your app on an app store like Google Play or Amazon, and users can download and install it through the store.
It’s important to note that when users download and install an APK file, they are granting certain permissions to the app. These permissions allow the app to access certain features and data on the device. Users have the option to revoke these permissions at any time through the device settings.
In summary, if you’re using a version of Android earlier than Android 8, there are still options available to create and distribute your app as an APK file. Whether you prefer a visual interface like Android Studio or a more code-focused approach like Maui or Blazor, you can find a solution that works for you.
Publish a NET MAUI app for Android
If you are a Windows user and prefer to develop your mobile apps using .NET, then you’ll find Microsoft’s NET MAUI framework very useful. In this tutorial, we will guide you through the process of publishing a NET MAUI app for Android.
Before we begin, make sure you have the following:
- A development environment set up with Visual Studio and the NET MAUI workload installed.
- A registered developer account on the Google Play Store.
Here are the steps to publish your NET MAUI app for Android:
- Create a release build of your app. This can be done by selecting the “Release” build option in Visual Studio.
- On the Google Play Developer Console website, create a new app and fill in the required information, such as the app name, description, screenshots, and app icon.
- Prepare your app for release by signing the app bundle or APK with a digital certificate. You can generate a keystore file using Visual Studio and use it to sign your app.
- Upload the signed app bundle or APK to the Google Play Console. The console will guide you through the process of uploading the file.
- Review and configure the release options, such as the rollout percentage, countries, and release tracks. You can choose to release the app immediately or schedule it for a later date.
- Submit your app for review. Google Play will review your app to ensure it complies with their guidelines and policies.
- Once your app is approved, it will be available for download through the Google Play Store on Android devices.
It’s important to note that publishing a NET MAUI app for Android is similar to publishing a Blazor WebAssembly app. However, there are some differences in the process due to the nature of mobile app development.
NET MAUI allows you to build native-like apps for multiple platforms, including Android, iOS, and Windows. By using the power of NET MAUI, you can create an app that’s not only visually appealing but also performs well on different devices and screen sizes.
In summary, publishing a NET MAUI app for Android involves creating a release build, preparing the app for release, uploading it to the Google Play Console, configuring release options, submitting the app for review, and finally making it available for users to download on their devices. With the steps outlined above, you’ll be able to publish your NET MAUI app to the Android platform and reach a wider audience.
How to revoke installation permissions
When you release an app on Android, it is generally installed on multiple devices by users. There may be times when you need to revoke the installation permissions for your app. This can be done in a few simple steps.
First, select the version of your app that you would like to revoke installation permissions for. If you have published multiple versions of the app, make sure to choose the correct one.
Once you have selected the app version, there are a couple of ways to revoke installation permissions. If you have the APK file of the app, you can use that. If not, you can download it from the Play Store or any other trusted source.
If you have the APK file, you can revoke installation permissions using the following steps:
- Download and open the APK file on your Windows device.
- Open the APK file with a program like WinRAR or 7-Zip.
- Navigate to the “META-INF” folder.
- Find the file named “MANIFEST.MF”.
- Delete or modify the permissions you want to revoke in the MANIFEST.MF file.
- Save the changes and close the program.
- The modified APK file can now be used to install the app without the revoked permissions.
If you don’t have the APK file, you can still revoke installation permissions through the Play Store or any other trusted source. Here’s how:
- Go to the Play Store or the website from where you earlier downloaded the app.
- Search for the app and go to its download page.
- Under the “More” or “Additional Information” section, look for the option to revoke installation permissions.
- Select the permissions you want to revoke and save the changes.
- The updated app will be available for download by users, without the revoked permissions.
Revoke installation permissions is an important step in ensuring the security and privacy of your app’s users. By carefully managing the permissions and regularly reviewing and revoking unnecessary ones, you can provide a safer experience for your app users.