

If you’re looking for a fun and creative project to pass the time, making soy candles is a great option. Not only will you have a beautiful finished product, but you’ll also be able to enjoy the relaxing and soothing scent that fills the air when you light your homemade candle. Plus, soy candles are a popular choice among those who prefer a more natural and eco-friendly option.
So, how do you make soy candles? It’s actually quite simple, and you don’t need any fancy equipment or hard-to-find ingredients. In fact, with just a few supplies that you may already have at home, you can easily turn soy flakes into a beautiful, fragrant candle that will make a lovely addition to any room.
To start, gather all your materials. You’ll need soy flakes, cotton wicks, a candle-making pitcher, a heat source (such as a double boiler or microwave), and any optional extras like stickers or decorations for your candle jar. You’ll also want to have a thermometer handy to ensure that your wax reaches the correct temperature.
Once you have everything set up, it’s time to melt the soy flakes. If you’re using a double boiler, fill the bottom pot with water and place it on the heat source. Then, carefully pour the soy flakes into the top pot and allow them to melt slowly over low heat. If you’re using a microwave, place the soy flakes in a microwave-safe container and heat them in short bursts, stopping to stir every 30 seconds or so, until they are fully melted.
Next, add any fragrance or color to your melted soy wax, if desired. There are countless scents and colors available on the market, so feel free to get creative and experiment with different combinations. Just be sure to follow the instructions on the fragrance or coloring agent you choose to ensure you use the correct amount.
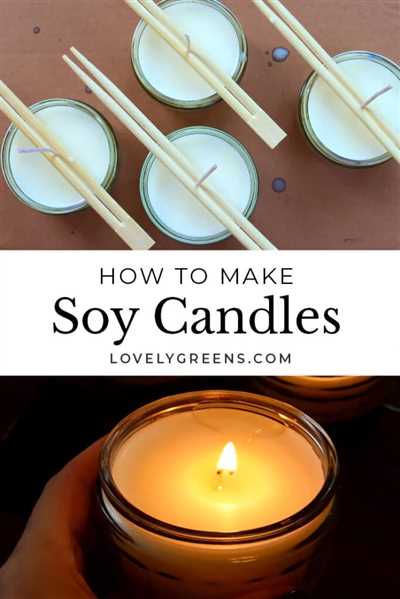
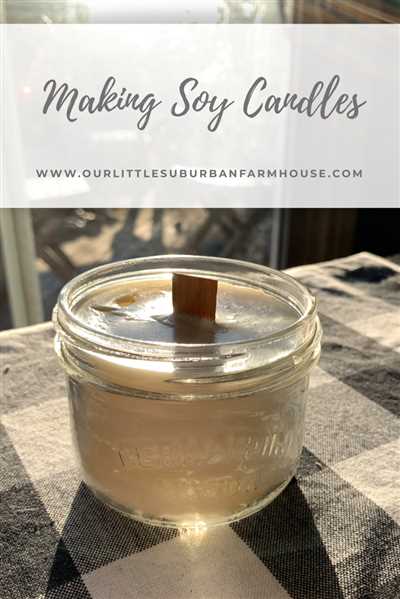
Now comes the fun part – pouring the melted wax into your chosen candle container! Make sure the container is clean and dry before you start. Place the cotton wick in the center of the container and use a stick or pencil to hold it in place. Carefully pour the melted soy wax into the container, leaving a small amount of space at the top. Allow the candle to cool and set completely before trimming the wick to about a quarter of an inch.
Voila! You’ve just made your very own soy candle. Not only did you learn a new skill, but you also created a centerpiece for your home that will fill the air with a beautiful scent. Plus, since soy wax is a renewable resource and is biodegradable, you can feel good about the eco-friendly choice you made. So go ahead and light that candle, sit back, and enjoy the cozy ambiance you created with your own two hands.
How to make a soy candle
To get started, here’s what you’ll need:
- Soy wax flakes
- Cotton wicks
- A heat source, like a double boiler
- A thermometer
- A fragrance oil of your choice
- A container to pour the melted wax into
- Candle stickers
Now, let’s dive into the instructions:
- First, measure out the amount of soy wax flakes that you’ll need for your container. It’s generally recommended to use a ratio of one ounce of wax flakes for every one ounce of container volume.
- Melt the soy wax flakes in a double boiler. This will help ensure that the wax melts evenly and doesn’t burn. Heat the wax until it reaches a temperature of around 185 to 190 degrees Fahrenheit.
- Add your chosen fragrance oil into the melted soy wax. The amount you use will depend on how strong you want the scent to be, but a general rule of thumb is to use about one ounce of fragrance oil for every pound of soy wax.
- While the wax is still hot, place a cotton wick in the center of your container. You can use a wick sticker to secure it in place. Make sure the wick is straight and centered.
- Once the fragrance oil is mixed in, carefully pour the melted soy wax into the container. Be sure to leave some space at the top, as the wax will shrink slightly as it cools.
- Allow the candle to cool and harden completely. This usually takes a few hours, but it’s important to be patient and let it cool naturally. You can also place the candle in the refrigerator to speed up the cooling process, if you’d like.
And there you have it – your very own homemade soy candle! Making soy candles can be a fun and rewarding project that allows you to create unique scents and designs. The next time you want to enjoy a candlelit atmosphere, you’ll have a zero-waste, eco-friendly option right at your fingertips. So go ahead and give it a try!
You might also like
If you enjoy making soy candles, you might also like to try some other DIY projects. Here are a few ideas to get you started:
– Candle Stickers: Add a unique touch to your candles by decorating them with stickers. You can find a wide variety of designs and styles to choose from.
– Cotton Wicks: Instead of using traditional wicks, try using cotton wicks for your candles. They are eco-friendly and give a more natural look to your finished product.
– Coconut Candle: If you’re looking for a different wax source, try making candles with coconut wax. It has a slightly different texture and scent compared to soy wax, but it can be a fun and interesting alternative.
– Open-Pour Candles: Experiment with different pouring techniques, such as open-pour candles. Instead of using containers, pour the melted wax directly onto a heat-resistant surface, like a silicone mat. This creates a unique, modern look for your candles.
– Zero Waste Candles: If you’re conscious about reducing waste, try making zero waste candles. This involves reusing old containers, repurposing leftover wax, and using natural materials, like dried flowers or herbs, for decoration.
– Extra Fragrance: If you prefer stronger scented candles, try adding extra fragrance oil to your soy wax. Just be sure to follow the recommended guidelines for fragrance load to prevent overpowering the candle.
– Learn New Techniques: Expand your candle making skills by learning new techniques. Whether it’s experimenting with different candle shapes, learning how to create layered candles, or mastering the art of candle carving, there’s always more to learn!
By exploring these additional projects, you’ll not only enhance your candle making abilities, but you’ll also have the opportunity to get creative and try something new. Enjoy the process and have fun!
Instructions
To make soy candles, you’ll need the following materials:
– Soy wax flakes
– Candle wicks
– Fragrance oil or essential oil of your choice
– Candle dye (optional)
– Coconut oil (optional for extra scent)
– Stickers or labels (optional for decoration)
Here are the step-by-step instructions on how to make soy candles:
Step 1: Prepare your materials
Gather all the materials needed for your project. Make sure your work area is clean and free from any distractions.
Step 2: Melt the soy wax
Measure the amount of soy wax flakes you’ll need for your candle and melt them using a double boiler or a microwave. If using a microwave, melt the wax in 30-second intervals and stir in between until completely melted.
Step 3: Add fragrance and dye
Once the wax is melted, add your desired fragrance oil or essential oil. You can also add candle dye if you want to color your candles. Stir well to ensure the fragrance and dye are evenly distributed.
Step 4: Prepare the wicks
While the wax is still liquid, dip the bottom end of the wick into the melted wax and then press it onto the center of your candle container. Hold it in place until the wax hardens and the wick stands upright. You can also use a wick sticker or a bit of melted wax to secure the wick in place.
Step 5: Pour the wax
Slowly pour the melted wax into your candle container, making sure not to disturb the wick. Leave about an inch of space at the top to allow for expansion when the wax cools and hardens.
Step 6: Let the candles cool
Allow the candles to cool and harden completely. This can take a few hours, so be patient. Avoid moving or jostling the candles during this time to prevent any imperfections.
Step 7: Trim the wicks
Once the candles are fully cooled, trim the wick to about 1/4 inch above the wax. This will prevent the flame from getting too large and will also help with a clean, even burn.
Step 8: Enjoy your handmade soy candles
Your soy candles are now ready to be enjoyed! Light them up and enjoy the lovely scent and warm glow they provide.
By following these instructions, you’ll learn how to make soy candles that are not only eco-friendly but also free from any harmful additives. It’s a fun and rewarding project that you can also gift to friends and family.
How to Make Soy Candles
Making soy candles is a fun and rewarding project that allows you to create your own custom candles. Unlike traditional paraffin wax candles, soy candles are made with natural soybean oil, which is a renewable source. They burn cleaner and longer, emit zero soot, and release a pleasant fragrance.
To make soy candles, you’ll need a few basic supplies:
- Soy wax flakes (you can find these at most craft stores or online)
- Candle wicks (make sure they are made of cotton and are the appropriate size for your candle)
- A heat-resistant container, like a jar or tin
- Candle fragrance oils (optional, but can add a nice scent to your candles)
Once you have your supplies ready, follow these instructions:
- Prepare your container by cleaning it and ensuring it is free of any stickers or residue.
- Melt the soy wax flakes in a double boiler or a microwave-safe container. If using a microwave, melt the wax in 30-second intervals, stirring in between, until completely melted. Be careful not to overheat the wax.
- If desired, add a few drops of candle fragrance oil to the melted wax and stir well to combine. Be sure to follow the manufacturer’s instructions for the recommended amount of fragrance.
- Attach the wick to the bottom center of your container, using a bit of melted wax to secure it in place.
- Carefully pour the melted wax into your container, taking care not to spill or overflow. Leave a small amount of space at the top to allow for expansion as the candle cools.
- Allow the candle to cool and harden completely, which may take a few hours depending on the size of your candle.
- Trim the wick to about ¼ inch in length, using scissors or a wick trimmer. This will help the candle burn evenly.
Now you have your very own soy candle! You can further personalize it by adding decorations like dried flowers or ribbons. To enjoy your candle, simply light the wick and enjoy the warm glow and gentle scent it provides.
Once you’ve mastered the basics of soy candle making, you might also like to experiment with different colors and shapes for a more unique touch. The possibilities are endless!