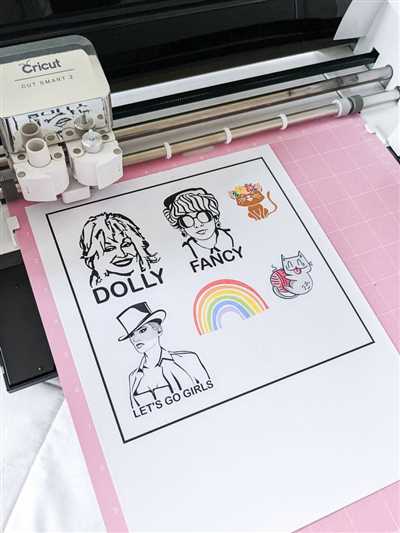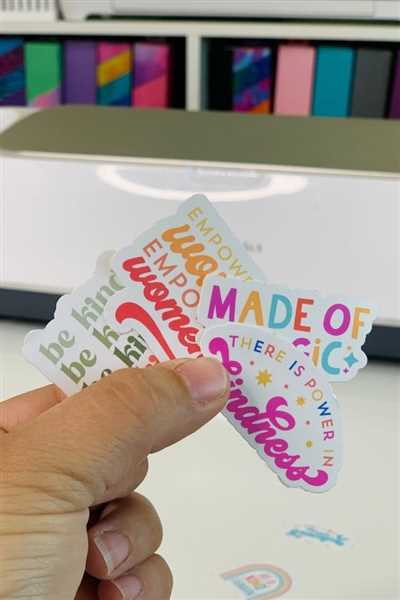
Making your own decals with a Cricut machine is a fun and creative way to personalize your belongings. Whether you want to add a unique touch to your laptop, water bottle, or even your walls, Cricut decals are a great option. In this guide, we will show you how to make Cricut decals in just a few simple steps.
To begin, you will need a Cricut machine, adhesive vinyl, a weeding tool, transfer tape, and a scraper. First, you’ll need to prepare your design. Using Cricut Design Space, you can choose from a wide variety of pre-made designs or create your own. Once your design is ready, click the “Make It” button to proceed to the next step.
Next, it’s time to cut your design. Load the adhesive vinyl into your Cricut machine and select the appropriate settings for the type of vinyl you are using. After the machine finishes cutting, remove the excess vinyl from the cutting mat. You will be left with the individual parts of your design on the mat.
Now comes the weeding process. Use a weeding tool to carefully remove the excess vinyl from around your design. Be sure to remove any small pieces from the inside of letters or intricate parts of the design. This step requires patience and attention to detail, but it is crucial for achieving a clean and professional-looking decal.
Once you have finished weeding, it’s time to apply transfer tape to your decal. Cut a piece of transfer tape slightly larger than your design and carefully place it over the vinyl. Use a scraper to smooth out any air bubbles and ensure the transfer tape is fully adhered to the vinyl.
Now, it’s time to transfer your decal to its final destination. Peel off the backing of the transfer tape, making sure that all the vinyl pieces stick to the transfer tape. Carefully place the decal on the desired surface, making sure it is straight and centered. Once the decal is in the right position, use the scraper to firmly press it down, starting from the center and working your way out to the edges.
Finally, it’s time to remove the transfer tape. Slowly and carefully peel back the transfer tape, leaving the vinyl decal behind on the surface. If any parts of the decal start to lift with the transfer tape, simply press them back down and continue peeling. Once the transfer tape is completely removed, your Cricut decal is done!
These tips should help you create beautiful Cricut decals without any issues. Remember to take your time and follow the steps carefully for the best results. With a little practice, you’ll be able to create custom decals for all your projects. So go ahead and get started – click on the links below to find more inspiration and ideas for your next Cricut decal project!
How to Prepare Vinyl Decals to Sell: 5 Things No One Else Will Tell You

When it comes to making Cricut decals, one important part of the process is preparing the vinyl. Preparing your vinyl decals properly can make a huge difference in the final product and can set you apart from other sellers. Here are 5 things that no one else will tell you about preparing vinyl decals for sale:
- Take the time to clean the surface: Before applying your vinyl decal, make sure the surface you are applying it to is clean and free from any dust or debris. This will help the decal adhere better and make it last longer.
- Choose the right vinyl: Not all vinyl is created equal. Make sure to use high-quality vinyl that is suitable for decals. There are many different types and colors of vinyl available, so choose the one that works best for your projects.
- Weld your layers together: If your design consists of multiple layers, you can use the Cricut Design Space to weld them together. This will make the decal easier to apply and ensure that all the parts stay in place.
- Remove the background: When preparing your decal, take the time to remove any unnecessary background parts. This will make the design look cleaner and more professional.
- Offer customization options: To attract more customers, consider offering customization options for your decals. This can include different colors, sizes, or even the ability for customers to upload their own images to be used on the decal.
By following these tips and taking the time to properly prepare your vinyl decals for sale, you can create high-quality products that stand out from the competition. Remember that attention to detail and a focus on customer satisfaction are key to running a successful decal business.
Cricut Maker 3 – for large projects

If you have a lot of large projects to tackle, the Cricut Maker 3 is the perfect machine for you. With its open menu, this machine can handle big tasks with ease. When you open the menu, you will see a list of machines, and the Maker 3 will be one of them.
When you click on the Maker 3, it will take you to the machine’s main screen. Here, you can see the different tools and settings available. One of the most important things to know about the Maker 3 is that it has three layers. The top layer is your foreground, the middle layer is your background, and the bottom layer is your vinyl color.
To prepare your large project, you’ll need to click on the “Upload” button. This will open a new window where you can select the image you want to use. After you’ve selected the image, you can click on the “Open” button to load it into the Maker 3.
Once the image has loaded, you can use the sliders to adjust the size and position. If your image has multiple colors, you can use the “Layers” button to see and edit each color separately. You can also click on the “Weld” button to join different parts of the image together.
After you’ve prepared your image, you can click on the “Continue” button to move on to the next step. Here, you can select the material you will be using for your decal. The Maker 3 will recommend the right cut settings for you, but you can also adjust them if necessary.
When you’re ready, you can click on the “Cut” button to start the cutting process. The Maker 3 will do all the work for you, making precise cuts without any hassle. After the cut is done, you can remove your decal from the cutting mat and apply it to your desired surface.
When working with larger projects, it’s important to have enough space to work with. You may need to shift things around or use scraps of vinyl to make it fit. Don’t worry, though – the Maker 3 can handle it all.
One last tip for working on large projects with the Maker 3 is to stay organized. Keeping all your parts and layers together will make the process much smoother. You can also sell your decals to customers, so preparing them in advance is a great idea!
In summary, the Cricut Maker 3 is a powerful machine that is perfect for large projects. With its open menu and easy-to-use tools, you can create stunning decals in no time. Whether you’re a professional or just starting out, the Maker 3 will definitely be a game-changer for you.
Step 2: Remove the Background
After preparing your image in step 1, it’s time to remove the background. This step is crucial to ensure that only the desired parts of the image are cut out by your Cricut maker.
To remove the background, start by opening your image in the Cricut Design Space. Click on the “Upload” button on the left-hand menu and select the image you want to work with.
Once your image is uploaded, click on the “Complex” option in the upload window. This will allow you to remove more intricate parts of the image, such as the background.
Next, use the “Select & Erase” tool to remove the background. Click and drag your cursor to select the parts you want to remove. You can also use the “Magic Wand” tool to select and remove larger areas of the background.
Make sure to carefully remove all parts of the background without accidentally erasing important parts of your image. Using the “Undo” option or holding down the “Shift” key while clicking will help you correct any mistakes.
Once the background is successfully removed, you can click the “Continue” button to proceed to the next step. If there are any remaining parts of the background that you missed, the Cricut machine will also cut those out.
Before cutting your decal, it’s a good idea to check if there are any more parts that need to be removed. Click on the “Layers” tab on the right-hand menu to see if there are any additional layers. If there are, click on the “Slice” or “Weld” option to combine them with the rest of the design.
It’s also important to note that if your image has multiple layers or colors, the Cricut machine will cut each layer separately. You can either remove the excess vinyl after cutting or leave it on for a more layered look.
Removing the background may take some time and practice, but with these tips, you’ll be able to do it like a pro. Just remember to take your time, double-check each step, and stay patient. Removing the background is a crucial part of preparing your image for Cricut decal projects, so it’s definitely worth the effort.
Preparing to Cut the Vinyl for Layers
Before you begin cutting the vinyl for your cricut decals, there are a few things you need to do to prepare. First, gather all of the materials you will need for this step. You will need your Cricut machine, vinyl in the colors you would like for your decals, transfer tape, and a weeding tool.
Next, open Cricut Design Space on your computer or mobile device. From the main menu, click on “New Project” to start a new project. Then, click on “Upload” to import the image you would like to use for your decal. If you have multiple parts or layers to your design, you will need to upload them separately.
Once you have uploaded your design, click on it to select it. Then, click on the “Ungroup” button at the top of the screen. This will separate the different parts or layers of your design so you can work with them individually.
Now, arrange the different parts or layers of your design on the canvas to make sure they fit together the way you want them to. If necessary, you can resize the different parts by clicking on them and dragging the slider that appears on the side.
When you are happy with how the layers fit together, it’s time to prepare the vinyl for cutting. Click on the “Make It” button at the top right corner of the screen. This will take you to the mat preview, where you can see how the design will look on the cutting mat.
If your design has multiple layers, you will need to weld them together to ensure they cut as one piece. To do this, select all of the layers by clicking and dragging your cursor over them. Then, click on the “Weld” button at the bottom of the screen.
After you have welded the layers together, you can arrange them on the cutting mat. If your design is larger than the width of your mat, you may need to move some of the layers to a second mat. To do this, click and drag the layers onto a new mat.
Now, it’s time to load the vinyl into your Cricut machine. Remove the protective backing from your vinyl and place it onto the cutting mat with the color side up. Smooth out any wrinkles or air bubbles to ensure the vinyl stays in place during cutting.
Once the vinyl is in place, insert the mat into your Cricut machine by sliding it under the machine’s rollers. Press the “Load/Unload” button to secure the mat in place.
Now, you can follow the prompts on the Cricut machine’s screen to cut your design. Make sure the right material setting is selected and adjust the blade depth if necessary. Then, press the “Go” button to start cutting.
After the Cricut machine has finished cutting, press the “Unload” button to remove the mat from the machine. Carefully peel away the excess vinyl from around your design, leaving only the cut decal on the mat.
Now your vinyl decal is ready to be applied to your desired surface. If you have multiple layers, you can use transfer tape to keep them aligned when applying them to the surface. Make sure to follow the manufacturer’s instructions for using transfer tape.
And there you have it – you’ve successfully prepared your vinyl for cutting and created your cricut decals. Take your time and have fun with this step, as it is crucial for getting the best results in your projects.
Comments
Here are some comments from Cricut customers who have used their machines to make decals:
Customer 1: I’m new to Cricut but I love it! I’ve made 3 decals so far and they came out great. The tips in this article really helped me prepare my images and remove any background or foreground parts. I also used the weld tool to join multiple layers together and it worked perfectly.
Customer 2: I’ve been selling decals made with my Cricut Maker for a while now, and the customers always love them. The machine cuts perfectly and the vinyl holds up well on walls. I would definitely recommend using the larger mat and slider for bigger projects.
Customer 3: The step-by-step instructions here are really helpful. I had no idea how to use my Cricut to make decals before I read this article. Now I can easily cut out any image I want and it looks professional. The tips about using the black marker instead of the blade are great too!
Customer 3: This article is a game-changer! I struggled with making decals before because I didn’t know how to prepare my images properly. Now that I know how to remove backgrounds and weld things together, my decals look so much better. Thank you!
Customer 4: I’ve tried making decals with other machines before, but the Cricut is by far the best. The precision and accuracy of the cuts are amazing. It’s also great that you can choose from so many different colors of vinyl. I’ve made decals in red, blue, green, and more!
Customer 5: One tip I would give to others is to always have some extra vinyl scraps on hand. Sometimes, you might make a mistake or the cut might not come out perfectly. Having extra vinyl allows you to start over without wasting too much time or materials.
Customer 5: I love how easy it is to use the Cricut machines. You can create intricate designs with just a few simple clicks. It’s also great that you can use the machine to work on other projects too, not just decals. Highly recommend!
Customer 6: March 1st will definitely stay in my memory as the day I discovered the Cricut! It has changed the way I create decals. The cut quality is amazing and the machine is so easy to use. I can’t wait to try out more projects in the future!

