
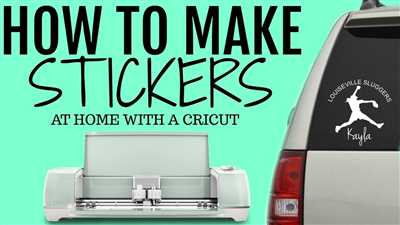

If you’re looking to decorate your walls, windows, or even your laptop with unique designs, then homemade decals are a great option. With just a few supplies and a little bit of time, you can create custom decals that will add a personal touch to any surface. In this article, we’ll show you how to make your own homemade decals using a printer, some plastic sheets, and a few other simple materials.
The first step in making homemade decals is to gather all the necessary supplies. You’ll need a computer with a printer, some thin plastic sheets, scissors, tissue paper, and a spray bottle filled with water. If you don’t have a printer, you can also find printable decal sheets online. Once you have everything you need, you’re ready to get started.
Next, you’ll need to choose the design or image you want to turn into a decal. This could be anything from birds and leaves to more intricate designs. If you’re not sure what to choose, you can check online for some inspiration. Once you have your design, you’ll need to print it out on a regular sheet of paper. Make sure to adjust the size of the image to fit the plastic sheet you’re using.
Once your design is printed, you can begin the process of making the decal. Start by laying a plastic sheet onto a flat surface, such as a table. Then, place a piece of tissue paper onto the plastic sheet and secure it with tape or weights. This will help to keep the plastic sheet in place while you work.
Next, cut out the printed image from the regular sheet of paper. Make sure to cut along the outline of the design as accurately as possible. If there are any details that are too intricate to cut with scissors, you can use a craft knife to carefully cut them out.
Once you’ve cut out the image, carefully place it onto the plastic sheet with the tissue paper side facing up. Gently brush the tissue paper with water using a spray bottle. Make sure to wet the paper thoroughly, but not too much as it could tear. Leave the decal to soak for a couple of minutes to ensure that the tissue paper is fully saturated.
After soaking, gently slide the tissue paper off the plastic sheet. The printed image should now be transferred onto the plastic surface. At this point, you can leave the decal to dry for a few hours or use a hairdryer to speed up the process.
Once the decal is dry, it’s ready to be applied to any surface. Simply peel off the plastic sheet and place the decal onto the desired object. If you’re applying the decal onto a wall or window, make sure the surface is clean and dry. You can use a damp cloth to wipe away any dust or dirt before applying the decal.
By making your own homemade decals, you have the option to create unique designs that are not available in stores. You can also choose to make them removable, which allows you to change your decorations as often as you like. With a few hours of work and a little bit of creativity, you can produce homemade decals that will add a personal touch to any space.
Decorate With Waterslide Decals
Waterslide decals are a fantastic way to decorate various objects with custom designs. Whether you want to spruce up your laptop, decorate your walls, or add some unique details to your car, waterslide decals can help you achieve the look you desire. They are easy to make at home and fun to apply!
To start making your own waterslide decals, you’ll need a few materials. Gather scissors, a computer with an online image printing option, clear waterslide decal sheets, a spray bottle filled with water, and a tissue or paper towels. You may also want to have an outline of the design you want to create, as it helps with the cutting process.
Begin by finding the images or designs you want to use. You can choose from a wide collection of pre-made designs available online, or create your own using graphic software. Once you have your designs ready, you can print them onto the clear waterslide decal sheets. Make sure to use high-quality printing settings for the best results.
After printing, let the sheets dry for a couple of minutes to ensure the ink has fully set. Then, carefully cut out the individual decals using scissors. Leave a thin border around each design to help with application.
Next, fill the spray bottle with water and dampen the tissue or paper towels. This is to help with the application process and prevent the decals from sticking prematurely. Place the decal into the water, ensuring that the adhesive side is facing down. Let it soak for a few seconds until the decal starts to slide off the backing paper.
Once the decal is ready, gently slide it off the backing paper and onto the desired object. Position it accurately, so it aligns with your design. Use the damp tissue or paper towel to gently press out any air bubbles or excess water. Be careful not to tear the decal during this step.
When the decal is in place, let it dry for a few hours or overnight to ensure a secure application. Once dry, you can apply a thin coat of clear varnish or sealant to protect the decal and enhance its longevity. This step is especially important if you’re applying the decal to an object that will be frequently touched or exposed to water.
Waterslide decals give you the freedom to decorate various objects with ease. Whether you’re adding some beautiful birds to your laptop or creating custom signs for your windows, waterslide decals offer endless design options. They are versatile, removable, and can be used on both flat and curved surfaces. So, next time you want to add a personal touch to your belongings, give waterslide decals a try!
Decorate Your Place with Removable Wall Decals
If you want to add a personal touch to your living space, removable wall decals are a great option. They allow you to easily change the look of a room without having to commit to a permanent design. Whether you want to create a focal point or simply add some accents, wall decals can help you achieve the desired effect.
To get started, you’ll need a few supplies. First, check online for a collection of designs that you can print yourself. Many websites offer free printable decals, so you’ll have plenty of options to choose from. You’ll also need a printer, quality paper, and some scissors. For those who want a more professional result, you can use waterslide decal paper.
Once you have your designs printed, it’s time to start working. Lay them on a flat work surface and carefully cut around the outline of each design with scissors. If you’re using waterslide decal paper, follow the instructions shown on the packaging for best results.
Next, prepare your wall for application. Make sure the surface is clean and dry. If needed, remove any dirt or dust with a damp cloth. If you’re applying the decals to a painted wall, give it a couple of hours to fully dry.
Before applying the decals, it’s a good idea to do a test on a small area of the wall. This will help you determine how much pressure is needed and how long the decal should be left to set before removing the backing. You can then adjust your technique as needed.
When you’re ready to apply the decals, gently peel off the backing paper and position the decal on the wall. Use a credit card or squeegee to press the decal onto the wall, starting from the center and working your way out towards the edges. This will help eliminate any air bubbles and ensure a smooth application.
If you want to remove or reposition the decals, they should come off easily without damaging the wall. Simply peel them away gently, starting from a corner. If any residue remains, you can use a damp cloth to wipe it clean.
With removable wall decals, you can easily change the look and feel of your space to suit your mood or the season. Whether you want to add a splash of color or create a focal point with a large photo decal, the possibilities are endless. So get creative and start decorating!
2 Making Decals With A Computer
If you want to create custom decals using your computer, there are a few options available to you. One popular method is using waterslide decal paper, which allows you to print your design onto a special surface that can be applied to various objects. To begin, you’ll need a computer with a printer and some waterslide decal paper.
First, create your design on your computer using a program like Adobe Photoshop or Microsoft Word. You can use text, images, or both to create the decal. Once you have your design ready, print a test page on regular paper to check the layout and quality. If everything looks good, proceed to print the design onto the waterslide decal paper.
Before applying the decal, soak it in water for a few seconds to activate the adhesive. Then, gently slide the decal onto the desired surface, such as a wall or a piece of furniture. Use a piece of tissue to remove any excess water and smooth out any air bubbles. Leave the decal to dry for a few hours before handling it.
If you want your decals to be more durable, you have the option of laminating them. This involves applying a thin, clear plastic film over the decal to protect it from moisture and wear. Laminating can help your decals last longer, especially if they will be exposed to outdoor elements like rain or sun.
There are also online services that specialize in producing custom decals from your designs. These services usually offer a wide range of options, including different sizes, shapes, and colours. Simply upload your design and select the specifications you want, and they will produce the decals for you. This option can be a great time-saver if you need a large quantity of decals or if you want a professional-quality finish.
When making decals with a computer, it’s essential to use the best quality printer and paper possible. High-quality printing helps ensure that your designs are sharp and vibrant. Additionally, you should consider the type of surface you’ll be applying the decals to – smooth surfaces work best, as rough or textured surfaces may hinder the application.
Whether you’re using a computer or an online service, making your own decals can be a fun and creative way to decorate and personalize your belongings. Take some time to explore different designs and colour options, and don’t be afraid to experiment. With a little practice, you’ll be able to produce beautiful decals that will make your items stand out.
Remember to have fun with the process and let your creativity shine through!
What You’ll Need

To make homemade decals, you’ll need:
- A computer with a printer
- White or clear waterslide decal paper
- Scissors or a cutting tool
- A plastic object to transfer the decal onto
- A spray bottle filled with water
- A damp cloth or tissue
- A surface to work on
These are the basic materials you’ll need to get started. Let’s go into more details about each item:
- A computer with a printer: You’ll need a computer to design your decals and a printer to print them. Make sure the printer you use can produce high-quality prints.
- White or clear waterslide decal paper: Waterslide decal paper is a special type of paper that helps you transfer the designs onto different surfaces. You can choose between white or clear depending on what you want your decals to look like.
- Scissors or a cutting tool: You’ll need something to cut out your designs from the decal paper. Scissors will work just fine, but if you want more precise cuts, a cutting tool like an X-Acto knife may help.
- A plastic object to transfer the decal onto: You can decorate many different objects with decals, such as a laptop, a wall, or even a piece of furniture. Choose an object that has a smooth surface for better application.
- A spray bottle filled with water: Water is used to soak the decal paper and separate the decal from its backing. Fill a spray bottle with water to make this process easier.
- A damp cloth or tissue: After soaking the decal paper, you’ll need a damp cloth or tissue to gently slide the decal onto the object’s surface. This will help eliminate air bubbles and ensure a smooth application.
- A surface to work on: To keep your workspace clean and organized, it’s best to have a dedicated surface to work on. A table or desk with a protective covering, such as a plastic sheet or newspaper, will do the job.
Once you have gathered all the necessary materials, you’re ready to start making your own homemade decals!
Sources

If you want to make homemade decals, there are a few sources you can turn to for help and inspiration. Here’s a list of some helpful resources:
- Online tutorials: There are many online tutorials that can guide you through the process of making homemade decals, from design to application. These tutorials often include step-by-step instructions and images to help you along the way.
- Waterproof decal paper: This special type of paper allows you to easily print your designs onto it using a regular inkjet printer. Once your designs are printed, you can cut them into any shape you want.
- Water slide decal paper: If you want to decorate objects with your homemade decals, water slide decal paper is the way to go. It produces high-quality, removable decals that can be applied to any smooth surface when soaked in water.
- Spray adhesive: Using a spray adhesive helps eliminate any air bubbles when applying your homemade decals. This ensures that they adhere smoothly to the surface you’re decorating.
- Tissue paper: If you’re working with thin or delicate decals, you can use tissue paper to protect them during the application process. Simply place a piece of tissue paper over the decal and press it gently onto the object.
- Laminating sheets: If you want your homemade decals to be more durable and long-lasting, you can use laminating sheets to protect them. This will help prevent them from fading or peeling over time.
- Design software: If you’re creating your own decals from scratch, design software like Adobe Photoshop or Illustrator can be a great help. These programs allow you to create intricate designs and add text or images to your decals.
With these sources at your disposal, you’ll be able to produce beautiful homemade decals that will decorate your walls, objects, or any other surface you want to personalize.


