

If you love DIY crafts, then you’ll definitely enjoy making your own pot holders. These handy kitchen accessories are not only practical, but they also make lovely gifts for family and friends. Plus, making pot holders allows you to unleash your creativity and create unique pieces that reflect your personal style.
When making pot holders, the corners and trim are essential elements to consider. Choose materials that are heat-resistant and easy to work with, such as quilting cotton or double-sided thermal batting. Make sure to stitch each piece together with a straight stitch and secure the binding with prefolded binding tape.
The first step is to baste the place a piece of batting down onto the wrong side of the fabric you’ll be using for the front of the pot holder. Then, place the backing fabric on top, right sides together, and leave a few inches open for turning. Sew along the lines you made, and be sure to square the corners before stitching.
Once the pot holder is sewn and turned right-side out, you can attach the binding. Fold the tape over and pin it in place around the edges of the pot holder. Use a walking foot on your sewing machine to ensure even stitching, and sew all around the edge of the pot holder.
Another option is to create a quilted pot holder. For this, stack a piece of batting, the backing fabric, and the front fabric. Pin the layers together, and begin sewing in the center. Sew in straight lines or create fun patterns to quilt the layers together.
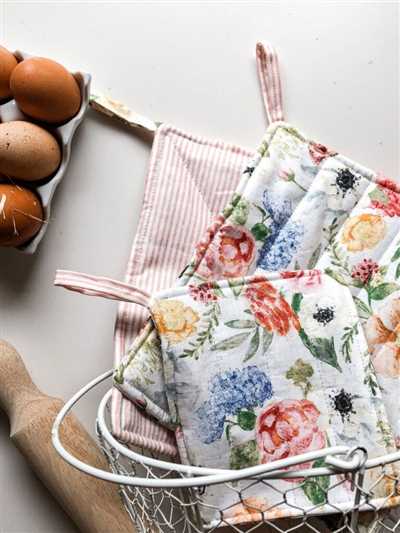
Remember to add a loop of fabric or ribbon to one corner of the pot holder for hanging. This small detail is both functional and decorative. Once the pot holders are complete, you can make a bunch at once and give them as gifts or keep them for yourself.
Making pot holders is a simple and inexpensive project that can be done with basic sewing supplies. It’s a great way to use up fabric scraps and can also be a fun way to practice new sewing techniques. So grab some cotton fabric, a double-fold bias tape, and some batting, and get started on making your own set of pot holders today!
DIY Pot Holders
Looking to add a personal touch to your kitchen? Why not try making your own pot holders! Creating your own pot holders is not only a fun and inexpensive project, but it also allows you to customize them to your liking. Whether you prefer a simple design or want to get more creative with quilting and embellishments, making your own pot holders can be a rewarding and practical adventure.
To begin, gather your supplies. You will need fabric, batting, and a backing. Cotton fabric works best for its heat-resistant properties. You can even repurpose old towels or quilts that are no longer being used. Prefolded squares or fat quarters are a good option if you’re looking for a quick and easy project.
Start by cutting your fabric and batting into squares that are large enough to create the desired size for your pot holders. A 9-inch by 9-inch square is a good starting point, but feel free to adjust the size to your liking.
Next, layer the fabric and batting together with the right sides facing out. If you’re using a patterned fabric, make sure the pattern is facing the right way. Pin the layers together to hold them in place. You can also baste the layers together with a long machine stitch.
Once your layers are secure, trim down any excess fabric or batting. This will help create clean edges and make it easier to turn the pot holders inside out later on.
Now it’s time to sew around the edges to complete the pot holders. Start sewing at one corner and stitch around the square, leaving a small opening for turning. Sew close to the edges, around 1/4 inch away, to ensure your pot holders are sturdy. Backstitch at the beginning and end to secure the stitching.
After stitching, trim the corners to reduce bulk and make it easier to turn the pot holders right side out. Be careful not to cut too close to the stitching. Use a chopstick or pencil to gently push out the corners, creating a crisp shape.
Now, it’s time to turn the pot holders right side out. Use the small opening you left in the stitching to carefully pull the fabric through. Make sure to push out the corners and smooth out any wrinkles for a professional finish.
Once your pot holders are turned right side out, it’s time to add some extra insulation for maximum heat protection. You can add another layer of batting or use a special heat-resistant material like Insul-Bright. Cut this extra layer slightly smaller than your pot holders and place it inside, making sure to push it all the way into the corners.
To close up the opening, fold in the raw edges and stitch it closed with a small hidden stitch. This will give your pot holders a neat finish.
If desired, you can also add a decorative binding around the edges of your pot holders. Cut a strip of coordinating fabric about 2 inches wide and long enough to go around the entire edge. Fold the strip in half lengthwise, wrong sides together, and press. Then, unfold the strip and attach it to the right side of your pot holders, aligning the raw edges. Stitch along the edge, folding the corners neatly to create a mitred look.
Voila! Your DIY pot holders are complete and ready to be used in your kitchen. If you’re feeling adventurous, try making a matching set or experimenting with different shapes and designs. With the freedom to choose your own fabric and embellishments, you can create pot holders that are as unique as you are.
– Making pot holders yourself is a great way to add a personal touch to your kitchen.
– The process involves cutting and layering fabric and batting, sewing around the edges, and adding extra insulation if desired.
– You can get creative with different fabric designs and even add decorative bindings for a polished look.
– DIY pot holders are a practical and stylish addition to any home and make great gifts for family and friends who love to cook.
Pot Holder Supplies
When it comes to making pot holders, you don’t need a lot of fancy materials or expensive tools. In fact, you can create your own DIY pot holders with just a few simple supplies. Here’s what you’ll need:
Materials:
- A prefolded fill-a-yard square
- 2 pieces of fabric
- A bread towel
- Sewing machine (with a walking foot, if possible)
- Sewing tape and scissors
- Thread, pins, and a rotary cutter
Step 1: Prepare the Pot Holder
To begin, take the prefolded fill-a-yard square and cut it into the desired size for your pot holder. You should have two pieces of fabric that are the same size.
Step 2: Stack the Pieces
Take one piece of fabric and place it on top of the other, with the wrong sides together. Make sure the edges are aligned.
Step 3: Baste the Edges
Using a sewing machine, baste the edges of the fabric together. This will help keep the pieces in place while you work on the pot holder.
Step 4: Create the Binding
Next, create the binding for your pot holder. Cut a strip of fabric that is long enough to go around the entire edge of the pot holder, with a little extra for seam allowance.
Step 5: Attach the Binding
Pin the binding strip around the edge of the pot holder, right sides together, and sew it in place. Make sure to leave enough space at the beginning and end of the strip to turn it under neatly.
Step 6: Turn and Stitch
Turn the pot holder right side out and stitch the binding down using a straight stitch. This will create a neat and finished edge.
Step 7: Quilt the Pot Holder
If you love the look of a quilted pot holder, you can add some extra stitching to the surface. Use a walking foot on your sewing machine to help feed the layers of fabric evenly and prevent them from shifting.
Step 8: Complete the Pot Holder
Trim any excess fabric or thread, and your pot holder is complete! You now have a functional and attractive pot holder that you made with your own hands. Enjoy using it in your kitchen or give it as a thoughtful gift to a friend or family member.
With these simple supplies and easy steps, you can create plenty of pot holders to use or share. Have fun with your sewing adventure and enjoy the satisfaction of making something useful for your home!
Materials
To make pot holders, you will need the following materials:
- 1 year of cotton fabric (preferably prewashed and preshrunk)
- 1 foot of cotton batting or fill-a-yard
- Thread in a color that matches your fabric
- Sewing machine
- Scissors
- Pins
- Iron and ironing board
- Quilting ruler or straight edge
- Fabric marker or chalk
These supplies should be enough to make several pot holders, depending on the size and quantity you want. They are all inexpensive and can easily be found at your local fabric or craft store.
Step 2: Trim and Add Backing Fabric
Now that you have your quilted pot holder panel stitched and ready, it’s time to trim and add the backing fabric. This step will ensure a clean and finished look for your pot holders.
First, gather the materials and supplies you’ll need for this step. You’ll need the quilted pot holder panel you just made, the backing fabric of your choice, scissors, pins, and a sewing machine.
Start by trimming the edges of your pot holder panel to make sure they are straight and even. Using a ruler or a square, mark the excess fabric and cut it off. This will give your pot holders a squared-off look.
Next, cut a piece of backing fabric that is slightly larger than your pot holder panel. Place the pot holder panel on top of the backing fabric, with the right sides facing each other. Align the edges and pin them together to hold them in place.
Using a sewing machine, stitch around all four sides of the pot holder panel, leaving a small opening of about 2-3 inches on one side. This opening will be used to turn the pot holder right side out later.
Once you’ve stitched around the edges, trim the excess fabric and trim the corners to reduce bulk. Be careful not to cut too close to the stitching to prevent it from unraveling.
Turn the pot holder right side out through the opening you left earlier. Use a pencil or a chopstick to gently push out the corners and make them nice and crisp.
Now it’s time to add the backing fabric. Cut a piece of cotton batting or an inexpensive towel to the size of your pot holder. Insert it into the pot holder through the opening and push it into place. This will provide extra heat resistance and protect your hands from hot pots and pans.
Finally, stitch around the edges of the pot holder to close the opening and secure the layers together. You can use a straight stitch or a decorative stitch, depending on your preference.
And there you have it! You’ve successfully trimmed and added the backing fabric to your pot holders. These simple steps will ensure that your pot holders are not only functional but also pretty and durable. Now you’re ready to move on to the next step – adding binding to complete your pot holders.
Supplies for Sewing the Pot Holders
When it comes to making pot holders, you’ll need a few supplies to get started. Here are the materials you’ll need:
- Fabric: Look for a good quality cotton fabric that will withstand heat. You can use scraps or buy materials specifically for this project. A fat quarter or a half yard of fabric should be enough.
- Batting: This is the material that will provide insulation and protect you from the heat. You can find inexpensive batting at your local craft store. It’s usually sold in pre-cut squares or by the yard. One yard should be enough to make several pot holders.
- Backing Fabric: This is the fabric that will be on the back of your pot holder. It should be a sturdy fabric that can withstand wear and tear. You can use the same fabric as your front panel or choose a contrasting fabric for a more interesting look.
- Trim: Adding a trim to your pot holders can give them a finished and decorative look. You can choose from a variety of trims, like bias tape or ribbon.
- Thread: You’ll need plenty of thread for sewing your pot holders. Make sure you have a good quality cotton thread that matches or complements your fabric.
- Basic Sewing Supplies: In addition to the materials mentioned above, you’ll need basic sewing supplies like scissors, pins, and a sewing machine. If you’re going to be stitching through thick layers, you may also need a walking foot for your sewing machine.
Now that you have all your supplies ready, you can start making your pot holders! The next step is to measure and cut your fabric and batting into squares. Trim your fabric and batting to the size you want your pot holders to be, leaving an extra ¼ inch for seam allowance.
Next, place the wrong sides of your fabric and batting together, making sure they are squared up. Pin them in place. If you like, you can also baste them together to keep them from shifting during stitching.
Now it’s time to stitch around the edges of your pot holder. Using a straight stitch, sew close to the edge, leaving a small opening for turning. Backstitch at the beginning and end of your stitching to secure the thread.
After stitching, trim the corners of your pot holder to reduce bulk. Turn the pot holder right side out through the opening. Use a pointed object to push out the corners and create nice, sharp edges.
Once your pot holder is turned right side out, you can add the trim if desired. Pin the trim around the edges of the pot holder and stitch it in place using a straight or zigzag stitch.
If you want to make your pot holder quilted, you can add stitching lines across the front panel of the pot holder. This can be done using a walking foot on your sewing machine. Stitching lines can be placed vertically, horizontally, diagonally, or in a pattern of your choice.
Finally, close the opening used for turning by either hand stitching it closed or stitching close to the edge with your sewing machine.
With these steps, you’re on your way to creating beautiful and functional pot holders for your kitchen. Enjoy your DIY adventure and have a good time sewing!