

Google Forms is a powerful and user-friendly tool that allows you to create custom forms, surveys, quizzes, and more. Whether you are a teacher looking to gather feedback from your students or a business owner in need of customer feedback, Google Forms has got you covered. In this article, we will walk you through the steps and provide useful tips to help you create a form that meets your specific needs.
1. Choose the type of form you want to create: Depending on your requirements, you could create a form for collecting responses, conducting surveys, or even creating quizzes. The options are endless, and you can customize your form to capture the exact information you need from your respondents.
2. Take advantage of the various question types: Google Forms offers a wide range of question types, including multiple choice, short answer, and rating scales. By using different question types, you can ensure that your respondents can input their answers in a clear and concise manner.
3. Add sections for better organization: If your form is quite lengthy and contains multiple topics, it is a good idea to add sections. Sections help break down your form into smaller, more manageable parts, making it easier for respondents to navigate and provide accurate answers.
4. Customize the look and feel of your form: Google Forms allows you to add your brand’s colors, logo, and even choose from different templates to make your form more visually appealing. This customization can help create a cohesive look and feel, which is especially useful when capturing customer feedback or conducting surveys.
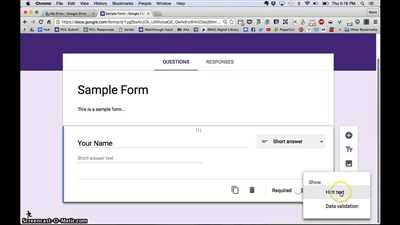
5. Ensure data validation: Google Forms provides validation options, allowing you to create criteria for each question. This ensures that respondents provide answers within the specified range or format, making the data collected more reliable and accurate.
By following these simple steps and utilizing the various features Google Forms offers, you can create highly engaging and effective forms for a wide range of purposes. So, what are you waiting for? Start creating your own form now and unlock the power of Google Forms!
- 5 Steps to a Google Form
- Step 2 Capture customer information
- Form Questions
- How to Create a Google Form
- How To Make A Google Form Quiz
- How to Design Google Forms Header Image and Colors
- 1. Order of the Form
- 2. Click on “Theme” to Access the Design Settings
- 3. Ensure Compatibility with Multiple Devices
- 4. Use Clear and Captivating Image
- 5. Add Colors that Reflect Your Brand or Theme
- 6. Use the Google Forms Header Image Maker
- 7. Make Sure to Include Clear Instructions
- 8. Use Color to Differentiate Sections
- 9. Use Input Validation for Clear and Accurate Responses
- 10. Allow Respondents to Upload Images
- How to Use Google Forms Create Template
- How to Add Sections when Creating a Google Form
- How to Store Google Forms Responses in Google Sheets
- Video:
- How to Make Google Forms Look Amazing!
5 Steps to a Google Form
Google Forms is a free tool provided by Google that allows users to create online forms for various purposes. Whether you need to collect feedback, conduct surveys, or capture customer data, Google Forms can help you gather the information you need in a clear and organized way.
Creating a Google Form involves a few simple steps. In this article, we’ll walk you through the process to help you get started.
- Step 1: Create a new form
- Step 2: Add questions and sections
- Step 3: Customize your form
- Step 4: Set up validation and response validation
- Step 5: Share and collect responses
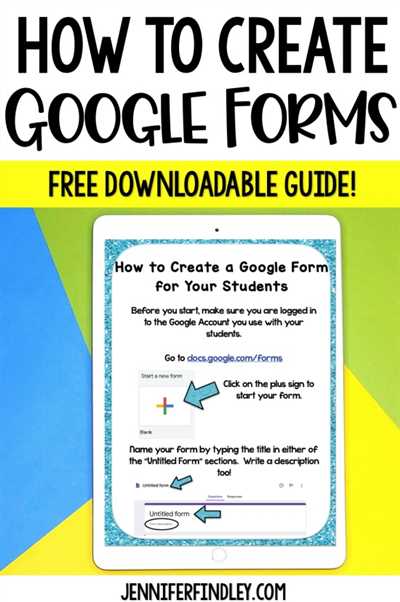
The first step is to go to Google Forms and click on “Blank” or choose a template to start with. If you have a Google account, you can access Google Forms through your Google Drive. Give your form a name and add a brief description in the header section.
Next, you can start adding questions to your form. You can choose from different types of questions, such as multiple-choice, short answer, or rating scale. If you need to add multiple questions, you can also create sections to organize them more effectively. Use the drag-and-drop feature to rearrange the questions in the order you prefer.
Google Forms allows you to customize the design of your form. You can change the color scheme, font style, and background color to match your preferences. You can also add images or a logo to make your form more visually appealing. Take advantage of the available customization options to create a form that reflects your brand or the purpose of the survey.
To ensure the quality of the responses, you can set up validation rules for certain types of questions. For example, you can require respondents to provide a specific answer format, such as a valid email address or a number within a certain range. Additionally, you can choose to limit respondents to one response or allow them to submit multiple responses.
Once your Google Form is ready, you can share it with others by providing a link or embedding it on a website. As people fill out your form, the responses will automatically be stored in a Google Sheets spreadsheet. You can access and analyze the collected data through this endpoint.
Remember to test your form before sharing it with others. Go through each step to ensure that all questions and validation criteria are working as intended. This will help you avoid any confusions or issues for your respondents.
By following these 5 steps, you can create a Google Form that captures the information you need from your users. Whether you are creating a survey, a quiz, or an entry form, Google Forms provides an efficient and user-friendly platform to collect and organize data.
Keep in mind that there are more advanced features and tips available for creating effective Google Forms. Explore the different options and tools to enhance your forms and make them even more useful for your specific needs.
Step 2 Capture customer information
Once you have designed your Google Form and finalized the questions to be included in it, you can move on to capturing customer information. This step is crucial as it allows you to gather important details about your customers that can help you tailor your products or services to their needs.
When creating your form, you can choose from various types of questions to capture different types of information. For example, you can use short answer questions to collect names or addresses, multiple-choice questions to select specific criteria, or a scale to measure customer satisfaction. It’s important to include clear instructions for each question to ensure that respondents understand what information you’re looking for.
Depending on the nature of your business or the purpose of your form, you may want to add validation to some of the questions. This can help ensure that respondents provide accurate and valid information. For example, you can use validation to check if an email address provided by a customer follows the correct format.
Google Forms also allows you to customize the design of your form to make it more visually appealing and align it with your brand. You can choose colors, fonts, and headers that reflect your brand’s identity. Just click on the paintbrush icon to access the customization options.
Furthermore, Google Forms offers the option to create sections within your form, which can help organize your questions and make the form easier to navigate for your respondents. This is particularly useful if you have a long form or if you want to group related questions together. Each section can have its own header and description.
To capture customer information, you need to ensure that their responses are stored in a way that is accessible and easy to manage. Google Forms automatically saves responses into a Google Sheets spreadsheet, making it convenient to view and analyze the data. You can also use apps like Google Formbot or Google Sheets Data Validation to create even more functionality and automation for capturing and processing customer information.
Finally, when your form is ready to go, you can choose how to share it with your customers. You can send the form’s unique link directly to them or embed it on your website. Google Forms also provides the option to create a QR code, which can be scanned by customers to access the form. Make sure to provide clear instructions on how to fill out the form, and if applicable, set a deadline for when you need their responses.
By taking these steps to capture customer information, you can gather valuable insights that can help you better understand your customers and improve your products or services accordingly. This information can also be used for order processing, quizzes, or any other activities where customer input is required.
Form Questions
One of the key components of creating a Google Form is designing the questions that you want your respondents to answer. Depending on the purpose of your form, you can make use of various question types and formats to gather the necessary data. Here are some tips on how to create effective form questions:
| Question Type | Description |
|---|---|
| Short Answer | A simple text input field where respondents can fill in a short response, like their name or contact information. |
| Multiple Choice | Allows respondents to select only one answer among a set of predefined choices. You can add as many options as needed. |
| Checkbox | Similar to multiple choice, but allows respondents to select multiple answers. Useful when there can be more than one applicable response. |
| Dropdown | Show a list of options in a dropdown menu. Respondents can only choose one option. |
| Grid | Offers a grid-like table where respondents can provide ratings, rankings, or other data based on a set of criteria. |
| Image | Allows respondents to choose an image from a given set of options or upload their own image as a response. |
To ensure that respondents provide valid and consistent answers, you can add validation rules to certain question types, such as requiring a specific format for email addresses or setting a minimum and maximum character count. Additionally, you can use the “Other” option to capture any responses that do not fit into the predefined choices.
When creating a form, it’s important to organize your questions into logical sections or order. This will make it easier for respondents to navigate through the form and provide accurate responses. Depending on the complexity of your form, you may want to break it down into multiple sections or pages.
Finally, you can enhance the design of your form by choosing different colors, themes, and images. This can help create a more engaging and visually appealing experience for your users.
By following these steps and tips, you can create effective form questions that capture the data you need and provide a user-friendly experience for your respondents.
How to Create a Google Form
Creating a Google Form is a simple and free way to collect information from customers, users, or any other respondents. Whether you need to capture contact information, take a survey, or create a quiz, Google Forms provides a user-friendly interface that makes it easy to design and customize your form. Follow these steps to create your own Google Form:
Step 1: Open Google Forms
To create a Google Form, first, go to your Google Sheets and click on the icon that looks like a grid of nine squares. From the dropdown menu, select “Forms.” This will open up Google Forms in a new tab.
Step 2: Choose a Form Template
Upon opening Google Forms, you’ll have the option to choose from a variety of pre-made form templates. These templates can be used as a starting point for your own form design. Select a template that is applicable to your needs, or choose the option to start with a blank form.
Step 3: Design Your Form
Once you’ve chosen a template or started with a blank form, you can begin designing your Google Form. Give your form a name and add a description if necessary. You can also choose to add a header image or link to an external image to make your form more visually appealing.
Step 4: Add Questions
Now it’s time to add questions to your Google Form. Depending on the type of information you want to collect, you can choose from a variety of question types. Google Forms offers options such as multiple-choice, short answer, paragraph text, checkboxes, and more. Select the appropriate question type and enter the question text. You can also add answer options and specify whether the question is required or optional.
Step 5: Customize Form Layout
If you’d like to group questions under different sections, add pages by clicking on the “Add section” button. You can also change the order of the questions by dragging and dropping them. Additionally, you can change the color scheme of your form by clicking on the “Theme” button and selecting from a range of predefined colors.
Step 6: Set Form Options
Under the settings section, you can customize various options for your Google Form. For example, you can choose to collect email addresses, limit the number of responses, or allow respondents to edit their responses after submission. You can also enable a progress bar, which shows respondents how far they are in completing the form.
Step 7: Preview and Test
Before sharing your Google Form, it’s important to preview and test it to ensure everything is working correctly. Click on the “eye” icon to preview how your form will look to respondents. You can also click on the “Send” button and enter your email address to test the form by submitting responses.
Step 8: Share and Collect Responses
Once you’re satisfied with your Google Form, it’s time to share it with your audience. Click on the “Send” button to get the link to your form. You can then share the link directly with respondents via email, social media, or any other appropriate channels. As respondents submit their answers, the data will be automatically collected and stored in a Google Sheets spreadsheet.
Tips and Tricks:
- Use the “Form Description” section to provide any additional instructions or information for respondents.
- If you want to gather feedback or ratings, use the “Multiple choice” or “Checkbox” question types with a scale of 1-5.
- Consider using the “Short Answer” question type if you want to capture free-form responses.
- For a more interactive experience, enable the “Quiz” option, which allows you to assign points, provide feedback, and automatically grade responses based on specific criteria.
- Take advantage of the “Formbot” feature that suggests relevant question types based on the information you’re capturing.
By following these steps and utilizing the various features and options provided by Google Forms, you can create a visually appealing and effective form to gather information from your target audience.
How To Make A Google Form Quiz
Creating a quiz using Google Forms is a simple and efficient way to collect information from users, capture their responses, and store the data for further use. Google Forms is a free tool provided by Google, which can be accessed by opening Google Forms from the Google Sheets interface. To ensure a good user experience, follow these steps to create a Google Form quiz.
| Step 1: | Open Google Forms by clicking on the Google Forms icon in your Google Sheets. |
| Step 2: | Choose a template for your quiz or create a new form from scratch. |
| Step 3: | Add questions to your form using the different question types available. Google Forms supports multiple-choice, short answer, and other types of questions. |
| Step 4: | Design your form by customizing the colors, icon, and header. You could also add sections to organize your quiz better. |
| Step 5: | Set any additional criteria or rules like required fields, word limits, or rating scales depending on the applicable quiz. |
| Step 6: | Ensure clear instructions are provided for each question to avoid confusion for respondents. |
| Step 7: | Add an endpoint with a “Thank You” message or redirect respondents to another form or app after they submit their quiz answers. |
| Step 8: | Share the quiz by generating a unique link that you could distribute to users, embed it in your website, or share it through other means. |
| Step 9: | Take the quiz yourself to ensure it functions as expected and looks good. |
| Step 10: | Respondents can fill out the quiz form, and their answers will be automatically stored in a Google Sheets spreadsheet for easy access and analysis. |
By following these steps, you could create a Google Form quiz to collect information, capture responses, and analyze data. Whether you’re a teacher using edtech tools for online quizzes or a business wanting to gather feedback, Google Forms is a versatile and user-friendly solution.
How to Design Google Forms Header Image and Colors
When creating a Google Form, the header image and colors are important design elements that can make your form stand out and create a visually appealing experience for your respondents. Here are some tips on how to effectively design the header image and choose colors for your Google Form:
1. Order of the Form
Before you start designing the header image and choosing colors, it’s important to consider the order of the form. Think about the flow of questions and sections. This will help you determine the best placement for the header image.
2. Click on “Theme” to Access the Design Settings
To design the header image and choose colors, click on the “Theme” button located at the top right corner of the Google Form. This will open up the design settings where you can make customizations.
3. Ensure Compatibility with Multiple Devices
When designing the header image, it’s crucial to ensure compatibility with multiple devices. Use an image that scales well on different screen sizes and orientations. Test the image on different devices to make sure it looks good on all of them.
4. Use Clear and Captivating Image
Select a header image that is clear and captivating. It should be visually appealing and relevant to the form’s theme or purpose. Avoid using images that are too busy or confusing, as they may distract the respondents from focusing on the form’s questions.
5. Add Colors that Reflect Your Brand or Theme
Select colors that reflect your brand or theme. You can choose a single color or a combination of colors for different form elements. Click on the color palette in the design settings and choose the colors that match your preferences.
6. Use the Google Forms Header Image Maker
If you don’t have a suitable header image, you can use the Google Forms Header Image Maker to create a custom image. This free online tool allows you to design a header image that includes text and other elements. Simply follow the step-by-step instructions provided by the image maker tool.
7. Make Sure to Include Clear Instructions
When designing the header image, keep in mind that it should not overpower the form’s instructions. The instructions are essential for the respondents to understand how to fill out the form. Make sure the header image does not distract or confuse the users from following the instructions.
8. Use Color to Differentiate Sections
To make your form more user-friendly and visually appealing, you can use different colors to differentiate sections. For example, you can use a different color for each section and include a clear title at the beginning of each section. This will help the respondents navigate through the form more easily.
9. Use Input Validation for Clear and Accurate Responses
Depending on the type of information you want to capture, you can use input validation to add criteria for the respondents’ answers. This can ensure that the respondents provide clear and accurate responses. For example, you can set up validation for email addresses, phone numbers, or specific words.
10. Allow Respondents to Upload Images
If your form requires respondents to upload images, you can add an image upload field. This will allow the respondents to attach images to their form entry. You can specify the file types and size limits to manage the uploaded images.
Designing the header image and choosing colors for your Google Form can enhance the overall user experience and make the form more visually appealing. By following these tips, you can create a well-designed form that captures the attention of the respondents and encourages them to provide valuable feedback or information.
How to Use Google Forms Create Template
Google Forms is a free tool offered by Google that allows users to create forms for various purposes, such as surveys, quizzes, and data collection. With Google Forms, you can easily design and customize forms to capture information from users or respondents. Here are the steps you can follow to create a template using Google Forms:
Step 1: Go to forms.google.com and click on the “+” icon to create a new form.
Step 2: Choose a template or start from scratch. Google Forms provides a variety of pre-designed templates that you can choose from, or you can create a form from scratch by selecting the “Blank” template.
Step 3: Customize the form. You can edit the form title, add a description or header image, and choose colors and themes that are applicable to your form. This step is important as it helps ensure a good user experience when respondents fill out the form.
Step 4: Add questions or fields. Google Forms offers various types of questions and input fields that you can use to gather specific information from respondents. Some of the commonly used question types include multiple-choice, open-ended, and rating scale. Depending on the type of information you want to capture, you can choose the appropriate question type.
Step 5: Organize your form into sections. If your form has multiple sections or sessions, you can use the “Section” feature to divide your form into different parts. This is useful when you want to break down a long form into smaller, more manageable sections.
Step 6: Ensure data validation. Google Forms provides options to add data validation to certain types of questions, such as email addresses or numerical inputs. This step helps ensure that respondents provide accurate and valid information.
Step 7: Customize the form’s endpoint. By default, Google Forms stores responses in a Google Sheets spreadsheet. However, you can choose to redirect respondents to a specific webpage or show a custom message as the form’s endpoint.
Step 8: Add any additional features or settings. Google Forms offers several additional features and settings that you can enable or customize, such as limiting the number of responses, setting up notifications for new responses, or allowing users to edit their responses after submitting the form.
Step 9: Preview and test the form. Before sharing the form with others, it’s a good practice to preview and test the form to ensure that everything is working as expected. You can click on the “Preview” button to see how the form will look like to respondents.
Step 10: Share or embed the form. Once you’re satisfied with the form, you can share it in various ways. Google Forms provides a link that you can copy and share directly, or you can embed the form into a website or blog.
By following these steps, you can easily create a template using Google Forms and start capturing responses and data efficiently. Whether you’re an educator using Google Forms for quizzes or an edtech maker collecting feedback, Google Forms offers a user-friendly interface that can be customized to your specific needs.
How to Add Sections when Creating a Google Form
Google Forms is a free tool provided by Google that allows users to create surveys and collect data. One useful feature of Google Forms is the ability to add sections to your form. Adding sections can help organize your form and make it easier for respondents to navigate. In this guide, we will walk you through the step-by-step process of adding sections to your Google Form.
- To begin, navigate to the Google Forms website and click on “Blank” or choose a template to start creating your form.
- Once you are in the form editor, click on the “+” button at the top-left corner of the screen to add a new question or section.
- In the drop-down menu that appears, select “Section” under the “Add-ons” category.
- A new section will be added to your form. You can now customize the section by giving it a name and adding a description if desired.
- By default, sections are set to “Continuation” type, which means that the questions or content in the section will continue from the previous section. However, you can change this by clicking on the drop-down menu next to “Continuation” and selecting “New page”. This will start a new page for the section, allowing respondents to view it separately.
You can add as many sections as you need in your form by following these steps. By organizing your form into sections, you can provide a clear structure for respondents and make it easier for them to navigate through the form.
In addition to sections, Google Forms offers various question types that you can use to capture information from your respondents. These question types include multiple-choice, rating scales, short answer, and more. Depending on the nature of your form, you can choose the question types that best suit your needs.
When creating a form, it is important to consider the order of the questions and sections. If you want to rearrange the order of your sections or questions, you can do so by dragging and dropping them into the desired position. This can be helpful in ensuring that your form flows logically and collects the necessary information.
Once you have finished creating your form, you can share it with others by clicking on the “Send” button at the top-right corner of the screen. You can share the form using a link, through email addresses, or by embedding it on a website or blog.
Creating a Google Form with sections can be a straightforward process when you follow these steps. By organizing your form into sections, you can create a user-friendly experience for your respondents and ensure that you capture the information you need.
How to Store Google Forms Responses in Google Sheets
If you’re a Google Forms user, you probably know that it’s a great tool for creating surveys, quizzes, and other types of forms. However, when it comes to storing and managing responses, Google Sheets is a powerful companion that can help you organize and analyze the data you collect.
By linking your Google Form to Google Sheets, each response submitted through the form will be saved as a single entry in a Google Sheets spreadsheet. This section will guide you through the steps of creating this link and ensuring that all of your form responses are stored in an easily accessible location.
- Open the Google Form or quiz maker you want to store responses for.
- Click on the “Responses” tab at the top of the form.
- In the “Responses” section, click on the green Google Sheets icon.
- A pop-up will appear with options for linking your form to a Google Sheets spreadsheet. You can either create a new spreadsheet or select an existing one.
- Click on the “Create” or “Select” button, depending on whether you want to create a new spreadsheet or use an existing one.
- Once you have linked your Google Form to Google Sheets, all responses will be automatically stored in the spreadsheet as new entries.
When you view your Google Sheets spreadsheet, you will see each form response as a row. The columns in the spreadsheet will correspond to the different questions in your form. This allows you to easily sort, filter, and analyze the data collected from your form.
Depending on the types of questions you included in your Google Form, the data in your Google Sheets spreadsheet may include various types of information. For example, if you included short answer or paragraph fields, the corresponding cells in Google Sheets will contain the text entered by the respondent. If you included multiple choice or checkbox questions, the cells will contain the answer choices selected by the respondent.
In addition to capturing and storing the respondents’ answers, Google Sheets also provides useful features such as data validation, conditional formatting, and image insertion. You can use these features to enhance the visual representation of your data or to perform calculations and analysis.
To ensure that the data in your Google Sheets spreadsheet is organized and easy to understand, here are a few tips:
- Use clear and concise header rows to label the different columns.
- Apply colors or formatting to highlight important information or specific trends.
- Use data validation to restrict the type of input that is allowed in certain cells.
- Add images to visually represent certain data points or to provide additional context.
- Create formulas or use built-in functions to perform calculations or analysis on the collected data.
By following these steps and best practices, you can make the most of Google Forms and Google Sheets to store and analyze customer or user responses. Whether you’re using these tools for educational purposes, market research, or any other data collection need, Google Forms and Google Sheets offer a free and easy-to-use solution.


