

Printing nail stickers is a fun and creative way to personalize your manicure. Whether you want to change up your regular nail design or need custom stickers for a special occasion, you can easily make your own nail stickers at home. In this article, we will give you some tips on how to print nail stickers, what type of printer and paper to use, and how to apply them onto your nails.
There are a number of different methods you can use to print nail stickers, but one of the most popular and easy ways is to use waterslide decals. These decals are compatible with inkjet printers and can be easily transferred onto your nails. The process is quite simple – first, you need to design or choose the images you want to print onto the decals. You can create your own designs or use pre-made ones from a seller or a company.
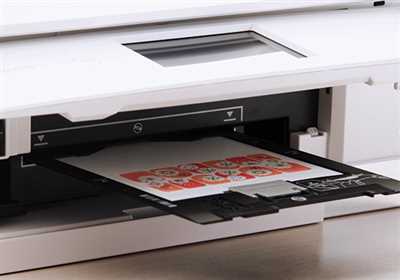
Once you have your designs ready, you will need to print them onto the waterslide decal paper using an inkjet printer. Make sure to follow the instructions provided by the decal paper manufacturer for the best results. After printing, you will need to let the decals dry completely. This usually takes about 5-10 minutes, but it may vary depending on the type of ink and printer you are using.
After the decals have dried, you can cut them to the desired size and shape using scissors or a craft knife. Then, apply a coat of clear nail polish onto your nails and let it dry. Once the polish is dry, you can place the decals onto your nails and press them down firmly. Make sure to align the design properly and smooth out any bubbles or wrinkles. Finish off with another coat of clear nail polish to seal the decals and make them last longer.
Printing your own nail stickers is a great way to experiment with different designs and colors without the high price tag of salon manicures. You can create custom stickers for special occasions or simply change up your regular manicure. With the right printer and paper, you can easily make your own nail stickers at home. So why not give it a try and unleash your inner nail artist?
Design Your Own Custom Nail Wraps or Press-Ons
Are you tired of the same old nail polish colors and designs? Do you want to stand out and express your unique style? With custom nail wraps or press-ons, you can create your own personalized manicure without the need for regular printing or a high price tag.
There are many different types of nail wraps and press-ons available on the market, but if you can’t find exactly what you’re looking for, why not design your own? Here’s how:
1. Choose Your Design: Think about what kind of nail art you want on your wraps or press-ons. Do you like flowers, geometric patterns, or abstract designs? The options are endless! You can even use images from your favorite artist or create your own design.
2. Get the Right Supplies: To create your own custom nail wraps or press-ons, you will need a few specific items. First, make sure you have a compatible printer, such as an inkjet printer, that can print onto waterslide decal paper. You will also need a clear top coat, nail polish or inkjet ink in the colors of your choice, and a pair of scissors or a craft knife.
3. Design Your Wraps: Use design software programs like Adobe Photoshop or Canva to create your nail wrap design. Be sure to check the specifications of the paper you are using for printing, as different brands may have different requirements. Create a layout that matches the size of your nails and print your designs onto the decal paper.
4. Cut and Apply: Once your designs are printed, carefully cut them out using scissors or a craft knife. Apply a clear top coat to your nails and let it dry. Then, dip your designs into water for a few seconds to activate the adhesive. Slide the design onto your nails and smooth out any bubbles or wrinkles. Finally, apply another layer of top coat to seal in the design.
5. Enjoy Your Custom Nail Wraps or Press-Ons: Now that your custom nail wraps or press-ons are on, show them off! These temporary decals can last for about a week, depending on the quality of the top coat and how well you take care of your nails. Change up your designs as often as you like and experiment with different colors and patterns.
Creating your own custom nail wraps or press-ons is an easy and fun way to express yourself and add a unique touch to your manicure. Whether you want intricate designs or simple patterns, you can be your own nail artist. So, unleash your creativity and start designing!
Simply Inked
Simply Inked is a company that specializes in creating custom nail stickers. These stickers are like temporary tattoos for your nails, and they can be easily applied without the need for any special tools or programs. With Simply Inked, you can design your own nail stickers or choose from a wide variety of pre-made designs.
The process of printing these nail stickers is simple. First, you will need an inkjet printer and some waterslide decal paper. You can find waterslide decal paper online or at your local craft store. The paper has a special coating that allows the ink to transfer onto it when you print your designs.
To print your nail stickers, start by designing them using the Simply Inked Nail Sticker Creator. This online tool allows you to upload your own images or choose from a library of designs. You can also change the size and color of your nail stickers to fit your needs.
Once you have your designs ready, you can print them onto the waterslide decal paper using your inkjet printer. Make sure to follow the printer’s specification for printing on special paper, as different printers may have different settings.
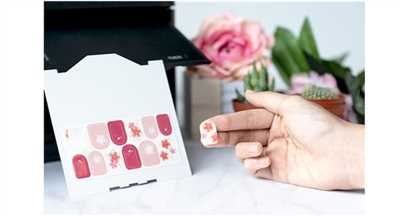
After printing, let the ink dry for a few minutes. Then, cut out each nail sticker using a pair of scissors or a craft knife. Once you have your stickers cut out, you can apply them to your nails. Simply peel off the backing paper and place the sticker onto your nail. Smooth out any air bubbles or wrinkles with your fingers or a clean cloth.
To make your nail stickers last longer, you can apply a clear top coat of nail polish over them. This will help protect the stickers from chipping or peeling. If you want to remove the stickers, simply soak your nails in warm water for a few minutes and then peel them off.
Simply Inked offers a wide range of designs to choose from, including floral patterns, animal prints, and abstract designs. They also have seasonal designs for holidays like Halloween and Christmas. If you can’t find a design you like, you can always create your own custom nail stickers.
The price of Simply Inked nail stickers varies depending on the design and the number of stickers you order. They are sold in sets, with each set containing a specific number of stickers. You can find the price and description of each set on the Simply Inked website.
Many people love using Simply Inked nail stickers because they are easy to apply and remove, and they allow you to change up your nail design without the commitment of regular polish. They are also compatible with press-ons and nail wraps, so you can mix and match different designs.
In conclusion, Simply Inked is a company that offers high-quality nail stickers that are easy to print and apply. They provide a wide range of designs, and you can even create your own custom stickers. Whether you’re looking for a temporary nail design or something more permanent, Simply Inked has the perfect solution for you.
Product Specification
When it comes to nail stickers, there are many different options available on the market. If you want to create your own custom designs, then you will need a printer that is compatible with inkjet ink. This will allow you to print your own images onto the sticker paper.
One popular type of nail sticker is a water transfer decal. These are easy to apply – simply cut out the design, soak it in water, and then press it onto your nails. These decals usually last for about a week and can be easily removed without damaging your nails.
Another type of nail sticker is a nail wrap. These are like press-ons, but they come in different designs and sizes. You simply apply them onto your nails and they will last for about two weeks. These wraps are also easy to remove without any damage to your nails.
If you prefer a temporary manicure, you might want to try nail wraps or nail stickers that can be easily changed. These wraps or stickers usually last for a day or two and can be easily removed without any damage to your nails.
When choosing nail stickers, it is important to consider the size and design of the sticker, as well as the type of adhesive used. Some stickers come with a clear adhesive and are easy to apply, while others may require you to use a tape or nail polish to secure them onto your nails.
In terms of price, nail stickers can range from a few dollars to more expensive options. The price will depend on the brand, the number of stickers in the pack, and the quality of the design. It is always a good idea to read reviews and compare prices before making a purchase.
Lastly, if you are unsure about how to apply nail stickers, there are many online tutorials and video programs that can help guide you through the process. These programs will provide you with step-by-step instructions on how to use nail stickers and create your own unique designs.
In conclusion, nail stickers are a fun and easy way to change up your manicure. Whether you prefer water transfer decals or wraps, there are many options available to suit your individual style. Just remember to consider the product specification, such as the type of nail sticker and its compatibility with your printer, in order to achieve the best results.
Product Description
A nail sticker is a fun and creative way to add a unique touch to your manicure. With nail stickers, you can easily change the design of your nails without the hassle of painting or waiting for the polish to dry. Nail stickers come in different designs and sizes, allowing you to find the perfect one for your nail shape and personal style.
One popular type of nail sticker is the waterslide transfer wrap. These stickers are made from a special type of paper and need to be applied with water. Simply cut out the sticker design, soak it in water, and then slide it onto your nail. The paper will dissolve, leaving behind the sticker on your nail.
Another type of nail sticker is the inkjet nail decal. These stickers can be printed using an inkjet printer and specialized nail sticker paper. You can design your own stickers using graphic design programs or choose from a variety of pre-made designs. Once printed, simply cut out the sticker, peel off the backing, and apply it to your nail.
Nail stickers are a great option for people who like to change their nail designs frequently or want to try out different looks without committing to a full manicure. They are also a popular choice for special occasions or events when you want your nails to stand out.
Nail stickers are easy to apply and can last for a week or longer, depending on the type of sticker and how well it is applied. They can be applied to natural nails or over regular nail polish. Nail stickers are also compatible with gel manicures, making them a versatile option for all types of nail treatments.
So whether you’re a nail art creator or just want to add a little extra flair to your manicure, nail stickers are a great choice. With their easy application and endless design options, they are sure to impress. Get yourself some nail stickers and let your creativity run wild!
Product Video
If you’re wondering how to print nail stickers, our product video will walk you through the process. With our easy-to-use nail sticker printing kit, you can create your own custom designs and apply them onto your nails like a professional manicure.
Many people think that printing nail stickers is complicated or requires special equipment. But with our kit, it’s as simple as using a regular inkjet printer.
Here’s what you’ll need:
- An inkjet printer
- Water slide or temporary tattoo paper
- Nail polish or top coat
- Scissors or a paper cutter
First, you’ll need to design your own nail stickers. You can use any graphic design programs or even a nail sticker creator software. Think about what kind of design you’d like on your nails, whether it’s a custom image or a pattern.
Next, you’ll need to print your designs onto the water slide or temporary tattoo paper. Make sure to follow the manufacturer’s instructions for compatibility with your printer. You can fit multiple images onto one sheet of paper to make the most of it.
Once your designs are printed, you’ll need to cut them out. Carefully trim around each design with scissors or a paper cutter, leaving a small border around the edges.
Now it’s time to apply the nail stickers to your nails. Start by preparing your nails – clean and dry works best. Apply a coat of nail polish or top coat to the nails you’ll be covering with the stickers.
Next, remove the backing from the nail stickers and place them onto your nails. Press down gently to ensure they stick well.
If you’ve opted for water slide paper, you can use a bit of water to help slide the sticker off the paper and onto your nail. If you’re using temporary tattoo paper, simply press it onto your nail like regular nail stickers.
And there you have it! Your own custom nail stickers without the need to go to a salon or buy expensive pre-made ones. With our easy-to-follow product video, you can change up your nail designs as often as you like and try out different looks.
So why wait? Get your hands on our nail sticker printing kit and start creating fabulous designs for your nails today! Don’t forget to check out the product description and specification from the seller to ensure compatibility with your printer and high-quality results.
About the Company
The company specializes in producing high-quality nail stickers that are easy to apply and can last for a long time. Our nail stickers are made using a water transfer printing technique, which allows the designs to be transferred onto the nails without any fuss. They are compatible with both regular polish and gel nail polish.
With our nail stickers, you can change the design on your nails as often as you like without the need for a trip to the salon. We offer a wide range of different designs, including custom designs that you can create yourself using our online creator program. Simply choose the design, size, color, and number of stickers you want, and we will print them for you.
Our nail stickers are made using high-quality inkjet printing technology, ensuring vibrant and long-lasting colors. The stickers are printed onto a thin, flexible film that easily adheres to the nail surface. To apply the stickers, simply cut them out, soak them in water, and then transfer them onto your nails. Finish with a top coat to seal in the design.
Our nail stickers are a great alternative to traditional nail wraps or press-ons and are perfect for people who want to have beautiful nails without the hassle of a manicure. They are also great for those who like to change their nail designs frequently or want a temporary nail art solution for special occasions.
If you’re unsure about how to apply our nail stickers, we have a video tutorial on our website that provides step-by-step instructions. We also have tips and tricks to help you get the best results. Our nail stickers are priced competitively, making them an affordable and fun way to enhance your manicure.
Get your own nail stickers today and join the many people around the world who are enjoying the convenience and beauty of our easy-to-use and long-lasting nail stickers!
How To Make And Apply Waterslide Decals To Nails
Waterslide decals are a great way to add temporary nail art to your manicure. Whether you’ve been inspired by a design you saw online or want to create your own, making and applying nail decals is easy and fun!
To start, gather the following materials:
- Waterslide decal paper
- An inkjet printer compatible with the decal paper
- Nail polish in the color of your choice
- Clear top coat nail polish
- A small bowl of water
- Tweezers
- Scissors
First, design your nail decals using a graphic design program or online nail decal creator. You can find many images and designs to choose from, or create your own custom designs. Make sure to size the designs to fit your nails.
Next, print the decals onto the waterslide decal paper using your inkjet printer. Follow the manufacturer’s instructions for best results. Allow the decals to dry completely before handling them.
Once the decals are dry, cut them out using scissors. It’s a good idea to cut as close to the design as possible to minimize any excess paper around the edges of your nails.
Before applying the decals, prep your nails like you would for a regular manicure. File and shape your nails, then apply a base coat of nail polish. Once the base coat is dry, you’re ready to start applying the decals.
To apply the decals, simply dip a decal into the bowl of water for a few seconds. The decal will start to separate from the backing paper. Use your fingers or tweezers to slide the decal off the backing paper and onto your nail.
Once the decal is in place on your nail, use a clean, dry tissue to press out any excess water or air bubbles. This will help the decal adhere to your nail and give a smooth finish.
After applying all the decals to your nails, allow them to dry completely. Once dry, apply a clear top coat of nail polish to seal the decals and give them a glossy finish. This will also help the decals to last longer.
Voila! You now have beautiful nail art without the need for a professional manicure. These waterslide decals are a fun and easy way to change up your nail look whenever you like. And the best part is, if you decide you want to change your design, simply peel off the decals and start again!
So why not give waterslide nail decals a try? With their wide range of designs and easy application process, they’re sure to become one of your favorite nail art tools.
Tips for how to cut and apply nail decals
When it comes to nail decals, there are a few tricks that can help you get the best results. Whether you’re using pre-made designs or creating your own, these tips will ensure that your decals look amazing and last for as long as possible.
Choose high-quality decals: Look for nail decals that are compatible with your nail type and color. High-quality decals will adhere better and last longer on your nails.
Get the right size: Before applying the decal, make sure it fits your nail properly. If it’s too large, you can cut it to size using scissors or a nail clipper.
Cut through the backing paper: Many nail decals come with a backing paper that you need to remove before applying. Use scissors or a nail clipper to cut through the backing paper, making it easier to peel off.
Apply on a clean, dry surface: Make sure your nails are clean and dry before applying the decal. Any oil or moisture on your nails can prevent the decal from sticking properly.
Use a top coat: After applying the decal, seal it with a clear top coat to protect the design and make it last longer. This will also give your nails a glossy finish.
Follow the instructions: Different nail decals may have specific instructions for application. Read the description or watch a video tutorial if available to ensure you are using the decals correctly.
Try water decals: Water decals are easy to apply and can create beautiful designs on your nails. Simply soak the decal in water for a few seconds, slide it onto your nail, and press down gently to secure.
Get creative with custom decals: If you want a unique design, consider creating your own nail decals using an inkjet printer. There are programs and websites available that allow you to print your own designs onto special decal paper.
Change it up with temporary decals: If you like to switch up your nail design often, consider using temporary decals. These can be easily applied and removed, allowing you to try many different designs without committing to a permanent look.
By following these tips, you can achieve professional-looking nail decals that will impress people without breaking the bank. Whether you choose pre-made designs or create your own, nail decals are a fun and easy way to add some flair to your manicure.