

If you’ve ever left a task of choosing and printing labels until the last minute, you know how stressful it can be. But fear not! In this step-by-step guide, we will walk you through the process of making round labels with ease. Whether you need them for organizing your pantry or adding a personal touch to your homemade goodies, we’ve got you covered.
Step 1: Set up your artwork
To start, open your design software of choice (such as Canva or Microsoft Word) and create a new document. In the dropdown settings, choose the desired page size and set the background color to white. Then, add the desired images or text to the canvas.
Step 2: Make the circles
Now, it’s time to create the circular shapes for your labels. Click on the “shapes” or “outline” tool and choose the circle shape. Click and drag on the canvas to adjust the size of the circles. Remember to leave a safe zone between each label to avoid any text or images being cut off during the printing process.
Step 3: Group and adjust
Once you have all your circles in place, select them all and group them together. This will make it easier to move them around as a single unit. You can also adjust the position and size of the circles to fit your desired layout.
Step 4: Add text and change colors
Now it’s time to add text to your labels. Click on the “text” tool and type in the desired information. You can choose your desired font, size, and color for the text. Feel free to get creative and experiment with different fonts and colors to make your labels stand out.
Step 5: Check the final look
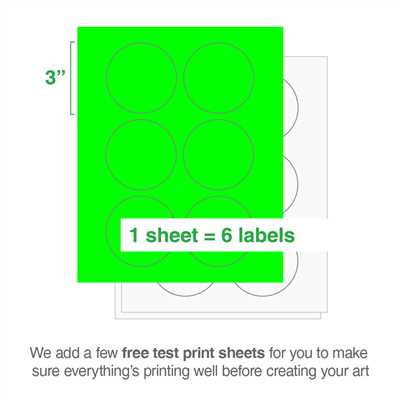
Before sending your labels to the printer, take a moment to double-check everything. Make sure the text is within the safe zone and that the overall layout looks balanced. It’s always a good idea to print a test sheet on regular paper before using your label sheets to ensure everything looks just right.
Step 6: Print and stick
Once you’re happy with how your labels look, it’s time to print them out. If you have a label printer, simply load the sheets into the printer following the manufacturer’s instructions. If you’re using a regular printer, make sure to select the correct paper size and adjust the print settings accordingly.
Step 7: Stick and enjoy
Once your labels are printed, carefully peel them off the sheet and stick them onto your desired items. Whether it’s jars, envelopes, or gift boxes, your labels will give them a polished and professional look.
Remember, making round labels doesn’t have to be a daunting task. With the right tools and a plan in place, you can easily create custom labels that will elevate your organizing game or add a personal touch to your homemade goodies. So, start exploring different templates, play around with colors and fonts, and get ready to make your labels look as good as Kathy’s!
- Going In Circles – Tips For Printing Circular Labels
- Making a Circle Sticker in Word- Step-by-Step Guide
- Step 1: Start by choosing your sticker shape
- Step 2: Adjust the shape outline and shape fill settings
- Step 3: Adjust the sticker outline
- Step 4: Change the color of the outline in the shape outline dropdown
- Step 5: Layer your design if desired
- Step 6: Add your text
- Step 7: Group your labels
- How to set up your circle sticker design
- How Do I Make a Daily Plan on Canva
- Kathy McFarland
- Video:
- how to make a circle sticker in cricut design space
Going In Circles – Tips For Printing Circular Labels
When it comes to designing and printing circular labels, it’s important to have a guide to help you navigate through the process. In this step-by-step guide, we’ll go over some tips to remember when making circular labels using Canva, a popular online design tool.
- Plan your design: Before you start designing your circular labels, it’s important to have a clear idea of what you want them to look like. Take some time to brainstorm and sketch out a rough plan of how you want your labels to look.
- Choose the right shape: When designing circular labels, you’ll need to choose from a variety of shapes. Canva offers a wide range of circular shapes, so you can select the one that fits your needs.
- Set up your label: In Canva, you can set the desired size for your circular labels. Keep in mind that the size will vary depending on your printer and the paper you’ll be using. It’s always a good idea to check the printer’s manual for the recommended label sizes.
- Add images and text: Once you’ve set up your label, you can start adding images, text, and other elements to it. Canva provides a wide range of fonts, colors, and images to choose from, so you can customize your labels according to your preferences.
- Fill the space: To make your circular labels look more appealing, try to fill the empty space. You can add borders, background colors, or patterns to enhance the overall design.
- Avoid the bleed area: When printing circular labels, it’s important to avoid placing important elements, such as text and images, too close to the edges. This is because some printers may not be able to print all the way to the edge of the paper. Leave a safe margin to prevent any important information from getting cut off.
- Order a test print: Once you’ve finished designing your circular labels, it’s always a good idea to order a test print. This will allow you to check the final result and make any necessary adjustments before printing a large batch.
By following these tips, you can ensure that your circular labels turn out beautiful and vibrant. Remember to take your time and double-check everything before proceeding with the printing process. With a little patience and attention to detail, you’ll end up with stunning circular labels that will make your products or projects stand out.
Making a Circle Sticker in Word- Step-by-Step Guide
Making circle stickers in Microsoft Word is a simple and effective way to create custom labels for various purposes. Follow these step-by-step instructions to design and print your own circular stickers:
-
Plan and gather your artwork: Before starting the task, have a clear idea of what you want your circle sticker to look like. Decide on the colors, images, and text you want to include. Collect all the necessary files and assets, such as logos and graphics, before getting to work.
-
Open Word and set up your canvas: Open Microsoft Word and create a new document. In the “Page Layout” tab, click on “Size” and choose the desired dimensions for your circle sticker. If you don’t see the size you want, click on “More Paper Sizes” to manually enter the dimensions.
-
Add a circle shape: In the “Insert” tab, click on “Shapes” and choose the circle shape. Click and drag on your canvas to create a circle of the desired size for your sticker.
-
Fill the circle with color: Select the circle shape and click on “Shape Fill” in the “Format” tab. Choose a color or gradient that matches your design by clicking on “More Fill Colors” or “Gradient Fill.” You can also choose to fill the circle with an image or texture.
-
Change the circle’s borders: To add borders to your circle sticker, click on “Shape Outline” in the “Format” tab. Choose the color and weight of the border or select “No Outline” if you prefer your sticker to have no borders.
-
Design the sticker content: Click inside the circle shape and type the desired text using the font, size, and color of your choice. If you want to add images or additional shapes, use the “Insert” tab to include them within the circle.
-
Check for bleed and safe space: If you plan on printing the stickers yourself or through a professional printing service, it’s essential to include bleed and safe space. Bleed refers to the images or colors that extend beyond the trimmed edge, while safe space ensures that no important text or artwork gets cut off. Check your printing specifications and adjust your sticker accordingly.
-
Order sticker sheets or use templates: If you don’t have sticker sheets, you can order them from a printing company or use pre-cut sticker templates that match your desired dimensions.
-
Print your stickers: Once your circle sticker design is complete, go to the “File” tab and click on “Print” to send it to your printer. Make sure you have enough sticker sheets loaded and that your printer settings are correct.
-
Get creative with shapes and sizes: Don’t limit yourself to just one circle shape. Experiment with different sizes and styles to create a variety of circular stickers. You can also try using colored sticker sheets or thermal labels for a unique and eye-catching look.
Remember to always double-check your artwork and proofread your text before printing. Following these step-by-step guidelines will help you create beautiful and professional-looking round labels in Microsoft Word.
Step 1: Start by choosing your sticker shape
When it comes to making round labels, the first step is always to choose the shape of your sticker. Creating round labels can give your final design a unique and eye-catching look.
In order to set the shape of your sticker in Canva, you can use the dropdown menu under the “Add a new page” section. Click on the “Custom dimensions” option and enter the desired size for your round label. Remember to adjust the dimensions according to your printing needs and the size of the sticker you want.
Once you have set the dimensions for your sticker, you can start working on the design. Canva provides a wide range of tools and features to help you create stunning stickers. You can add text, images, and even change the colors to make your sticker more beautiful.
While designing your sticker, keep in mind the printing requirements. If you’re using a thermal printer, make sure to leave a 7 mm bleed space on all edges of your sticker. This will ensure that your design looks perfect once it’s printed.
When choosing the colors for your sticker design, it’s always a good idea to work with transparent or colored backgrounds. This will help the sticker blend well with the surface it’s applied on, and avoid the white edges that can appear when using a circle-shaped sticker.
During the designing process, it’s important to remember that the size and shape of your sticker can vary depending on the group or zone within your design. You can move and adjust the cells or text to fit everything perfectly.
Kathy, a Canva user who designs stickers daily, shares some tips for creating round labels. She suggests starting with a plan and a clear idea of what you want your sticker to look like. This will help you stay organized and focused throughout the task. A step-by-step guide can also help you stay on track and make sure you don’t miss any important details.
Once your sticker design is ready, double-check all the settings and make sure you’re happy with the final result. You can preview the design by clicking on the “Preview” button and make any necessary changes before moving on to printing.
In summary, when making round labels:
- Start by choosing the shape of your sticker
- Work on the design using Canva’s tools and features
- Adjust the dimensions and settings to fit your printing needs
- Keep in mind the bleed space and color choices for a professional look
- Plan and stay organized throughout the designing process
- Preview your design before printing to ensure everything looks as desired
By following these steps and considering these tips, you can create beautiful round labels for any purpose or project.
Step 2: Adjust the shape outline and shape fill settings
Once you have created your circular labels using the template and have all the necessary details in place, it’s time to make them look even more appealing by adjusting the shape outline and shape fill settings.
To begin with, select the circle shape that you want to modify. In Microsoft Word, you can do this by clicking on the circle and then selecting the “Format” tab at the top of the screen. From there, choose the “Shape Outline” and “Shape Fill” options.
Within the “Shape Outline” dropdown menu, you will find various options to change the outline color, thickness, and style. Feel free to experiment with different colors and thicknesses until you find the desired look for your labels.
In the “Shape Fill” dropdown menu, you can set the background color of your circular labels. Choose a color that complements your design or matches the theme of your project. You can also select “No Fill” if you want the labels to be transparent.
Remember to check how your changes look by previewing the labels within the design canvas. Make any necessary adjustments until everything looks just right.
If you’re using a graphic design program like Adobe Photoshop or Illustrator, the process will vary slightly. You can use the “Layers” panel to select the circle shape and then adjust the outline and fill settings accordingly.
Helpful Tips:
- Always keep in mind the final printing process when selecting colors. Colors on your screen may look different when printed.
- Avoid using very thin or light-colored outlines and fills, as they may not be visible when printed.
- If you’re designing labels for a specific printer or using pre-cut label sheets, be sure to check the printer’s specifications and templates for accurate sizing and positioning of your labels.
- If you plan on printing circular labels on regular paper and cutting them out manually, it may be helpful to create guides within your design software to assist with cutting.
- Consider using a mix of colored shapes, images, and text to create a beautiful and eye-catching label.
By following these step-by-step instructions and utilizing the various shape outline and shape fill settings, you’ll be able to create professional-looking round labels for any project or task. With some creativity and attention to detail, your labels are sure to stand out!
Step 3: Adjust the sticker outline
Once you have your artwork ready, it’s time to adjust the sticker outline. Here’s how:
- Open Canva and sign in to your account.
- Click on “Create a design” and choose the “Custom dimensions” option.
- Enter the desired size for your round labels. Keep in mind that sticker sizes can vary, but a common size is 2 inches in diameter.
- In the “Design” tab, click on “Elements” and search for “circles”.
- Choose a circle shape and drag it onto the page.
- Move the circle to the desired position on the page. You can use the guides to help you align it.
- Adjust the size of the circle by clicking and dragging on the edges or by entering the desired dimensions in the settings.
- Check if the circle looks the way you want it to by adding a colored background or a transparent fill.
- Click on the “Text” tab to add your desired word or text onto the label. You can choose the font, color, and size of the text to match your design.
- Remember to leave some space around the edges of the label to avoid any text or design getting cut off when printing.
- Once you’re satisfied with the design, click on the “Download” button to save the artwork as a PDF or image file.
- You can now print the labels using a thermal or inkjet printer, or order professionally printed stickers.
Following these step-by-step instructions will help you create the desired look for your round labels. It’s important to adjust the sticker outline carefully to ensure that the borders and edges are well-defined and safe from being cut off during the printing process.
Step 4: Change the color of the outline in the shape outline dropdown
Once you have created your round labels using Canva’s sticker templates or by designing your own in Canva, you may want to customize the colors to make them more unique and eye-catching. In this step-by-step guide, we will show you how to change the color of the outline in the shape outline dropdown.
-
Start by opening your Canva account and navigating to the page where your round label design is located.
-
In order to change the color of the outline, you will need to select the circle layer of your round sticker design. To do this, click on the circle shape in the design.
-
Once the circle is selected, you will notice a toolbar at the top of the page with various editing options. Look for the “Shape Outline” dropdown in the toolbar and click on it.
-
A dropdown menu will appear with different options for modifying the outline of the circle shape. To change the color, click on the desired color swatch.
-
If the color options in the dropdown menu do not meet your needs, you can click on the “More” option at the bottom of the menu to access additional color choices and adjust the color settings further.
-
Play around with different colors until you find the one that best suits your design. Remember that you can also choose a transparent outline color if you want to create a sticker with no visible outline.
-
Once you have selected your desired outline color, you can click outside of the circle to deselect it and see how the new color looks.
-
If you are satisfied with the changes, you can proceed to the next step of finalizing your round label design. If not, you can repeat the steps above to adjust the color settings until you achieve the desired result.
By following this step-by-step process, you can easily change the color of the outline in the shape outline dropdown in Canva. This will help you create beautiful round labels with customized colors that stand out and make your artwork or text pop. Don’t be afraid to experiment with different colors and design choices to make your stickers truly unique!
Step 5: Layer your design if desired
If you want to add more depth or complexity to your round labels, you can choose to layer your design. This step allows you to incorporate different elements and create a more unique and eye-catching label.
To begin layering your design, start by selecting the desired shape or object that you want to add. This could be a colored circle, an outline, or even a transparent shape.
Once you have chosen the desired shape, you can use a word-processing program like Microsoft Word or a graphic design tool like Canva to add the text or images you want to include. Make sure to align everything within the circles or shapes you have created.
If you’re using Word, you can group the shapes and text together for easier moving and arranging. To do this, click on each object while holding down the “Ctrl” key, right-click, and select “Group” from the dropdown menu.
Keep in mind that the final look will vary depending on the size and shape of your round labels. It’s a good idea to plan out your design and order a sample sheet to check how your design will look when printed.
When designing your labels, also consider the bleed area. This is the space around the edges of your design that will get cut off during the printing process. To avoid any important parts of your design getting cut off, make sure to keep all crucial elements within the safe area.
If you’re using a thermal printer, keep in mind that some printers require a white border around the edges of your design. Check the printer’s specifications and adjust your design accordingly.
Once you’re happy with your design, save it and prepare to print. If you’re not sure how to set up your printer for round labels, refer to the manufacturer’s instructions or seek help online.
Now that you have completed all the necessary steps, you’re ready to start printing your beautiful round labels! Follow the instructions for your specific printer and enjoy the satisfaction of seeing your designs come to life.
Step 6: Add your text
Now that you have your round label templates ready, it’s time to add your text. Remember, the number of cells and sizes may vary depending on the labels you’re making and the desired shape and size. Here’s a step-by-step guide on how to add text to your round labels:
- Open your chosen design software, such as Canva or Microsoft Word.
- Create a new document or open the page where you have your round label template.
- Choose the font, colors, and settings for your text. Make sure the font is well-suited for a circular shape.
- Click on the canvas or cell where you want to add your text.
- Type in the desired text for your label.
- Position the text within the cell, making sure it looks centered and aligned with your design.
- If you want a transparent background, check the settings and make sure the white background is removed.
- Adjust the size of the text to fit the cell or the desired area of your label.
- Once you’re happy with the text, you can duplicate and move it to other cells if needed.
- Always check your text and artwork for any errors or typos. It’s a good idea to proofread everything before moving on.
- If you’re using a thermal printer, remember to choose the correct settings for the label paper and desired print quality.
- If you have a bleed or outline around your design, account for that in your text placement to avoid any important elements being cut off.
- Lastly, save your work and proceed to the printing process. Make sure you’re using the correct paper and printer settings for round labels.
Following these tips and steps will help you in creating professional-looking round labels. Once everything is set up, you can print your sheet of circular stickers and start using them for your desired purpose!
Step 7: Group your labels
Once you have finished designing your round labels, it’s important to group them together to make the final process easier. This step will help you keep all your labels organized and easily accessible when you are ready to print or cut them.
Here is how you can group your labels:
- Open Canva and go to your account page.
- On the left side panel, click on “Create a design”.
- Choose the desired canvas size from the dropdown menu. You can also adjust the settings such as the canvas color and the bleed area.
- Click on the “Text” tab and add the text or label that you want to use for your round labels.
- Select the text or label and move it within the canvas by using the guide lines. Make sure to align it in the center for a clean and professional look.
- Add any desired colors or shapes to your labels to make them stand out. You can use the color picker to choose the exact shade or go with a pre-designed template.
- When everything looks the way you wanted, click on the “Group” option to group your labels together. This will ensure that they stay together as a single unit while you work on the design.
- Remember to always check the final look of your labels by zooming in and out. This will help you catch any errors or issues that may have been missed while designing them.
By grouping your labels, you’ll be able to easily access and manipulate them as a whole instead of working on individual elements. This will save you time and effort in the long run, and also help you stay organized throughout the design process.
So, go ahead and group your round labels to create beautiful stickers for all your labeling needs!
How to set up your circle sticker design
When it comes to making round labels or stickers, the first step is to set up your design properly. By following these step-by-step instructions, you can ensure that your circle sticker design looks perfect and is ready for printing.
1. Start by creating a new canvas in your chosen design tool, such as Canva or Adobe Photoshop. Choose the desired size of your circle sticker, usually 2″ or 3″ in diameter.
2. Before you start designing, it’s important to know the printing process to ensure your stickers turn out just the way you want. If you’re printing at home, make sure your printer is set to its highest quality settings. If you’re using a professional printer, check with them about their specific requirements.
3. Once your canvas is set up, you can start designing your round label. You can use the shapes tools to create a perfect circle, or you can search for circle templates in your design tools. McFarland provides some great circular templates that you can use as a starting point.
4. If you want a colored background for your circle sticker, you can fill the circle shape with the desired color. Be sure to choose colors that complement your overall design. Always keep in mind that the space outside the circle will be cut off, so any elements you want to keep should be inside the circle.
5. Once you have your circle shape and background ready, it’s time to add the text and other elements to your design. Choose a font and font size that is legible and matches the style of your stickers. You may also want to add an outline or stroke to your text to make it stand out.
6. If you’re including images or logos in your design, make sure they are high-resolution and placed correctly within the circle. You can move and adjust them as needed to achieve the desired look.
7. Lastly, it’s important to set up the file with the correct print settings. Add a bleed if required by your printer, usually around 0.125″ to ensure no important elements get cut off. Also, make sure to set your transparency settings correctly, especially if you want some parts of your sticker to be transparent.
Once everything is set up and your circle sticker design looks the way you want, it’s always a good idea to check for any final adjustments or corrections before sending it for printing. Remember to save your design and export it in the appropriate file format for printing.
With this guide, you can easily create professional-looking circle stickers or labels for any task or purpose. Whether you’re using them for personal use or for your business, following these steps will ensure that your circle sticker design is top-notch and ready to stick.
How Do I Make a Daily Plan on Canva
Creating a daily plan using Canva is a simple and efficient way to stay organized and manage your tasks. With Canva’s user-friendly interface and a wide range of features, you can design a beautiful and functional daily plan that suits your needs.
Here is a step-by-step guide on how to make a daily plan on Canva:
- Start by creating a new Canva account or logging into your existing account.
- Once you’re in, click on “Create a design” and choose the “Custom Dimensions” option.
- Enter the desired dimensions for your daily plan, such as 8.5 x 11 inches for a standard letter-size sheet.
- Select a background color or design that fits your style and preferences.
- Add a title to your daily plan, such as “Daily Schedule” or “To-Do List”, using the text tool.
- Choose a font and adjust the size and color of the text to make it stand out.
- Divide your daily plan into sections using the shape tool. Select the circle shape and draw circles on the canvas. You can adjust the size of the circles by dragging the edges or choosing from the dropdown menu.
- Within each circle, add text to label different tasks or activities you have planned for the day.
- To make the circles look like stickers, add a border or outline to them. You can choose a color or adjust the thickness of the border.
- If you want the circles to have a transparent background, select the circle you want to edit and click on “Fill” in the toolbar. Then, choose the transparent option.
- Group the circles together by selecting all of them and clicking on the “Group” option. This will make it easier to move them around the canvas as a whole.
- Arrange the circles on the canvas in the desired order. You can move them by dragging and dropping or using the arrow keys.
- Once everything looks perfect, you can proceed to the final step: printing your daily plan. Before printing, make sure that the settings on your printer are correct and that the paper size is set to match the dimensions of your design.
- To avoid any unwanted white edges, choose the “Bleed” option in the print settings if available.
- Print your daily plan and start using it to stay organized and focused on your tasks.
Remember, you can always customize the design and layout of your daily plan based on your personal preferences. Canva provides various templates, colors, and fonts to choose from, allowing you to create a unique and visually appealing daily plan.
With these step-by-step instructions, designing a daily plan on Canva should be a breeze. Enjoy the process and let your creativity fill each round sticker with the tasks that will help you stay on track throughout the day!
Kathy McFarland
When it comes to making round labels, Kathy McFarland has you covered. With her expertise in designing and printing, she knows all the tips and tricks to create beautiful circular stickers that will make your products stand out.
Step 1: Start by choosing the right design software for your round labels. Kathy recommends using Canva, a user-friendly online tool that offers a wide range of templates and design options. It allows you to create custom artwork and adjust colors, fonts, and shapes according to your desired look.
Step 2: Once you have your design ready, it’s time to set up your document for printing. Create a new page with the size of your desired round labels, keeping in mind the dimensions of your thermal printer. Adjust the settings accordingly and make sure to use a transparent background for your artwork.
Step 3: Now that you have your document set up, it’s time to start designing your round labels. Kathy recommends using a circular shape as a guide to ensure that your design stays within the borders. You can easily create a circle by using the shape tool in Canva or any other design software.
Step 4: Add your text, images, and any other elements you want to include in your round labels. Kathy suggests using a font that is easy to read and stands out well against the background color. Remember to adjust the size and position of your elements to make them fit nicely within the circle shape.
Step 5: To give your round labels a more polished look, consider adding an outline or borders around your design. You can choose a color that complements your artwork or stick with a simple black or white outline for a clean and professional look.
Step 6: Before finalizing your design, check for any spelling or grammatical errors. Kathy always recommends proofreading your text to avoid any embarrassing mistakes. Once you’re satisfied with your design, save it and move on to the next step.
Step 7: Now it’s time to print your round labels. Make sure your thermal printer is set to the appropriate settings and load your paper into the tray. Kathy suggests doing a test print on a regular sheet of paper to check the alignment and make any adjustments if needed. Once everything looks good, proceed with printing your labels.
By following Kathy McFarland’s expert tips and step-by-step process, you can easily create professional-looking round labels for all your printing needs. Whether you’re making stickers for your daily planner or designing labels for your products, Kathy’s advice will help you get the perfect results every time.