

Welcome to our guide on how to make pear cider, also known as perry! Making your own cider can be a rewarding and enjoyable process, and with a few simple steps, you can create a delicious and refreshing drink that you can proudly share with friends and family.
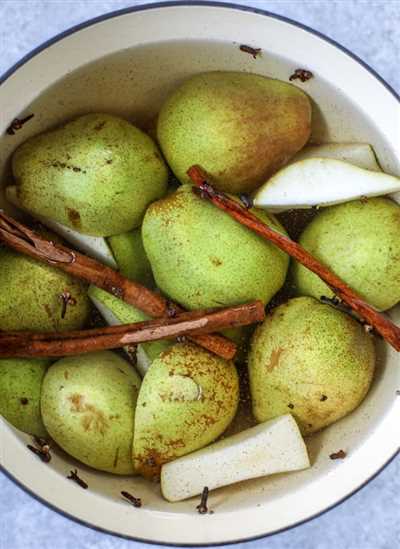
The first step in making pear cider is gathering the main ingredient – pears! Make sure to choose ripe and flavorful pears for the best results. Once you have your pears, wash them thoroughly and remove any stems, as these can introduce unwanted flavors to your cider.
Next, the pears need to be pressed to extract their juices. Traditionally, a fruit press is used for this purpose. However, if you don’t have one, don’t worry! Many people find that using a demijohn or a suitable plastic container works just as well. If you are using demijohns, make sure they are sterilized before use.
Once the pears have been pressed, it’s time to start the fermentation process. In a sterilized demijohn or plastic container, combine the pear juice with a suitable cider or wine yeast. Add some sugar to help kick-start the fermentation. A general rule of thumb is to add one teaspoon of brewing sugar per gallon of juice.
After adding the yeast and sugar, it’s important to seal the demijohn or container with an airlock. This will allow carbon dioxide, a byproduct of fermentation, to escape while preventing any unwanted airborne contaminants from entering. Place the demijohn or container in a room with a suitable temperature, around 18-22°C (64-72°F), and let the magic happen!
Fermentation can take anywhere from a few weeks to a few months, depending on the desired sweetness and alcohol content. It’s a good idea to periodically check on the progress of your pear cider, tasting it to see if it has reached your desired flavor profile.
Once the fermentation process is finished, it’s time to bottle your pear cider. Sterilized glass bottles with swing-top caps or crown caps are recommended for this purpose. If you prefer a sparkling cider, add a small amount of sugar to each bottle before sealing. This will create natural carbonation during the bottling process.
Finally, let your pear cider sit for a few more weeks to allow it to carbonate and mellow. The longer you let it age, the better it will taste. Once you’re satisfied with the flavor, chill the bottles in the fridge and enjoy your homemade pear cider! Cheers!
- How to Make Pear Cider Hard or Sweet
- Making Hard Pear Cider
- Making Sweet Pear Cider
- Traditionally made perry – what’s better than that
- How to Gather and Prepare the Pears
- Fermentation and Bottling
- Aging and Enjoying
- Making Cider and Perry
- Pear Cider Classic Recipe
- What You’ll Need
- The Process
- Video:
- making ‘hard’ apple and pear cider
How to Make Pear Cider Hard or Sweet
When it comes to making pear cider, also known as perry, there are two main options: making a hard cider or a sweet cider. The choice depends on your personal taste preferences and the type of fruit you have available. Here’s a step-by-step guide on how to make both types of pear cider.
Making Hard Pear Cider
If you prefer a drier and more alcoholic pear cider, then making a hard cider is the way to go. The process is similar to making traditional cider, with a few adjustments:
- Gather your pears: Start by gathering ripe pears that are suitable for making cider. Look for pears that are slightly soft but not too mushy.
- Pressing the pears: Use a fruit press to extract the juice from the pears. It’s essential to remove all the seeds and stems before pressing to avoid any bitter flavors in the final cider.
- Fermentation: Pour the pear juice into a sterilized demijohn, leaving some headspace at the top. Add a teaspoon of wine or cider yeast to kickstart the fermentation process. Fit an airlock to the demijohn to allow carbon dioxide to escape while preventing air from entering.
- Let it ferment: Place the demijohn in a cool, dark room with a consistent temperature between 60-70°F (15-21°C). Let the cider ferment for about 2-3 weeks or until it reaches the desired level of sweetness and carbonation. The longer you leave it, the drier and more alcoholic it will become.
- Bottling: Once the fermentation is finished, transfer the cider to sterilized bottles. You can add a small amount of sugar or honey to carbonate the cider further if desired. Seal the bottles tightly and store them in a cool place for at least a couple of weeks to let the flavors develop.
Now you have a classic hard pear cider that is ready to be enjoyed!
Making Sweet Pear Cider
If you prefer a sweeter and less alcoholic pear cider, then making a sweet cider is the way to go. The process is slightly different:
- Follow steps 1-3 from the hard pear cider recipe.
- Build your sweet cider: Mix a small amount of sugar or honey with the pear juice before pouring it into the demijohn. The extra sugar will be consumed by the yeast during fermentation, resulting in a sweeter cider.
- Let it ferment: Follow step 4 from the hard pear cider recipe and ferment the cider for a shorter period of time. Check the cider regularly to make sure it doesn’t become too dry or over-carbonated.
- Bottling: Follow step 5 from the hard pear cider recipe to bottle and store the sweet pear cider.
Now you have a delicious and drinkable sweet pear cider!
Whether you prefer hard or sweet pear cider, the process of making it is a fun and rewarding endeavor. Experiment with different pear varieties and fermentation times to find your perfect recipe. Cheers and enjoy!
Traditionally made perry – what’s better than that
Traditionally made perry, also known as pear cider, is a delightful and refreshing drink that is perfect for those hot summer days. The process of making perry involves pressing the juice out of juicy and ripe pears, resulting in a cloudy and delicious drink.
How to Gather and Prepare the Pears
The first step in making perry is to gather ripe and juicy pears. It is important to pick the pears when they are at their peak ripeness to ensure the best flavor in the final product. Once you have gathered enough pears, rinse them thoroughly and remove the stems and any damaged parts.
Next, you will need to press the pears to extract the juice. You can use a traditional press or a more modern fruit press for this purpose. The pressing process helps release the delicious pear juice that will be used to make the perry.
Fermentation and Bottling
Once you have obtained the fresh pear juice, it’s time to begin the fermentation process. Traditionally, the juice would be left to ferment in a sterilized demijohn, a type of large glass jar, with a small airlock to allow gases to escape while keeping out unwanted bacteria and oxygen. However, nowadays, many people use plastic demijohns or other suitable fermentation containers.
A teaspoon of yeast can be added to the pear juice to kickstart the fermentation process. The container should be kept at a temperature of around 18-22°C (64-72°F) during the fermentation period, which can take anywhere from a few weeks to several months. During this time, carbon dioxide is produced, causing the liquid to bubble.
After the fermentation is complete, the perry can be transferred to bottles for aging. It is important to use bottles that are suitable for carbonated drinks, as the perry may continue to ferment and produce carbon dioxide in the bottle. This carbonation is what gives perry its delightful fizz.
Aging and Enjoying
Once the perry has been bottled, it is ready to be aged. Like fine wine, perry benefits from some aging. It is suggested to let the perry age for at least a few months in a cool and dark place before opening. This allows the flavors to develop and mellow, resulting in a more complex and enjoyable drink.
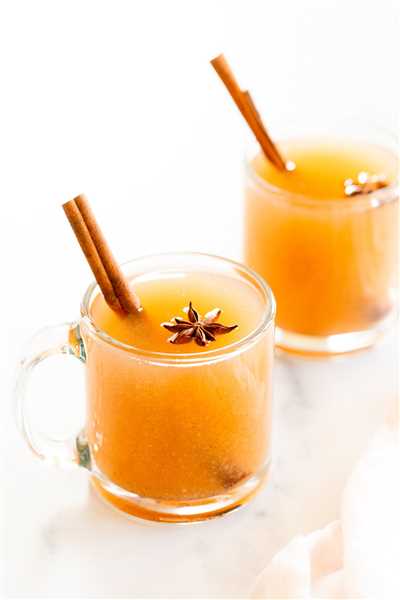
When you are ready to taste your own homemade perry, simply pop open a bottle and pour yourself a glass. The finished perry should be sweet, with a slightly tangy and fruity flavor that is unique to the pear. Sit back, relax, and savor the taste of your hard work and effort.
So, why not try your hand at making traditionally made perry? With just a few steps and some patience, you can create a classic and delicious drink that will impress your friends and family. Cheers!
Making Cider and Perry
When it comes to making cider and perry, there are a few key steps that can help ensure success. Whether you’re a beginner or an experienced cider maker, it’s important to scale your recipe accordingly.
First, gather your fruit. Pears are traditionally used to make perry, while apples are more commonly used for cider. Choose ripe, unblemished fruit for the best flavor.
The next step is pressing the fruit to extract the juice. There are many different methods you can use, from using a classic cider press to simply squeezing the fruit by hand. The purpose is to extract as much juice as possible.
Once you have your juice, it’s important to sterilize your equipment. This includes your fermentation vessel, airlock, and any utensils you will be using. This will help prevent any unwanted bacteria from affecting the finished product.
After sterilizing your equipment, you can begin the fermentation process. Traditionally, cider and perry are fermented in demijohns. You can use plastic demijohns or glass ones, depending on your preference.
Sweet cider or perry needs to ferment for a longer period of time, usually around a month or so at room temperature. During this time, the yeast will convert the sugars in the juice into alcohol, creating carbon dioxide as a byproduct.
While the cider or perry is fermenting, it’s important to keep an eye on the temperature. The ideal temperature for fermentation is around 65-75°F (18-24°C). If it gets too cold, the yeast may become dormant and the fermentation process will slow down. If it gets too hot, the yeast may become too active and produce off flavors.
Once the fermentation is complete, you can then move on to the next step: clarifying the cider or perry. This can be done by racking the liquid into another container, leaving behind any sediment at the bottom.
After clarification, it’s time to carbonate the cider or perry. This can be done by adding priming sugar or using a carbonation drop. This step is optional, as some people prefer still cider or perry.
Finally, it’s time to bottle your cider or perry. Make sure to use sterilized bottles and caps to prevent any contamination. If you want to age your cider or perry, it’s best to use bottles with a sealable cap that allows for aging.
Now, all that’s left to do is wait for your cider or perry to carbonate and age. This can take anywhere from a few weeks to several months, depending on the recipe and the desired flavor profile. Once it’s finished, it’s time to enjoy your homemade cider or perry!
Pear Cider Classic Recipe
In this classic recipe, we will show you how to make pear cider, also known as perry. People have been making cider and perry for centuries, and traditionally, they are made from a mixture of apples and pears. However, this recipe will focus on making cider solely from pears.
What You’ll Need
To make pear cider, you’ll need the following ingredients and equipment:
| Equipment | Ingredients |
| – Demijohns or plastic fermentation vessels | – Pears (enough to fill the demijohn or plastic vessel) |
| – Airlock | – Yeast suitable for cider or wine making |
| – Hydrometer or refractometer | – Sugar (optional, depending on the sweetness of the pears) |
| – Sterilized equipment for pressing the pears | – Pectic enzyme (optional, helps break down the fruit) |
| – Bottles or containers for the finished cider | – Campden tablets (optional, used to kill unwanted bacteria) |
The Process
Here is a step-by-step guide on how to make pear cider:
Step 1: Gather your pears and make sure they are ripe. You can use any variety of pears, but sweeter ones tend to work better.
Step 2: Wash and sterilize all of your equipment, including the demijohns or plastic fermentation vessels.
Step 3: Press your pears to extract the juice. You can use a fruit press or even a clean plastic container with a tight lid.
Step 4: Add the juice to the demijohns or plastic vessels, leaving some headspace at the top.
Step 5: If desired, add sugar to the juice to increase the alcohol content and sweetness. Use a scale to measure the appropriate amount.
Step 6: Check the specific gravity of the juice using a hydrometer or refractometer. This will help you determine the potential alcohol content of the cider.
Step 7: Add yeast suitable for cider or wine making to start the fermentation process. Follow the instructions on the yeast package for the appropriate amount to use.
Step 8: If using, add pectic enzyme to help break down the fruit and release more juice.
Step 9: Seal the demijohn or plastic vessel with an airlock to allow carbon dioxide to escape during fermentation.
Step 10: Place the demijohn or plastic vessel in a room with a constant temperature, ideally around 18-20°C (64-68°F).
Step 11: Leave the cider to ferment for around 1-2 weeks. You can check the progress of the fermentation by observing the airlock activity and taking hydrometer readings.
Step 12: Once fermentation is complete and the specific gravity readings have stabilized, you can transfer the cider to a clean demijohn or container, leaving any sediment at the bottom behind.
Step 13: If desired, you can now sweeten the cider by adding sugar or other sweeteners. Use a teaspoon to measure the appropriate amount.
Step 14: Allow the cider to mature for a few more weeks to develop its flavors. This can be done in the demijohn or by bottling the cider in sterilized bottles. Add a campden tablet to each bottle if desired to further prevent unwanted bacteria.
Step 15: Enjoy your homemade pear cider! It should be drinkable now, but some people prefer to let it age for a few more months for a better flavor.
And there you have it – a classic recipe for making pear cider. Now you can build upon this recipe and try different variations to suit your taste. Cheers!