

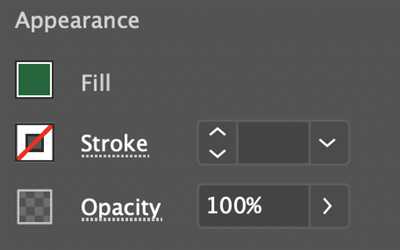
When working with graphics and images, one important aspect to consider is their opacity. Opacity refers to the transparency level of an image, where a higher value means a more opaque (less transparent) image, and a lower value means a more transparent image.
To change the opacity of an image, you can use CSS properties and filters. Here’s how:
First, select the image you want to change the opacity of. You can do this by clicking on the image or using CSS selectors to target specific images on your page. Once you have selected the image, go to the top, then find the “Graphics” or “Images” section.
Inside the graphics section, you will find filters or other tools that allow you to adjust the opacity of the image. Select the appropriate tool or filter and set the desired opacity value. This will make the image more or less transparent, depending on the value you choose.
It’s important to note that changing the opacity of an image will also affect any underlying layers or parent elements. This means that if you have other elements inside or behind the image, their visual appearance will also be adjusted accordingly.
If you’re looking to make the background of an image transparent, there’s a different solution. Instead of changing the image’s opacity, you can use a pseudo-element or an overlay layer with transparency. By adding a transparent layer on top of the image, you can create the illusion of a transparent background.
To add a transparent layer, you need to open the image in a graphics editing software, such as Adobe Photoshop. Then, create a new layer and set its opacity to a value less than 100%. This will make the layer partially transparent, revealing the underlying image.
In some cases, you may need to make the entire image or a specific element completely transparent. When thinking about logo design, for example, you may want to get rid of the background and make the logo fully visible. To achieve this, you can use the “transparent” value for the image or element’s opacity property.
When an element’s opacity is set to “0”, it becomes completely transparent, and everything inside it will also be invisible. On the other hand, if you set an element’s opacity to “1”, it becomes fully opaque, and all colors and graphics will be displayed as they are, without any blending or transparency.
To check the changes you’ve made, you can place the image on a background with a checkerboard pattern. This pattern helps you visualize the transparency and the effect of changing opacity.
So, next time you need to change the opacity of an image, remember to use CSS filters or image editing software to achieve the desired effect. Whether you want a slightly transparent image or a fully visible logo, being able to control opacity will give you more flexibility in your designs.
- Adjust the opacity of a layer
- Change opacity of image
- Opacity Changes on a Parent will Get Inherited to Child Elements
- Solution: Put the Background Image into a Pseudo-element of the Parent
- Add an Overlay with Reduced Opacity and Background Color on Top of the Background Image
- Video:
- How to Make a Photoshop Layer Transparent
Adjust the opacity of a layer
Changing the opacity of an image or layer is a great way to add visual effects to your graphics. By adjusting the transparency value, you can make an element more or less opaque, allowing the underlying layers or background to show through.
To change the opacity of a layer, you can use the CSS “opacity” property. This property accepts values between 0 and 1, where 0 represents a fully transparent element and 1 represents a fully opaque element. For example, setting the opacity to 0.5 will make the layer semi-transparent.
Here’s an example of how you can adjust the opacity of a layer:
/* Select the element you want to adjust */
.layer {
opacity: 0.5;
}
With this code, the “layer” element will be 50% transparent, allowing the content or background to partially show through.
If you want to adjust the opacity only for the background image of an element without affecting its child elements, you can use a pseudo-element like ::before or ::after to overlay a transparent layer:
/* Create a pseudo-element with the same dimensions and position as the parent */
.parent {
position: relative;
}
.parent::before {
content: "";
position: absolute;
top: 0;
left: 0;
width: 100%;
height: 100%;
opacity: 0.5; /* Adjust the opacity value as desired */
background-color: transparent;
}
With this solution, the transparency will be applied only to the background image, leaving the child elements fully visible.
Remember that not all image formats support transparency. If you’re working with images, make sure that the file format supports transparency, such as PNG or GIF. Additionally, certain older versions of Internet Explorer may not fully support the opacity property, in which case you may need to use alternative tools or filters to achieve the desired effect.
When adjusting the opacity of a layer, keep in mind that it will affect everything inside the layer, including text, borders, and other elements. If you need to adjust the opacity of a specific element without affecting its children, you can consider using a separate layer or composite the desired graphics beforehand.
Now that you know how to adjust the opacity of a layer, have fun experimenting with different values and blending effects to create stunning visual experiences!
Change opacity of image
When thinking about changing the opacity of an image, there are a few tools you can use to achieve the desired effect. One option is to adjust the opacity value directly using CSS. This can be done by selecting the image element and adding the opacity property. The value of this property will determine the transparency of the image, with a value of 1 being fully opaque and a value of 0 being fully transparent.
Another option is to blend the image with a transparent background or overlay it with another layer. This can be done using pseudo-elements like ::before or ::after. By adjusting the opacity of these pseudo-elements, you can create a composite image where the underlying image becomes partially or completely visible.
If you want to change the opacity of an image without affecting its parent or child elements, you can use CSS filters. The filter property allows you to apply visual effects, including changing the opacity, to an element. However, keep in mind that CSS filters are not supported in older browsers.
Using graphics software like Photoshop or GIMP is another way to change the opacity of an image. These tools provide more advanced options for adjusting opacity and offer a range of tools and features to work with.
Whether you choose to adjust the opacity through CSS or using graphics software, keep in mind that changing the opacity of an image will also affect any text or other elements placed on top of it. If you need to maintain the visibility of these elements while reducing the opacity of the image, you may consider using a checkerboard pattern or a semi-transparent overlay to create a visually pleasing effect.
Opacity Changes on a Parent will Get Inherited to Child Elements
When you change the opacity of a parent element, the same opacity value will be inherited by its child elements. This means that if you reduce the opacity of a parent element, the child elements inside will also become less visible or transparent.
Let’s say you have a parent element with a background color and a child element that contains an image. If you set the opacity of the parent element to a value less than 1, such as 0.5, the child element will also have its opacity reduced. This can be useful when you want to create a visual effect where everything inside a particular element becomes partially transparent without thinking about adjusting the opacity of each individual child element.
For example, imagine a parent element with a background color of blue and a child element that contains a logo image. By reducing the opacity of the parent element, the blue background will blend with the underlying elements and the logo image will appear as if it’s overlaid on top of the background. This can create an interesting visual style.
If you need to change the opacity of a parent element without affecting its child elements, you might need to consider using additional tools or techniques. One solution is to add an extra layer of elements on top of the parent element and adjust their opacity separately. This way, you can have full control over the opacity of each layer and the child elements inside will not be affected.
While changing the opacity of parent elements can be useful in some cases, it’s important to keep in mind that any changes in opacity will get inherited by all child elements. So, if you have multiple layers or composite images, and you want to put a transparent logo on top of them, you cannot simply change the opacity of the parent element. You will need to use graphics tools or filters to adjust the transparency of the logo image itself.
Without using any additional tools or filters, if you’re working with cropped images or elements that are fully opaque, changing the opacity of the parent element might not be the best solution. Instead, consider using pseudo-elements or background images with a checkerboard pattern to create a visual effect of transparency.
In conclusion, when you change the opacity of a parent element, the same opacity value will be inherited by its child elements. This can be useful when you want everything inside a particular element to become partially transparent. However, if you need to change the transparency of individual child elements without affecting their parent element, you will need to use additional tools or techniques.
Solution: Put the Background Image into a Pseudo-element of the Parent
If you want to change the opacity of an image in a more controlled way, you can achieve this by using a pseudo-element of the parent element. By doing this, you can adjust the opacity of the background image separately from the child elements inside the parent.
Here’s how you can implement this solution:
- Select the parent element that contains the image you want to change the opacity of.
- Create a pseudo-element for the parent element using the ::before or ::after selector.
- Set the content property of the pseudo-element to an empty string, as it is required for the pseudo-element to be visible.
- Set the background-image property of the pseudo-element to the URL of the image you want to use.
- Adjust the opacity property of the pseudo-element to change the opacity of the background image.
By placing the background image on a pseudo-element, you can easily control its transparency or opacity without affecting the child elements inside the parent. This technique also allows you to apply other CSS properties, such as blending modes or filters, to the background image.
For example, let’s say you have a parent element with a child element that contains a logo image. You want to make the background image partially transparent while keeping the logo image opaque. Here’s how you can achieve this:
- Open your HTML file and locate the parent element where you want to change the background image opacity.
- Add a pseudo-element to the parent element using the ::before or ::after selector.
- In the CSS file, target the pseudo-element and set its background image using the background-image property, e.g., background-image: url(“path/to/image.jpg”);
- Adjust the opacity of the pseudo-element using the opacity property, e.g., opacity: 0.5; (this will make the background image 50% transparent).
With this solution, you can adjust the transparency of the background image without affecting the logo image or any other child elements inside the parent. You have the flexibility to change the opacity to any value you desire, whether you want to make it more transparent or less transparent.
By thinking creatively and using CSS to composite transparent layers, you can achieve complex visual effects without the need for additional graphical tools. The solution presented here is just one of many techniques available to manipulate images and add transparency to your web design.
Add an Overlay with Reduced Opacity and Background Color on Top of the Background Image
When you need to add an overlay with reduced opacity and a background color on top of a background image, you can achieve this effect using CSS. This technique allows you to adjust the visibility of the underlying image without completely covering it up, creating a visually appealing composite of the two layers.
To accomplish this, you can create a pseudo-element or a separate HTML element that sits on top of the background image. This element will act as the overlay layer, allowing you to adjust its opacity and background color as desired.
Here’s a step-by-step guide on how to add this effect:
- Select the HTML element or create a pseudo-element (such as
::beforeor::after) that will act as the overlay layer. - Apply the desired background color to the overlay element using the
background-colorCSS property. - Adjust the opacity of the overlay element using the
opacityCSS property. A value of 1 means the overlay is fully opaque, while a value closer to 0 will make it more transparent. - Position the overlay element on top of the background image using CSS positioning tools, such as
position: absolute;andtop: 0;. - If necessary, use CSS cropping techniques to ensure the overlay element covers only the desired area of the background image.
By following these steps, you will be able to create an adjusted overlay with reduced opacity and a background color on top of a background image. This technique is useful when you want to add a visual element, such as a logo or a checkerboard pattern, without completely hiding the underlying image.
Keep in mind that the opacity property applies not only to the overlay element itself, but also to its child elements. This means that any elements inside the overlay will inherit the same opacity value and undergo similar transparency changes.
So, next time you’re thinking about adding an overlay with reduced opacity and a background color on top of a background image, remember these techniques and use them to create visually stunning composite layers!


