
Are you ready to take your business to the next level and increase your online presence? Creating Google Ads can be the key to driving more traffic to your website and generating conversions. In this article, we will guide you through the process of creating successful Google Ads campaigns that will help you reach your target audience and achieve your business goals.
Step 1: Open Google Ads and Sign in to your account
The first step is to open Google Ads and sign in to your account. If you don’t have an account yet, you can easily create a new one by following the simple steps provided by Google. Once you’re signed in, you can start creating your first campaign.
Step 2: Configure your campaign settings
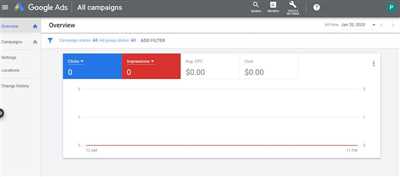
After signing in, you’ll be taken to the Google Ads dashboard, where you can configure your campaign settings. Here, you can choose the type of campaign you want to create, such as Search, Display, or Video. You can also select the geographic location, language, and budget for your campaign. Take some time to carefully set up your campaign to ensure it aligns with your goals and target audience.
Step 3: Select your advertising platform
Google Ads offers a variety of advertising platforms to choose from. You can select the platform that best suits your business and campaign goals. Whether you want to advertise on the Google Search Network or the Google Display Network, each platform has its own advantages and can help you reach different audiences. It’s important to select the right platform to maximize the effectiveness of your ads.
Step 4: Create your ad
Now it’s time to create your ad itself. You’ll need to choose the right ad format, write compelling ad text, and select relevant keywords. Make sure your ad looks appealing and stands out from the competition. Google Ads provides a library of resources and tools to help you design and optimize your ads. Take advantage of these resources to create a visually appealing and engaging ad.
Step 5: Optimize your landing page
Your landing page is the first impression your visitors will have of your website. It’s crucial to make it visually appealing, easy to navigate, and optimized for conversions. A well-designed landing page can significantly increase your chances of converting visitors into customers. Make sure the content on your landing page matches the ad they clicked on and guides them towards taking action.
Step 6: Preview and publish your ad
Before publishing your ad, it’s essential to preview how it looks and make any necessary edits. Google Ads provides a preview feature that allows you to see how your ad will appear on different devices and platforms. Once you’re satisfied with the preview, you can click on the “Publish” or “Activate” button to make your ad live. Congratulations! You’ve successfully created a Google ad!
Now that you know how to create Google Ads, it’s time to put your knowledge into action. Follow these steps and make use of the various tools and resources available to optimize your campaigns for maximum success. Good luck!
- How to Set Up a Google Ads Account
- Make Your Landing Page Relevant
- How to Create a Landing Page for Google Ads
- Step 1: Install and Activate SeedProd
- Step 2: Create a New Landing Page for Google Ads
- Step 3: Customize Your Landing Page
- Step 4 Configure Your Landing Page Settings
- Step 5: Publish Your Landing Page for Google Ads
- Can I do Google Ads by myself
- Sources
How to Set Up a Google Ads Account
Setting up a Google Ads account is a crucial step in creating a successful advertising campaign. Google Ads is a service provided by Google that allows businesses to create and display ads on the Google search results page. By clicking on these ads, users are directed to the advertisers’ websites, generating traffic and potential conversions.
To create a Google Ads account, follow these steps:
| Step 1 | Go to the Google Ads website. |
| Step 2 | Click on the “Start Now” button to begin the account setup process. |
| Step 3 | Enter your website URL and click “Next” to proceed. |
| Step 4 | Customize your Google Ads account by entering relevant information such as your business name, billing details, and target audience. |
| Step 5 | Configure your ad settings by selecting the type of campaign you want to run, choosing your budget, and setting your bids. |
| Step 6 | Create your ad by entering a compelling headline, ad text, and a relevant landing page URL to direct users to. |
| Step 7 | Preview your ad to see how it looks and make any necessary edits. |
| Step 8 | Install the Google Ads conversion tracking code on your website to track conversions. |
| Step 9 | Follow the on-screen instructions to complete the account setup process. |
Once your Google Ads account is set up, you can start creating campaigns to advertise your products or services. It’s important to design your ads and choose keywords that are most relevant to your target audience to increase the chances of getting more clicks and conversions. Regularly monitor and optimize your ad campaigns to ensure that you’re getting the best possible results.
Make Your Landing Page Relevant
When creating Google Ads campaigns, one of the most important things you can do is make sure your landing page is relevant to the ads you are running. A relevant landing page will not only help increase conversions but also improve your quality score, which can result in lower bids.
The first step in making your landing page relevant is to choose the right content for it. Google Ads lets you enter text in the copy section of your ads, and this text should align with the content on your landing page. For example, if you’re promoting a specific product or service in your ads, make sure that the landing page provides information about that product or service.
Along with having the right content, you also need to make sure that your landing page is easy to navigate. Use buttons or links that are clear and visually appealing, and configure them to take users to the relevant sections of your website. This will help guide your customers through the desired actions and improve their overall experience.
Another important aspect of making your landing page relevant is to customize it to your brand. Use colors and images that match your brand identity and create a consistent experience for your visitors. You can use the editing tools provided by Google Ads to change the colors, text, and images on your landing page to make it stand out.
After making the necessary edits and customizations, it’s crucial to preview and test your landing page before publishing it. This will give you a chance to see how it looks on different screen sizes and ensure that everything is working correctly. Tools like SeedProd’s landing page editor can help you with this process, offering a platform where you can preview and configure your landing page to meet your needs.
Once you’re satisfied with the changes you’ve made, it’s time to publish your landing page and start driving traffic to it through your Google Ads campaigns. Remember to monitor the performance of your landing page and make adjustments as necessary to improve conversions and achieve your goals.
Making your landing page relevant is an essential step in creating successful Google Ads campaigns. By taking the time to align your landing page with your ads, you can provide a better user experience, attract more customers, and ultimately increase conversions. So, follow these steps, learn from the best practices suggested by industry experts, and configure your landing page accordingly to achieve optimal results.
How to Create a Landing Page for Google Ads
Creating an effective landing page is a crucial step in running a successful Google Ads campaign. A landing page is the first place potential customers will visit after clicking on your ad, so it’s essential to make a positive first impression. Here’s a step-by-step guide on how to create a landing page for Google Ads:
-
Choose the right platform: When creating a landing page for Google Ads, there are various platforms available. You should choose a platform that aligns with your business goals and provides the features you need. One popular option is SeedProd’s Landing Page Builder, which offers a user-friendly interface and customizable templates.
-
Configure your landing page: After choosing a platform, you need to configure your landing page settings. This includes entering your business name, URL, and relevant keywords. You can also choose the colors and layout that best represent your brand.
-
Create compelling content: The content on your landing page should be clear, concise, and relevant to the ad that brought users there. It should also highlight the benefits of your product or service and encourage visitors to take the desired action, such as making a purchase or filling out a contact form.
-
Customize the design: To make your landing page visually appealing, customize the design elements. You can add images, videos, buttons, and more to enhance the user experience and make it easy for visitors to find what they’re looking for.
-
Preview and edit: Before publishing your landing page, preview it to ensure everything looks as intended. Take the time to edit any grammatical errors or typos and make sure that all links and buttons are functioning correctly.
-
Publish your landing page: After making any necessary edits, it’s time to publish your landing page. SeedProd’s Landing Page Builder provides an easy-to-use editor that lets you publish your page without the need for coding or making changes to your website’s existing structure.
By following these steps, you can create a landing page that effectively converts Google Ads traffic into customers. Remember to continually monitor and optimize your landing page to improve conversions and maximize your advertising budget.
Step 1: Install and Activate SeedProd
Before you can create Google Ads for your website, you need to install and activate the SeedProd plugin. This tool will help you increase the success of your ad campaigns by allowing you to create landing pages that are relevant and engaging to your audience.
To install SeedProd, follow these steps:
- Log in to your WordPress account and navigate to the dashboard of your website.
- On the left-hand side menu, click on “Plugins” and then select “Add New”.
- In the search bar on the top right corner, enter “SeedProd”.
- From the search results, find the SeedProd plugin and click on the “Install Now” button.
- Once the installation is complete, click on the “Activate” button to activate the plugin.
Now that you have SeedProd installed and activated, you can proceed to configure its settings and customize your landing pages. SeedProd provides a visual editor that lets you customize the look and feel of your landing pages with ease.
To configure SeedProd, follow these steps:
- From the WordPress dashboard, click on “SeedProd” in the left-hand side menu.
- On the SeedProd dashboard, click on the “Settings” tab.
- Here, you can choose the global settings for your landing pages, such as the colors, fonts, and images.
- Customize the settings according to your preferences and click on the “Save Changes” button.
With SeedProd configured, you are now ready to create a landing page for your Google Ads campaign.
To create a new landing page, follow these steps:
- From the WordPress dashboard, click on “SeedProd” in the left-hand side menu.
- On the SeedProd dashboard, click on the “Pages” tab.
- Click on the “Add New Landing Page” button to open the page editor.
- In the editor, you can enter the content for your landing page, such as the text, images, and buttons.
- Customize the page to match the content and style that will be most relevant and appealing to your target audience.
- When you are done editing the page, click on the “Publish” button to make it live on your website.
Now you have successfully installed and activated SeedProd, and learned how to create a landing page for your Google Ads campaign. The next step is to set up your Google Ads account and start creating your paid advertising campaigns.
Step 2: Create a New Landing Page for Google Ads
Once you have set up your Google Ads account, the next step is to create a new landing page for your ads. This is the page that visitors will find themselves on after clicking on your ad. In this step, we will walk you through the process of creating a new landing page.
To start, log into your Google Ads account and click on the “Campaigns” tab. From there, select the campaign you want to create a landing page for. On the left-hand side of the screen, you will find a section called “Settings”. Click on “Ad extensions” and then “Landing pages”.
In the landing page editor, you can select a pre-existing landing page from your website or create a new one. If you choose to create a new landing page, you have the option to customize it according to your needs. You can change the colors, layout, and content of the page to match your branding and optimize it for better conversions.
When you click on the “Create new” button, you will be taken to the landing page editor. Here, you can enter the URL of your new landing page and preview how it looks in the editor. If you are not familiar with HTML or website design, Google Ads provides a visual editor that lets you customize your landing page without any coding.
Follow the steps provided by the editor to customize your landing page. You can add text, images, buttons, and more to make your landing page more engaging and successful. You can also suggest different colors and layouts that best suit your advertising campaign.
After you have finished customizing your landing page, click on the “Publish” button to make it live. Your new landing page will now be available for visitors to see when they click through your Google Ads. This step is crucial in making sure that you have a well-designed and optimized landing page that can increase conversions and help you achieve your advertising goals.
In summary, creating a new landing page for your Google Ads involves following these steps:
- Log into your Google Ads account
- Click on the “Campaigns” tab
- Select the campaign you want to create a landing page for
- Click on “Ad extensions” and then “Landing pages”
- Create a new landing page or select an existing one
- Customize the landing page with the visual editor
- Preview how the page looks and make any necessary changes
- Publish the landing page and make it live
By following these steps, you can ensure that you have a high-quality landing page that will attract visitors to your website and increase your chances of a successful Google Ads campaign.
Step 3: Customize Your Landing Page
After signing up for a Google Ads account, you need to customize your landing page to make it relevant and appealing to your customers. This step is crucial because a well-designed landing page can increase the chances of a successful advertising campaign.
1. Open the SeedProd visual editor. This powerful and user-friendly tool lets you design landing pages without any coding knowledge.
2. Select a template from the library that matches your business needs and goals. You can choose from a wide range of professionally designed templates.
3. Customize your landing page by changing the content, heading, and text to make it more relevant to your business. You can also add images and buttons to make it visually appealing.
4. Preview the changes you’ve made to your landing page to ensure everything looks right. This step is important as it allows you to preview the page before it goes live.
5. Activate and configure your landing page settings. Follow the prompts provided by SeedProd to choose the right settings for your campaign.
By customizing your landing page, you can optimize it for search advertising and increase the chances of conversions. A poor landing page can turn away potential customers, so it’s essential to make it as attractive and relevant as possible.
Remember that a successful advertising campaign goes beyond creating ads. It involves making sure your landing page matches the message in your ads and provides a seamless experience for your customers. Follow these steps to create a landing page that drives results for your business.
Step 4 Configure Your Landing Page Settings

After creating your ads and setting up your Google Ads account, the next step is to configure your landing page settings. This step is crucial because it determines how your website or landing page looks and functions for potential customers.
The landing page settings can be accessed by clicking on the “Settings” button on the left-hand side of the Google Ads platform. In this section, you can find different settings and options to customize your landing page.
The first setting you need to configure is the landing page URL itself. This is the web page that users will be directed to after clicking on your ad. You can enter the URL of your website or a specific landing page that is relevant to the ad you’re creating.
Next, you can choose whether you want to optimize your landing page for conversions or for advertising. If you’re looking to increase conversions and get more leads or sales, choose the “Optimize for conversions” option. If you’re more focused on advertising and getting traffic to your website, choose the “Optimize for ad clicks” option.
Along with the landing page URL and optimization settings, you can also customize the appearance of your landing page. You can change the colors and layout of the page to match your brand and design preferences.
After making all the necessary changes and customizations, it’s important to preview your landing page to see how it looks. This can be done by clicking on the “Preview” button, which lets you see a live preview of your landing page.
If everything looks good, you can go ahead and publish your landing page by clicking on the “Publish” button. This will make your landing page live and ready for your potential customers to visit.
You’re now on your way to creating successful Google Ads campaigns. By configuring your landing page settings, you can ensure that your ads are driving relevant traffic to a well-designed and optimized landing page, increasing your chances of converting those visitors into customers.
Step 5: Publish Your Landing Page for Google Ads
Once you have created and customized your landing page using the SeedProd editor, it’s time to publish it so that you can use it for your Google Ads campaigns. This step-by-step guide will show you how to easily publish your landing page and optimize it for the best results.
1. Activate the SeedProd Plugin
First, make sure you have installed and activated the SeedProd plugin on your website. This plugin will help you create and publish landing pages without the need for any coding or technical skills.
2. Go to the SeedProd Editor
Next, navigate to the editor by clicking on the “SeedProd” tab in the left corner of your WordPress dashboard. This will open the SeedProd editor where you can customize your landing page.
3. Customize Your Landing Page
When you open the editor, you will see a visual representation of your landing page along with various customizable sections. You can change the design, colors, and content of your landing page to make it more relevant to your customers and increase conversions.
4. Configure Google Ads Settings
In the editor, you will find a section for Google Ads settings. Here, you can input your Google Ads conversion tracking code, configure any additional settings, and choose the page where customers should be redirected to after clicking on your ad.
5. Publish Your Landing Page
Once you have customized and configured your landing page, it’s time to publish it. Simply click on the “Publish” button in the top right corner of the editor. This will make your landing page live and accessible to visitors.
By following these steps, you can create a landing page specifically designed for your Google Ads campaigns. This will help you create a seamless experience for your customers when they click on your ads, increasing the chances of conversions. Remember to regularly monitor and optimize your landing page to ensure the best results for your Google Ads campaigns.
Can I do Google Ads by myself
Yes, you can create Google Ads by yourself without the need for a professional advertising service. Google Ads is a platform that allows businesses to advertise their products or services on search engine results pages, websites, and other platforms in exchange for a fee.
Here are the steps to create Google Ads by yourself:
| Step 1: | Sign into your Google Ads account or create a new one if you don’t already have one. |
| Step 2: | Click on the “Campaigns” tab and then click the “+ New Campaign” button. |
| Step 3: | Choose the type of campaign you wish to create such as Search, Display, Video, or App. |
| Step 4: | Configure your campaign settings, including the advertising budget, target audience, and bidding strategy. |
| Step 5: | Create your ad groups and enter relevant keywords and ad copy that will be displayed to potential customers. |
| Step 6: | Design your ads by adding images or videos, and customize the appearance with colors and fonts. |
| Step 7: | Set up your landing pages, which are the webpages that users will be directed to when they click on your ads. |
| Step 8: | Preview and optimize your campaign to ensure a seamless user experience. |
| Step 9: | Click the “Activate” button to start running your campaign. |
By following these steps, you can create and launch your own Google Ads campaign without the need for external assistance. However, it is important to note that making the most out of your Google Ads campaign requires continuous monitoring, adjusting bids, and optimizing your ads and landing pages based on the performance data.
Sources
When creating Google Ads, there are several sources you can rely on to help you optimize your ads and increase conversions.
1. Google Ads Help Center: This is an invaluable resource where you can find step-by-step guides and tutorials on how to create effective ads. It provides information on best practices, tips, and tricks to make your ads stand out.
2. Google Ads Editor: If you’re experienced in creating Google Ads and want a more efficient way to edit and manage your campaigns, the Google Ads Editor is a powerful tool. It allows you to make changes in bulk, copy and paste campaigns, and quickly navigate through different sections of your account.
3. Google Ads Library: This is a global library of ads that have been published on Google Ads. It lets you search and learn from successful ads created by others. You can find ads from different industries and use them as inspiration for your own campaigns.
4. Google Ads Providers: If you don’t have the time or expertise to create ads yourself, you can choose from a variety of Google Ads providers. These providers offer services that range from ad design to keyword research and bidding strategies. They can help you set up and activate your ads without having to do it all on your own.
5. Google Ads suggestions: When creating a new ad, Google Ads itself can suggest relevant keywords, target audiences, and ad formats. This feature can be useful if you’re unsure where to start or if you want to explore different options.
6. SeedProd: If you’re making a new website or landing page for your business, SeedProd is a great tool to help you create visually appealing and conversion-focused pages. It has a drag-and-drop editor that allows you to easily change the layout, colors, and text of your page without any coding knowledge.
By utilizing these sources, you can learn from others’ experiences, find the right tools and services to help you create successful ads, and optimize your campaigns for better results.