
Are you looking to enhance your mobile app experience and boost productivity? Look no further than the AppSheet app! With this powerful tool, you can create, import, and customize apps with ease, all within a cloud-based environment. Whether you’re an experienced developer or a beginner, this codelab will walk you through the steps of setting up and using the AppSheet app.
First, let’s make sure you have all the requirements in place. To use AppSheet, you’ll need a Google account and access to a Google Sheets or other database as a data source. Once you have these credentials, it’s time to get started!
The first step is to import your data into the AppSheet app. This can be done by selecting the “Import” button and then choosing your data source. Whether you’re using Google Sheets, a SQL database, or another source, AppSheet will guide you through the importing process. Once your data is imported, you can create and customize various views and layouts to fit your needs.
Next, let’s talk about adding functionality to your app. AppSheet allows you to add buttons, dialog boxes, and other interactive items to enhance user experience. By using the AppSheet editor, you can easily set up actions and workflows that respond to user input. For example, you can create a button that updates data in your database or triggers a dialog box with additional information.
Conclusion: The AppSheet app provides a powerful and user-friendly platform for creating mobile apps. Whether you’re a developer or a non-technical user, AppSheet makes it easy to create, import, and customize apps for your specific needs. Don’t wait any longer, start building your next app with AppSheet today!
- 5 Types of Views to Enhance Your AppSheet Apps
- Setup and requirements
- Using the App – Adding and Updating Items
- Create and customize new database by importing from a Google Sheet
- Step 1: Preparing Google Sheets
- Step 2: Setting up AppSheet
- Step 3: Importing data from Google Sheets
- Step 4: Customizing your database
- Step 5: Testing and using the app
- Conclusion
- Conclusion
- Sources
5 Types of Views to Enhance Your AppSheet Apps

AppSheet is a versatile platform that allows you to create and customize mobile apps by importing data from various sources. With AppSheet, you can add and enhance different types of views to your app to boost its functionality and user experience. In this article, we will explore five types of views that can take your AppSheet apps to the next level.
1. Deck View: The deck view is a card-based layout that lets you display multiple items at once. It’s great for showcasing images or key information about each item, and users can swipe through the cards to browse the content. You can customize the deck view to highlight specific data fields and provide a visually appealing interface.
2. Detail View: The detail view allows users to view and edit the details of a single item. It provides a comprehensive view of the selected item, with all its associated data and images. You can enable different actions within the detail view, such as updating or deleting the item.
3. Gallery View: The gallery view displays items in a grid-like format, making it easy for users to browse through a large number of items. You can customize the gallery view to show specific fields or images, and users can select an item to view its details in the detail view.
4. Chart View: The chart view allows you to create visual representations of your data, such as bar charts, pie charts, or line graphs. It’s a great way to analyze and present your data in a more visually appealing format. Users can interact with the chart view by selecting different data points or categories.
5. Map View: The map view displays your data on a map, allowing users to visualize the geographical distribution of your items. You can customize the map view to show specific data fields or markers, and users can interact with the map by zooming in or out, or tapping on the markers for more details.
To create these views within your AppSheet app, you’ll need to follow a few steps:
- Create or import a database of your items into your AppSheet account.
- Select the types of views you want to add to your app.
- Customize the views by selecting the relevant data fields and properties.
- Add actions or buttons to enhance user interactions within the views.
- Once you have set up and customized your views, you can preview and test your app on a mobile device or in the AppSheet cloud environment.
In conclusion, AppSheet provides a wide range of view options to customize and enhance your apps. By importing data from various sources and adding different types of views, you can create a powerful and user-friendly mobile app tailored to your specific requirements. Please note that you will need a Google account and the necessary credentials to connect to Google Sheets or other data sources.
Setup and requirements
Before using the AppSheet app, there are a few setup requirements that need to be met. The following are the steps to set up and requirements to consider.
| Steps | Description |
|---|---|
| 1 | Sign up for an account on appsheet.com |
| 2 | Create or select a Google Sheets database as the data source for your app |
| 3 | Import data to the Google Sheets database or add data manually |
| 4 | Customize your app by adding views, enhancing the UI, and updating the data structure |
| 5 | Configure the app’s requirements and set up user roles and access permissions |
| 6 | Generate credentials for your app and set up security measures |
| 7 | Test your app within the AppSheet environment and make any necessary adjustments |
| 8 | Import your app to a mobile device or other compatible platform |
| 9 | Share the app with other users or publish it to be accessible by others |
| 10 | Finalize and conclude the setup process |
Please note that the setup steps may vary depending on the type of app you are creating and the specific requirements you have. Additionally, there are other sources such as the AppSheet community, codelab tutorials, and documentation from appsheet.com that can help you further enhance your app-building skills.
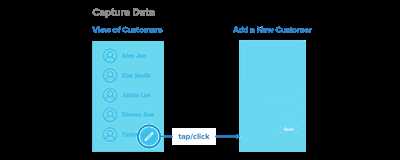
Using the App – Adding and Updating Items
To boost the functionality of your mobile app, you can add and update items using AppSheet. This feature allows you to create and customize various types of buttons, views, and dialogs to enhance your app’s data management capabilities.
Before you can start adding and updating items, there are a few requirements to note. First, you need to have a Google account to use AppSheet. Once you have signed up and signed in to your AppSheet account, you are ready to proceed.
Here are the steps to select, create, import, and update items within your app:
Step 1: Set Up Your App
- Create a new app on appsheet.com or import an existing app.
- Connect your app to a data source, such as Google Sheets or another database.
- Import data from other sources if needed.
- Customize your app’s appearance and functionality to fit your needs.
Step 2: Adding Items
- Select the “Items” tab within your app’s environment.
- Click on the “Add” button to create a new item.
- Fill in the required data fields with the appropriate information.
- Save the item to add it to your app’s database.
Step 3: Updating Items
- Navigate to the “Items” tab within your app.
- Locate the item you want to update.
- Edit the desired data fields with the updated information.
- Save the changes to update the item in your app’s database.
By following these steps, you can easily add and update items within your mobile app. AppSheet provides a user-friendly interface and seamless integration with various data sources, making the process efficient and convenient. Please keep in mind that the steps and requirements may vary depending on the specific setup and configuration of your app.
In conclusion, using AppSheet to add and update items in your app is a straightforward process that empowers you to manage your app’s data effectively. Whether you are creating a new app or enhancing an existing one, AppSheet’s capabilities and flexibility make it a valuable tool for app development.
Create and customize new database by importing from a Google Sheet
If you’re using AppSheet to build mobile apps, one of the first steps is to create and customize a new database. One way to do this is by importing data from a Google Sheet. In this guide, we’ll walk you through the process of setting up and importing data from a Google Sheet to enhance your app’s functionality.
Step 1: Preparing Google Sheets
To get started, you’ll need the credentials of your Google account and access to Google Sheets. If you don’t have a Google account, please sign up for a new one. Next, create a new Google Sheet or use an existing one with the data you want to import.
Note: If you plan on updating the data in your app from within the Google Sheet, make sure your sheet meets the requirements of AppSheet.
Step 2: Setting up AppSheet
Once you have your Google Sheet ready, go to the AppSheet website and sign in to your account. From there, you can create a new app or select an existing one to add the imported data. If you’re new to AppSheet, follow the steps provided to set up your environment.
Step 3: Importing data from Google Sheets
In the AppSheet editor, navigate to the “Data” tab and click on the “Tables” option. Then, click the “Import GSheets/Table” button to open the import dialog. Select your Google account, choose the Google Sheet you want to import from, and then select the sheet within the Google Sheet that contains the data you want to import.
Step 4: Customizing your database
After importing the data, you can customize your database by adding and removing columns, changing data types, and enhancing views. AppSheet provides a user-friendly interface for these customization options, allowing you to tailor your database to your specific app requirements.
Step 5: Testing and using the app
Once you have your database set up and customized, you can test and use your app on a mobile device. AppSheet provides a mobile app for iOS and Android that allows you to view and interact with the app you created. Sign in with your AppSheet account credentials, and you’ll be able to access and use your app on the go.
Conclusion
Importing data from a Google Sheet is a convenient way to create and customize a new database in AppSheet. By following the steps outlined in this guide, you can quickly set up your database, import data from your Google Sheet, and customize it to meet your app’s requirements. AppSheet’s tools and features make it easy to enhance your app’s functionality and provide a seamless user experience.
Conclusion
In conclusion, the use of the AppSheet app allows users to create a new app from existing data sources such as Google Sheets. By importing data from these sources, users can then customize the app to their specific requirements. With a variety of views and types of data items available, AppSheet provides a flexible platform for enhancing your mobile app environment.
Once you have created an app, you can use the AppSheet editor to add or update data within the app. By selecting the “Import” button, you can import data from Google Sheets or other cloud-based databases. It is important to note that you will need to have a Google account and the necessary credentials to import data from Google Sheets.
With the AppSheet app, you can boost your productivity by creating and updating apps that suit your needs. The step-by-step setup process and the codelab provided by AppSheet.com make it easy to get started. The AppSheet app also provides a range of views to select from, allowing you to customize the app to your liking.
In conclusion, the AppSheet app is a powerful tool that allows you to create and customize apps using data from various sources. Whether you are using Google Sheets or other cloud-based databases, AppSheet provides a user-friendly interface for importing, updating, and enhancing your app’s functionality.
Sources
When creating a new app in AppSheet, you have various sources to choose from to import your data. These sources include Google Sheets, MySQL database, Salesforce, and many more.
The first step is to ensure you have the necessary credentials to connect to your desired data source. For Google Sheets, you need to have a Google account and access to the Google Sheets document that contains your data.
Once you have the required credentials, you can proceed with the app setup. The setup dialog lets you select the type of app you want to create and the data source you want to use. For Google Sheets, you can simply select the “Google Sheets” option and specify the document you want to import from.
After selecting the data source, you can customize how your app interacts with the data. You can choose to import all the data or only specific sheets within the document. You can also define views and customize the behavior of buttons and other UI elements.
In order to enhance data import, you can also define additional steps like adding formulas or filtering data. These steps can help boost the performance and accuracy of your app.
You can also import data from multiple sources and combine them into a single app. AppSheet lets you import data from different databases and apps, giving you the flexibility to create a comprehensive mobile app.
In conclusion, AppSheet provides a variety of sources for importing your data. Whether it’s Google Sheets, a database, or other apps, you can easily connect to them and create a customized app. The setup dialog lets you select the desired data source and customize the app’s behavior. With additional steps and customization, you can enhance the performance and accuracy of your app. So why wait? Create your own app today!