

If you want to have more control and privacy over your YouTube channel, there are certain steps you can take to make your channel private. By doing this, you can avoid issues with copyright and have more advanced control over your channel and its content. In this tutorial, we will walk you through the process of creating a private YouTube channel.
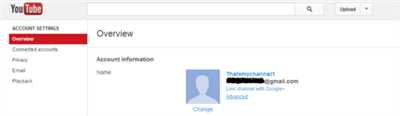
First, click on the YouTube icon on your Android or iOS device to open the app. Once you have done this, you can then click on your profile picture at the top right corner of the screen to access your account settings.
Next, scroll down to the bottom of the page and click on “Settings”. From here, you will be able to regulate the privacy and permissions of your YouTube channel.
By making your YouTube channel private, you have the advantage of saving your videos and information in the cloud, as well as controlling who has access to your content. This means that only viewers you give permission to can see what you post.
Creating a private YouTube channel is a great way to have a more personal and secure space on the platform. It allows you to avoid the issues that can arise from having a public channel, such as copyright claims or unwanted comments from the YouTube community.
So, if you want to have full control over your YouTube channel and make it private, follow the steps outlined here. By doing so, you can enjoy the benefits of a private channel and ensure that your content is only seen by those you choose to share it with.
- How To Create A Private YouTube Channel 2023 Tutorial
- Advantages of a Private YouTube Channel
- Regulate Viewer’s Access
- Avoid Copyright Issues
- Create A Private Community
- Share On YouTube To Save Cloud Storage Space
- How to Make a YouTube Channel Private
- YouTube: A Tutorial on How to Make YouTube Private
- Video:
- Make $22,100 Per Month Posting No-Face Videos On YouTube (Side Hustle)
How To Create A Private YouTube Channel 2023 Tutorial
YouTube is a popular video-sharing platform that allows anyone to upload and share videos with the world. However, sometimes you may want to have more control over who can access your content. In this tutorial, we will show you how to create a private YouTube channel in 2023.
Before we dive into the tutorial, it is important to understand the difference between a public and private YouTube channel. A public channel is available to anyone who visits YouTube, and your videos can be found through search results and recommendations. On the other hand, a private channel is only accessible to those who have been granted permission by the channel owner.
To create a private YouTube channel, follow these steps:
- First, sign in to your YouTube account using your Google credentials.
- Click on your profile picture at the top right corner of the screen, and then click on the “Settings” option.
- In the left sidebar, click on the “Privacy” option.
- Scroll down to the “Private” section and toggle the switch to enable the option “Keep all my subscriptions and liked videos private”. This will ensure that your activity on YouTube remains private.
- To create a private channel, click on your profile picture again and select the “Create a channel” option.
- On the following page, enter a name for your channel and choose a category that best represents the content you will be sharing.
- At the bottom, make sure to click on the “Create channel” button to save your changes.
Once you have created your private YouTube channel, you can start uploading videos that will only be accessible to those you explicitly grant access to. You can share the link to your private videos with specific individuals or invite them to become members of your channel’s community.
One of the advantages of having a private YouTube channel is that you can avoid copyright issues and regulate who can view your content. This is especially useful if you want to share personal videos with friends and family without making them public. Additionally, creating a private channel allows you to have more control over the storage space you use on YouTube’s cloud.
Now that you know how to create a private YouTube channel, you can start sharing your videos with the right audience. Remember to always keep your personal information secure and be mindful of the content you post online. Enjoy your private YouTube channel in 2023!
Advantages of a Private YouTube Channel
A private YouTube channel offers several advantages compared to a public channel. When you create a private channel on YouTube, you have control over who can access and share your videos, which can save you time by avoiding issues related to copyright and other community guidelines. Here are some of the main advantages of a private YouTube channel:
| More Control: With a private YouTube channel, you have more control over who can view your videos. You can regulate access by granting permission only to specific individuals or groups of people. This allows you to keep your videos secure and limit access to only those you want to share the information with. | Save Storage Space: By creating a private YouTube channel, you can save storage space on your Android device or cloud storage. Instead of keeping videos on your device or in your cloud storage, you can upload them to your private YouTube channel and access them anytime, anywhere with just a click. |
| Avoid Copyright Issues: When you have a private YouTube channel, you don’t have to worry about copyright infringement. Since only permitted individuals can access your videos, you can ensure that the content you share doesn’t violate any copyright laws. | Advanced Features: Private YouTube channels come with advanced features that are not available on public channels. You can customize the layout and appearance of your channel, add banners or logos, and include links to other websites or social media platforms. |
In conclusion, creating a private YouTube channel has many advantages. It allows you to have more control over your videos, save storage space, avoid copyright issues, and enjoy advanced features. If you want to share information or tutorials with a specific audience, creating a private YouTube channel is the right choice for you.
Regulate Viewer’s Access
One of the main advantages of creating a private YouTube channel is that you have control over who can access your videos. By default, when you create a YouTube channel, it is set to public, meaning anyone can view and share your videos. However, if you want to avoid any issues related to copyright or community guidelines, it is best to regulate viewer’s access to your content.
Here are the steps on how to make your YouTube channel private:
- Sign in to YouTube using your Google account.
- Click on your profile picture at the top right corner of the screen.
- From the dropdown menu, click on “YouTube Studio”.
- On the left side of the screen, click on “Settings”.
- Click on “Privacy” from the menu on the left side of the screen.
- Under the “Privacy” section, you will see an option to set the channel as public or private. Click on “Private.”
- Below the “Private” option, there is a checkbox that says “Keep all my liked videos private.” If you want to keep your liked videos private as well, make sure to check this box.
- Click on the “Save” button at the bottom of the screen to save your changes.
By making your YouTube channel private, only the people you give permission to will be able to access and view your videos. This way, you can have more control over who sees your content and avoid any unwanted attention or comments. It is a great way to save your videos in the cloud without using up storage space on your Android device or computer.
Keep in mind that by making your YouTube channel private, you will also limit the availability of your videos to the general public. If you want to share your videos with a wider audience, it is recommended to make them public again. You can easily do this by following the same steps outlined above and selecting the “Public” option instead.
To sum up, regulating viewer’s access to your YouTube channel can help you maintain a more private and controlled environment for your videos. With the advanced settings available on YouTube, you can easily have more control over who can see and interact with your content. By following this tutorial, you can make your YouTube channel private and have peace of mind knowing that your videos are only accessible to the people you choose to share them with.
Avoid Copyright Issues
If you want to make your YouTube channel private, you must first understand how to avoid copyright issues. Copyright issues can arise when you post content on the public domain without proper permission or attribution. To prevent these issues, follow the steps below.
Step 1: Understand the copyright laws and regulations for video-sharing channels. This will help you know what is allowed and what is not.
Step 2: Make sure to obtain the necessary licenses or permissions for any copyrighted material you want to use in your videos.
Step 3: Be aware of the advantages of making your YouTube channel private. By doing so, you can control access to your videos and regulate who can view and share them.
Step 4: When creating a channel, choose the “Private” option instead of the “Public” one. This will ensure that your videos are only visible to those you have given permission to.
Step 5: Save your videos in a cloud storage space instead of posting them directly on YouTube. This way, you have more control over who can access your video content.
Step 6: If you want to share your videos with a select audience, you can utilize YouTube’s advanced settings. This lets you grant access to specific individuals or create a shareable link with limited permissions.
Step 7: Familiarize yourself with YouTube’s copyright policies. This information will help you avoid any copyright issues and ensure that you comply with the platform’s guidelines.
Step 8: Stay up to date with any changes or updates in YouTube’s copyright policies. This will help you understand what is acceptable and what could potentially lead to copyright issues.
By following these steps, you can avoid copyright issues and protect your content from being used without your permission. It’s important to respect the rights of others and be mindful of the copyright laws in place.
Create A Private Community
If you want to have more control over who can access your videos and information on YouTube, you can create a private community. By creating a private community, you can regulate who has permission to view and share your videos, ensuring that they are only accessible to a select group of people.
To create a private community on YouTube, follow these steps:
- Sign in to your YouTube account.
- Click on your profile picture in the top-right corner of the screen.
- Select “YouTube Studio” from the drop-down menu.
- On the left side of the screen, click on “Settings”.
- Under the “Channel” tab, click on “Advanced settings”.
- Scroll down to the “Community” section.
- Click on the checkbox that says “Keep all my subscriptions private”.
- Click on the “Save” button at the bottom of the page.
By enabling the “Keep all my subscriptions private” option, you are creating a private community for your YouTube channel. This means that any information about the channels you subscribe to will be kept private. This includes the videos you like and the comments you make.
Creating a private community on YouTube has several advantages. Firstly, it allows you to avoid any copyright issues that may arise from sharing copyrighted content with the public. This helps to protect your channel from potential copyright strikes and takedown notices.
In addition, creating a private community allows you to have more control over who can access your content. You can choose to only share your videos with a select group of people, such as friends, family, or colleagues. This helps to maintain the privacy of your videos and ensures that only those you choose to share with have access to them.
Furthermore, by creating a private community, you can also control the viewer’s ability to comment on your videos. You can choose to allow only certain individuals to comment on your videos, or you can disable comments altogether. This gives you the ability to maintain a more controlled and positive environment for your viewers.
Lastly, by creating a private community, you can save space on the public cloud storage provided by YouTube. This is especially useful if you have a large number of videos or if you want to upload high-quality videos without worrying about running out of storage space.
Overall, creating a private community on YouTube is a great way to have more control over who can access and interact with your videos. Take the time to follow this tutorial and enjoy the benefits of a private YouTube channel.
Share On YouTube To Save Cloud Storage Space
If you’re looking to save cloud storage space and avoid any issues with storage limits, YouTube provides a great solution. By sharing your videos on YouTube, you can create a private channel and have more control over who can access your content.
When you upload a video on YouTube, you have the option to choose the video’s privacy settings. By default, videos are set to public, meaning anyone can view them. However, you can easily change the settings to make your video private.
To make a video private on YouTube, follow these steps:
- Create a YouTube channel if you don’t already have one. You can do this by clicking on your profile picture in the top right of any YouTube page and selecting “Create a Channel”.
- Once you have a channel, go to the YouTube Studio by clicking on your profile picture again and selecting “YouTube Studio”.
- In the YouTube Studio, click on the “Videos” tab on the left sidebar.
- Find the video you want to make private and click on the three-dot menu icon next to it.
- Click on “Details” in the dropdown menu.
- Scroll down to the privacy section and click on the “Visibility” dropdown menu.
- Select “Private” from the options.
- Click on “Save” to apply the changes.
By making your video private, only you and anyone you’ve granted access to will be able to view it. It won’t be available for the public or anyone who visits your channel. This way, you can save space on your cloud storage by storing your private videos on YouTube instead.
Another advantage of sharing videos on YouTube is that the platform has advanced copyright policies in place to regulate video-sharing. This means that if you create and upload your own content, you can have peace of mind knowing that YouTube will protect it from unauthorized use.
In conclusion, if you want to save cloud storage space and have more control over who can view your videos, consider sharing them on YouTube. By following the steps outlined in this tutorial, you can easily make your videos private and avoid any storage issues. Plus, with YouTube’s copyright policies, you can confidently share your content without worry.
How to Make a YouTube Channel Private

If you want to regulate who can see your YouTube channel and avoid any issues with copyright or community guidelines, you can make your channel private. By making your channel private, you have more control over who has access to your videos and information.
Here is a step-by-step tutorial on how to make your YouTube channel private:
- Open the YouTube app on your Android device or go to the YouTube website on your computer.
- Click on your profile picture at the top right corner of the screen to access your account.
- In the drop-down menu, click on “YouTube Studio” to go to the main page of your channel.
- On the left side of the screen, click on “Settings” to access the advanced settings of your channel.
- Select the “Privacy” tab from the menu on the left.
- Under the “Channel visibility” section, click on the drop-down menu and select “Private”.
- Click on the “Save” button at the bottom right to save your changes.
By making your YouTube channel private, only those with permission will be able to view your videos. This gives you the ability to share videos with specific individuals or groups while keeping your channel private from the general public.
One of the advantages of having a private YouTube channel is that you can save storage space on your cloud and control who can view your content. Additionally, by avoiding any copyright issues and community guideline violations, your channel will be protected and you can have a more secure experience on YouTube.
Keep in mind that by making your channel private, any videos you post will only be available for viewing by those with access. This means that your videos won’t appear in search results, on your channel page, or in the “Up Next” suggestions for other viewers.
So, if you want to create a YouTube channel where you have more control over who can view your content and avoid any issues, making it private is the right choice.
YouTube: A Tutorial on How to Make YouTube Private
YouTube is a popular video-sharing platform that allows users to upload, share, and watch videos. With YouTube, you have the option to make your videos public or private. In this post, we will explore how to create private YouTube channels and the advantages of keeping your videos private.
By default, YouTube videos are public, meaning that anyone can access and view them. However, if you want to share your videos with only a selected group of people, making your YouTube channel private is the right way to go. When you make your channel private, only those who have your permission can view your videos.
To make your YouTube channel private, follow these steps:
- Click on your profile picture at the top right corner of the YouTube homepage.
- Select “YouTube Studio” from the drop-down menu.
- On the left sidebar, click on “Settings”.
- Under the “Channel” tab, click on “Advanced settings”.
- Scroll down to the bottom until you see the “Privacy” section.
- Click on the “Private” option to set your channel to private.
- Click on “Save” to save your changes.
Once you have made your YouTube channel private, only those with access can view your videos. This is ideal if you want to create content for a specific audience or if you want to avoid copyright issues.
By keeping your videos private, you have more control over who can access your content. You can also regulate comments and prevent anyone from embedding your videos on other websites. Additionally, private videos do not appear in search results, which means they won’t be easily discoverable by the wider YouTube community.
If you want to share a private video with someone, you can provide them with the video’s URL. They will then be able to click on the link to view the video, as long as they have the permission to access it.
It’s important to note that the availability of private YouTube channels may vary depending on the platform you are using. Private channels are typically available on YouTube’s website and mobile apps, including Android.
In conclusion, making your YouTube channel private is a great way to control access to your videos. By following the tutorial above, you can easily create a private channel and enjoy the storage space and advantages of private video sharing. Keep in mind the privacy settings and be mindful of the information you share. By keeping your videos private on YouTube, you can save time and avoid any potential issues.


