

Launching an online store has become a necessary step for businesses in order to expand their shopping options and reach more customers. If you have a product or an idea that you want to sell, creating an online store with Shopify is a reliable and simple way to get started. In this guide, we will walk you through the necessary steps to launch your Shopify store and ensure a smooth and successful start to your online business.
- 1. Create a Shopify Account
- 2. Choose a Shopify Theme
- 3. Add Products to Your Store
- 4. Set Up Payment Options
- 5. Configure Shipping and Taxes
- 6. Check and Test Your Store
- 7. Launch Your Store and Enjoy
- How to Publish Your Shopify Store: Complete Guide
- Step 1: Choose a Shopify Theme
- Step 2: Set Up Your Shopify Store
- Step 3: Add Products to Your Store
- Step 4: Customize Your Store’s Pages
- Step 5: Configure Payments and Shipping
- Step 6: Test and Refine Your Store
- Step 7: Publish Your Shopify Store
- Table of Contents
- 📌 Shopify Checklist: The Essential Steps
- 1 Choose the Shopify plan that suits your business needs
- 2 Set up your Payment Options
- 3 Add your Products in a compelling way
- 4 Customize the Theme
- 5 Configure Shipping and Taxes
- 6 Set up Customer Accounts
- 7 Add your Terms and Conditions Document
- A Simple Shopify Checklist Template
- Run a Checkout Page Test
- Check Your Product and Collection Pages
- Share with us your idea
- Test a Cart Page
- Check an Account Page
- Refresh Your Contact Page
- Verify your Product page
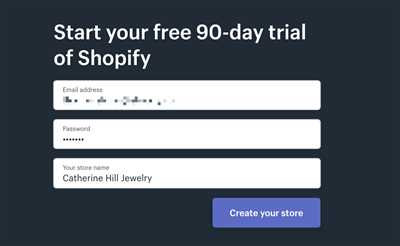
1. Create a Shopify Account
The first thing you need to do is sign up for a Shopify account. Visit the Shopify website and click on the “Get Started” button. Fill in your email address, password, and store name. Once you have entered this information, click “Create Your Store” to proceed. You will then be asked to answer a few questions about your business in order to configure your account and set up your store.
2. Choose a Shopify Theme
After setting up your account, you will need to choose a theme for your store. Shopify offers a variety of templates that you can customize to create a unique and compelling storefront. Take the time to browse through the different options and select a template that suits your business and products. You can preview each template and see how it looks with your products, so make sure to choose the one that best represents your brand and appeals to your target audience.
3. Add Products to Your Store
Once you have selected a theme, it’s time to start adding your products. Click on the “Products” tab, then click on the “Add Product” button. Fill in the necessary information for each product, including the title, description, and pricing. You can also add images, videos, and other elements to make your product pages more engaging. Shopify also allows you to manage your inventory and keep track of your stock levels. Take the time to organize your products into different categories and collections to make it easier for your customers to navigate your store.
4. Set Up Payment Options
A crucial step in launching your Shopify store is setting up the payment options. Shopify provides a secure checkout system that supports different payment methods, including credit cards, PayPal, and more. You can set up these payment gateways by going to the “Settings” tab and selecting “Payment Providers”. From there, you can choose the payment options that are available in your country and configure the settings according to your preferences. Make sure to test the payment process to ensure everything is working properly before launching your store.
5. Configure Shipping and Taxes
Another important aspect of setting up your Shopify store is configuring the shipping and taxes. Depending on your business and the countries you ship to, you may need to add different shipping options and rates. Shopify allows you to set up shipping zones and define specific shipping methods and prices for each zone. You should also consider the taxes that apply to your products and set up the appropriate tax rates in your Shopify settings. Make sure to double-check your shipping and tax settings to ensure that they are accurate before launching your store.
6. Check and Test Your Store
Before launching your store, it’s important to go through a checklist to make sure everything is set up properly. Check the contents and layout of each page, including your homepage, product pages, and checkout page. Make sure all the links and buttons are working and that there are no spelling or grammatical errors. Test the checkout process by placing test orders to ensure that the payment and shipping options are working correctly. It’s also a good idea to have someone from your team or a trusted friend check your store to provide feedback and catch any potential issues.
7. Launch Your Store and Enjoy
Once you have completed all the necessary steps and are confident that your store is ready, it’s time to launch. Hit the “Publish” button to make your store live and start accepting orders. Congratulations! You have successfully launched your Shopify store. Now it’s time to promote your business, drive traffic to your site, and start making sales. Remember to regularly check your store’s performance, analyze the data, and make any necessary adjustments to improve your sales and grow your online business.
How to Publish Your Shopify Store: Complete Guide
Launching your own Shopify store is an exciting step towards starting your online business. With the help of this comprehensive guide, you can learn the necessary steps to successfully publish your store and prepare it for sales. Follow these steps to ensure a smooth and professional launch:
Step 1: Choose a Shopify Theme
First and foremost, select a Shopify theme that suits your business needs. Shopify provides a wide range of free and paid themes that you can browse through and choose from. Make sure to pick a theme that is visually appealing, user-friendly, and contains essential features for your business.
Step 2: Set Up Your Shopify Store
Once you have selected your theme, it’s time to set up your Shopify store. Sign up for a Shopify account and follow the step-by-step process to enter your business details, preferences, and payment information. This will help you manage and track your sales, customers, and orders effectively.
Step 3: Add Products to Your Store
One of the most crucial aspects of an online store is the products it offers. Add a collection of relevant and compelling products to your Shopify store. Make sure to provide accurate product descriptions, high-quality images, and competitive prices. Moreover, set the quantity and shipping preferences for each product to streamline the checkout process.
Step 4: Customize Your Store’s Pages
Make your Shopify store more unique and customer-friendly by customizing its pages. Add essential pages like FAQs, About Us, Contact Us, and Terms of Service to provide necessary information to your customers. Check and test each page to ensure they are error-free and properly formatted.
Step 5: Configure Payments and Shipping
To ensure a seamless shopping experience, configure the payment and shipping settings on your Shopify store. Set up payment gateways that are popular in your target country. Don’t forget to add trust symbols and secure checkout badges to build customer trust. Additionally, configure shipping zones, rates, and taxes based on your business needs and the countries you plan to ship to.
Step 6: Test and Refine Your Store
Before publishing your store, run multiple tests to ensure everything is working correctly. Place test orders, check the checkout process, and make sure the cart functions properly. Test various devices and browsers to ensure your store is responsive and user-friendly across different platforms.
Step 7: Publish Your Shopify Store
Finally, it’s time to publish your Shopify store and make it live for the world to see. Double-check all the necessary steps and make sure everything is set up correctly. Once you’re confident, hit the “Publish” button and share the good news of your new online business with your audience.
By following this complete guide, you can successfully launch your Shopify store and start generating sales. Remember to regularly check and manage your store, update product listings, and encourage customer reviews to build trust and improve your business over time. Good luck!
Table of Contents
In this article, we will walk you through the necessary steps to launch your Shopify store successfully. From setting up your account to configuring payments and shipping, we will cover everything you need to know to get your online store up and running.
1. Choose the Best Shopify Template
One of the first things you need to do is choose the best Shopify template that suits your needs. Shopify offers a wide range of professionally designed templates that can be easily customized to match your brand and idea.
2. Set Up Your Shopify Account
To start launching your store, you need to create a Shopify account. Simply sign up with your email address and follow the steps to set up your account. Shopify will guide you through the process, ensuring that you have all the necessary information to get started.
3. Add Products and Customize Your Store
With your Shopify account set up, it’s time to add your products and customize your store. You can easily add products by clicking on the “Products” tab in your Shopify dashboard. Make sure to provide all the relevant details, such as price, quantity, and product description.
4. Configure Payments and Shipping
One of the most important things to consider when launching your Shopify store is configuring payments and shipping. Shopify provides different payment options to choose from, ensuring that your customers can enjoy a seamless shopping experience. Moreover, make sure to set up shipping rates and calculate the correct pricing based on the weight, size, and destination of your products.
5. Ensure Trust with Customers
To have a successful online store, you need to ensure trust with your customers. Adding trust elements, such as customer reviews, testimonials, and trust marks, can help build trust and credibility. Moreover, make sure to have clear and compelling product descriptions and terms and conditions clauses to provide a transparent shopping experience.
6. Run a Check and Launch Your Store
Before launching your store, it’s essential to run a thorough check to ensure everything is set up correctly. Go through the launch checklist provided by Shopify to make sure you haven’t missed any important steps. Moreover, contact Shopify support if you have any questions or need further assistance.
7. Enjoy Higher Sales with Shopify
Once you have launched your Shopify store, it’s time to sit back and enjoy higher sales. Shopify provides a range of features and tools to help you monitor and optimize your store for better sales. Refresh your website regularly with new and relevant content to attract more customers and make sure to provide excellent customer service to retain your existing ones.
📌 Shopify Checklist: The Essential Steps
Launching an online store on Shopify requires careful planning and attention to detail. To ensure a successful launch, consider following this checklist of essential steps:
1. Create a Shopify Account: Sign up for a Shopify account and set up your store. Fill in all the necessary details and preferences, and choose a suitable plan that suits your business.
2. Verify Your Business: Provide the correct information about your business, such as your name, address, and contact details. Shopify may require additional documents to verify your business.
3. Set Up Payments: Enter your desired payment options and configure the payment gateways, including trusted providers like PayPal, Stripe, or Shopify Payments.
4. Add Products: Start adding products to your Shopify store. Include relevant details such as price, quantity, images, and product descriptions. Make sure to categorize them into collections for easy navigation.
5. Design Your Store: Choose a theme that best reflects your brand and business. Customize the theme to match your preferences and make sure the layout and contents are appealing and user-friendly.
6. Check Tax Settings: Set up correct tax settings based on your country’s regulations. Don’t forget to consider regional taxes and ensure that your store complies with all legal requirements.
7. Set Up Shipping: Determine the shipping methods, rates, and conditions that align with your business model. Make sure to account for different shipping zones and provide clear shipping policies to the customers.
8. Test and Adjust: Before launching your store, thoroughly test all the elements and functionality. Make sure the shopping cart, payment process, and checkout flow work smoothly. Adjust any issues or errors you encounter.
9. Provide Customer Support: Set up a system to provide efficient customer support. Make sure to provide clear contact information and respond to customer inquiries promptly.
10. Set Up Marketing: Create a marketing plan to promote your Shopify store online. Utilize various channels such as social media, email marketing, and content marketing to reach your target audience.
11. Launch and Publish: When you’re satisfied with the setup and have completed all the necessary steps, it’s time to hit the launch button. Publish your Shopify store and make it accessible to customers.
12. Monitor and Improve: Regularly analyze the performance of your Shopify store. Monitor sales, traffic, customer reviews, and user behavior. Use the insights gained to make improvements and optimize your store for better results.
By following this Shopify checklist, you’ll be well-prepared to launch your e-commerce store and enjoy a successful online business. Don’t forget to share your store with friends, family, and online communities to gain higher visibility.
1 Choose the Shopify plan that suits your business needs
When setting up your Shopify store, it is important to choose the right plan that contains all the necessary features required for your e-commerce business. Shopify offers different pricing plans, each with its own set of features and benefits, allowing you to find the one that best suits your needs.
Before making your final decision, it is important to thoroughly go through each plan option. Take the time to check the features and conditions that come with each plan by reviewing Shopify’s pricing page. By doing so, you can ensure that you select the plan that provides the necessary elements to complete the setup process and launch your store.
Moreover, when choosing a plan, you need to consider your business preferences for things like quantity markings, shipping conditions, and payment methods. Each Shopify plan allows you to set up and customize these preferences, ensuring that your store aligns with your specific requirements.
Don’t worry about getting it right the first time. Shopify offers a 14-day free trial that allows you to test and configure your store without any worry. This trial period gives you ample time to add products, configure your theme, and make sure everything is set correctly before publishing your store.
Additionally, when setting up your Shopify store, it is essential to have a good checklist to guide you through the process. This checklist should contain the essential steps like creating a Shopify account, setting up your store, configuring your theme, organizing your products into collections, ensuring proper payment methods are set up, and checking that all general preferences are correct.
| Step 1 | Create a Shopify account and choose a plan that suits your business needs. |
| Step 2 | Set up your store by customizing the theme, adding necessary elements, and configuring general preferences. |
| Step 3 | Organize your products into collections and set up proper pricing and quantity markings. |
| Step 4 | Ensure that payment methods are correctly set up, providing your customers with hassle-free and secure checkout options. |
| Step 5 | Test and review your store to make sure everything is functioning as expected. |
| Step 6 | Trust your store to a team of e-commerce experts who can provide guidance and assistance, if needed. |
| Step 7 | When you’re ready, click the “Publish” button to make your store live and open for business. |
In conclusion, choosing the right Shopify plan is a crucial step in the process of launching your online store. Take the time to explore and compare the options, ensuring that the plan you select contains all the necessary features, preferences, and payment methods that will suit your business needs. With Shopify’s easy-to-use platform, you can set up and customize your store in no time, making it ready for your customers to enjoy a seamless shopping experience.
2 Set up your Payment Options
Setting up your payment options is an essential step in launching your Shopify store. It allows your customers to easily make payments for the products they purchase from your online store. By ensuring a smooth and reliable payment process, you can increase your sales and provide a seamless shopping experience for your customers.
Here is a simple guide to help you set up your payment options:
- Go to your Shopify admin dashboard and click on “Settings”.
- From the dropdown menu, select “Payment providers”.
- In the “Accept payments” section, you can choose the payment gateway that suits your business. Shopify provides several options, such as Shopify Payments, PayPal, and others. Choose the one that best meets your requirements.
- If you have an existing payment account, click on “Select an alternative payment method” to integrate it with your Shopify store.
- Configure your account settings by providing the necessary information, such as your email address and business details.
- Check the pricing plans and transaction fees associated with each payment gateway to make sure they align with your business goals and budget.
- Ensure that your terms and conditions and privacy policy clauses are clearly stated and easily accessible on your website. They should contain the necessary information to protect both you and your customers.
- Test your payment process by placing a test order to verify that everything is working smoothly. This way, you can check if your customers can easily navigate through the checkout process and complete their purchase.
- Customize your checkout page to make it visually appealing and compelling for your customers. You can choose a theme and customize the layout to match your brand and provide a more enjoyable shopping experience.
By following this checklist, you ensure that your payment options are set up correctly, enabling you to launch your Shopify store with confidence. Don’t forget to regularly check and manage your orders, as well as refresh and update the contents of your website. Customer reviews and feedback are valuable sources of information that can help you improve your business and make necessary adjustments.
In conclusion, setting up your payment options is a crucial step in the process of launching your Shopify store. It ensures a seamless and secure checkout experience for your customers and helps you build trust and credibility. Take the time to configure and customize your payment settings, and enjoy the benefits of running a successful e-commerce business!
3 Add your Products in a compelling way
Once your Shopify store is up and running, the next essential step is to add your products. This process involves a series of steps that will ensure your products are displayed in a compelling and organized way for customers to browse and purchase.
1. Create a collection: Before adding individual products, it’s a good idea to create collections. Collections group similar products together, making it easier for customers to navigate your store. For example, you could have collections based on product type, theme, or even a specific collection based on a holiday sale.
2. Add product information: When adding each product, provide a clear and concise description that highlights its features and benefits. Be sure to include important details such as product dimensions, material, and any customization options. You can also include customer reviews and ratings to build trust and credibility.
3. Set pricing and quantity: Adjust the pricing of your products based on your profit margins and the value you’re providing to customers. Consider any applicable taxes, shipping fees, or discounts that may apply. Specify the quantity of each product you have in stock to manage inventory effectively.
4. Customize product pages: Take advantage of Shopify’s customizable options to create professional and visually appealing product pages. Choose a layout that best suits your products and brand aesthetic. Add relevant images, videos, and additional product variations to give customers a better idea of what they’re purchasing.
5. Test the checkout process: Before making your store available to customers, it’s important to test the entire checkout process. Go through the steps of adding products to the cart, entering customer information, and completing payment. This will ensure a smooth and hassle-free experience for your customers.
6. Verify payment and shipping options: Make sure you have reliable payment gateways set up to receive payments from customers. Similarly, choose convenient and trustworthy shipping options that align with your customers’ preferences. Don’t forget to check and document your store’s terms and conditions regarding returns and exchanges.
7. Publish and promote your products: Once you have added and customized your products, it’s time to publish them on your website. Open your online store to the world and start promoting your products through various marketing channels. Use social media, email marketing, and other strategies to drive traffic to your store and increase sales.
In general, adding products to your Shopify store is a crucial aspect of making your online business a success. Consider these steps as you add your products and ensure that your customers have a compelling shopping experience.
4 Customize the Theme
Once you have chosen the best template for your Shopify store, it is necessary to customize the theme to make it suit your preferences and needs. Shopify offers a wide range of customizable themes to choose from, so you can adjust the look and feel of your store in the best way possible.
To customize your theme, go to the “Themes” section of your Shopify admin panel. Here you will find all the themes you have installed for your store. Click on the “Customize” button next to the theme you want to modify.
In the theme customization panel, you can make changes to various aspects of your store’s design such as the logo, colors, fonts, layout, and more. You can also add or remove sections to create a compelling and professional-looking store.
Moreover, you can set up the general settings like currency, language, and country-specific options. These settings are essential for making your store relevant to your target audience.
When customizing your theme, don’t worry about making mistakes. Shopify saves your changes automatically, so you can always go back or refresh the page if needed.
Some of the essential theme customization options include:
- Uploading your logo and adjusting its size and placement.
- Setting the colors of various elements on your store, such as the background, text, and buttons.
- Managing the layout of your store’s pages, including the home page, product pages, and cart page.
- Customizing the product display, such as showing the quantity, price, and add to cart button.
- Adding contact information and relevant pages like about us, shipping and returns, and customer reviews.
- Setting up payment and shipping preferences to provide a reliable and seamless shopping experience for your customers.
- Adding any other features or sections that you may need for your specific product or business.
Once you have customized your theme to your satisfaction, you can publish it and run your store. However, before launching, it is a good idea to test the ordering process, payment options, and the overall functionality of your store.
By customizing your Shopify theme, you can create a unique and professional online store that will attract customers and drive sales. Take the time to make your store stand out and enjoy the rewards of a successful launch!
📌Sources: Shopify- Setting Up Your Shopify Store: The Ultimate Guide
5 Configure Shipping and Taxes
When launching your Shopify store, it’s essential to consider how you will configure shipping and taxes. These two elements are crucial for your business, as they determine how your customers will receive their products and how they will be charged for them.
To configure shipping, go to the “Settings” tab in your Shopify dashboard and click on “Shipping and delivery.” Here, you can set up shipping rates based on the weight, size, and destination of your products. Make sure to complete all the necessary information, such as your shipping origin and shipping zones.
Moreover, when setting up shipping, you can take advantage of Shopify’s built-in shipping calculator, which makes it easy to calculate accurate shipping rates for your customers. You can also customize your shipping options by adding additional services like expedited shipping or international shipping.
Next, let’s talk about taxes. Click on the “Taxes” tab in your Shopify dashboard to configure your tax settings. Shopify will provide you with a default tax setup based on your store’s location, but you can easily customize it according to your preferences. Verify if the tax rates are correct for your country and make any necessary adjustments.
It’s also a good idea to document and share these tax rates with your customers. You can include them in your website’s terms and conditions or create a separate page for tax information. This builds trust with your customers and ensures they have all the relevant information when making a purchase.
Finally, when it comes to pricing your products, make sure to account for shipping costs and taxes in your pricing strategy. You can choose to offer free shipping or include shipping costs in the product prices. Similarly, you can either add taxes to the product prices or display them separately at checkout.
By configuring shipping and taxes correctly, you’ll ensure a smooth checkout process for your customers and avoid any unexpected surprises. It’s always a good idea to test the entire order process from start to finish to verify that everything works as expected. Create a test customer account and go through the entire checkout process to make sure that the pricing, shipping, and tax calculations are accurate.
To provide a more professional and trustworthy e-commerce experience, consider also configuring your payment preferences. Shopify offers various payment gateways that allow your customers to easily and securely pay for their orders. Choose the payment providers that suit your business and enable them in your Shopify settings.
Once you have completed all the steps in this checklist, you’re ready to publish your Shopify store and launch your online business. Your store is now set up with a reliable shipping and tax system, making it easier for customers to purchase your products.
Enjoy the process of running your Shopify store and remember to refresh your knowledge by referring to Shopify’s user guide and other reliable sources. These will help you optimize your store’s performance and stay up to date with the latest e-commerce trends and features.
6 Set up Customer Accounts
When launching your Shopify store, it’s important to set up customer accounts to provide a better shopping experience for your customers and manage their information effectively. In this section, we will guide you on how to set up customer accounts and what to consider while doing so.
The first thing you need to do is to make sure that the customer account functionality is enabled in your Shopify store. To do this, go to the “Settings” tab on your Shopify dashboard, then click on “Checkout” from the options provided. Scroll down and look for the “Customer accounts” section. Make sure the “Accounts are optional” checkbox is selected. This will allow customers to either create an account or checkout as a guest.
Next, you need to choose the right customer account option that suits your business needs. There are two options available:
| Accounts are required | This option forces customers to create an account before they can make a purchase. This can help you build a customer database, but it may also deter some customers who prefer a quick checkout process. |
| Accounts are optional | This option allows customers to choose whether they want to create an account or checkout as a guest. It provides a more streamlined checkout process, but you may miss out on valuable customer information. |
After setting up the customer account option, you can customize the customer registration form according to your needs. You can add additional fields such as contact number or address to collect more information from your customers. Just go to the “Customers” tab, then click on “Customer registration settings”. From there, you can add or delete the fields you require.
It is essential to provide a clear document of your store’s terms and conditions on the checkout page. This document should contain all relevant clauses and information that customers need to know before making a purchase. Make sure the terms and conditions are easily accessible and visible to your customers.
Moreover, you need to verify the trustworthiness of your customers by checking their contact pages or other relevant sources. This will help you protect your business from any potential fraud or scams. You can also consider adding a trust badge or trust marks on your website to increase customer trust and confidence.
In addition, it is crucial to manage the contents of your customer’s shopping cart. You can provide options for customers to easily add or remove products, change the quantity, and even provide an option to save the cart for later. This will enhance their shopping experience and encourage them to make more purchases.
Finally, make sure to consider the different shipping options available in your country and choose the best ones that suit your business needs. Shipping can greatly affect your profit margin, so research and compare prices to choose reliable and cost-effective shipping methods. Additionally, consider the taxes that you need to apply based on your country’s regulations.
By setting up customer accounts, you can launch your Shopify store with a better customer experience and enjoy the benefits of a more efficient checkout process. Don’t forget to regularly check and analyze your customer account data to make necessary improvements and optimize your store for higher profits.
7 Add your Terms and Conditions Document
When setting up an online store, it’s essential to have a terms and conditions document in place. This document outlines the rules and regulations that customers must agree to when making a purchase from your e-commerce store. It helps provide trust and security to your customers, ensuring that both parties are aware of their rights and responsibilities.
Here are some steps to help you add your terms and conditions document into your Shopify store:
Step 1: Choose or create a terms and conditions document that is relevant to your business and complies with the laws of your jurisdiction. You can find professional templates and free sources online to guide you in creating a good document.
Step 2: Configure the settings of your Shopify store. Go to “Settings” and then click on “Legal.” Here, you can easily customize the legal elements of your store.
Step 3: Under the “Checkout” section, you will find the option to add your terms and conditions. Click on “Manage checkout language” and scroll down to find the “Policies” section.
Step 4: In the “Policies” section, you can add a hyperlink to your terms and conditions document. You can host the document on a separate webpage and provide the URL, or you can copy and paste the document’s contents directly into the text box.
Step 5: Verify that the terms and conditions document is correct and contains all the necessary clauses. Make sure the document clearly states the rights and obligations of both the buyer and the seller.
Step 6: Publish your changes. Once you’ve added your terms and conditions document, click on the “Save” button to apply the changes to your store.
Step 7: Share your terms and conditions document. It’s important to make sure that your customers can easily access and read the document. One way to do this is by including a link to the terms and conditions in the footer of your website.
By adding your terms and conditions document, you are ensuring that your e-commerce store is running in a legal and trustworthy manner. Customers will have a clear idea of what they are purchasing and the rules they need to follow. Moreover, having a terms and conditions document in place can help protect your business in case of disputes or issues with orders.
Don’t worry if you’re not familiar with legal jargon or unsure about what to include in your terms and conditions. There are options to hire a professional to help you or use templates that you can adjust to fit your specific needs. The important thing is to have a legally binding document that protects both you and your customers.
Follow this checklist and enjoy a worry-free launch of your Shopify store!
A Simple Shopify Checklist Template
Launching your Shopify store can be an exciting and rewarding experience. However, it’s essential to ensure that you have all the necessary elements in place before you start selling. This simple checklist template will guide you through the process and help you make sure you don’t miss anything important.
1. Set up your Shopify account: Sign up for a Shopify account and choose a plan that suits your preferences and budget. Make sure to enter the correct country and currency details.
2. Choose a professional theme: Select a Shopify theme that reflects the style and vibe of your brand. A good theme will help you create a compelling and trustworthy e-commerce website.
3. Add products to your store: Add all the products you have in your inventory to your Shopify store. Make sure to include detailed descriptions, high-quality images, and relevant information for each product.
4. Manage your product collection: Organize your products into collections and categories to make it easier for customers to navigate your store. This will help them find what they’re looking for and increase the chances of making a purchase.
5. Verify your payment options: Set up the payment process and test it to ensure that everything is working correctly. Provide different payment options to cater to the preferences of your customers.
6. Complete your store’s terms and conditions: Include all the necessary clauses and policies in your store’s terms and conditions. This will help protect your business and clarify the rights and responsibilities of both you and your customers.
7. Check your checkout process: Go through the checkout process as a customer to make sure everything is smooth and user-friendly. Test all the necessary fields, such as shipping address, quantity, and payment details.
8. Run a test order: Place a test order to verify that the entire order fulfillment process works correctly. Make sure the order details are saved in your system, and you can manage orders effectively.
9. Refresh and customize your store: Make any necessary adjustments to your store’s settings and preferences. Customize the design and layout to create a unique and appealing storefront.
10. Trust the experts: If you’re feeling overwhelmed or unsure about any step, don’t hesitate to reach out to Shopify’s support team or consult the extensive documentation and resources available. They’re always ready to help you succeed.
Once you’ve completed this checklist, you’re ready to launch your Shopify store and start making a profit. Enjoy your e-commerce journey, and remember that continuous improvement is key to running a successful online business!
Run a Checkout Page Test
When launching your Shopify store, it’s necessary to test the checkout page to ensure that the process is seamless for your customers. This step is crucial as it ensures a smooth shopping experience, higher conversion rates, and customer satisfaction.
To run a checkout page test, you’ll first need to have products in your store. If you haven’t set up your product collection yet, take some time to configure it according to your business plan and what you want to offer to customers.
1. Open your Shopify store and go to the “Products” section. Make sure you have the necessary products available for customers to purchase and add them to your store’s inventory.
2. Once you have your products set up, go to the “Checkout” settings under “Settings” in the Shopify admin menu. Here, you can customize various elements of your checkout page, such as adding shipping and payment options, configuring taxes, and adjusting the general settings.
3. Before launching your store, it’s a good idea to inspect and test your checkout page thoroughly. Start by going through the shopping experience as if you were a customer. Add products to your cart, go through the checkout process, and make test orders to ensure that everything is working correctly.
4. Check the contents of the cart and make sure that the pricing, shipping, and taxes are all correct. Verify that the terms and conditions are clearly visible, and consider adding a trust mark or trust badges to your checkout page to instill confidence in your customers.
5. Test the payments by choosing one or two different payment methods and going through the payment process. Ensure that the necessary payment gateways are configured correctly, and contact Shopify support if you encounter any issues.
6. Customize the checkout page to make it more professional and to match your store’s overall theme and branding. You can choose a relevant theme and customize it as needed to reflect your brand image. Don’t forget to configure any additional checkout options such as abandoned cart recovery and order tracking.
7. Once you’ve completed these steps and are satisfied with the checkout page’s performance, you’re ready to launch your Shopify store. Make sure to go through your saved settings one more time to ensure everything is in order before publishing it online.
By running a checkout page test, you’ll be able to identify and resolve any issues or inconsistencies before customers start making real purchases. It ensures a smooth checkout experience, increases trust, and boosts sales for your e-commerce business.
| Steps to Run a Checkout Page Test: |
|---|
| 1. Have products in your store |
| 2. Go to “Checkout” settings and customize |
| 3. Test the checkout process as a customer |
| 4. Verify cart contents, pricing, and clauses |
| 5. Test different payment methods |
| 6. Customize the checkout page for a professional look |
| 7. Launch your Shopify store after final checks |
Check Your Product and Collection Pages
When launching your Shopify store, it’s essential to check your product and collection pages to ensure they are set up correctly. These pages are where your customers will find and purchase your products, so it’s important to make sure everything is in order.
1. Verify the product details: Go through each product page to make sure all the necessary information is filled out correctly. Check that the product names, descriptions, and prices are accurate and up to date. If you have variant options, such as size or color, double-check that the quantities and prices are set correctly for each option.
2. Customize your product pages: Use the built-in customization features of your theme to make your product pages visually appealing and easy to navigate. Choose a layout that suits your business and preferences. Add features like a product image gallery, customer reviews, and a trust badge to build trust and make the shopping experience more compelling for your customers.
3. Manage your collections: Collections are groups of products that are organized based on specific criteria. Make sure you have created relevant collections and assigned the appropriate products to each collection. This will help your customers find products that are of interest to them and make the shopping process smoother.
4. Test the checkout process: Before you launch your store, it’s crucial to go through the checkout process yourself to make sure it’s working correctly. Verify that your payment gateway is set up properly and that the shipping options and conditions are clear and accurate. Run a test order to ensure everything is functioning as it should.
5. Publish your product and collection pages: Once you have completed all the necessary checks and adjustments, it’s time to publish your product and collection pages. Click the “Publish” button to make them visible on your website. Double-check that everything looks and works as intended before opening your store to the public.
By checking your product and collection pages thoroughly before launch, you can ensure a professional and reliable shopping experience for your customers. This will increase the trust in your brand and lead to higher sales and profit margins. Take the time to document your setup and share it with your team for future reference and to make the process smoother when adding new products or making changes to your store.
Share with us your idea
When making the decision to open an online store, it’s important to have a clear idea of what you want to sell and who your target customers are. Before setting up your Shopify store, take some time to brainstorm and define your niche. Consider what products or services are in demand, what sets your offerings apart from competitors, and what types of customers you want to attract.
Once you have a solid idea in mind, it’s time to start the process of setting up your Shopify store. The first step is to create a Shopify account and choose a theme or template that best fits the overall style and aesthetic you want for your online store. Shopify offers both free and paid themes, so take some time to explore the options and choose one that aligns with your brand and preferences.
After selecting a theme, it’s important to properly set up your Shopify store. This includes adding your products to the store, managing inventory and quantity, setting up shipping and delivery options, and configuring payment gateways. Shopify makes it easy to complete these steps with a user-friendly interface and comprehensive guides and tutorials.
Moreover, you’ll want to ensure that your Shopify store contains all the necessary elements for a professional and compelling online shopping experience. This includes having clear and concise product descriptions, high-quality product images, customer reviews and ratings, and a user-friendly checkout process. Take some time to check and adjust your store’s layout and design to make sure it’s visually appealing and easy to navigate. Pay attention to small details like font styles, colors, and margin adjustments to make sure everything looks correct.
Furthermore, it’s important to consider the needs of your customers and make sure your store’s features and settings are relevant to their preferences. You may want to offer special promotions, discounts, or loyalty programs to encourage repeat purchases. Additionally, consider adding social proof elements like customer testimonials or trust badges to build trust and credibility with potential buyers.
In order to run a successful e-commerce business, you’ll also need to consider some legal and administrative aspects. This includes setting up terms and conditions, shipping clauses, and return policies. Make sure to check the legal requirements in your specific location and adjust these clauses accordingly. It’s also a good idea to have reliable customer support options in place, such as a contact page or live chat feature, to address any inquiries or concerns.
Finally, before you publish your Shopify store and start making sales, it’s important to go through a checklist to ensure everything is in order. Double-check that your product listings are accurate and up-to-date, your checkout process is functioning correctly, and your shipping and payment settings are properly configured. It’s also a good idea to test the purchasing process from the perspective of a customer to make sure it’s smooth and seamless.
In conclusion, launching a Shopify store can be an exciting and rewarding endeavor. By following these steps and considering the elements discussed above, you’ll be well on your way to creating a successful online store that meets the needs and preferences of your customers. If you need further help or guidance, Shopify offers a wealth of resources and support to help you along the way. Good luck!
| Step | Description |
|---|---|
| 1 | Create a Shopify account and choose a theme. |
| 2 | Add your products to the store. |
| 3 | Manage inventory and quantity. |
| 4 | Set up shipping and delivery options. |
| 5 | Configure payment gateways. |
| 6 | Check and adjust your store’s layout and design. |
| 7 | Consider the needs of your customers and customize your store accordingly. |
| 8 | Set up terms and conditions, shipping clauses, and return policies. |
| 9 | Implement customer support options. |
| 10 | Double-check all settings and publish your Shopify store. |
| 11 | Test the purchasing process from the perspective of a customer. |
Test a Cart Page
When setting up an online store, it is crucial to test the functionality of your cart page. This is where your customers will have the opportunity to add products to their cart and proceed to checkout. To ensure a smooth and reliable shopping experience for your customers, you need to test the cart page thoroughly before launching your Shopify store.
To test a cart page, you will need to have some products added to your store. Make sure you have at least 5 products in your collection that you can use for testing purposes. If you don’t have actual products yet, you can configure test products to simulate the buying process.
First, you need to make sure that the cart page is set up correctly. Open your Shopify admin dashboard and go to the “Online Store” section. From there, navigate to the “Themes” tab and open the “Actions” dropdown menu for your current theme. Select “Edit code” to access the HTML template of your cart page.
In the cart template, you will find the code that displays the contents of the cart, such as the product name, price, quantity, and total price. It is important to verify that these elements are correct and displayed in a compelling way to your customers. Adjust the template if needed to ensure a professional and user-friendly layout.
Next, check the settings for the cart page. Make sure the pricing and payment options are configured according to your business needs. Shopify provides a range of options for accepting payments, including a built-in payment system called Shopify Payments. You can also integrate other payment gateways to provide more flexibility for your customers.
Along with the pricing and payments, don’t forget to set up the terms and conditions for your store. These can be general terms that apply to all orders, or specific terms for certain products or countries. Consider including clauses for refunds, returns, and shipping policies to protect your business and provide clarity to your customers.
Once you have made all the necessary adjustments and configurations, it’s time to test the cart page. Add some products to your cart and go through the checkout process as if you were a customer. Make sure you can easily adjust the quantity of the products, apply any discounts or promotions, and proceed to the payment step without any issues.
During the testing process, pay attention to every step and ensure that the cart page is running smoothly. Verify that the correct products and quantities are saved, and that the total price is calculated correctly. You can also check if any additional features, such as abandoned cart recovery, are working as expected.
By thoroughly testing your cart page, you can identify and correct any issues before your store goes live. This way, you can provide a reliable and user-friendly shopping experience for your customers, making it more likely for them to make a purchase and for you to make a profit.
Check an Account Page
When launching your Shopify store, it’s important to check your account page to ensure everything is setup correctly. Here are 7 steps to follow:
- Ensure that you have a Shopify account. If you don’t, you can easily sign up on the Shopify website.
- Adjust your country setting. Shopify will automatically set this based on your IP address, but make sure it’s correct.
- Check the general settings of your account. This is where you can configure various aspects of your store, such as the currency and payment options.
- Set up your store’s theme. Shopify provides a variety of free and paid themes to choose from. Select the one that best suits your business and adjust the elements and layout to your liking.
- Add your products to the store. You can easily create product listings and include important details such as price, quantity, and product conditions. Make sure to include any terms and conditions that apply to your products.
- Configure your cart and checkout settings. This is where you can specify how customers can make purchases and set up any additional features, such as saved carts and discount options.
- Check the account page layout. This is where customers can create accounts, view order history, and make any necessary changes. Ensure that the page is professional and instills trust in your customers.
By completing these steps, you will be able to launch your Shopify store with confidence. It’s important to test your store thoroughly before launching and make any necessary adjustments based on customer feedback. Moreover, consider adding customer reviews and trust elements to enhance the shopping experience. Take your time and enjoy the process of running your e-commerce business with Shopify!
Refresh Your Contact Page

A well-designed and informative contact page is an essential part of any successful e-commerce business. It not only provides an easy way for your customers to get in touch with you, but also allows you to manage their inquiries and ensure customer satisfaction. Therefore, when launching your Shopify store, it’s important to take the time to refresh your contact page and make sure it meets all the necessary requirements.
To begin with, you’ll need to choose a Contact Us template from the available options. Shopify provides several templates that you can easily customize to suit your business needs. Make sure to check the features of each template and choose the one that best fits your website and customer base.
Once you’ve selected a template, you’ll need to customize it by adding your business information. This includes your company name, address, phone number, and email address. Moreover, you can provide additional information such as your business hours, social media accounts, and any other contact options that are relevant to your customers.
It’s also important to make sure that the contact form on your page is well-designed and easy to use. Test it yourself to ensure that all the necessary fields are clearly marked and that there are no errors or bugs that could hinder customer inquiries.
Additionally, you should consider adding a checkbox or button that allows customers to sign up for your newsletter or receive updates about your products and sales. This not only helps you build a customer database but also provides an opportunity to market to potential customers in the future.
One other thing to keep in mind is that your contact page should include a link to your terms and conditions. This is important for ensuring that customers are aware of the policies and guidelines that apply to their purchases. It’s also a good idea to provide a link to your privacy policy, as this helps build trust with your customers.
Finally, before launching your Shopify store, don’t forget to test your contact page to make sure all the links and forms are working properly. With everything in place, you can confidently open your business and start processing orders.
By refreshing your contact page and ensuring that it provides the necessary information and features, you’re marking the final check on your Shopify launch checklist. With a professional and easy-to-use contact page, you’re ready to share your products with customers from all over the world. So, go ahead, publish your store, and enjoy the process of running a successful e-commerce business!
Verify your Product page
When launching your Shopify store, it’s important to verify and optimize your Product page to enhance the shopping experience for your customers. Here are some steps to follow:
Step 1: Set up your Product page
Choose the best template that suits your e-commerce business and make sure to customize it according to your brand. Add all the necessary features like pricing options, product images, and a clear product description. Don’t forget to configure the shipping and payment options to make the purchasing process simple for your customers.
Step 2: Add relevant product information
Provide your customers with all the necessary details about your products. This includes product features, specifications, and any additional information that may help them make an informed purchase. Include any customer reviews or testimonials to build trust and credibility.
Step 3: Check for any marks or open order
Before launching your store, go through all the product pages to ensure that there are no pending orders or marks that might confuse your customers. Refresh the pages and make sure everything is up to date. This step helps in ensuring a seamless shopping experience for your customers.
Step 4: Verify pricing and quantity
Double-check the pricing and quantity of each product on the page. Make sure you’ve set the right prices and have sufficient stock to fulfill orders. This step ensures that there are no discrepancies or issues during the checkout process.
Step 5: Test the checkout process
Before launching your store, it’s essential to test the checkout process to ensure that everything works smoothly. Make a test purchase and go through the entire buying process. This helps you identify any issues or glitches with the payment gateway or shipping options.
Step 6: Provide a simple and reliable payment system
Choose a payment gateway that is popular and reliable. Integrate it into your store, so customers can easily make payments. Make sure to offer multiple payment options to cater to different customer preferences.
Step 7: Enjoy your verified Product page
Once you’ve completed all the necessary steps to verify your Product page, you can confidently launch your Shopify store. Your customers will appreciate a seamless shopping experience, and you can focus on managing your sales and growing your business.
By following this guide, you ensure that your customers can enjoy a simple and efficient shopping experience on your Shopify store. Verify your Product page to provide customers with the necessary information and options they need to make a purchase with confidence.


