

Building an Android APK (Android Application Package) allows you to distribute your app to Android users. An APK file is the installation package that contains all the necessary files and code for your app to run on an Android device.
If you want to create an APK file, you can follow these steps:
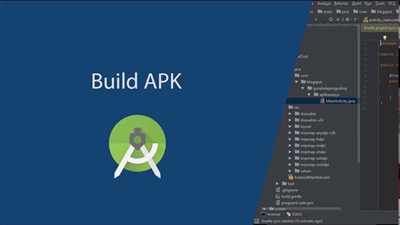
Step 1: Open Android Studio and navigate to the project you want to build. Make sure your project is set up correctly, with the necessary dependencies and configuration.
Step 2: In the top menu, click on “Build” and then select “Build Bundle(s) / APK(s)”.
Step 3: In the prompt that appears, select the “Build APK(s)” option.
Step 4: Android Studio will start the build process, which involves compiling your code and resources, creating the APK file, and signing it with a digital certificate. This may take some time.
Step 5: Once the build is successfully completed, you can find the generated APK file in the project directory under the “app” folder, specifically in the “build/outputs/apk/debug” folder (for a debug build) or in the “build/outputs/apk/release” folder (for a release build).
After following these steps, you should have a fully functional APK file that can be installed on Android devices. Keep in mind that if you’re developing with Flutter or other frameworks, the steps may vary slightly, but the general process remains the same.
Additionally, if you encounter any errors during the build process, make sure to check the error message for any specific instructions or troubleshooting steps. Common issues can include missing dependencies, misconfigured build files, or conflicts with other installed software.
By successfully building an APK, you can now distribute your Android app to users via various app stores, or distribute it directly by sharing the APK file.
Solved Android SDK error when executing step “Build Android APK”

If you encounter an Android SDK error when executing the step “Build Android APK” in your Android application development process, don’t worry. This article will guide you through some common issues and their solutions.
- Issue: “Cannot find the ‘keytool’ command”
- Issue: “The system cannot find the path specified”
- Issue: “No suitable Java Virtual Machine (JVM) found”
- Issue: “Keystore file not found”
- Issue: “Gradle build failed with an error”
In some cases, the ‘keytool’ command may not be found when trying to build the APK file. This command is required for generating a signing certificate.
Solution: Make sure that the Android SDK is properly installed and the ‘keytool’ command is accessible from the command prompt or terminal. You can check the SDK path by going to “File” > “Project Structure” > “SDK Location” in Android Studio.
This error occurs when the path to the key file specified in the build.gradle file is incorrect or the file is not found.
Solution: Verify that the path to the key file is correct and the file exists in that location. Also, check if the key file is properly referenced in the build.gradle file.
This error indicates that the Java Development Kit (JDK) is not installed or it is not configured correctly.
Solution: Install the JDK and make sure that the JAVA_HOME environment variable is set to the correct JDK path. You can verify the JDK installation by running the “java -version” command in the command prompt or terminal.
If the keystore file specified in the build.gradle file is not found, this error will be displayed.
Solution: Check the keystore file’s location and make sure that it exists at that path. If not, provide the correct path to the keystore file in the build.gradle file.
If the Gradle build fails with an error, it may be due to various reasons such as incompatible dependencies, incorrect configurations, or missing files.
Solution: Review the error message in the Gradle console and address the specific issue mentioned. This could involve resolving dependency conflicts, fixing configuration settings, or adding the missing files.
By following these steps, you should be able to resolve most of the common Android SDK errors encountered when building an APK file. Always ensure that your Android SDK, Android Studio, and related tools are up to date for the best development experience.
Release APK
When building an Android app, it is important to create a release APK in order to distribute your app to users. The release APK is a compiled version of your app that is ready for installation on Android devices.
Before generating the release APK, make sure you have set up the necessary security features for your app. This includes creating a keystore file, which is a secure storage for your app’s certificate and other sensitive data.
To generate a release APK in Android Studio, follow these steps:
- Open your Android app project in Android Studio.
- Click on “Build” in the top menu.
- Click on “Generate Signed Bundle / APK” option.
- Select “APK” and click “Next”.
- In the “Key store path” field, click on the “…” button and select your keystore file.
- Fill in the necessary information, such as the key store password, key alias, and key password.
- Click “Next” and select the build type (release).
- Choose the modules you want to include in the release APK.
- Click “Finish” to start the release APK generation process.
Android Studio will then generate the release APK for your app. The generated APK will be located in the “app” folder of your project.
It’s important to note that when executing the release APK, you may encounter some issues related to signing and certificate. These issues can be resolved by following the steps mentioned above and ensuring that the keystore file you provided is correct.
In addition, if you are using a Flutter app or a native Android app, you can also build the release APK using the command line. In this case, you need to navigate to the project directory in the command prompt or terminal and execute the flutter build apk or ./gradlew assembleRelease command, respectively.
By successfully executing these steps, you will have a release APK file which can be exported and distributed through Google Play Store or any other platform of your choice. Your users can then install the app on their Android devices and access its features without any issues.
Step 2: Configuring the build.gradle file
Once you have successfully installed Android Studio and Flutter SDK, the next step is to configure the build.gradle file for your Android app. This file contains all the necessary configurations and dependencies required for building your application.
To configure the build.gradle file, follow these steps:
Step 1: Open your project in Android Studio and navigate to the android directory.
Step 2: Open the build.gradle file located in the app directory.
Step 3: In the android block, fill in the values for the compileSdkVersion, minSdkVersion, and targetSdkVersion according to your requirements.
Step 4: In the same file, locate the defaultConfig block and ensure that the applicationId is set to your package name.
Step 5: Next, you need to configure the signing of your app. Scroll down to the bottom of the file and add the following lines:
android {
...
signingConfigs {
release {
storeFile file('path/to/your.keystore')
storePassword 'your_keystore_password'
keyAlias 'your_key_alias'
keyPassword 'your_key_password'
}
}
buildTypes {
release {
signingConfig signingConfigs.release
}
}
}
Replace path/to/your.keystore with the location of your keystore file, and set the respective passwords and alias as per your keystore file configuration.
Note: Make sure to keep your keystore file and passwords secure, as they are used for signing your app with a release certificate.
Step 6: Save the changes to your build.gradle file.
By following these steps, you have successfully configured the build.gradle file for your Android app. The next step is to generate the release APK of your application.
Sources
When building an APK, there are a few sources that you need to be aware of:
1. Certificate: A certificate is required to sign your APK. This ensures the security and authenticity of your app.
2. APK: The APK file is the package file format used by Android to distribute and install apps onto devices.
3. Security: Building an APK involves various security measures to protect the app and user data from unauthorized access.
4. Google: Google provides tools and documentation to help with the APK building process, such as Android Studio and the Google Play Developer Console.
5. Button: When building an APK, you may encounter different buttons and options for executing certain actions, such as building, signing, or generating the APK.
6. Media and Widgets: APKs may contain various media files, such as images, audio, or video, as well as interactive widgets for the app’s user interface.
7. Alias: An alias is a unique identifier for the keystore used to sign the APK. It helps ensure the integrity and security of the APK.
8. build.gradle: The build.gradle file is a configuration file in Android projects that specifies build settings and dependencies.
9. Signed APK: A signed APK is an APK that has been signed with a certificate and is ready for distribution.
10. Successfully: Building an APK involves following specific steps and resolving any issues that may arise to ensure the APK is built successfully.
11. Sources found: When building an APK, various sources are utilized, such as code, libraries, resources, and assets.
12. Same issue: If you encounter the same issue when building an APK, you may need to investigate further and find a solution.
13. Your_key_alias: Your_key_alias is the alias used to identify the signing key when building the APK.
14. Resolved issues: When building an APK, you may face certain issues that need to be resolved before the APK can be generated successfully.
15. APK Generation Path: The APK generation path is the location where the generated APK file is saved on your system.
16. Screenshots: Screenshots are images that showcase your app’s features and design. They can be included in the APK.
17. Build Native Step: The build native step is a part of the APK building process that involves compiling native code for the target device.
18. Related Data: APKs can store related data such as app preferences, databases, and configuration files.
19. Clicking Next: In the APK building process, you need to click the “Next” button to proceed to the next step.
20. Class Path: The class path is the location where the necessary classes and dependencies are stored for building the APK.
By following these sources and steps, you will be able to build your APK successfully without encountering any errors or issues.


