

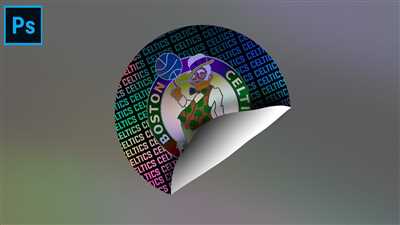
Are you ready to add some sparkle and life to your crafts? With holographic stickers, you can create eye-catching designs that will make anything they’re applied to stand out. Whether you want to customize your laptop, phone case, or even create unique window decals, holographic stickers are a fun and versatile way to add an extra touch of vibrancy to your projects. In this tutorial, we will guide you step-by-step through the process of making your own holographic stickers.
To get started, you will need a few materials. First, gather the holographic vinyl sheets in the colors of your choice. You can find a wide range of colors available, from metallics to shifts that add depth and dimension to your designs. Next, you’ll need a vinyl cutting machine such as Cricut, or you can also use scissors if you prefer. Additionally, you’ll need a self-adhesive, waterproof vinyl material to ensure your stickers will last. Lastly, gather your favorite drawing supplies, as you’ll have the option to create your own unique designs or use pre-made templates.
Before you begin, it’s important to prepare your workspace. Make sure your cutting board or working surface is clean and free from any dust or debris that could interfere with the adhesion of the vinyl. You may also want to gather some swatch sheets or opaque materials to test your designs and make any necessary adjustments before cutting the final sticker sheets.
Now that everything is ready, it’s time to dive into the process! First, open the design software on your cutting machine or computer. If you’re using a cutting machine, follow the manufacturer’s instructions on how to upload or create your design. If you’re using scissors, draw your design on the back of the vinyl and carefully cut it out. Remember to keep your designs within the bounds of the sticker sheets, leaving some space around the edges to ensure a clean finish.
Once you have your designs ready, it’s time to cut the vinyl sheets. Place the holographic vinyl sheets on your cutting board, making sure they are securely in place. Follow the machine’s instructions to cut your designs into the vinyl sheets. If you’re using scissors, carefully cut along the outlines of your designs. Take your time and double-check that everything is cut correctly before moving on.
Now comes the fun part – peeling off the excess vinyl and revealing your holographic stickers! Carefully peel away the excess vinyl, leaving behind only your designs on the backing sheet. Take a moment to admire the vibrant colors and holographic effect that the vinyl provides – it truly brings your stickers to life! If you want, you can also add a spot-white layer to make certain areas of your design pop even more.
The last step is to apply your holographic stickers. Start by cleaning the surface where you want to place the sticker, ensuring it is free from any dirt or oils. Once the surface is clean and dry, peel your holographic sticker off the backing sheet, making sure to handle it by the edges to avoid fingerprints. Carefully place the sticker on the desired surface, applying light pressure to ensure it sticks properly. Smooth out any air bubbles or wrinkles with your fingers or a scraper tool, working from the center outwards. Be mindful of the angle you apply the sticker – holographic effects can change depending on the viewing angle, so experiment to find the best placement.
Voilà! You’ve just created your very own holographic stickers. Now you can enjoy the mesmerizing colors and finishes that the holographic vinyl adds to your crafts. Whether you choose to use them as a decoration, a way to personalize your belongings, or as a unique gift for someone special, holographic stickers are sure to make a lasting impression. So gather your materials, unleash your creativity, and let’s get sticker-making!
- Custom Holographic Stickers
- Gather Your Materials
- Comment est fabriqué le vinyle holographique
- Materials to Make Holographic Stickers on a Cricut
- Want to remember this Save this Holographic Sticker Tutorial to your favorite Pinterest Board
- Build Your Spotwhite Layer
- Video:
- How To Make Holographic Print Then Cut Stickers
Custom Holographic Stickers
If you’re looking to make eye-catching, vibrant holographic stickers, you’ve come to the right place. In this step-by-step tutorial, we will guide you on how to create your own custom holographic stickers using a Cricut machine.
Materials you will need:
- Holographic vinyl sheets
- Self-adhesive vinyl sheets
- Free holographic sticker template from Pinterest or design your own
- Cricut machine
- Favorite design software or Cricut Design Space
Step 1: Gather your materials and set up your workspace
Before you start, make sure to gather all the materials you will need for this project. Set up your work area on a clean, flat surface.
Step 2: Draw or find your holographic sticker design
You can either draw your own design or find a free holographic sticker template online, such as on Pinterest. Keep in mind that the design should be simple and have bold attributes to maximize the vibrancy of the holographic effect.
Step 3: Import your design into Cricut Design Space
If you’re using a premade sticker template, upload it into Cricut Design Space. If you’re creating your own design, use your favorite design software to transfer it to Cricut Design Space.
Step 4: Cut the holographic vinyl sheets
Place the holographic vinyl sheets onto the cutting board of your Cricut machine. Follow the instructions provided by Cricut Design Space for cutting the vinyl.
Step 5: Weed the holographic vinyl
After cutting, remove the excess holographic vinyl from the sheet. Use a weeding tool to carefully remove any small pieces of vinyl that remain on the sticker design.
Step 6: Apply the holographic sticker to the self-adhesive vinyl
Peel off the backing of the self-adhesive vinyl sheet and carefully place the holographic sticker on top. Smooth out any bubbles or wrinkles.
Step 7: Cut out the holographic sticker
Using scissors or a craft knife, cut out the holographic sticker from the self-adhesive vinyl sheet.
Step 8: Enjoy your custom holographic stickers
Now you have your own unique, waterproof, and eye-catching holographic stickers. Stick them on your favorite items or give them as gifts to friends and family.
Remember, the process can be shifted depending on the materials and options you choose, so feel free to experiment and make the stickers to your liking.
Gather Your Materials
To create holographic stickers, you will need to gather the following materials:
| Materials | Description |
| Holographic Vinyl Sheets | This self-adhesive vinyl material will give your stickers a holographic and eye-catching finish. You can find a variety of colors and finishes available online or at your favorite craft store. |
| Cricut Machine | If you plan on creating custom designs for your holographic stickers, a Cricut machine can be a great option. It allows you to easily cut out precise shapes and designs from the vinyl sheets. |
| Vinyl Cutting Mat | A vinyl cutting mat is necessary when using a Cricut machine. It provides a stable surface for the vinyl to adhere to while it is being cut. |
| Swatch Book | A swatch book is a helpful tool that displays all the available colors and finishes of holographic vinyl. It allows you to easily choose the colors and effects you want for your stickers. |
| Drawing Materials | If you’re going to draw your own designs, gather your favorite drawing materials, such as pencils, pens, or markers. Make sure they are waterproof so that the colors don’t smudge. |
Remember to follow the specific instructions provided by the vinyl manufacturer and the Cricut machine’s manual to ensure proper usage of the materials. Now that you have gathered all the necessary materials, let’s move on to the next step in this tutorial.
Comment est fabriqué le vinyle holographique
Le vinyle holographique est un matériau autocollant et auto-adhésif qui offre un look accrocheur et une finition supérieure. Il est souvent utilisé pour créer des étiquettes et des autocollants holographiques. Ce type de vinyle est disponible dans une variété de couleurs et d’effets, tels que des shifters métallisés, des effets argentés, des finitions opaques et plus encore.
Le processus de fabrication du vinyle holographique commence par la collecte des matériaux nécessaires. Vous devrez vous procurer des feuilles de vinyle holographique de votre choix, des feuilles imprimables, une imprimante, un Cricut ou une autre machine de découpe, un spotwhite, une planche à découper, une lame de coupe, de l’eau et des instructions de travail.
Une fois que vous avez rassemblé tous les matériaux, vous pouvez commencer le processus de fabrication du vinyle holographique. Voici un tutoriel étape par étape pour vous aider :
- Créez votre design : utilisez un logiciel de conception graphique pour dessiner ou importer votre propre design pour l’autocollant holographique.
- Préparez votre machine de découpe : assurez-vous que votre Cricut est configuré correctement pour découper le vinyle holographique.
- Chargez le vinyle : placez la feuille de vinyle holographique sur la planche à découper et chargez-la dans votre Cricut.
- Réglez les attributs de découpe : choisissez les attributs de découpe appropriés pour le type de vinyle holographique que vous utilisez.
- Découpez le vinyle : utilisez votre Cricut pour découper le design dans la feuille de vinyle holographique. Veillez à suivre les instructions de coupe du fabricant.
- Retirez les déchets : retirez délicatement les pièces indésirables du vinyle holographique à l’aide de la lame de coupe.
- Appliquez l’autocollant : retirez le papier support de l’autocollant holographique et appliquez-le sur la surface souhaitée en utilisant de l’eau pour une application sans bulles.
- Laissez sécher : laissez l’autocollant holographique sécher complètement avant de le manipuler ou de l’exposer à l’eau.
Une fois que vous avez terminé ces étapes, vous aurez créé votre propre autocollant holographique à partir de vinyle holographique. Vous pouvez utiliser ce processus pour créer des autocollants personnalisés pour embellir des objets, des fenêtres, des vitrines et plus encore. N’oubliez pas de toujours suivre les instructions du fabricant et de prendre les précautions nécessaires lors de la manipulation du vinyle holographique.
Le vinyle holographique est un matériau polyvalent et durable qui peut ajouter une touche vibrante et accrocheuse à n’importe quel projet. Que vous recherchiez un effet métallisé brillant, une finition argentée ou une couleur opaque, le vinyle holographique peut vous offrir une multitude d’options pour rendre vos réalisations uniques et visuellement attrayantes.
Materials to Make Holographic Stickers on a Cricut
When it comes to creating eye-catching holographic stickers on a Cricut, you’re going to need a few key materials. Here’s a list of what you’ll need:
- A Cricut machine – The Cricut machine is essential for cutting out your holographic sticker designs with precision and accuracy.
- Vinyl sheets – Use vinyl sheets to create the base layer for your holographic stickers. Vinyl is a self-adhesive and waterproof material that will ensure your stickers last.
- Holographic vinyl sheets – To give your holographic stickers their signature look, you’ll need holographic vinyl sheets in various colors. These sheets have a metallic finish that shifts and changes color as the light hits them.
- Cricut SpotWhite – If you want to add an opaque and vibrant white layer to your holographic stickers, consider using Cricut SpotWhite. This will make your holographic colors pop even more.
- Swatch book – Gathering a swatch book of holographic colors will help you choose the type of holographic vinyl you want to work with. From vibrant purples to silver or gold finishes, the options are endless.
- Drawing tools – Be sure to have drawing tools on hand to sketch out your sticker designs. You can either draw them freehand or use a Cricut machine to draw for you.
- Waterproof adhesive – To make sure your holographic stickers stay on any surface, use a waterproof adhesive. This will keep them securely in place and looking great.
By gathering these materials, you’ll be well on your way to creating custom holographic stickers with vibrant colors and an eye-catching finish. Now that you have everything you need, it’s time to dive into the step-by-step process of making holographic stickers on a Cricut. Just remember to follow the instructions available for your specific Cricut machine and enjoy the creative process!
Want to remember this Save this Holographic Sticker Tutorial to your favorite Pinterest Board
If you want to create eye-catching holographic stickers, this step-by-step tutorial is exactly what you need. By using holographic vinyl, you can create self-adhesive stickers that are not only waterproof but also have a vibrant color shift from different angles. Before we dive into the process, make sure to gather the following materials:
- Holographic vinyl
- Matériel de Cricut (si vous utilisez un coupe-vinyle Cricut)
- Scissors or a cutting machine (such as Cricut)
- Swatch of holographic vinyl
- Spotwhite vinyl (optional, for opaque stickers)
- Instructions for your cutting machine
Step 1: Draw or find the holographic design you want to turn into a sticker. You can either draw it yourself or download one from a free resource website like Pinterest.
Step 2: Once you have your design ready, open your cutting machine’s software or design program. Import the design and adjust its size as needed.
Step 3: If you’re working with Cricut, follow the instructions provided by Cricut to set up your materials and load the holographic vinyl onto the cutting mat.
Step 4: Send the design to your cutting machine and let it work its magic. The machine will cut the holographic vinyl precisely according to your design.
Step 5: Once the cutting process is complete, carefully remove the holographic vinyl stickers from the cutting mat.
Step 6: If you want to add an additional layer of opacity to your stickers, you can cut the same design from spotwhite vinyl and layer it on top of the holographic vinyl. This step is optional but can enhance the vibrancy and color shift effect.
Step 7: Peel off the backing of the holographic vinyl stickers. If you added a spotwhite layer, make sure to peel off its backing as well.
Step 8: Carefully place the holographic sticker on any smooth surface, such as a laptop, water bottle, or window. Ensure that there are no air bubbles or wrinkles in the sticker.
Step 9: Once the sticker is applied, press firmly on it to ensure that it adheres properly to the surface.
That’s it! Now you have your very own holographic sticker. These stickers are perfect for adding a touch of color and vibrancy to your belongings. Don’t forget to save this tutorial to your favorite Pinterest board so you can easily come back to it whenever you want.
Build Your Spotwhite Layer
Now that you have gathered all the materials you will need for this holographic sticker tutorial, it’s time to start building your spotwhite layer. This step-by-step process will guide you on how to create eye-catching stickers that have a vibrant holographic finish.
First, make sure you have a self-adhesive vinyl material that is opaque and waterproof. This type of material will provide a superior finish and ensure that your stickers last for a long time. You can find these materials available online or at your local craft store.
To start, create a swatch of your favorite holographic color using your Cricut machine or any other cutting tools you have. This will serve as a reference for the color of your sticker. Draw it on a piece of paper or use a pre-made holographic vinyl swatch that you can find on Pinterest or any other inspiration board.
Next, cut out the shape of your sticker using the Cricut machine or by hand. Remember to leave a small border around your design to ensure it sticks properly to the surface. Stick this shape onto the spotwhite layer.
Now, using the spotwhite material, cut out a shape that is slightly larger than your sticker shape. This will act as a backing layer and make your sticker stand out. Peel off the backing and stick it onto your sticker shape.
Once your spotwhite layer is securely attached, make sure there are no air bubbles between the layers. Smooth out any wrinkles or shifts in the material to ensure a clean and professional look.
Voilà! Your sticker is now complete and ready to use. The spotwhite layer will give your holographic sticker a metallic and opaque look, making it truly eye-catching. It is also a great option if you want to make custom holographic stickers that stand out from the crowd.
Remember, the spotwhite layer is just one option to add vibrancy to your stickers. You can also experiment with different colors and finishes to create a unique and personalized holographic look. Get creative and have fun with the process!
Comment below if you have any questions or if you want to share your own holographic sticker creations. We love to see what our community comes up with!


