

If you love design and image creation, making stickers can be a fun and creative way to express yourself. Procreate, with its wide range of tools and resources, has become a popular choice for sticker making. Whether you’re a beginner or an experienced artist, this guide will show you how to create and turn your designs into stickers using Procreate.
First, it’s important to make sure you have Procreate installed on your device. Once you have it, start by creating a new canvas. Choose a size that fits your sticker’s dimensions and make sure to set the background to transparent. This will allow you to have more flexibility when it comes to exporting and cutting your stickers.
Next, start sketching or designing your sticker using Procreate’s powerful brushes and tools. You can create anything from lettering designs to intricate illustrations. Experiment with different brush options to find the perfect style for your stickers. Don’t be afraid to let your creativity shine through!
Once you’re done with your design, it’s time to export it. Procreate offers various ways to export your sticker, depending on how you plan to use it. If you’re printing your stickers at home, export the file as a high-resolution image. If you’re planning to use a cutting machine like Cricut or Silhouette, make sure to export the file as a compatible format for easy uploading.
Finally, trim and cut your stickers according to your preferred shape and size. You can use scissors or a cutting machine for precision cutting. If you want to give your stickers a professional touch, consider using a sticker paper or vinyl for the final product. This will ensure that your stickers are durable and long-lasting.
Now that you know how to make stickers in Procreate, it’s time to unleash your creativity and start turning your design ideas into reality. With the endless possibilities and potential for sticker marketing, you’ll surely fall in love with this art form. Don’t forget to explore more tutorials and resources to further enhance your sticker-making skills. Happy creating!
How to Make Sticker on Procreate

If you’re a fan of making your own stickers, Procreate is a fantastic tool for designing and creating them. Whether you want to make stickers for personal use or for your business, Procreate offers plenty of features to help you bring your sticker ideas to life.
Here’s a step-by-step guide on how to make stickers on Procreate:
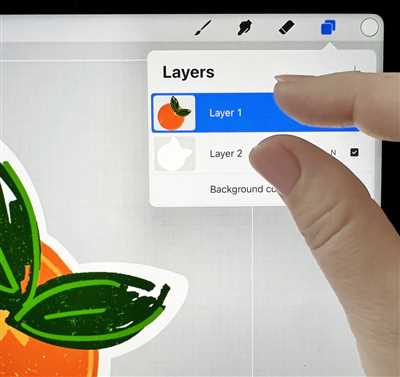
- Design your sticker: Start by sketching or doodling your sticker design on a new canvas in Procreate. You can use Procreate’s wide range of brushes and tools to create stunning designs. Take advantage of layers to add depth and details to your design.
- Export your design: Once you’re happy with your sticker design, export it as an image file. You can do this by tapping on the wrench icon in Procreate and selecting “Share” or “Export.” Choose a high-resolution format like PNG to ensure the best quality for your sticker.
- Print and cut: Print your sticker design onto sticker paper. Make sure to set your printer settings correctly and adjust the paper size according to your sticker dimensions. After printing, use scissors or a cutting machine like Cricut or Silhouette to cut out your stickers.
- Prepare the sticker background: Before you can stick your stickers, make sure the surface where you’ll be applying them is clean and dry. Wipe away any dust or debris from the area to ensure adhesion.
- Peel and stick: Carefully peel off the backing of your sticker and stick it onto your desired surface. Press firmly to ensure it adheres well.
If you want to create lettering stickers, you can utilize Procreate’s lettering brushes to design beautiful custom lettering stickers. Just create a new canvas, choose your brush, and start lettering.
In addition to the above steps, there are more ways to make stickers on Procreate. You can experiment with different brush settings, textures, and effects to add more depth and creativity to your designs. Procreate also offers a wealth of online tutorials and resources that can help you master sticker-making.
Once you have your stickers ready, you can upload them to your favorite online platforms or marketplaces to share and sell them. Make sure to have high-quality product photos and engaging descriptions to attract potential buyers.
Stickers have a lot of marketing potential, whether it’s for personal expression or promoting your brand. People love to decorate their belongings or use stickers as a means of self-expression. By creating unique and eye-catching designs, you can tap into this market and find success in selling stickers.
So, if you’re looking to make stickers, Procreate is a great tool to get started with. With its design features, user-friendly interface, and export capabilities, you’ll be creating stunning stickers in no time.
Procreate Sticker Resource Page
If you love making stickers and want to explore the full potential of Procreate, this resource page is for you! Whether you’re a beginner or an experienced designer, these tips, tutorials, and design ideas will help you create beautiful stickers with Procreate.
First, you’ll need a design for your sticker. Procreate offers a variety of brushes and tools that make it easy to create unique and eye-catching designs. Whether you’re into hand lettering, illustrations, or just want to make fun stickers, Procreate has the brush for you.
Once you have your design, you can use Procreate’s exporting features to save it as an image file. This will allow you to print your stickers at home or upload them to a print-on-demand service for professional printing.
If you have a cutting machine like a Cricut or Silhouette, you can use Procreate to create a cut file for your stickers. Just export your design as an SVG file, then upload it to your cutting machine software. This way, you can create precision cut stickers with ease.
On this resource page, you’ll find tutorials on how to create different types of stickers using Procreate. From die-cut stickers to kiss-cut stickers, there are many ways to make stickers that suit your style.
In addition to tutorials, we also provide tips on sticker marketing and packaging. We’ll show you how to create a cohesive sticker brand, design packaging that stands out, and market your stickers to the right audience.
So whether you’re a hobbyist looking to make stickers for fun or a designer wanting to start a sticker business, this Procreate sticker resource page has everything you need to turn your designs into beautiful stickers.
Uploading into Cricut Design Space as a Print then Cut Image
If you love making stickers and have been using Procreate to create your designs, you may be wondering how to upload them into Cricut Design Space as a Print then Cut image. Well, you’re in luck! There are a few ways you can do this, and in this section, we’ll explore one of them.
First, make sure you have your design ready in Procreate. Create your sticker using Procreate’s brushes and tools, and make sure to export it with a transparent background. This will ensure that when you upload it into Cricut Design Space, you’ll have a clean and professional-looking sticker.
Once your design is ready, go to Cricut Design Space, and select the “Upload” button on the left side of the page. You can choose to upload an image or a pattern. In this case, select “Upload Image.”
Next, click on the “Browse” button and locate your exported sticker design on your computer. Select the file and click “Open” to upload it into Cricut Design Space.
After uploading your design, Cricut Design Space will prompt you to choose the image type. For a sticker, you’ll want to select “Complex” to retain all the details and colors in your design. Then, follow the on-screen instructions to clean up your design, if needed, and click “Continue” to proceed.
In the next step, you’ll have the option to choose how you want Cricut to cut your design. Select “Print then Cut” to indicate that you want to print your design first and then have the Cricut machine cut it out. Adjust any settings if necessary, and click “Continue” to move forward.
On the following page, you’ll see a preview of your design. Make sure everything looks good, and if you’re satisfied, click “Save” to save your design as a Print then Cut image in Cricut Design Space.
Now you’re all set to print and cut your sticker design using your Cricut machine! Cricut Design Space gives you the option to resize, duplicate, or make any other adjustments to your design before sending it to be printed and cut. Take advantage of these features to make the most out of your sticker-making potential.
Of course, there are many more ways to upload your Procreate designs into Cricut Design Space, and this is just one of them. Online tutorials, forums, and other resources can provide tips and tricks on different methods you can try.
So, if you’ve been wondering how to make sticker Procreate designs compatible with Cricut Design Space, now you know how to do it. Just follow these steps, and you’ll be able to create beautiful stickers right at home!
HOW TO CREATE STICKERS WITH PROCREATE AND SILHOUETTE
Creating your own stickers can be a fun and creative way to express yourself! And with the right tools, like Procreate and Silhouette, you can easily turn your designs into stickers for personal use or even for marketing purposes.
First, make sure you have Procreate and Silhouette installed on your device. Procreate is a popular digital drawing app that offers a wide range of tools and features, while Silhouette is a cutting machine that can be used to cut out your stickers.
Start by designing your sticker in Procreate. You can use the brush tool to create your design, add lettering or any other elements you like. Get creative and have fun with it!
When you’re happy with your design, make sure to export it as an image with a transparent background. This will make it easier to work with in Silhouette.
Now it’s time to switch over to Silhouette. Open Silhouette Studio and create a new page. Import your design by dragging and dropping the image file onto the page. You can then resize and position your design to fit the space on your sticker sheet.
Once your designs are all set, it’s time to cut them out! Make sure you have the right settings for cutting stickers on your Silhouette machine. You may need to adjust the cut settings depending on the type of material you’re using for your stickers.
After the cutting is done, you can peel off the excess material and admire your newly made stickers! Now you have a whole sheet of stickers ready to be used or shared with others.
There are so many ways you can use stickers – decorate your journal, spruce up your phone case, or even use them for scrapbooking. The possibilities are endless!
If you love making stickers and want to learn more, there are plenty of tutorials and resources available online. Check out Procreate’s official website and the Silhouette user community for more tips and inspiration.
So go ahead and unleash your sticker-making potential with Procreate and Silhouette. Get creative, have fun, and enjoy making your own unique stickers!
MORE PROCREATE TUTORIALS
If you have just started your journey with Procreate, there is so much potential for you to explore. Stickers are a popular design element that many artists and designers use to add a personal touch to their work. In this course, you will learn how to make stickers in Procreate and discover the various ways you can use them.
First, let’s talk about how to create sticker designs in Procreate. With the right tools and tips, you can create stunning designs that will make your stickers stand out. This includes choosing the right brush, experimenting with different styles and colors, and adding unique elements to your designs.
Once you have designed your stickers, you can then explore different ways to use them. Stickers are not limited to just being printed and used as physical objects. You can also use them in digital formats for marketing purposes, such as on your website, social media profiles, or even as part of an email campaign.
When it comes to printing your stickers, there are several options to consider. You can either print them at home using a Cricut or Silhouette machine, or you can upload your designs to an online printing service. Make sure to choose the right size and paper type to ensure the best quality for your stickers.
If you’re interested in making sticker lettering, Procreate is a great tool to use. You can create beautiful lettering designs and then export them as an image with a transparent background. This makes it easy to use your lettering in various ways, such as on a website or as part of a design project.
There are many more tutorials and resources available to help you make the most of Procreate for sticker-making. Whether you’re a beginner or an experienced artist, you will love the creative space that Procreate provides. So dive in and start exploring all the possibilities!
Sources
If you love making stickers in Procreate, there are a few ways to find resources to help you improve your sticker design skills. Here are some sources you can explore:
1. Online Tutorials: There are many tutorials available on platforms such as YouTube and Skillshare that can teach you different techniques and tips for making stickers in Procreate. These tutorials can help you learn how to cut out backgrounds, create lettering designs, and more.
2. Design Courses: Consider taking online design courses specifically focused on sticker making. These courses can teach you everything from brush techniques to exporting and uploading your designs for printing.
3. Marketing Tips: If you want to turn your hobby into a business, you can find resources that provide marketing tips and strategies for selling your stickers. These resources can help you understand the potential market for stickers and how to promote your designs.
4. Sticker Design Communities: Join sticker design communities, such as online forums and social media groups. Here, you can connect with other sticker makers, share your work, and gain inspiration from their designs.
With these sources, you can have much more confidence and knowledge in making stickers in Procreate. Be sure to explore all the options available to you, and have fun creating your own unique sticker designs!


