Google Forms is a powerful tool that allows you to create custom forms and collect data from respondents. Whether you want to gather feedback, conduct surveys, or even create quizzes, Google Forms has you covered. In this guide, we will walk you through the step-by-step process of setting up a Google Form.
The first step is to log in to your Google account and open Google Forms. Once you are in, click on the “+” button to create a new form. You will be given a series of options, including the form’s name and its appearance. You can choose from various pre-made templates or create your own custom design.
Next, you need to add the fields or questions you want to include in your form. Google Forms allows you to add multiple types of fields, such as text fields, multiple-choice, checkboxes, and more. Simply click on the “+ Add” button to add new questions to your form. You can also customize each field by adding validation, making them required, or even changing the order.
Once you have created all the necessary fields, you can now save your form and start sharing it. You have the option to either send the form via email to specific recipients or generate a link that can be shared with anyone. Additionally, you can also embed the form on a website or share it on social media.
After sharing the form, you can start collecting responses. Google Forms automatically stores all the responses in a Google Sheets file, which you can access at any moment. You can follow the responses by clicking on the “Responses” tab, where you can see all the collected data, including the status and the date and time it was submitted.
To further customize your form, Google Forms offers a variety of options such as changing the theme, adding images or videos, and even creating quizzes. These options can be accessed by clicking on the “More” button located at the top right corner of the form-creation panel.
Lastly, please keep in mind that Google Forms has certain restrictions. For example, it does not allow anyone entering the form to change their responses once they have been submitted. However, you can grant edit-access to a selected group of people by choosing the “Edit after submit” option and entering their email addresses.
In conclusion, Google Forms is a versatile tool that allows you to easily create and customize forms for various purposes. By following these steps, you can create a form that meets your needs and start collecting valuable data from your audience.
- Create a Google form
- Collect Email Addresses
- Step By Step Guide in How to Make a Form in Google Forms Public
- To make a Google Form public, follow these steps:
- Things to keep in mind at the moment of making a Google Form Public
- How to create a google form and embed or link to it
- How to Set Up Google Forms
- Sources
- Videos:
- How to use Google Forms – Tutorial for Beginners
Create a Google form
Google Forms is a powerful tool that allows anyone with a Google account to create and share surveys, quizzes, and other types of forms. In this guide, we will walk you through the steps of creating a Google form.
Step 1: Access Google Forms
To create a Google form, you’ll first need to access Google Forms. You can do this by opening a web browser and going to the Google Forms website or by searching for “Google Forms” in the Google search widget.
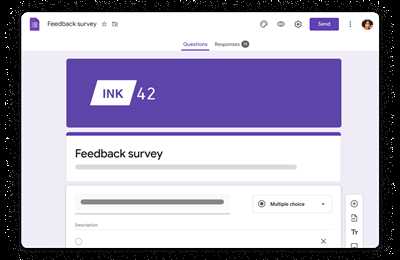
Step 2: Create a new form
Once you’re on the Google Forms website, click the “+ Create” button in the top left-hand corner of the screen. This will open a new form for you to start customizing.
Step 3: Customize your form
When creating a Google form, you have a number of options to customize the appearance and functionality of your form. Take a moment to customize these options to make sure your form meets your needs.
Step 4: Add form fields
To collect information from respondents, you’ll need to add form fields to your Google form. Click on the “+” button to add a new field. You can choose from a variety of field types, including text input, multiple-choice, and file upload.
Step 5: Publish your form
After you’ve finished creating your form and adding all the necessary fields, it’s time to make your form public. To do this, click on the “Send” button in the top right-hand corner of the screen. From here, you have several options to share your form, including sending it via email or embedding it on a website.
Step 6: View and manage responses
Once your form is published, you can view and manage the responses you receive. To view responses, go back to the Google Forms website and click on the form you want to view. From here, you can see a summary of the responses or view them in a Google Sheets file.
By following these steps and customizing your Google form, you can create a form that suits your needs and collect the information you require. Keep in mind that some options, such as validation for email addresses or restricting access to certain users, may require additional setup.
Collect Email Addresses
When creating a Google Form, you may want to collect email addresses from your respondents. This can be done easily by adding an email input field to your form.
To add an email field, click on the “+ Add” button in the top right corner of the form. This will open a panel with various options for adding new elements to your form.
In the panel, click on the “Short answer” option. This will add a new input field where respondents can enter their email addresses.
After adding the email field, you can customize its appearance and validation options. You can choose whether the email field should be required or optional, and you can specify a validation pattern to ensure that the entered value is a valid email address.
Once you have created your form and added the email field, you can share the form with others by clicking on the “Send” button in the top right corner of the form. You can choose to send the form via email, by copying and pasting a link, or by embedding the form in a website or blog.
If you choose to send the form via email, you can enter the email addresses of the recipients manually or choose from a list of contacts in your Google account. You can also customize the email message that will be sent to the recipients.
If you choose to share the form by copying and pasting a link, you can send the link to anyone you want. Keep in mind that anyone with the link will be able to view and fill out the form, so if you want to restrict access to certain individuals, you should use the email option instead.
By default, the email field in the form allows respondents to enter their email addresses, but it does not validate whether the entered value is a valid email address. To enable email address validation, you can use a Google Sheets add-on called “formLimiter”. This add-on will automatically validate the email address entered by the respondents and make sure it matches the required format.
When viewing the responses to your form, you will see the email addresses that respondents have entered in the email field. To make sure that the email addresses are valid, you can use the “validate email addresses” option in the response validation panel. This will check if the entered emails are in the correct format.
Collecting email addresses in a Google Form is a simple and efficient way to gather contact information from your respondents. By following the steps outlined in this guide, you can create a form that collects email addresses and customize it to match your specific needs.
Remember to save your form regularly as you make changes, and publish it when you’re ready for others to fill it out. Happy form making!
Step By Step Guide in How to Make a Form in Google Forms Public
Creating a form in Google Forms is a simple and straightforward process that allows you to collect data and information for various purposes. By default, Google Forms are private and can only be accessed by those with whom you choose to share the form. However, if you want to make your form public and accessible to anyone, follow these steps:
- First, sign in to your Google account or create a new one if you don’t already have an account.
- Go to to access Google Forms.
- Click on the “+” icon in the corner of the screen to create a new form.
- Enter a title for your form in the provided space.
- Customize the appearance of your form by choosing a theme.
- Create the fields you want to include in your form by clicking on the “+” button.
- If needed, set up validation for certain fields to ensure that respondents enter the correct information.
- After creating all the necessary fields, click on the “Send” button at the top right corner.
- Choose the “Link” option to get a direct link to the form.
- Copy the link and share it with others, or use the “Embed” option to embed the form within a web page.
- If you want to grant access to edit the form or view responses, click on the “Send” button and enter the email addresses of those you want to share it with.
- Additionally, you can choose other options such as limiting responses to one per person or collecting email addresses by clicking on the gear icon in the top right corner.
- Once you have finished customizing your form and choosing the desired options, click on the “Send” button again to save the changes.
- Your form is now public and anyone with the link can access and fill it out.
By following this step by step guide, you can easily make a form in Google Forms public, allowing anyone to fill it out and submit their responses. Remember to double-check all the settings and options to ensure your form matches your requirements. Making a form public can be useful for various purposes, such as collecting feedback, conducting surveys, or gathering information from a large audience.
To make a Google Form public, follow these steps:
To set your Google Form as public and accessible to anyone, you will need to modify its settings. The following guide will walk you through the necessary steps:
- Open the Google Form you want to make public by clicking on the form’s link or locating it within your Google Drive or Google Sheets.
- Once you are viewing the form, click on the “Send” button located at the top-right corner of the screen. This will open a panel with various options.
- In the “Send” window, you will see different ways to distribute your form. To make it public, choose the “Get link” option from the panel on the left side.
- After clicking on “Get link,” a window will appear giving you the link to your form. You can copy this link and share it with anyone you want to have access to the form.
- Keep in mind that by default, the form allows anyone with the link to fill and submit responses. If you want to change this option, you can do so by clicking on the gear icon located at the top-right corner of the form.
- Within the settings panel, you can customize various aspects of the form’s appearance and behavior. You can also choose to collect email addresses or limit the number of responses.
- Once you have made the necessary changes, click on the “Save” button to save your settings.
- If you want to embed the form on a website or blog, you can copy the embed code provided within the settings panel. This allows you to keep the form within your site while still collecting responses.
By following these steps, you can easily make your Google Form public and accessible to anyone. Please note that if you haven’t created or written the form yet, you will need to do that first before making it public.
Things to keep in mind at the moment of making a Google Form Public
When making a Google Form public, there are a few things to keep in mind to ensure that your form is set up correctly and functions as intended.
1. Check your form’s settings: Before publishing, review the settings of your Google Form to make sure it collects the necessary information and has the desired appearance. Take the time to customize the theme and layout to match your preferences or brand.
2. Add validation to fields: By adding validation to input fields, you can ensure that respondents provide the correct information. This can be especially useful for fields like email addresses or phone numbers.
3. Grant access to the public: By default, Google Forms are restricted to viewing by anyone with the link. However, if you want anyone to fill out your form, make sure that the form’s settings allow for public access. This can be done by clicking on the “Send” button and selecting the appropriate options.
4. Consider using a shortened link: Google Forms provides a long URL for your form, but it can be challenging to remember or share. Consider using a URL shortening service to create a shorter, more manageable link.
5. Test your form before publishing: Before making your form public, test it by filling out the fields and submitting responses. This will help you identify any issues or errors that need to be fixed before others can access the form.
6. Save responses in a Google Sheet: After respondents fill out your form, their answers are collected in a Google Sheet. Make sure you have the settings configured to save responses to a spreadsheet and that you have access to view and analyze the data.
By following these steps and keeping these considerations in mind, you can ensure that your Google Form is set up correctly and ready to be made public.
How to create a google form and embed or link to it
Creating a Google Form is a simple and effective way to gather information and collect data from anyone. Whether you need to create a survey, questionnaire, or registration form, Google Forms has all the options you need.
To get started, log in to your Google account and go to the Google Forms page. If you haven’t created a form on Google Forms before, click on the “Blank” template to start creating your own form.
Google Forms provides a wide range of options for creating your form. You can choose from different types of fields, including multiple-choice, short answer, paragraph text, and more. You can also add other elements to your form, such as images, videos, and file upload fields.
Once you’ve entered all the necessary fields and options, you can change the settings to match your needs. You can choose whether your form is public or restricted to certain people, including those with a link or those who have been emailed the form. You can also set validation for specific fields to ensure the information entered is accurate.
After you’re done creating your form, make sure to click on the “Send” button in the top-right corner of the screen. This will open a window with various options for sharing your form. You can choose to send the form via email, embed it on a website, or share the link directly.
If you choose to embed the form, Google will provide you with a code that you can paste into your website’s HTML to display the form. This allows users to fill out the form without leaving your website.
If you choose to share the link, you can simply copy the URL and share it with anyone you want. They will be able to view and fill out the form, even if they don’t have a Google account.
Keep in mind that while the form is editable by anyone with the link or people who have been emailed the form, their responses will be anonymous unless they choose to enter their name or email address. Google Forms automatically collects and organizes all the responses in a Google Sheets file, which you can access at any time.
By following these steps, you can create a Google Form and embed or link to it, allowing you to collect the information and data you need from others.
How to Set Up Google Forms
Google Forms is a powerful tool for collecting information and gathering data from your audience. Whether you’re creating a survey, registration form, or quiz, Google Forms makes the process easy and efficient. In this guide, we’ll walk you through the steps of setting up a Google Form.
- Sign in to your Google account and go to .
- Click on the “+” button to create a new form.
- Enter a title for your form in the “Untitled form” field.
- Start adding questions by clicking on the “+ Add question” button. You can choose from various question types, including multiple choice, short answer, and more.
- Customize the appearance of your form by clicking on the “Theme” button located at the top right corner of the screen. You can change the background color, font, and more.
- Make sure to set the form to collect email addresses by clicking on the “…” button in the top right corner and selecting the “Collect email addresses” option.
- Decide whether you want to allow respondents to edit their responses after submitting the form. You can enable or disable this option by clicking on the “…” button and selecting “Edit after submit” or “Edit restrictions” respectively.
- Choose where the responses will be saved by clicking on the “Responses” tab. You can have the responses emailed to you, stored in a Google Sheets spreadsheet, or both.
- Keep in mind that you can add file upload fields to your form by clicking on the “…” button and selecting “File upload” under the “More question types” section.
- Once you have created your form, click on the “Send” button located at the top right corner of the screen. You can share the form by copying the link, sending it via email, or embedding it on a website.
By following this step-by-step guide, you can easily set up a Google Form to collect the information you need. Google Forms offers a range of features and customization options, allowing you to create forms that match your specific requirements.
Sources
When creating a Google Form, there are a number of sources where you can find the needed information and options to set up your form:
– Google Forms: This is the main source where you can create and edit your forms. It allows you to enter the necessary questions and choose the desired options.
– Google Sheets: After creating a form, all the responses will be saved in a Google Sheets file. You can view and analyze the responses within this file.
– Google Drive: You can also save your form as a file in your Google Drive account. This way, you can access and view the form at any time.
– Google Form Widget: If you want to embed the form on a website or within a blog post, you can use the Google Form widget. This widget provides an easy way for users to fill out the form without leaving the current screen.
– Email: Google Forms also allows you to send the form via email. This can be done by clicking the “Send” button and choosing the “Email” option. The form will be emailed to the recipients, and they can fill it out directly from their email.
– Public link: By choosing the “Send” button and selecting the “Link” option, you can get a public link to the form. This link can be shared with anyone, and they can fill out the form by clicking on the link.
– Share with others: If you want to collaborate with others while creating the form, you can share it with them. This can be done by clicking the “Share” button in the top right corner of the editing panel and entering the email addresses of the people you want to grant access to.
– Viewing responses: After you’ve created your form and people start filling it out, you can view the responses by going to the “Responses” tab. Here, you can see a summary of all the responses and access more detailed information about each individual response.
– Restricted access: If you want to restrict access to your form, you can choose the “Restricted” option in the sharing settings. This way, only people who are granted access will be able to view and fill out the form.
Please note that these are just some of the sources and options available when creating a Google Form. The steps and choices may vary depending on the specific features and settings you have chosen.