
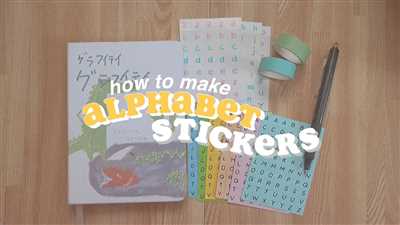

If you’re looking to add a touch of design and decor to your craft projects, letter stickers are a great way to do it. These stickers come in all sorts of designs and can be used to personalize anything from walls to glass windows. The best part is, you can easily make them yourself!
To begin, you’ll need a few supplies. First, you’ll need a computer and a printer. Make sure your printer is inked up and ready to go. Next, you’ll need sticker paper, which you can typically find at your local craft store. If you want larger stickers, you can try using regular paper and a vinyl cutter machine.
Once you have all your materials, open up a design program on your computer. There are plenty of sources online where you can find lettering and border designs to use. Choose a font and size that you like, and get creative with the layout. Play around with different colors and styles until you find the perfect look for your stickers.
When you’re satisfied with your design, print it out on the sticker paper. Make sure to follow the instructions that come with the paper, as some may require you to adjust the printer settings. Once your stickers are printed, carefully cut them out using a pair of scissors or a craft knife.
Now you’re ready to place your letter stickers wherever you like. They can be used to label storage bins, create custom decorations, or even add a personal touch to gifts. The possibilities are endless! Just peel off the backing and stick them down. You can also use a small ruler or a credit card to help smooth out any air bubbles or wrinkles.
So if you’re ready to dive into a fun and creative project, try making your own letter stickers. They’re easy to make and can really add a fancy touch to any craft or decorative piece. Get your designs ready, gather your materials, and let your imagination run wild!
Large Vinyl Letters
If you’re working on a craft or DIY project and need large vinyl letters, there are a few different ways you can create them. In this article, we’ll walk you through the process of making your own large vinyl letters, using scissors or an vinyl cutting machine.
Materials you’ll need:
- Vinyl (in your chosen color)
- Scissors or a vinyl cutting machine
- Transfer tape or clear contact paper
1. Choose your design
First, decide on the design for your large vinyl letters. You can use any font or style of lettering that you like! You can also choose to add fun borders or decorative elements if you want. There are many online sources for free lettering designs that you can use as a starting point.
2. Get your vinyl
Once you have your design ready, go to a craft store or search online to find vinyl in the color and texture you want. Make sure to check that it is adhesive vinyl, as this is what you’ll use for your letter stickers.
3. Cut out your letters
If you’re using scissors, carefully cut out each letter from the vinyl sheet. Make sure to follow the lines closely to get clean edges. If you’re using a vinyl cutting machine, follow the instructions to set it up and use the software to cut out your letters. This can be a quick and easy way to manage larger projects!
4. Weed and transfer
If you’re using a cutting machine, you’ll need to remove the excess vinyl from around your letters. This process is called weeding. Use a weeding tool or a small pair of scissors to carefully peel away the unwanted vinyl, leaving just your letters behind.
Next, use transfer tape or clear contact paper to move your vinyl letters from the backing onto the desired surface. Take your time to carefully place each letter to avoid air bubbles or crooked alignment.
5. Decorate your project
Once your vinyl letters are in place, step back and admire your work! You can use large vinyl letters to create a catchy slogan on a wall, add a business name to a storefront window, or decorate a plain glass vase. The possibilities are endless!
Summing it up
Large vinyl letters can add a bold and eye-catching look to any project! Whether you’re using scissors or a vinyl cutting machine, with a little practice and patience, you can create professional-looking letter stickers. So, gather your materials, choose your design, and get started on your lettering project today!
Core Decor Rainbow Buffalo Check EZ Border
The Core Decor Rainbow Buffalo Check EZ Border is a great way to add a pop of color and design to any window, wall, or craft project. Whether you like larger letter designs or smaller fancy lettering, this border has got you covered. It’s easy to manage and makes letter sticker placement a breeze.
This border is made of vinyl, which means it’s easy to cut and customize to fit any size project. With a pair of scissors or a vinyl cutting machine, you can create any letter or design you like. The letters come in a rainbow of colors, so you can mix and match to create your own unique look.
To use the Core Decor Rainbow Buffalo Check EZ Border, simply open the package and peel off the backing. The letters are pre-adhesive, so you don’t need any extra glue or tape to secure them in place. Just place them down on your desired surface and press them firmly to ensure a strong bond.
When it’s time to remove the border, you can peel it off without leaving any residue or damaging the surface underneath. If you make a mistake or want to change the placement of the letters, simply lift them up and reposition them as needed. It’s an easy and hassle-free way to update your decor.
You can find the Core Decor Rainbow Buffalo Check EZ Border at your local craft store or online. There are many sources where you can purchase it, so you can easily get your hands on this versatile letter sticker border. With its easy-to-use design and wide range of colors, it’s a must-have for any craft or DIY project.
In summing up, the Core Decor Rainbow Buffalo Check EZ Border is a convenient and stylish way to add lettering and design to any project. Its easy application and removal make it a great choice for beginners and experienced crafters alike. So get creative and give your next project a pop of color and personality with the Core Decor Rainbow Buffalo Check EZ Border.
How to Get the Look of Vinyl Lettering without a Fancy Machine

If you’ve ever wanted to make letter stickers but don’t have a fancy machine, don’t worry! There are still ways to achieve the look of vinyl lettering without all the expensive equipment. In this guide, we’ll show you some simple techniques to create your own letter stickers with just a few supplies.
First, decide on the design and size of your letter stickers. You can use any font you like, but keep in mind that smaller fonts may be harder to cut out and manage. Once you have your design, open a word processing or design program on your computer and type out the letters you want to use. You can also find pre-made letter designs online if you don’t want to create your own.
Next, print out the letters onto a sheet of adhesive paper. There are many brands to choose from, so make sure to read reviews and check the quality before purchasing. If you can’t find adhesive paper, you can also use regular paper and glue stick to attach the letters to your project.
After printing, carefully cut out each letter using a pair of scissors. Take your time with this step to ensure clean and precise edges. If your design includes borders, be sure to cut them out as well. This will help give your letter stickers a more professional and finished look.
Once your letters are cut out, peel off the backing from the adhesive paper and place them down on your desired surface. Whether it’s a wall, window, or glass surface, make sure to press them firmly to prevent any air bubbles from forming. If you make a mistake or need to reposition a letter, don’t worry! Adhesive paper is forgiving and easy to manage.
If you want to add extra flair to your letter stickers, you can also use markers or paints to create fun designs or decorations. For example, you can add a rainbow border around the letters or use a paintbrush to create a brushstroke effect. Get creative and experiment with different techniques to make your letter stickers truly unique.
So, don’t let the lack of a fancy machine hold you back from creating beautiful vinyl lettering. With just a printer, adhesive paper, scissors, and a little creativity, you can easily achieve the look of vinyl lettering without breaking the bank. Give it a try and let your imagination run wild!
Summing Up
Letter stickers are a fun and easy way to add a personalized touch to your crafting projects. Whether you’re making a large vinyl letter for a wall decoration or a smaller sticker for a glass or a window, there are various methods you can use to make the process simple and efficient.
If you have a vinyl cutting machine like the Cricut or the Silhouette, you can easily design and cut out custom letter stickers. These machines allow you to choose from a wide range of fonts and designs, and they can cut through vinyl with precision. Simply select the desired font, size, and border options, then let the machine do the work for you.
If you don’t have a vinyl cutting machine, don’t worry! There are still plenty of options available to you. You can purchase pre-made letter stickers from a craft store or online source. These stickers come in a variety of fonts, sizes, and colors, making it easy to find the perfect letters for your project. Simply peel them off the backing and place them where you like.
If you’re feeling more creative, you can make your own letter stickers using basic materials like paper and adhesive. Simply print out the desired letters using a printer and cut them out with scissors. Then, apply a small amount of adhesive to the back of each letter and press them down onto your project.
Whether you’re using a machine or making your own, adding borders and designs to your letter stickers can help make them stand out and add an extra touch of style. You can use colored markers or pens to draw borders around each letter, or you can use decorative tape or stickers to create a fancy border. Get creative and experiment with different techniques to achieve the look you desire.
When it comes to managing your letter stickers, organization is key. Keep them all in one place, like a small box or a drawer, so that you always know where to find them when you need them. You can also label each sticker with the corresponding letter or use dividers to separate them by size or color. This will help you stay organized and make it easier to find the letters you need for your projects.
In summing up, letter stickers are a versatile and easy way to add a touch of personalization and decoration to your crafts. Whether you’re making large vinyl letters for wall décor or smaller stickers for glass or window decorations, there are plenty of options available to help you achieve the look you want. From using a vinyl cutting machine to making your own stickers with basic materials, there is no limit to the possibilities. So go ahead and get creative with letter stickers, and let your imagination run wild!
Sources
If you’re looking to make letter stickers for your DIY project or craft, there are several sources where you can get the materials you need. Here’s a list of some of the places you can check out:
- Glass: If you’re making glass letter stickers, you can find glass sheets or smaller glass pieces at a local glass store or online.
- Vinyl: Vinyl is a popular material for making letter stickers, and there are many sources where you can get vinyl sheets or rolls. Check out craft stores, online retailers, or specialty stores that sell vinyl for signs and decals.
- Printer: If you have a printer at home, you can design your own letter stickers and print them on sticker paper. Sticker paper is available at craft stores, office supply stores, and online retailers.
- Scissors: You’ll need a pair of sharp scissors to cut out your letter stickers. Make sure your scissors are suitable for cutting through the material you’re using.
- Buffalo Designs EZ Letters: If you’re looking for ready-made letter stickers, Buffalo Designs EZ Letters offer a wide range of designs and styles. You can find them at craft stores or order them online.
- Wall borders: If you’re looking to create letter stickers for wall decor or borders, there are many options available. Check out home decor stores, craft stores, or online retailers for a variety of styles and designs.
These sources can help you find the materials you need to make letter stickers for your project. Whether you’re making them from scratch or using ready-made options, there’s a wide range of choices to suit your needs.


