If you’re a bike enthusiast, you know that there’s something special about customizing your ride. Whether you want to give your old bike a fresh new look or add some personal flair to your brand-new bicycle, bike decals are a great way to make your bike stand out from the crowd.
At Stikrd.com, we understand the importance of high-quality bike decals. That’s why we’ve put together this guide to show you how to make your own bike decals. We’ll take you through the step-by-step process, from choosing the right materials to applying the decals to your bike’s frame.
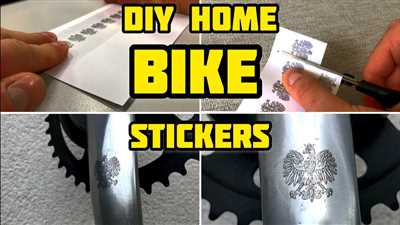
The first thing you’ll need to do is gather the materials you’ll need. You’ll need a clear surface to work on, such as a table or workbench. You’ll also need high-quality decal paper, which you can find at your local craft store or order online. Make sure to choose a decal paper that is compatible with your printer.
Next, you’ll need to design your decal. You can use design software like Adobe Photoshop or Illustrator, or you can draw your design by hand and scan it into your computer. Choose a design that reflects your personality and style. Consider using images or text that are meaningful to you, such as the logo of your favorite bike brand or a motivational quote.
Once you have your design ready, you can print it onto the decal paper using your printer. Make sure to follow the instructions that came with your decal paper to ensure a good print quality. After you’ve printed your decals, let them dry for a few minutes to prevent smudging.
Now it’s time to apply your decals to your bike’s frame. Start by cleaning the surface of your bike with a mild detergent and water. If there are any stubborn dirt or grease stains, you can use a small amount of acetone or a sticker remover to remove them. Make sure to test the acetone or sticker remover on a small, inconspicuous area of your bike first to ensure that it won’t damage the paint.
When the surface is clean and dry, carefully peel the backing off one of your decals and place it onto the desired location on your bike’s frame. Use a credit card or other flat, rigid object to press the decal onto the surface, starting from the center and moving outward. This will help remove any air bubbles and ensure that the decal adheres properly.
Repeat this process for each decal, making sure to align them properly and press them firmly onto the surface of your bike. Once all the decals are applied, let them dry for at least 24 hours before riding your bike. This will give the adhesive enough time to bond with the surface of your bike’s frame.
In conclusion, making your own bike decals is a fun and creative way to customize your ride. By following this step-by-step guide, you’ll be able to create high-quality decals that will give your bike that extra touch of personality. So go ahead and unleash your creativity, and let your bike be a reflection of who you are!
High-Quality Decals for Your Bike
If you have an old bike and want to give it a fresh new look, one of the best ways to do it is by adding high-quality decals. Decals are stickers that can be applied to the surface of your bike frame to add a touch of style and personality.
When it comes to high-quality decals for bicycles, there are a few things you should understand. First, it’s important to use materials that are durable and weather-resistant. This means that the decals won’t fade or peel off easily, even when exposed to rain, sun, or extreme temperatures.
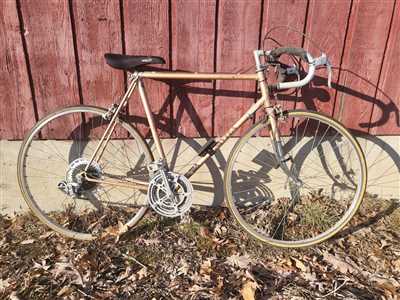
There are many companies that offer high-quality bike decals, such as Stikrd.com. They have a wide range of designs to choose from, so you can find the perfect decal to match your bike’s style. Whether you have a Raleigh, a Motobecane, or a Madone, you will find decals that fit your bike perfectly.
Applying decals to your bike is a straightforward process. First, clean the surface of your bike frame with acetone or a decal remover. This will remove any dirt, grease, or old decals that may be on the frame. Make sure the surface is completely dry before applying the new decal.
When you are ready to apply the decal, peel off the clear backing and place the decal on the desired location. Use a cloth or your fingers to smooth out any air bubbles or wrinkles. Press down firmly to ensure that the decal sticks well to the frame.
If you ever want to remove the decals from your bike, you can do so by using a decal remover or acetone. Apply a small amount to the decal and let it sit for a few minutes. Then, gently peel off the decal from one corner. Be careful not to scratch the frame surface.
It’s worth noting that some bike manufacturers may have policies against adding decals to their frames. Before applying decals, it’s always a good idea to check with the manufacturer or contact their customer service to understand their policy on decals.
In conclusion, high-quality decals can transform your bike and give it a unique and personalized look. Whether you want a simple design or a more intricate one, there are decals out there to suit your style. So go ahead and add some flair to your ride!
Contact us
If you have any questions or concerns about our bike decals, please feel free to contact us. We are here to help you with any inquiries you may have.
For any inquiries regarding custom decals, please make sure to include the following information in your message:
- Your name
- Your email address
- The make and model of your bicycle
- The design or text you would like for your decal
We offer a wide range of high-quality materials for our decals, including clear and white vinyl. Our decals are designed to withstand high levels of wear and tear, so you can be confident that they will last a long time on your bike frame.
If you need to remove an old decal from your bike, we recommend using acetone or a decal remover. Be sure to follow the instructions provided with the remover and take care not to damage the paint on your bike frame.
To ensure that our website functions properly, we may use cookies. By using our website, you consent to the use of cookies in accordance with our Cookie Policy. If you prefer not to have cookies stored on your device, you can disable them through your browser settings.
If you have any questions or concerns about our products or policies, please do not hesitate to contact us. We value your feedback and will do our best to assist you with your bike decal needs.
Count on us for high-quality decals that will give your bicycle a unique and personalized look. Whether you have a Motobecane, a Madone, a Raleigh, or any other bike from around the world, we have the perfect decal for you.
Contact us today to get started on creating your custom bike decals!
Bike Stickers

Designing and applying custom bike stickers is a fantastic way to personalize your bicycle and make it truly unique. Whether you want to showcase your own style or promote a brand, bike stickers are a great option.
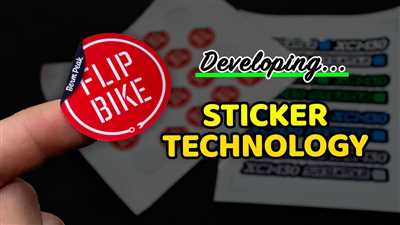
To create your own bike stickers, you will need a few materials. First and foremost, you will need a high-quality decal material that can withstand the elements. There are many options available, from vinyl to clear stickers, so choose the one that suits your preferences and needs.
If you have a specific design in mind, you can create it yourself or reach out to a professional designer. Many companies specialize in bike sticker design and can help bring your vision to life. Just provide them with your ideas, and they will work with you to create a stunning bike sticker.
Once you have your design ready, it’s time to apply the sticker to your bike. Before doing so, make sure to clean the bike frame thoroughly. Use a bike-specific cleaner or isopropyl alcohol to remove any dirt or grease that may interfere with the sticker’s adhesion.
When applying the bike sticker, start from one end and carefully peel off the backing. Align the sticker with your desired location on the bike frame, making sure to smooth out any bubbles or wrinkles as you go. Use a credit card or a squeegee to firmly press the sticker onto the frame, ensuring good adhesion.
If you ever want to remove the bike sticker, it can be done with the help of a hairdryer or a heat gun. Gently heat the sticker, and then use a plastic card or your fingernail to lift the edge and peel it away. If any residue remains, you can use acetone or adhesive remover to clean the area thoroughly.
It’s important to understand that applying and removing bike stickers requires care and precision. The decals are designed to stick onto the bike frame, so once applied, they will stay in place. However, if you want to change or update your stickers, make sure to remove the old ones before applying the new ones.
There are many online shops and companies that offer bike stickers and decals for sale. Some popular options include Stikrd.com, Madone Bikes, and Motobecane USA. Explore their websites to find the perfect sticker for your bike.
As with most websites, it’s important to note that these sites may use cookies. Cookies are small text files that are stored on your computer when you visit a website. They are used to track your preferences and provide a customized experience. If you want to disable cookies, you can do so through your browser’s settings.
In conclusion, bike stickers are a fun and creative way to add a personal touch to your bicycle. Whether you want to showcase your favorite brand or make your bike stand out in a crowd, high-quality decals will do the job. With the right design and materials, your bike stickers will not only look great but also withstand the wear and tear of the cycling world.
Remove the old decals

When it’s time to give your bike a fresh new look, it’s important to start with a clear frame. This means removing any old stickers or decals that may be on it. Whether you want to create a custom design for your bike or simply want to remove the existing decals, there are a few steps you can follow to make the process easier.
- First, gather all the materials you will need for this task. You may need a decal remover, such as acetone, a cloth or sponge, and possibly some tools depending on the type of decals you have on your bike.
- Before you begin, it’s a good idea to protect the surrounding areas from the decal remover. You can use masking tape or plastic sheeting to cover any parts of your bike that you don’t want to accidentally damage.
- Start by peeling off as much of the old decals or stickers as possible. Use your fingers or a plastic tool to gently lift the edges and peel them away from the bike’s surface. Be careful not to scratch or damage the frame during this process.
- If there are any stubborn decals that won’t come off easily, you can try using a decal remover. Apply a small amount of the remover to a cloth or sponge and gently rub the decal until it starts to loosen. Take care not to apply too much pressure so as to avoid damaging the paint or surface of your bike.
- Continue to rub the decal with the remover until it is completely removed. You may need to repeat this process a few times to fully remove all the adhesive. Be patient and take your time to ensure that the decal is completely gone.
- Once you have removed all the decals, use a clean cloth or sponge to wipe away any residue or remaining adhesive. You can also use warm soapy water to clean the surface of your bike and remove any dirt or grime.
- Finally, inspect the bike to ensure that all the decals have been successfully removed. If there are any remaining traces, you can use gentle rubbing with the decal remover or a clean cloth to remove them. Take care not to scrub too harshly, as this can damage the paint or surface of your bike.
By following these steps, you can remove the old decals from your bike and start with a fresh canvas for your new design. Remember to follow proper care and contact the bike manufacturer’s policy when working with high-quality or custom bikes like Motobecane or Raleigh. Now you are ready to apply your new stickers or decals from Stikrd.com and give your bike a brand-new look that stands out in the world.


