

Are you looking for a method to create quizzes online? Look no further! In the world of online exams, Google Quiz Maker is one of the leading and most trusted options available. Since its launch in 2006, Google Quiz Maker has been used by educators, businesses, and enterprises all over the globe.
Creating a quiz is easy, and in this article, we will guide you through the simple steps to make your own quiz using Google’s powerful cloud-based platform. Whether you are a business owner, trainer, or educator, Google Quiz Maker has the tools you need to create engaging and informative quizzes that yield valuable results.
- Step 1: Enter Google Forms
- Step 2: Title and Questions
- Step 3: Quiz Settings and Customization
- Step 4: Share and Submit
- tanaikech submitmd
- Trusted by the world’s leading enterprises, businesses, and educators since 2006
- Business Owners, Trainers, and Educators
- How to make a matching quiz in Google Forms
- Next steps
- Sources
Step 1: Enter Google Forms

The first step to creating your quiz is to enter Google Forms. To do this, please log in to your Google account and navigate to the Google Forms website. Once there, click on the “Blank” option to start with a blank quiz template.
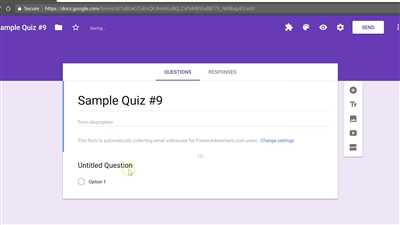
Step 2: Title and Questions
Next, enter a suitable title for your quiz in the provided field. This title will appear at the top of your quiz and should accurately describe the topic or theme of the quiz. After entering the title, you can begin adding questions. Google Forms offers various question types, including multiple-choice, true/false, matching, and more. Choose the type that best suits your quiz and enter the question and answer choices accordingly.
Step 3: Quiz Settings and Customization
After adding all the necessary questions, you can further customize your quiz by adjusting various settings. These include shuffling the answer choices, enabling the “Randomize order of questions” option, allowing respondents to submit the quiz multiple times, and much more. Take your time to explore these features and select the ones that best fit your quiz’s requirements.
Step 4: Share and Submit
Once you are satisfied with the quiz’s content and settings, click on the “Send” button located at the top-right corner of the screen. Google Forms will provide you with various methods to share your quiz, including a direct link, linking it to Google Classroom, embedding it in your website, and more. Choose the sharing option that suits your needs and share your quiz with the intended audience.
That’s it! In just a few simple steps, you can create a Google Quiz that is ready to be used for educational, business, or personal purposes. Enjoy the benefits of Google Quiz Maker and engage your audience with interactive and informative quizzes. Start creating your own quiz today!
tanaikech submitmd
In the world of online quizzes and tests, the tanaikech submitmd method is a popular choice among educators, businesses, and enterprises. This method, created by tanaikech in 2006, is a reliable and easy way to create and submit quiz results to a Google Sheet.
To use the tanaikech submitmd method, you need to have a Google Sheet prepared with the necessary column headers. These column headers include the title of the quiz, the question, the question type (such as multiple choice or matching), and the correct answer(s). In addition, you can include other items like question options, shuffle options, and extra options.
In order to create a quiz using the tanaikech submitmd method, you need to follow these steps:
- Create your quiz questions in a spreadsheet. Enter the question, question type, and answer(s) in the respective columns. You can also add additional columns for question options, shuffle options, or extra options.
- Link the Google Sheet to the tanaikech submitmd script. Click on “Add-ons” > “Google Apps Script” > “Create a new script”. Copy and paste the tanaikech submitmd script code into the script editor.
- Configure the script settings. In the script editor, go to “File” > “Project properties” > “Script properties” tab. Enter the necessary configuration values, including the Google Sheet ID, column names, and other options.
- Run the script. In the script editor, click on the “Run” button to execute the script. This will create the necessary forms and submit the quiz results to the Google Sheet.
- Check the results in the Google Sheet. Once the script execution is completed, you can view the quiz results in the linked Google Sheet. The results will include the quiz title, question details, selected answers, and any other relevant information.
The tanaikech submitmd method is a trusted and widely used method for creating online quizzes and tests. Its simplicity and flexibility make it a preferred choice for educators, trainers, and businesses worldwide. The method is free to use and is licensed under the MIT License, making it accessible to all users.
So, if you are looking for a reliable and easy way to create and submit quiz results to a Google Sheet, try using the tanaikech submitmd method. It will save you time and effort, and provide accurate and organized results for your quizzes and tests.
Trusted by the world’s leading enterprises, businesses, and educators since 2006
Creating quizzes is an essential method for trainers, educators, and businesses to assess knowledge and train their employees. Online Exam Maker has been a trusted tool since 2006, offering a convenient and easy way to create quizzes and tests. With this online tool, you can make quizzes of various types, including multiple-choice, true/false, matching, and more.
Online Exam Maker is a script that can be used with Google Forms. By linking your Google account to Online Exam Maker, you can create quizzes directly from your Google Sheets. The process is simple – just click “Create a Quiz” and follow the steps provided. Fill in the title and questions, select the question type, and enter the options. For multiple-choice and matching questions, you can shuffle the options to avoid any bias.
After preparing your quiz, you can customize various settings such as the number of questions, the value of each question, and whether the answers should be shuffled. You can also choose to add a time limit or enable results sharing. Once you are done, simply click “Submit” to create your quiz.
Trusted by leading enterprises, businesses, and educators worldwide, Online Exam Maker has been used for various purposes, including employee training, educational assessments, and secure certifications. This tool is free to use, making it accessible for individuals and organizations of all sizes.
With its user-friendly interface and reliable performance, Online Exam Maker has established itself as a go-to tool for creating online quizzes. Its versatility, coupled with the integration with Google Forms and Sheets, allows for seamless quiz creation and management.
So, if you are looking to create quizzes for your business or educational needs, Online Exam Maker is the trusted choice. Try it out today and experience the ease and convenience it offers.
Business Owners, Trainers, and Educators
If you are a business owner, trainer, or educator, you can create a Google Quiz to engage your audience and assess their knowledge. Google Quizzes are easy to make and provide a convenient way for your target audience to submit their answers and get instant results. You can use these quizzes to train your employees, test your students, or gather feedback from your customers.
To create a Google Quiz, follow the steps below:
- Sign in to your Google account and go to Google Forms.
- Click on the “+ Blank” button to create a new form.
- Enter a title for your quiz and add any instructions or additional information in the form description.
- Click on the “+ Add” button to add questions to your quiz.
- Choose the question type from the available options, such as multiple-choice, checkbox, or short answer.
- Enter the question and provide the answer choices or options for each question.
- You can also add images or links to your questions if needed.
- If you have prepared questions in a spreadsheet, you can import them into the quiz by clicking on the “Import questions” option.
- To make your quiz more interactive, you can enable the option to shuffle the questions and answers.
- Customize the settings of your quiz, including the response destination, answer key, and availability.
- Once you are satisfied with your quiz, you can click on the “Send” button to share it with your audience.
Google Quizzes are a trusted method used by businesses, trainers, and educators around the world. Since their introduction in 2006, Google Forms has become one of the leading online quiz makers in the cloud. It offers various question types and settings to cater to different needs.
By creating a quiz with Google Forms, you can easily link it to your website or share it with your audience via a direct link. You can also embed the quiz in your post or any other online platform that supports HTML.
Please note that while Google Forms is free to use, there are some advanced features and licensing options available for businesses and enterprises. If you have specific requirements or requests, you can explore the Google Cloud website or contact their support team for more information.
How to make a matching quiz in Google Forms
Creating a matching quiz in Google Forms is a straightforward process that can be done by following a few simple steps. This guide will walk you through the process step-by-step, so you can easily create a matching quiz for your business, educators, or any other purpose.
Here are the steps to create a matching quiz in Google Forms:
- First, open your Google Forms by clicking on the Google Apps icon and selecting “Forms”.
- Click on the blank template to create a new form.
- Give your quiz a title by clicking on the “Untitled form” field and entering a suitable title.
- Choose the type of question you want to add by clicking on the “+” icon.
- Select the “Multiple choice grid” option.
- Enter the question and the items you want to match in the “Question” field and the “Row 1” column, respectively.
- In the “Options” column, enter the choices that the user can select for each item.
- Click on the three-dot menu icon in the top-right corner of the question and select ” Shuffle option order” to randomize the order of the choices.
- Repeat these steps to add more matching questions to your quiz.
- Once you have added all the questions, click on the “Settings” gear icon in the top-right corner of the form.
- In the settings menu, you can customize various options including whether or not the user can submit the form multiple times, whether or not the form can be linked to a spreadsheet for storing the results, and more.
- After customizing the settings, click on the “Send” button to get the link to your quiz.
That’s it! You have successfully created a matching quiz in Google Forms. You can now share the link with others, and they can take the quiz online for free.
Google Forms is a trusted and easy-to-use online quiz maker used by businesses, educators, trainers, and individuals around the world. With its cloud-based platform, Google Forms offers a reliable and convenient way to create various types of quizzes and tests.
If you need any further assistance in creating your matching quiz in Google Forms or have any other questions, please feel free to post your queries to the online Google Forms community or consult the official documentation provided by Google.
Sources:
- Creating a Matching Quiz in Google Forms – post by tanaikech
- OnlineExamMaker
- Google Forms – Wikipedia
Next steps
To create a Google quiz, follow these steps:
Step 1: Open Google Forms. Click on the grid icon in the top right corner.
Step 2: Click on the “+” button to add quiz items. Choose the type of question, such as multiple choice, checkboxes, or short answer.
Step 3: Enter a title for your quiz in the “Untitled form” field. You can also add a description if desired.
Step 4: Make sure the toggle button next to “Quiz” is set to “ON” to turn your form into a quiz.
Step 5: In the “Answer Key” section, specify the correct answers for each question. You can also assign point values for each question.
Step 6: Click on the “Settings” icon to customize your quiz further. Here, you can shuffle question order, limit responses, collect email addresses, and more.
Step 7: Once your quiz is prepared, click the “Send” button to share it with others. You can send the quiz link via email, post it on a website, or share it on social media platforms.
Step 8: As the quiz owner, you can view the results by going to the “Responses” tab. The results will be automatically collected and displayed in a spreadsheet.
Please note that Google Forms can be used for creating quizzes, tests, and various types of forms. It’s an easy and free method to make quizzes online for businesses, educators, trainers, and more. For further customization, there are also third-party apps and scripts available.
For more information and tutorials on creating Google quizzes, you can visit the following trusted sources:
- Stack Overflow questions tagged with “google-apps-script”
- “How to Create Quizzes by Google Forms and Sheets using Google Apps Script” post by Tanaike
- “Online Exam Maker” website
Sources
In order to create a Google Quiz, there are several sources that can be used. Here are some of the trusted sources:
| Source | Description |
|---|---|
| forms.google.com | This is the official Google Forms website where you can create online quizzes and tests. It’s an easy and user-friendly method. |
| www.google.com/sheets | Google Sheets can be used to create quizzes by linking questions and answers together. It’s a convenient option for educators and businesses. |
| www.docs.google.com | This is the home of Google Docs, where you can create quizzes using multiple question types, including multiple choice, true/false, and matching. |
| onlineexammaker.com | OnlineExamMaker is a free online quiz maker that can be used to create quizzes for educational and business purposes. It offers a variety of settings and options. |
Please note that these sources are just a few examples and there are many other websites and apps available for quiz creation. If you’re looking for more advanced features or specific requirements, it’s recommended to do further research to find the best solution for your needs.


