

Adding a signature to your documents is essential for giving them a personal touch and ensuring their authenticity. While traditional handwritten signatures on paper are still widely used, digital signatures offer a more convenient and efficient way to sign documents. In this article, we will guide you through the process of creating and adding a handwritten signature to your electronic files and documents using various tools and software.
Starting with Microsoft Word, Excel, and PowerPoint, you can create a handwritten signature using the pen and touch functionality available in Microsoft Office 365. To do this, choose the “Draw” tab on the ribbon and click on the “Draw with Touch” or “Draw with Pen” option, depending on your device. Then, use the touch screen or a compatible pen to create your signature. Once done, save the document, and your handwritten signature will be associated with the file.
If you’re using Microsoft Office Starter or a previous version of Word, you can still add a handwritten signature to your documents. Simply follow the same steps mentioned above and save the document. However, keep in mind that in these older versions, the signature will not be associated with the file, so you will need to insert it manually each time you need to sign a document.
Zoho Sign is another handy tool for adding electronic signatures to your documents. It offers a user-friendly interface and allows you to create, insert, and remove digital signatures with ease. Simply upload your document, choose the “Add Signature” option, and select whether you want to create a new signature or use an existing one. You can also choose to draw, type, or import your signature from a saved image file. After adding the signature, you can crop and line it up as needed, and then save the signed document.
In addition to these specific tools, there are numerous other software and online platforms available that can help you create and add your handwritten signature to documents. Whether it’s through scanning a paper document, using a signature pad, or even signing with a stylus on a touchscreen device, you have plenty of options to explore. Ultimately, the method you choose will depend on your personal preferences, the nature of your work, and the information you are signing off on.
So, if you want to give your documents a professional touch, make sure to follow the steps outlined in this article to create and add your handwritten signature. Whether you choose to use Microsoft Office 365, Zoho Sign, or any other tools and software, remember that electronic signatures can save you time, effort, and the hassle of printing, signing, scanning, and emailing your documents.
With a digital signature, you can easily sign your documents electronically and send them across the globe with just a few clicks. Gone are the days of printing, signing, and manually sending documents. Embrace the convenience and efficiency of electronic signatures to streamline your workflow and increase your productivity!
- Add or remove a digital signature for Microsoft 365 files
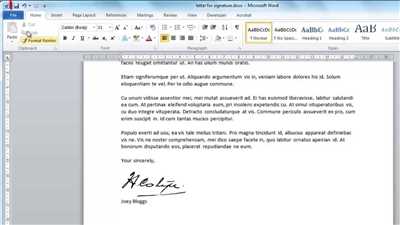
- Create and insert a handwritten signature
- Create a digital signature using a touchscreen device
- Use a signature tool or software
- Associate Signatures with your “from” addresses
- Step 1: Create your signature
- Step 2: Associate your signature with your “from” addresses
- Use Signature Line to Add Word Doc Signature
- Creating a Signature Line in Word
- Adding a Digital Signature
- How to sign a document in Word on Mac
- Video:
- How to Add Signature in Outlook
Add or remove a digital signature for Microsoft 365 files
If you work with electronic documents in Microsoft 365, like Word, Excel, or PowerPoint, you may need to add a digital signature to ensure the authenticity and integrity of your files. A digital signature is similar to a handwritten signature on a paper document but in an electronic format. It can also serve as a way to associate your name and contact information with the document.
To add a digital signature to your Microsoft 365 files, follow these steps:
- Open the document you want to sign in the appropriate Microsoft 365 application, such as Word, Excel, or PowerPoint.
- Click on the Insert tab at the top of the toolbar.
- Choose Signature Line from the Text group of tools.
- In the Signature Setup dialog box, enter your name and other information in the provided fields.
- If you want to include additional information, such as your address or job title, click on the Additional Instructions link.
- Click on the OK button to insert the signature line into your document.
- Save the file to ensure the signature is saved with it.
After you create a signature line, you can sign the document. To do this, follow these steps:
- Double-click the signature line to open the Sign dialog box.
- In the Sign dialog box, choose the Sign button to sign the document electronically.
- If you want to add more information to the electronic signature, such as an image or additional text, click on the Select Image or Sign button, respectively.
- Click the OK button to apply the electronic signature to your document.
- Save the document again to ensure the signature is saved with the file.
If you no longer need the digital signature or want to remove it from the document, follow these steps:
- Open the document in the appropriate Microsoft 365 application.
- Click on the signature line to select it.
- Press the Delete or Backspace key on your keyboard to remove the signature line.
- Save the document to confirm the removal of the digital signature.
Microsoft 365 offers powerful tools for working with electronic documents and allows you to easily add or remove digital signatures for your files. This information can be especially useful when sharing sensitive or important documents with others. If you work on a Mac or use other productivity suites like Zoho, you may also have similar options available to add and remove digital signatures.
Create and insert a handwritten signature
Using a handwritten signature can add a personal touch to your electronic documents. Whether you need to sign a Word document, Excel spreadsheet, PowerPoint presentation, or any other file, there are several methods you can choose from to create and insert your handwritten signature.
Create a digital signature using a touchscreen device
If you have a touchscreen device like a smartphone or tablet, you can use the built-in tools to create your electronic signature. Simply open a new document or file, choose the powerpoint or word processor that you prefer to work with, and use your finger or a stylus to write your signature on the screen. If you don’t have a touchscreen device, you can also use a digital pen to create your signature on a paper and then scan or take a photo of it to save it as an electronic file.
Use a signature tool or software
If you prefer to use a specific tool or software to create your signature, there are many options available. For example, Microsoft Word has a built-in signature feature that allows you to draw and insert your signature directly into a document. Zoho Sign, DocuSign, and Adobe Sign are other popular electronic signature tools that you can use to create and associate your signature with your documents.
Once you have created your handwritten signature, you can easily insert it into your files. In Microsoft Word or Excel, you can go to the “Insert” tab, click on “Signature Line,” and choose “Microsoft Office Signature Line” from the dropdown menu. This will insert a line with a placeholder for your signature. You can also crop the signature line if needed.
To add your signature to other files or documents, follow the same process of inserting a line or a signature placeholder. This method will work for PowerPoint presentations, PDF files, and many other file formats.
Remember to save your signature as a separate file, so that you can easily reuse it whenever needed. You can save your signature image as a JPG or PNG file, or save it as a digital signature file if you are using an electronic signature tool or software.
By following these steps, you can easily create and insert a handwritten signature into your electronic documents, giving them a personal touch and making them more professional.
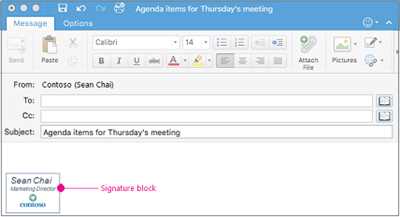
Associate Signatures with your “from” addresses
When sending emails, it’s important to add a personal touch by including a signature. This information can be in the form of a handwritten signature, a digital signature, or even a scanned image of your signature. In Microsoft Word, Excel, or PowerPoint, you can create your signature and save it for future use. Whether you’re using a Windows PC or Mac, the process is the same.
To create a signature in Microsoft Office 365, follow these steps:
Step 1: Create your signature
1. Open Word, Excel, or PowerPoint.
2. Go to the “Insert” tab.
3. Select “Signature Line” from the “Text” section.
4. A signature setup box will appear. Fill out the necessary information, such as your name, title, and email address.
5. Click “OK” to insert the signature line into your document.
Step 2: Associate your signature with your “from” addresses
1. Once your signature has been created and saved, open Outlook.
2. Go to “File” and select “Options”.
3. In the “Mail” section, click “Signatures”.
4. Under “Select signature to edit”, choose the “New messages” or “Replies/forwards” option.
5. Click the “Choose” button and select the signature you created.
6. Click “OK” to save your changes.
Now, when you compose a new email or reply to an existing one, your signature will automatically be inserted. You can also remove or change your signature using the same steps.
Using electronic signatures in your emails adds a professional touch and saves you the hassle of printing, signing, and scanning physical documents. With tools like Microsoft Office 365 and Zoho Mail, you can easily create and insert signatures into your emails. Whether you prefer a handwritten or digital signature, the process is quick and easy. Get started today and make your emails stand out!
Use Signature Line to Add Word Doc Signature
If you’re using Microsoft Word to create documents for work or personal use, you may need to add a signature to these files. While many people still sign documents by hand, you can also add an electronic signature to your Word documents for a more efficient and modern approach. Adding a signature line to your documents allows you to easily insert digital signatures, like handwritten ones, into your Word, Excel, or PowerPoint files, giving them a more professional look.
Creating a Signature Line in Word
To add a signature line to your Word document, follow these simple steps:
- Open the Word document you want to add a signature to.
- Place the cursor at the location where you want to insert the signature line.
- From the top menu, go to the “Insert” tab.
- Click on the “Signature Line” option in the “Text” section.
- A pop-up box will appear, allowing you to customize the signature line.
- Fill in the required information, such as your name, title, and email address.
- Click “OK” to insert the signature line into your document.
Adding a Digital Signature
After you’ve inserted a signature line, you can now add a digital signature to your Word document. Here’s how:
- Click on the signature line in your document to activate it.
- From the top menu, go to the “Review” tab.
- Click on the “Sign” button in the “Protect” section.
- You’ll be prompted to choose a digital signature service, such as Zoho Sign or DocuSign, or you can choose to sign with a certificate.
- Follow the on-screen instructions to create and insert your digital signature.
- Once you’ve added your digital signature, save the document.
By using the signature line feature in Microsoft Word, you can easily add and manage digital signatures in your documents. This can save you time and make your work look more professional. Whether you choose to sign documents by hand or digitally, the signature line tool offers a convenient way to include signatures in your Word, Excel, or PowerPoint files.
Remember, adding a signature line is not only useful for Word documents, but it can also be used in other Microsoft Office applications and even on Mac. You can find similar tools to add signature lines in programs like Excel and PowerPoint. Just follow the same steps to insert and sign your files with a digital signature from Zoho Sign or other compatible services.
How to sign a document in Word on Mac
If you have a Mac and need to sign a document in Microsoft Word, you can easily do so by following these steps:
1. Open the document that you need to sign in Word on your Mac.
2. Click on the “Insert” tab at the top of the screen, and then click on the “Signature Line” option in the toolbar. This will open a pop-up window.
3. In the pop-up window, you have the option to either create a handwritten signature or choose from one that you have saved. If you want to create a handwritten signature, click on the “Create Handwritten Signature” button and follow the instructions on the screen to draw your signature using your Mac’s trackpad or a connected drawing tablet.
4. If you have a saved signature file on your Mac, click on the “Select Image” button in the pop-up window, and then browse and select the image file of your signature that you want to use.
5. After you have created or selected your signature, you will have the option to add additional information such as your name, title, address, and more. Fill in the required fields, and then click on the “OK” button.
6. The signature line will now be inserted into the document. You can drag and resize the signature line if needed by clicking and dragging the handles around it.
7. To sign the document, click on the signature line and a small pop-up window will appear with options. Click on the “Sign” button, and then choose the signature that you want to associate with the document.
8. Word will remove the signature line and replace it with your chosen signature. The document is now signed and ready to be saved or sent via email or other tools.
By following these steps, you can easily sign documents in Word on Mac using either a handwritten or digital signature. This can be especially helpful when you need to sign multiple documents with the same signature, as you can save time and effort by using a saved signature file.
Note that if you are using Word Starter or Word for Mac 2011, the process may be slightly different or some features may not be available. In such cases, you can consider using other tools like Zoho, Excel, or PowerPoint to digitally sign your documents.


