Sending emails is an essential part of communication in today’s digital world. Whether it’s for business or personal use, knowing how to create professional emails is crucial. Your inbox is likely filled with countless emails from various sources, and you want to make sure that your email stands out from the rest. In this article, we will discuss some valuable tips and techniques to help you create professional emails that leave a lasting impression on your recipients.
1. Keep your subject line clear and concise: The subject line is the first thing your recipient sees, so it needs to be attention-grabbing and informative. Use clear and concise language to let the recipient know exactly what your email is about in just a few words.
2. Use a professional email address: When creating a professional email, it’s important to use a proper email address that reflects your name or your organization. Avoid using personal or informal email addresses that might not convey a professional image.
3. Use a professional greeting: Start your email with a formal greeting, such as “Dear Mr./Ms. [Last Name],” to show respect and professionalism. Avoid using casual greetings like “Hey” or “Hi” unless you have a close relationship with the recipient.
4. Keep your email focused and to the point: Make sure your email is clear and concise, avoiding unnecessary details or rambling. Stick to the main topic and provide all the relevant information in a structured manner.
5. Use proper grammar and proofread: Writing in proper English with correct grammar and spelling is vital for creating a professional impression. Take the time to proofread your emails before sending them to avoid any embarrassing mistakes.
6. Add a professional email signature: Include a professional email signature at the end of your email. This should include your full name, job title, contact information, and any relevant links, such as your LinkedIn profile or company website.
7. Avoid using gifs or emojis: While gifs and emojis are popular in casual conversations, they have no place in professional emails. Stick to text and keep your tone professional and formal.
8. Use a professional email service: While Gmail is a popular email service, it’s not the only option. Consider using professional email services like Outlook, which offer more advanced features and better integration with business tools like calendars and task lists.
By following these tips, you will be able to create professional emails that convey trust, clarity, and professionalism. Remember that your emails are a reflection of your skills and capabilities, so it’s important to take the time to craft them properly. Whether you’re emailing a client, colleague, or potential employer, a professional email will make a great impression and set you apart from the rest.
- How to Create an Email Account for Professional Use and Set Up a Mail Client
- What are the benefits of a professional email address
- 8 tips for writing a professional email
- 1 Include the topic in the subject line
- 2 Address the recipient properly
- 3 Keep it focused
- 4 Include your signature
- 5 Proofread
- 6 Avoid a casual tone
- 7 Watch your words
- 8 Make your directions clear
- 8 Ways to Perfect Your Presentation Skills in English
- Categories
- MOST POPULAR ARTICLES
- One giant leap for your inbox
- 1. Watch your tone
- 2. Use a professional email address
- 3. Create a clear subject line
- 4. Set up a professional signature
- 5. Proofread and edit your emails
- 6. Avoid using excessive formatting
- 7. Keep it concise
- 8. Use links and attachments wisely
- How to add an email signature in Gmail in less than 30 seconds
- How to export emails from Gmail to Google Sheets
- How to email a GIF in 2023 Gmail Outlook
- Video:
- How to create a business email account in 2023?
How to Create an Email Account for Professional Use and Set Up a Mail Client
Creating a professional email account and setting up a mail client is essential for effective communication in the modern business world. Emails have become the primary means of communication in both personal and professional settings, making it crucial to have a professional email account to ensure credibility and trust.
Here are 8 tips on how to create an email account for professional use and set up a mail client:
- Create a Gmail account: Gmail is one of the most popular email services and offers a wide range of features and benefits. Sign up for a Gmail account by visiting the Google account creation page and following the prompts.
- Choose an appropriate email address: When creating a professional email account, it’s important to choose an address that reflects your identity and is easy to remember. Avoid using personal or unprofessional terms in your email address.
- Set a strong password: Make sure to use a strong, unique password for your email account to ensure its security. Use a combination of letters, numbers, and special characters to create a password that is difficult to guess.
- Configure your mail client: A mail client is a software application that allows you to manage your email accounts. Popular mail clients include Outlook, Apple Mail, and Thunderbird. Set up your professional email account in your preferred mail client by entering your email address and password.
- Import or export contacts: If you already have a list of contacts in a spreadsheet or another email service, you can import them into your new professional email account. Similarly, if you want to export your contacts from your professional email account, most mail clients provide options to do so.
- Organize your inbox with folders or categories: To keep your professional email account organized, create folders or categories to categorize different types of emails. This makes it easier to locate and manage emails based on their topics or sender.
- Proofread before sending: Before sending any professional email, take a few seconds to proofread it for any spelling or grammatical errors. This ensures that your emails are written in clear and concise English, projecting professionalism and attention to detail.
- Include a clear subject line: When emailing someone for professional purposes, make sure to include a clear and concise subject line that accurately reflects the content of the email. This helps the recipient understand the purpose of the email at a glance.
By following these 8 tips, you can create a professional email account for your professional use, set up a mail client, and optimize your email communication skills. Remember to keep your emails focused, informative, and appropriate for the recipient. Trust and credibility are built upon effective and professional email communication.
What are the benefits of a professional email address
A professional email address is an essential tool in today’s digital age. Whether you are a freelancer, a small business owner, or an employee of a large corporation, having a professional email address has many advantages. Here are some of the key benefits:
- Increased credibility: Using a professional email address, such as [email protected], adds credibility to your communication. It shows that you are serious about your work and presents a more professional image to clients and colleagues.
- Builds trust: A professional email address helps to build trust with your clients and partners. It demonstrates that you are reliable and serious about your business commitments.
- Better organization: With a professional email address, you can create separate email accounts for different categories or projects, allowing you to keep your inbox organized and easily find important messages.
- Effective communication: Professional email addresses are more likely to be taken seriously and receive prompt attention. This can lead to more effective communication and faster responses from recipients.
- Less spam: When you use a professional email address, your email is less likely to be filtered as spam. This means that your emails have a higher chance of reaching the recipient’s inbox.
- Opportunities for branding: A professional email address gives you the opportunity to include your business or personal branding in your email signature. This can help to create brand recognition and promote your business or personal brand.
- Reputation management: By using a professional email address, you can maintain a consistent and professional online presence. It helps you to keep your personal and business communications separate and ensures that your professional reputation remains intact.
Overall, having a professional email address is essential for anyone who wants to make a good impression in the business world. It not only enhances your credibility and trustworthiness but also allows for better organization and more effective communication. So, whether you are an individual professional or a business entity, investing in a professional email address is a smart move that can benefit you in the long run.
8 tips for writing a professional email
When it comes to writing professional emails, there are certain tips and guidelines you should follow to ensure your message is clear, concise, and effective. Here are 8 tips to help you create the perfect professional email:
1. Use a clear and concise subject line: The subject line is the first thing your recipient will see, so make sure it clearly states the purpose of your email. Keep it short and to the point, so they know exactly what your email is about.
2. Start with a professional greeting: Begin your email with a proper greeting, such as “Dear Mr./Ms. [Last Name]” or “Hello [First Name]”. Avoid using casual greetings like “Hey” or “Hi”, unless you have an established relationship with the recipient.
3. Keep your email focused and to the point: Emails should be short and focused. Avoid including unnecessary information or going off-topic. Stick to the main purpose of your email and get straight to the point.
4. Use proper English and proofread: Make sure your email is free of grammatical errors and typos. Use proper punctuation and avoid slang or informal language. Take the time to proofread your email before sending it, to ensure it is professional and error-free.
5. Address the recipient properly: Double-check that you have spelled the recipient’s name correctly and that you are using the appropriate title (Mr., Ms., Dr., etc.). Be respectful and use proper titles when addressing someone in a professional email.
6. Include a clear and professional email signature: Add a professional email signature with your full name, job title, and contact information. This makes it easier for the recipient to find your contact details and shows that you are a professional.
7. Use a professional email address: Make sure your email address is professional and appropriate for business communication. Avoid using email addresses that contain nicknames, numbers, or other unprofessional elements.
8. Follow up and be considerate: If you are expecting a response from the recipient, give them a reasonable amount of time to reply. After the specified time, you can send a polite follow-up email if necessary. Be considerate of their time and avoid sending unnecessary follow-ups if not required.
By following these tips, you can ensure that your professional emails are clear, concise, and effective. Remember to always proofread your emails before sending them and to maintain a professional and respectful tone throughout the conversation.
1 Include the topic in the subject line
When writing a professional email, it is important to include the topic or main idea in the subject line. This helps the recipient quickly understand the purpose of the email and prioritize it accordingly in their inbox.
The subject line should be concise and focused, using clear and specific words to indicate exactly what the email is about. Avoid using vague or generic subject lines that don’t provide any direction or context. Instead, make sure it is written in a way that clearly conveys the topic.
For example, if you are emailing a client about a marketing presentation they need to watch, a good subject line could be “Marketing Presentation – Client XYZ”. This subject line clearly indicates the topic of the email and identifies the client it is intended for.
In popular email clients like Outlook and Gmail, emails are often organized into categories or tabs. By including the topic in the subject line, you can ensure that your email is properly categorized and doesn’t get lost in a sea of other emails.
Furthermore, a well-written subject line also helps when searching for emails in your inbox or when you need to quickly refer back to a specific conversation. It allows you to easily identify and locate the email you are looking for.
Remember to keep the subject line brief – ideally around 5 to 8 words. This ensures that it is easily readable and doesn’t get cut off or truncated on smaller screens.
In addition, it is important to use proper grammar, punctuation, and capitalization in the subject line. This helps create a professional impression and conveys that you have taken the time to compose a well-crafted email.
Finally, when exporting emails or keeping a record of correspondence, including the topic in the subject line makes it easier to organize and locate specific emails. This can be particularly beneficial for individuals who receive a high volume of emails or need to refer back to past conversations frequently.
In summary, including the topic in the subject line of your professional emails is a simple yet effective way to create more organized and efficient communication. It helps ensure that your emails are properly understood and attended to, enhances trust and professionalism, and provides various benefits in terms of organization and searchability.
2 Address the recipient properly
One of the most important aspects of creating professional emails is addressing the recipient properly. This sets the tone for the entire email and shows that you have taken the time to make it personalized.
Here are some tips to help you address the recipient appropriately:
- Make sure to use the recipient’s name, rather than a generic greeting like “Dear Sir/Madam.”
- If you are emailing a client or someone you have a professional relationship with, use their last name preceded by a Mr. or Ms. For example, “Dear Mr. Smith” or “Dear Ms. Johnson.”
- If you are emailing a colleague or someone you have a more casual relationship with, you can use their first name. For example, “Hi John” or “Hello Jane.”
- If you are unsure about the recipient’s gender or name, you can use a gender-neutral greeting like “Dear [First Name].” For example, “Dear Alex.”
When addressing the recipient properly, it is also important to use proper grammar and proofread your email for any mistakes. This shows that you are professional and focused on your communication.
Additionally, ensure that your email has a clear and concise subject line that accurately represents the content of the email. This helps the recipient understand the purpose of the email and makes it easier for them to find it later if needed.
Lastly, be sure to include a professional email signature at the end of your email. This should include your full name, job title, contact information, and any relevant links or additional information.
Addressing the recipient properly is a small but important step in creating professional emails. It sets the right tone and helps establish trust and credibility with the recipient. Take the time to address each email appropriately, and you will see the benefits in your professional communication.
3 Keep it focused
When it comes to emailing, it’s important to keep your messages focused on the intended topic. Rambling or including irrelevant information can make your email confusing and less effective.
If you’re sending an email to a client or coworker, make sure to clearly state the purpose of the email in the subject line. This helps the recipient understand what to expect and allows them to prioritize their inbox accordingly.
Avoid going off on tangents or including unnecessary details. Stick to the main point and provide the recipient with the information they need to know, without overwhelming them with extraneous information.
If you’re emailing multiple recipients, use the “Bcc” field to prevent their email addresses from being visible to others. This helps maintain privacy and prevents the risk of accidentally sharing someone’s email address.
Proofread your email before hitting send. Take a few extra seconds to review your message for any typos or mistakes. A properly written and error-free email will show your professionalism and attention to detail.
Use a professional email signature that includes your name, job title, and contact information. This not only looks more polished and organized, but it also makes it easier for the recipient to reach out to you if needed.
Make sure to use an appropriate tone in your email. While casual language may be appropriate in some situations, it’s best to err on the side of professionalism. Gauge your recipient’s preference and tailor your tone accordingly.
Keep in mind that not everyone uses the same email platform. Some popular email providers include Gmail, Outlook, and Yahoo. Be mindful of any formatting or compatibility issues when creating your email, such as using Google Sheets or exporting files in a compatible format.
When including links in your email, make them clear and properly formatted. Use anchor text that accurately represents the content of the link and avoid using long URLs. This makes it easier for the recipient to understand where the link will lead them.
Consider using visuals such as gifs or images sparingly. While they can add a touch of personality to your email, they can also increase the file size and may not be properly displayed or load for all recipients.
Lastly, remember that not everyone speaks English as their first language. Be conscious of language barriers and try to write in a clear and concise manner. Avoid using jargon or complex terms that may confuse the recipient.
By following these tips, you’ll be able to create professional, focused emails that are more likely to be read and understood by your intended audience.
4 Include your signature
When sending professional emails, it’s important to include your signature. Your signature provides important information about you and your company, and gives the recipient a way to contact you easily.
Here are some tips on how to create a professional email signature:
| 1. Keep it concise: | Make sure your signature is clear and to the point. Avoid including unnecessary information that doesn’t add value to your email. |
| 2. Include your name and job title: | Let the recipient know who you are and what you do. This will establish trust and credibility. |
| 3. Add your contact information: | Include your email address and phone number so that the recipient can easily get in touch with you. |
| 4. Provide links to your social media: | If appropriate, include links to your LinkedIn profile or other social media accounts. This can help the recipient learn more about you and your company. |
| 5. Use a professional photo: | If you choose to include a photo, make sure it is professional and appropriate for the workplace. |
| 6. Keep it consistent: | Use the same signature across all your emails to maintain a professional and cohesive brand image. |
By including your signature at the end of your professional emails, you can make a strong impression and ensure that your recipients have the necessary information to contact you if needed.
5 Proofread
After you have written your professional email, it is crucial to proofread it before sending it out. Proofreading ensures that your email is clear, concise, and error-free, which is essential in creating a professional impression on the recipient.
Here are 5 tips to help you proofread your email effectively:
- Take your time: Give yourself enough time to review the email thoroughly. Rushing through the proofreading process can lead to overlooking mistakes.
- Read it aloud: Reading the email out loud can help you identify any awkward phrasing or errors that you may have missed while reading silently. It also allows you to gauge the overall tone and ensures that it sounds professional.
- Use spell check: Most email clients, like Gmail or Outlook, have built-in spell checkers. Make sure to run the spell check and correct any misspellings or grammatical errors that it identifies.
- Check formatting and links: Take a close look at the formatting of your email, including proper line breaks and bullet points. Additionally, ensure that any links you have included are working and directing to the appropriate sources.
- Get a second opinion: If possible, ask a colleague or a friend to review your email. Getting a fresh pair of eyes can help catch errors that you might have missed.
By following these 5 proofreading tips, you can ensure that your professional emails are well-written and error-free. Taking the time to proofread can make a significant difference in how your emails are received and the level of trust and professionalism you create with your recipients.
6 Avoid a casual tone
When it comes to professional email writing, it’s important to avoid using a casual tone. While it may be tempting to write your emails in a laid-back and relaxed manner, it’s crucial to keep in mind that emails are a form of professional communication.
The first way to avoid a casual tone in your emails is to use proper English. Make sure to write in complete sentences and avoid slang or excessive use of abbreviations. This will show the recipient that you are focused and professional.
Secondly, be clear and concise in your email. Nobody wants to read a giant wall of text, so keep your message to the point. Use paragraphs or bullet points to break up the information and make it easier to read.
Another way to avoid a casual tone is to proofread your email before hitting the “send” button. Take a few seconds to review the content and make any necessary edits. This will help ensure that your email is error-free and professional.
Similarly, avoid using emojis, gifs, or other similar elements in your professional emails. While they may be popular in personal correspondence, they are not appropriate for professional communication. Stick to a simple and professional presentation.
Additionally, make sure to include an appropriate subject line in your email. This way, the recipient will know exactly what the email is about before they even open it. Use keywords and be specific to grab their attention and make your email stand out in their inbox.
Finally, be sure to use a professional email signature. This should include your full name, job title, company name, contact information, and any relevant links or social media accounts. It adds a touch of professionalism and trustworthiness to your email.
By following these tips, you can create professional and well-written emails that will make a positive impression on your clients or colleagues. Remember, your emails are a reflection of your skills and attention to detail, so make every email count.
7 Watch your words
When it comes to creating professional emails, the words you choose can have a significant impact on how your message is perceived. Here are some tips to help you choose your words wisely:
- Be concise: Your recipient doesn’t have time to read a lengthy email, so keep your message short and to the point. Aim for emails that can be read in less than 30 seconds.
- Avoid casual language: While it’s important to show your personality in your emails, using overly casual language can make you seem unprofessional. Stick to a more formal tone.
- Use appropriate language: Make sure the words you choose are appropriate for the topic and the recipient. Avoid using slang or jargon that the recipient may not understand.
- Proofread your email: Take the time to proofread your email for any spelling or grammar mistakes. This will show that you have good attention to detail and can convey your message effectively.
- Watch your tone: The tone of your email can greatly affect how it is received. Be mindful of your tone and use a polite and professional language.
- Avoid using GIFs: While GIFs may be popular in casual emails, they are not appropriate for professional communication. Stick to plain text or use images sparingly and only when necessary.
- Be clear and specific: Use clear and specific language to communicate your message. Avoid vague or ambiguous statements that could lead to confusion or misinterpretation.
By following these tips, you can ensure that your emails are professional, clear, and effective in conveying your message.
8 Make your directions clear
When writing professional emails, it is important to make your directions clear and concise. Ambiguity and confusion can lead to misunderstandings and mistakes, so it’s crucial to provide clear instructions. Here are some ways to ensure your directions are easily understood:
- Be specific: Use clear and specific language when giving directions. Avoid vague terms or generalizations.
- Use bullet points or numbered lists: This helps break down your instructions into manageable steps, making it easier for the recipient to follow.
- Include links or attachments: If you need to provide further information or resources, include relevant links or attachments to support your directions.
- Use a concise subject line: Your subject line should clearly indicate what the email is about, allowing the recipient to quickly understand the purpose of your message.
- Use a professional tone: Make sure your instructions are written in a professional and respectful manner, reflecting your expertise and building trust with the recipient.
- Avoid jargon or technical terms: If possible, use language that is easy to understand and avoid using jargon or technical terms that might confuse the recipient.
- Focus on the benefits: Highlight the benefits of following your directions. Clearly explain why it’s important and how it will help the recipient achieve their goals.
- Keep it concise: Be mindful of the recipient’s time and keep your directions as concise as possible. Avoid unnecessary information or lengthy explanations.
By making your directions clear, you will ensure that your emails are more effective and that the recipient will be able to follow your instructions accurately. This will ultimately lead to better communication and productivity.
8 Ways to Perfect Your Presentation Skills in English
When it comes to presenting in English, it’s essential to communicate your ideas effectively and professionally. Here are eight ways to improve your presentation skills:
1. Focus on Clear Communication: Make sure your message is easy to understand and concise. Use simple and straightforward language to convey your ideas.
2. Prepare and Practice: Before your presentation, take the time to prepare and rehearse. Practice your speech or script to ensure a smooth delivery.
3. Keep it Engaging: Incorporate visuals, such as slides or handouts, to support your message. Use relevant images, videos, or gifs to capture your audience’s attention and make your presentation more memorable.
4. Use Proper Body Language: Nonverbal cues can enhance your presentation. Make eye contact, use gestures to emphasize key points, and maintain a confident posture.
5. Be Aware of Your Tone: Pay attention to your tone of voice and pace. Speak clearly, at an appropriate volume, and maintain a steady rhythm throughout your presentation.
6. Include Interactive Elements: Engage your audience by asking questions, encouraging participation, or conducting polls. This will make your presentation more interactive and memorable.
7. Proofread and Edit: Double-check your presentation for any spelling or grammatical errors. Perform a thorough proofread to ensure that your content flows smoothly and is error-free.
8. Build Trust and Credibility: Share relevant statistics, data, or case studies to support your arguments. This will lend credibility to your presentation and make your audience more likely to trust your information.
By following these eight tips, you will be able to deliver professional and compelling presentations in English. Remember to always keep your audience focused and engaged throughout the presentation, and you will make a lasting impression.
Categories
When it comes to creating professional emails, there are several categories that you should keep in mind. These categories will help you organize your email content and ensure that your message is clear and concise. Here are the categories and some tips on how to use them:
- Subject Line: The subject line is the first thing that the recipient will see in their inbox. Make sure it is catchy and attention-grabbing, while still accurately summarizing the content of your email.
- Introduction: Start with a clear and concise introduction that states the purpose of your email. This will grab the recipient’s attention and let them know exactly what your email is about.
- Body: The body of your email should contain the main information or message that you want to convey. Use paragraphs, bullet points, or numbered lists to break up the text and make it easier to read.
- Call to Action: In the email, clearly state what action you want the recipient to take. Whether it’s replying to your email, visiting a website, or making a purchase, make it clear and easy for them to follow through.
- Closing: End your email with a polite closing, such as “Thank you” or “Best regards.” This shows professionalism and leaves a positive impression on the recipient.
- Signature: Include a signature at the end of your email that includes your name, job title, and contact information. This adds a personal touch and makes it easy for the recipient to reach out to you.
- Proofread: Before hitting the send button, make sure to proofread your email for any grammatical or spelling errors. A well-written email is more likely to be taken seriously and understood by the recipient.
- Formatting: Use proper formatting in your email, such as bold or italicized text, to emphasize important points or highlight key information. However, avoid using excessive formatting, as it can make your email look unprofessional or cluttered.
By categorizing your emails and following these tips, you can create professional emails that are clear, concise, and effective in delivering your message to the recipient. This will help you make a positive and lasting impression on your clients, coworkers, or anyone else you are emailing.
MOST POPULAR ARTICLES
If you want your professional emails to stand out from the rest, there are several ways you can make them more effective. In this article, we will give you some tips on how to create professional emails that are sure to impress your recipient.
| 1. Use a clear and professional subject line The subject line is the first thing your recipient will see in their inbox, so make sure it is clear and gets to the point. Avoid using vague or misleading subject lines that could cause your email to be ignored or deleted. | 2. Keep your emails focused and to the point Nobody wants to read a novel in their inbox. Keep your emails concise and avoid rambling or going off-topic. Stick to the main purpose of your email and include only the necessary information. |
| 3. Make sure your email is well-written and proofread Properly proofread your email for any grammar or spelling errors. A poorly written email can give the impression that you are careless or unprofessional, so take the time to make it perfect. | 4. Include a professional email signature Add a professional email signature at the end of your email. This can include your name, job title, contact information, and any relevant links or social media profiles. |
| 5. Use a professional tone When writing professional emails, it’s important to use a tone that is polite and respectful. Avoid using slang or casual language that could be misconstrued. | 6. Avoid using animated GIFs or similar distractions While GIFs can be fun in a personal email, they are not appropriate for professional communication. Keep your emails focused on the topic at hand and avoid any distractions. |
| 7. Use proper formatting and presentation Use headings, bullet points, and white space to make your emails easy to read and navigate. Use a professional font and avoid using too many different colors or fonts. | 8. Export from Google Sheets to Gmail If you need to include data or information from Google Sheets in your email, you can easily export it and include it as a table or chart. This will make your email more visually appealing and easier to understand. |
By following these tips, you can create professional emails that will make a lasting impression on your recipients. Whether you are sending an email for business, marketing, or any other purpose, the direction and trustworthiness of your emails are vital to the success of your communication.
Take the leap and make your emails stand out from the rest!
One giant leap for your inbox
When it comes to email, communication is key. The tone and style of your writing can either make or break your message’s impact. If you want to make a professional impression and build trust with your recipient, you need to know how to create professional emails. Here are some tips to help you take your email game to the next level:
1. Watch your tone
Keep your email tone appropriate and clear. Avoid using casual or overly formal language, and use proper English. Aim to be concise and to the point, while still conveying the necessary information.
2. Use a professional email address
Make sure your email address is professional and reflects your name or the name of your business. Avoid using personal or unprofessional email addresses, as this can give a negative impression to the recipient.
3. Create a clear subject line
The subject line is the first thing the recipient sees, so make it clear, concise, and engaging. Use keywords that accurately describe the content of the email, so the recipient knows exactly what to expect.
4. Set up a professional signature
Include your name, job title, company, and contact information in your email signature. This not only adds a professional touch but also makes it easier for the recipient to get in touch with you.
5. Proofread and edit your emails
Before hitting send, always proofread and edit your emails for grammar, spelling, and punctuation errors. A well-written email is more likely to be taken seriously and will convey professionalism.
6. Avoid using excessive formatting
While it’s important to present your email in a professional manner, be mindful of using excessive formatting, such as too many fonts, colors, or images. Keep the presentation simple and clean for a more professional look.
7. Keep it concise
Avoid writing lengthy emails that are difficult to read and understand. Instead, keep your emails concise and to the point, focusing on the most important information. This will help ensure that your message gets across effectively.
8. Use links and attachments wisely
When necessary, include links or attachments to provide additional information. However, be mindful of the recipient’s time and only include relevant links and attachments that enhance the email.
By following these tips, you can ensure that your emails are professional, clear, and effective. Take the time to craft your emails with care, and you’ll see a significant improvement in your email communication skills.
Remember, one giant leap for your inbox could make all the difference in how your emails are received and perceived in the professional world.
| 2023 | marketing | |
| record | client | information |
| Sheets | can | |
| benefits | of | using |
| properly | formatted | |
| directions | on | how |
| to | create | and |
| export | an | |
| signature | in | Gmail |
How to add an email signature in Gmail in less than 30 seconds
If you want to make sure your emails look professional and convey a sense of trust, it’s important to add a proper email signature. This small but essential element can make a big difference in your email presentation and show the recipient that you are a professional. Adding an email signature in Gmail is quick and easy, taking less than 30 seconds. Here’s how you can do it:
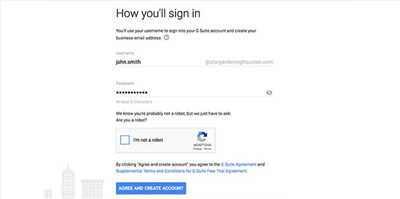
- First, open your Gmail account. If you don’t have one yet, create an account with Google, one of the most popular email providers in the world.
- From your inbox, click on the gear icon in the upper right-hand corner of the screen. This will open a dropdown menu.
- In the dropdown menu, select “Settings”. You will be taken to the settings page of your Gmail account.
- In the settings page, scroll down until you find the section labeled “Signature”. This is where you can create and modify your email signature.
- In the signature section, you can use the toolbar above the text box to format your signature. You can make text bold (like this), italic (like this), or add links.
- Use the text box to enter your email signature. Make sure to include your name, job title, company, phone number, and any other contact information you want to share. Keep it concise and avoid using too many words.
- Once you’ve typed in your email signature, make sure the toggle switch is turned on to automatically include your signature in new emails and replies.
- Finally, scroll to the bottom of the page and click on “Save Changes”. Your new email signature will be ready to use.
Now, whenever you compose a new email or reply to a client, your email signature will appear at the bottom of the email. This adds a professional touch and saves you time from manually typing it out in every email.
Adding an email signature is a simple but important step to properly branding your emails. It helps create a consistent and professional image for your business or personal email account. So don’t skip this step and make sure to add an email signature to your Gmail account today.
How to export emails from Gmail to Google Sheets
When it comes to managing emails, Gmail offers a range of powerful features that can help you stay organized and on top of your inbox. One such feature is the ability to export your emails to Google Sheets, allowing you to keep a clear record of important conversations or extract data for further analysis.
Whether you need to export emails for marketing purposes, client presentations, or simply for your own reference, Gmail’s export feature can be a valuable tool.
Here’s how to export emails from Gmail to Google Sheets:
- Open your Gmail account and navigate to the email or emails you want to export.
- Select the email or emails by clicking the checkbox next to each one. You can select multiple emails at once by holding down the Shift or Ctrl key.
- In the top menu, click on the “More” button (represented by three vertical dots) and choose “Export” from the dropdown menu.
- A pop-up window will appear with export options. Select “Google Sheets” as the export format.
- Choose the appropriate options for your export, such as the destination folder in Google Sheets and the categories of information you want to include.
- Click “Export” to start the export process. Depending on the number of emails you’re exporting, this may take a few seconds or longer.
- Once the export is complete, you can access the exported emails in Google Sheets. Each email will be listed as a separate row, with columns for the subject, sender, recipient, date, and other relevant information.
- From there, you can further organize, filter, or analyze the data as needed. Google Sheets offers a range of tools and functions to help you make the most of your exported emails.
When exporting emails, it’s important to keep a few key points in mind:
- Make sure your emails are properly written and proofread. Take the time to craft clear and concise messages with an appropriate tone.
- Include a professional email signature at the end of your emails. This can help establish trust and provide important contact information.
- When emailing clients or business partners, avoid using casual language or slang. Keep the tone professional and focused on the topic at hand.
- Be careful with the use of gifs or links in your emails. While gifs can add a fun element to your message, make sure they are appropriate for the recipient and the context. Likewise, avoid including unnecessary links that could be seen as spam.
- If you’re exporting emails for marketing purposes, consider the benefits of using gifs to show a product in action or to highlight key features. Gifs can be a great way to grab attention and engage your audience.
- Remember that not everybody uses Gmail as their primary email account. Be mindful of the email client or service your recipients may be using, and make sure your emails are compatible with popular platforms like Outlook.
- Keep in mind that exporting emails to Google Sheets is just one way to organize and analyze your communications. There are many other tools and skills you can develop to manage your emails effectively.
By following these directions, you can easily export your emails from Gmail to Google Sheets and take advantage of the benefits that come with having a clear record of your correspondence. Whether you’re a business professional, a marketer, or simply someone who wants to keep track of their emails, this leap in organization will surely help you stay on top of your inbox in 2023 and beyond.
How to email a GIF in 2023 Gmail Outlook
Sending GIFs through email has become increasingly popular in recent years. In 2023, most email clients, including Gmail and Outlook, have made it easier than ever to include animated GIFs in your messages. Whether you want to add some fun to a casual email or enhance the presentation of a professional email, sending a GIF can help you get your message across in a more engaging way.
Here are four easy steps on how to email a GIF:
Step 1: Find the perfect GIF
First, you need to find a GIF that is appropriate for your topic and the tone of your email. There are many websites and online platforms where you can watch and export GIFs. GIFs can be used for various purposes, from marketing emails to personal communication. Just make sure that the GIF you choose is relevant and adds value to your message.
Step 2: Include the GIF in your email
Once you have the GIF you want to use, you can simply insert it into your email. In Gmail, click on the “Compose” button to start a new email. In the email body, click on the insert picture icon and select the GIF you saved. In Outlook, you can drag and drop the GIF directly into the email composition window. Be sure to position the GIF where you want it to appear within the email.
Step 3: Proofread and format your email
Before sending your email, proofread the text to ensure it is well-written and error-free. Use concise and clear sentences to convey your message. Remember to use proper grammar and punctuation. Also, consider the recipient’s preferences. If you’re emailing a client or a professional contact, maintaining a more formal tone might be appropriate. However, if you’re emailing a friend or someone with whom you have a more casual relationship, a relaxed tone may be more suitable.
Step 4: Send the email
After making sure everything is set, double-check the recipient’s email address and click the send button. Once the email is sent, the recipient will see the GIF animated in their inbox. Note that not all email clients support animated GIFs, so there is a chance that the GIF might not display properly in some email clients.
In conclusion, emailing a GIF in 2023 through Gmail or Outlook is quite simple. Just follow these four steps: find the perfect GIF, include it in your email, proofread and format your email, and then send it. Remember to consider the appropriateness of the GIF and the tone of your email. GIFs can be a great way to add a touch of fun and visual interest to your emails, making them more engaging for your recipients.